Setting the Projector
135
d
Make necessary settings on the
Multi-Projection
menu
For details on making settings, see the projector's
User's Guide
.
Edge Blending
Black Level
Adjust the image overlapping section to create a seam‐
less image.
(
s
"Figures of Installation Dimensions"
Scale
Set the magnification and splicing position for the im‐
age.
Light Source Mode
Adjust the brightness of the entire image. Select
Cus‐
tom
, and then adjust the
Brightness Level
based on the
darkest projector.
Color Uniformity
Color Matching
RGBCMY
Adjust the color of the image for each projector so that
the entire image looks uniform.
Projector Sync. Settings (only when using interactive functions)
Connect the projectors in advance by using the remote control cable set (ELPKC28). For details,
see "Connecting Multiple Projectors"
a
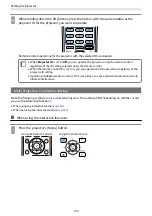
Press the [Menu] button
Using the Remote Control
Using the Control Panel
b
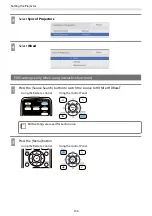
Select
Installation of Projectors
from the
Pen/Touch
menu
Summary of Contents for ELPHD02
Page 1: ...Installation Guide ...
Page 18: ...Introduction 17 Max 5m Max 5m ...
Page 29: ...Installing the Wall mount 28 Horizontal slide 45 45 Forward backward slide 0 383 ...
Page 77: ...Installing the Control Pad 76 For Canadian Users ...
Page 79: ...Installing the Control Pad 78 ...
Page 96: ...Installing the Touch Unit 95 Wavelength 932 to 952 nm ...
Page 99: ...Installing the Touch Unit 98 Adjustment range 79 5 140 5 15 76 ...
Page 138: ...Setting the Projector 137 c Select EDID from the Signal I O menu d Select 3240x1080 60Hz ...


