ISSUED: 02-13-08 SHEET #: 128-9029-2 07-10-08
2 of 6
Visit the Peerless Web Site at www.peerlessmounts.com
For Technical Support Contact Peerless Mounts at 1-800-729-0307 or 708-865-8870.
Table of Contents
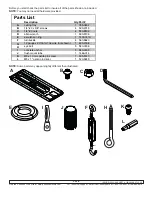
Parts List .............................................................................................................................................................................. 3
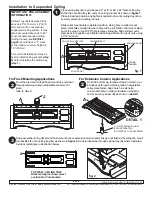
Installation to Suspended Ceiling .......................................................................................................................................... 4
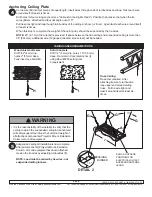
Anchoring Ceiling Plate ......................................................................................................................................................... 5
Warranty Information ............................................................................................................................................................. 6
Tools Needed for Assembly
•
stud finder ("edge to edge" stud finder is recommended)
•
phillips screwdriver
•
hammer
•
wire cutters
•
drill
•
1/4" bit for concrete surface
•
5/32" bit for wood studs
NOTE:
Read entire instruction sheet before you start installation and assembly.
• Do not begin to install your product until you have read and understood the instructions and warnings contained in this
Installation Sheet. If you have any questions regarding any of the instructions or warnings, call Peerless customer care
at 1-800-729-0307.
• This product should only be installed by someone of good mechanical aptitude, has experience with basic building
construction, and fully understands these instructions.
• Make sure that the supporting surface will safely support the combined load of the equipment and all attached hard-
ware and components.
• Never exceed the Maximum UL Load Capacity.
• Always use an assistant or mechanical lifting equipment to safely lift and position equipment.
• Tighten screws firmly, but do not overtighten. Overtightening can damage the items, greatly reducing their holding
power. See suggested torque values where applicable within these instructions.
• This product is intended for indoor use only. Use of this product outdoors could lead to product failure and personal
injury.
• When installing or adjusting the ceiling mount, do not use adhesives, lubricants or oils to prevent the screws from
loosening. If you use adhesives, lubricants, or oils to prevent the screws from loosening, the casing may crack and the
projector may fall, causing serious injury and damage to the projector.
WARNING


