30
Making Basic Adjustments
Adjusting the Gamma Setting
You can select from 5 gamma settings (2.0 to 2.4) or customize your own setting from your
image or a displayed graph. Lower values will increase the contrast of dark areas, but tend to
blur the bright areas. Higher values will darken the light areas.
1. Press the
Gamma
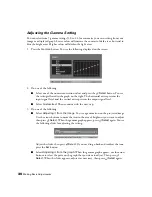
button. You see the following displayed on the screen:
2. Do one of the following:
■
Select one of the numeric correction values and press the
Select
button
.
You see
the setting reflected in the graph on the right. The horizontal axis represents the
input signal level, and the vertical axis represents the output signal level.
■
Select
Customized
. Then continue with the next step.
3. Do one of the following:
■
Select
Adjusting it from the image
. You see a gamma icon on the projected image.
Use the arrow buttons to move the icon to the area of brightness you want to adjust,
then press
Select.
When the gamma graph appears, press
Select
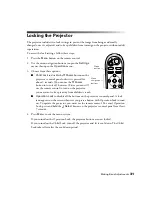
again. You see
the following slider for adjusting the setting:
Adjust the slider, then press
Select
.
If you need to go back and readjust the tone,
press the
Esc
button.
■
Select
Adjusting it from the graph
. When the gamma graph appears, use the arrow
buttons to select the point on the graph that you want to adjust. Then press
Select.
When the slider appears, adjust it as necessary, then press
Select
again.


