background image

Purpose

Resolution (Reference)

Displaying on a computer

Sending by email

Up to 200 dpi

Printing using a printer

Sending by fax

200 to 300 dpi

Scanning Originals to a Computer

There are two methods of scanning originals to a computer; scanning using the printer’s control panel, and
scanning from the computer.

Scanning from the Control Panel

Note:

To use this feature, make sure the following applications are installed on your computer.

Epson ScanSmart (Windows 7 or later, or OS X El Capitan or later)

Epson Event Manager (Windows Vista/Windows XP, or OS X Yosemite/OS X Mavericks/OS X Mountain Lion/Mac OS
X v10.7.x/Mac OS X v10.6.8)

Epson Scan 2 (application required to use the scanner feature)

See the following to check for installed applications.

Windows 10: Click on the start button, and then select 

Windows System

-

Control Panel

-

Programs

-

Programs and

Features

.

Windows 8.1/Windows 8: Select 

Desktop

-

Settings

-

Control Panel

-

Programs

-

Programs and Features

.

Windows 7/Windowes Vista: Click the start button, and then select 

Control Panel

-

Programs

-

Programs and Features

.

Windows XP: Click the start button, and then select 

Control Panel

-

Add or Remove Programs

.

Mac OS: Select 

Go

 > 

Applications

 > 

Epson Software

.

1.

Place the originals.

“Placing Originals” on page 35

2.

Select 

Scan

 > 

Computer

 on the control panel.

3.

Select a computer on which to save the scanned images.

If the 

Select Computer

 screen is displayed, select the computer from the screen.

If the 

Scan to Computer

 screen is displayed and the computer is already selected, make sure the selected

computer is correct. If you want to change the computer, select 

, and then select another computer.

4.

Select 

 to select how to save the scanned image to a computer.

Preview on Computer (Windows 7 or later, or OS X El Capitan or later): Previews the scanned image on a
computer before saving images.

Save as JPEG: Saves the scanned image in JPEG format.

Scanning

>

Scanning Originals to a Computer

>

Scanning from the Control Panel

79

Summary of Contents for ET-5150 Series

Page 1: ...User s Guide Printing Copying Scanning Faxing Maintaining the Printer Solving Problems NPD6592 00 EN ...

Page 2: ...imations 26 Loading Paper Paper Handling Precautions 29 Paper Size and Type Settings 29 List of Paper Type 30 Loading Paper 31 Precautions when Loading Letterhead Paper 31 Loading Various Paper 32 Loading Envelopes 32 Loading Pre punched Paper 33 Outputting Paper 33 Placing Originals Placing Originals 35 Originals that are not Supported by the ADF 36 Printing Printing Documents 38 Printing from a ...

Page 3: ...ther Useful Features 88 Sending Faxes Using the Printer 89 Selecting Recipients 89 Various Ways of Sending Faxes 90 Receiving Faxes on the Printer 92 Receiving Incoming Faxes 93 Receiving Faxes by Making a Phone Call 94 Viewing Received Faxes Saved in the Printer on the LCD Screen 95 Menu Options for Faxing 96 Recipient 96 Fax Settings 96 More 98 Menu Options for Inbox 99 Open Inbox XX Unread 99 U...

Page 4: ...or Devices Connecting to a Printer that has been Connected to the Network 218 Using a Network Printer from a Second Computer 218 Using a Network Printer from a Smart Device 219 Re setting the Network Connection 219 When Replacing the Wireless Router 219 When Changing the Computer 220 Changing the Connection Method to the Computer 220 Making Wi Fi Settings from the Control Panel 221 Connecting a Sm...

Page 5: ...e Network from the Control Panel 278 Settings to Use the Printer 280 Making Contacts Available 280 Making Fax Features Available 282 Problems when Making Settings 291 Where to Get Help Technical Support Web Site 295 Contacting Epson Support 295 Before Contacting Epson 295 Help for Users in Europe 295 Help for Users in Taiwan 295 Help for Users in Australia 296 Help for Users in New Zealand 296 Hel...

Page 6: ...Guide to This Manual Introduction to the Manuals 7 Searching for Information 7 Printing Only the Pages You Need 8 About This Manual 8 Trademarks 10 Copyright 11 ...

Page 7: ...ies L6490 Series Faxing You can obtain the latest versions of the above manuals with the following methods Paper manual Visit the Epson Europe support website at http www epson eu support or the Epson worldwide support website at http support epson net Digital manual To view the Web manual visit the following website enter the product name and then go to Support http epson sn Related Information A...

Page 8: ... in the File menu and then specify the pages you want to print in Pages in Pages to Print To specify a series of pages enter a hyphen between the start page and the end page Example 20 25 To specify pages that are not in series divide the pages with commas Example 5 10 15 About This Manual This section explains the meaning of marks and symbols notes on descriptions and operating system reference i...

Page 9: ...r 2019 Windows Server 2016 Windows Server 2012 R2 Windows Server 2012 Windows Server 2008 R2 Windows Server 2008 Windows Server 2003 R2 and Windows Server 2003 refer to the following operating systems Additionally Windows is used to refer to all versions Microsoft Windows 10 operating system Microsoft Windows 8 1 operating system Microsoft Windows 8 operating system Microsoft Windows 7 operating s...

Page 10: ...A OR PROFITS WHETHER OR NOT ADVISED OF THE POSSIBILITY OF DAMAGE AND ON ANY THEORY OF LIABILITY ARISING OUT OF OR IN CONNECTION WITH THE USE OR PERFORMANCE OF THIS SOFTWARE QR Code is a registered trademark of DENSO WAVE INCORPORATED in Japan and other countries Microsoft Windows Windows Server and Windows Vista are registered trademarks of Microsoft Corporation Apple Mac macOS OS X Bonjour Safari...

Page 11: ...s incurred by the purchaser or third parties as a result of accident misuse or abuse of this product or unauthorized modifications repairs or alterations to this product or excluding the U S failure to strictly comply with Seiko Epson Corporation s operating and maintenance instructions Seiko Epson Corporation and its affiliates shall not be liable for any damages or problems arising from the use ...

Page 12: ...Important Instructions Safety Instructions 13 Printer Advisories and Warnings 14 Protecting Your Personal Information 16 ...

Page 13: ...or in locations subject to shocks vibrations high temperature or humidity Take care not to spill liquid on the printer and not to handle the printer with wet hands Keep the printer at least 22 cm away from cardiac pacemakers Radio waves from this printer may adversely affect the operation of cardiac pacemakers If the LCD screen is damaged contact your dealer If the liquid crystal solution gets on ...

Page 14: ... use the printer in Germany the building installation must be protected by a 10 or 16 amp circuit breaker to provide adequate short circuit protection and over current protection for the printer When connecting the printer to a computer or other device with a cable ensure the correct orientation of the connectors Each connector has only one correct orientation Inserting a connector in the wrong or...

Page 15: ...ttempt to remove the broken pieces Press the touchscreen gently with your finger Do not press force or operate with your nails Do not use sharp objects such as ball point pens or sharp pencils to perform operations Condensation inside the touchscreen due to abrupt changes in temperature or humidity may cause performance to deteriorate Advisories and Warnings for Using the Printer with a Wireless C...

Page 16: ...sporting the printer make sure that the print head is in the home far right position Protecting Your Personal Information When you give the printer to someone else or dispose of it erase all the personal information stored in the printer s memory by selecting Settings Restore Default Settings Clear All Data and Settings on the control panel Important Instructions Protecting Your Personal Informati...

Page 17: ...Part Names and Functions Front 18 Inside 19 Rear 20 ...

Page 18: ...ls straight into the printer Slide to the edges of the originals E ADF document support Supports originals F ADF output tray Holds originals ejected from the ADF A Control panel Indicates the printer s status and allows you to make print settings B Ink tank cover Open to refill the ink tank C Ink tank cap Open to refill the ink tank D Ink tank Contains the ink tank Part Names and Functions Front 1...

Page 19: ...er glass Place the originals C Print head Ink is ejected from the print head nozzles underneath D Edge guide Feeds the paper straight into the printer Slide to the edges of the paper E Paper cassette Loads paper F Output switch lever Raise to output paper to the output tray Lower to output paper facing up to the front of the printer G Printer cover Open when removing jammed paper Part Names and Fu...

Page 20: ...e to connect with a computer D LINE port Connects a phone line E EXT port Connects external phone devices F AC inlet Connects the power cord G Rear paper feed slot Loads paper H Rear cover Remove when removing jammed paper I Maintenance box cover Open when replacing the maintenance box Only for ET 5170 Series L6490 Series Part Names and Functions Rear 20 ...

Page 21: ...Guide to the Control Panel Control Panel 22 Touch Screen Operations 22 Home Screen Configuration 23 Menu Screen Configuration 25 Entering Characters 26 Viewing Animations 26 ...

Page 22: ...s when you are in trouble E Turns on when received documents that have not yet been read printed or saved are stored in the printer s memory Only for ET 5170 Series L6490 Series Touch Screen Operations The touchscreen is compatible with the following operations Tap Press or select the items or the icons Flick Scroll the screen swiftly Guide to the Control Panel Touch Screen Operations 22 ...

Page 23: ...ting photos Home Screen Configuration A Displays the Remaining capacity of Maintenance box screen You can check the approximate service life of maintenance box B Displays the network connection status See the following for more details Guide to the Network Icon on page 24 Guide to the Control Panel Home Screen Configuration 23 ...

Page 24: ...o improve the quality of your printouts such as unclogging nozzles by printing a nozzle check pattern and performing head cleaning and improving blurring or banding in your printouts by aligning the print head You can also make this setting from the Settings menu Settings Maintenance Settings Allows you to make settings related to maintenance printer settings and operations F Scrolls the screen to...

Page 25: ...l information by selecting the icon Make settings by selecting the item or adding a check mark Grayed out items are not available Select the item to check why it is unavailable If any problems occur is displayed on the item Select the icon to check how to solve the problem D Starts operations using the current settings Items vary depending on the menu Copies Displays the on screen keypad allowing ...

Page 26: ...ntly used email domain addresses or URLs by simply selecting the item F Enters a space G Enters character H Deletes a character to the left Deletes a character to the right when the cursor is at the start of the line and there are no characters to the left Viewing Animations You can view animations of operating instructions such as loading paper or removing jammed paper on the LCD screen Select Di...

Page 27: ... Select How To at the bottom of the operation screen Displays the context sensitive animation Guide to the Control Panel Viewing Animations 27 ...

Page 28: ...Loading Paper Paper Handling Precautions 29 Paper Size and Type Settings 29 Loading Paper 31 Loading Various Paper 32 Outputting Paper 33 ...

Page 29: ...rinted paper Reduce the number of sheets to half or less or load one sheet of paper at a time if paper jams continue Make sure you are using long grain paper If you are not sure what type of paper you are using check the paper packaging or contact the manufacturer to confirm the paper specifications Fan and align the edges of the envelopes before loading When the stacked envelopes are puffed up wi...

Page 30: ...nformation Paper Setup Auto Display on page 253 List of Paper Type To obtain optimum printing results select the paper type that suits the paper Media Name Media Type Control Panel Printer Driver Epson Bright White Ink Jet Paper Plain paper Plain paper Epson Ultra Glossy Photo Paper Ultra Glossy Epson Ultra Glossy Epson Premium Glossy Photo Paper Prem Glossy Epson Premium Glossy Epson Premium Semi...

Page 31: ...rhead paper select Letterhead as the paper type For letterhead paper if you print on paper that is smaller than the setting in the printer driver the printer may print beyond the edges of the paper which can lead to ink smears on your printouts and excess ink building up inside the printer Make sure you select the correct paper size setting 2 sided printing is not available for letterhead paper Al...

Page 32: ...g down and slide the edge guides to the edges of the envelope Note We recommend lowering the output switch lever to output the envelope to the front of the printer Paper Cassette Load envelopes in the paper cassette with the flap facing up and then slide the edge guides to the edges of the envelopes Loading Paper Loading Various Paper Loading Envelopes 32 ...

Page 33: ...can be ejected at a time Outputting more than 100 sheets may cause paper to fall or a paper jam to occur Remove any excess paper so that it does not exceed the maximum number of sheets that can be ejected When you load thick paper photo paper or business card size paper lower the output switch lever to output paper to the front of the printer We also recommend outputting envelopes to the front of ...

Page 34: ...Placing Originals Placing Originals 35 Originals that are not Supported by the ADF 36 ...

Page 35: ...ks prevent exterior light from shining directly onto the scanner glass Do not apply too much force to the scanner glass or the document cover Otherwise they may be damaged Note If there is any trash or dirt on the scanner glass the scanning range may expand to include it so the image of the original may be displaced or reduced Remove any trash and dirt on the scanner glass before scanning A range ...

Page 36: ...isfeeding may wrinkle or damage the original Scan these documents on the scanner glass instead To prevent paper jams avoid placing the following originals in the ADF For these types use the scanner glass Originals that are torn folded wrinkled deteriorated or curled Originals with binder holes Originals held together with tape staples paper clips etc Originals that have stickers or labels stuck to...

Page 37: ...Printing Printing Documents 38 Printing on Envelopes 63 Printing Web Pages 64 Printing Using a Cloud Service 65 ...

Page 38: ...ay differ depending on the application See the application s help for details 1 Load paper in the printer Loading Paper on page 31 2 Open the file you want to print 3 Select Print or Print Setup from the File menu 4 Select your printer Printing Printing Documents Printing from a Computer Windows 38 ...

Page 39: ...elp 7 Click OK to close the printer driver window 8 Click Print Related Information Available Paper and Capacities on page 239 List of Paper Type on page 30 Adding Printing Presets for Easy Printing If you create your own preset of frequently used print settings on the printer driver you can print easily by selecting the preset from the list Printing Printing Documents Printing from a Computer Win...

Page 40: ...ting on 2 Sides You can print on both sides of the paper Note If you do not use paper that is suitable for 2 sided printing the print quality may decline and paper jams may occur Paper for 2 Sided Printing on page 241 Depending on the paper and the data ink may bleed through to the other side of the paper However it may not be available when the printer is accessed over a network or is used as a s...

Page 41: ...uality may decline and paper jams may occur Paper for 2 Sided Printing on page 241 Depending on the paper and the data ink may bleed through to the other side of the paper However it may not be available when the printer is accessed over a network or is used as a shared printer 1 On the printer driver s Main tab select the type of long edge binding you want to use from 2 Sided Printing 2 Click Set...

Page 42: ... click OK 6 Click Print Related Information Available Paper and Capacities on page 239 Loading Paper on page 31 Printing Using Easy Settings on page 38 Printing Several Pages on One Sheet You can print several pages of data on a single sheet of paper 1 On the printer driver s Main tab select 2 Up 4 Up 6 Up 8 Up 9 Up or 16 Up as the Multi Page setting 2 Click Layout Order make the appropriate setti...

Page 43: ...the application setting Output Paper Select the paper size you loaded in the printer Fit to Page is automatically selected Note Click Center to print the reduced image in the middle of the paper 2 Set the other items on the Main and More Options tabs as necessary and then click OK 3 Click Print Related Information Loading Paper on page 31 Printing Using Easy Settings on page 38 Printing Printing D...

Page 44: ...rcentage 4 Set the other items on the Main and More Options tabs as necessary and then click OK 5 Click Print Related Information Loading Paper on page 31 Printing Using Easy Settings on page 38 Printing One Image on Multiple Sheets for Enlargement Creating a Poster This feature allows you to print one image on multiple sheets of paper You can create a larger poster by taping them together 1 On th...

Page 45: ...s as necessary and then click OK 4 Click Print Related Information Loading Paper on page 31 Printing Using Easy Settings on page 38 Making Posters Using Overlapping Alignment Marks Here is an example of how to make a poster when 2x2 Poster is selected and Overlapping Alignment Marks is selected in Print Cutting Guides Printing Printing Documents Printing from a Computer Windows 45 ...

Page 46: ...he vertical blue line through the center of the top and bottom cross marks 2 Place the edge of Sheet 1 on top of Sheet 2 and align the cross marks then temporarily tape the two sheets together from the back Printing Printing Documents Printing from a Computer Windows 46 ...

Page 47: ...ed line through the alignment markers this time the line to the left of the cross marks 4 Tape the sheets together from the back 5 Repeat steps 1 to 4 to tape Sheet 3 and Sheet 4 together Printing Printing Documents Printing from a Computer Windows 47 ...

Page 48: ...ne through the center of the left and right side cross marks 7 Place the edge of Sheet 1 and Sheet 2 on top of Sheet 3 and Sheet 4 and align the cross marks and then temporarily tape them together from the back Printing Printing Documents Printing from a Computer Windows 48 ...

Page 49: ...heets in two along the horizontal red line through the alignment markers this time the line above the cross marks 9 Tape the sheets together from the back Printing Printing Documents Printing from a Computer Windows 49 ...

Page 50: ...h a Header and Footer You can print information such as a user name and printing date in headers or footers 1 On the printer driver s More Options tab click Watermark Features and then select Header Footer Printing Printing Documents Printing from a Computer Windows 50 ...

Page 51: ...anti copy pattern on your printouts If you print with an anti copy pattern the hidden letters appear when photocopied in order to distinguish the original from the copies Anti Copy Pattern is available under the following conditions Paper Type Plain paper Letterhead or Thick paper Quality Standard 2 Sided Printing Off Color Correction Automatic Short Grain Paper Not selected Note You can also add ...

Page 52: ...nt Project Lite in the Job Arranger Lite window you can edit the page layout 5 Click Print from the File menu to start printing Note If you close the Job Arranger Lite window before adding all the print data to the Print Project the print job you are currently working on is canceled Click Save from the File menu to save the current job The extension of the saved files is ecl To open a Print Projec...

Page 53: ... Color Universal Print settings Related Information Loading Paper on page 31 Printing Using Easy Settings on page 38 Adjusting the Print Color You can adjust the colors used in the print job These adjustments are not applied to the original data PhotoEnhance produces sharper images and more vivid colors by automatically adjusting the contrast saturation and brightness of the original image data No...

Page 54: ...in the Color Correction setting 2 Select Emphasize Thin Lines 3 Set the other items on the Main and More Options tabs as necessary and then click OK 4 Click Print Related Information Loading Paper on page 31 Printing Using Easy Settings on page 38 Printing Clear Bar Codes You can print a bar code clearly and make it easy to scan Only enable this feature if the bar code you printed cannot be scanne...

Page 55: ...page 31 Printing Using Easy Settings on page 38 Printing from a Computer Mac OS Printing Using Easy Settings Note Operations and screens differ depending on the application See the application s help for details 1 Load paper in the printer Loading Paper on page 31 2 Open the file you want to print 3 Select Print from the File menu or another command to access the print dialog If necessary click Sh...

Page 56: ...ist of Paper Type on page 30 Adding Printing Presets for Easy Printing If you create your own preset of frequently used print settings on the printer driver you can print easily by selecting the preset from the list 1 Set each item such as Print Settings and Layout Paper Size Media Type and so on Printing Printing Documents Printing from a Computer Mac OS 56 ...

Page 57: ...decline and paper jams may occur Paper for 2 Sided Printing on page 241 Depending on the paper and the data ink may bleed through to the other side of the paper 1 Select Two sided Printing Settings from the pop up menu 2 Select the bindings in Two sided Printing 3 Select the type of original in Document Type Note Printing may be slow depending on the Document Type setting If you are printing high ...

Page 58: ...u can print several pages of data on a single sheet of paper 1 Select Layout from the pop up menu 2 Set the number of pages in Pages per Sheet the Layout Direction page order and Border 3 Set the other items as necessary 4 Click Print Related Information Loading Paper on page 31 Printing Using Easy Settings on page 55 Printing Printing Documents Printing from a Computer Mac OS 58 ...

Page 59: ...Select Scale to fit paper size 4 Select the paper size you loaded in the printer as the Destination Paper Size setting 5 Set the other items as necessary 6 Click Print Related Information Loading Paper on page 31 Printing Using Easy Settings on page 55 Printing a Reduced or Enlarged Document at any Magnification You can reduce or enlarge the size of a document by a specific percentage Printing Pri...

Page 60: ...uration and brightness of the original image data Note PhotoEnhance adjusts the color by analyzing the location of the subject Therefore if you have changed the location of the subject by reducing enlarging cropping or rotating the image the color may change unexpectedly If the image is out of focus the tone may be unnatural If the color is changed or becomes unnatural print in a mode other than P...

Page 61: ...nel 5 Select the print document menu on the home screen 6 Select the document you want to print 7 Start printing Printing Documents Using AirPrint AirPrint enables instant wireless printing from iPhone iPad iPod touch and Mac without the need to install drivers or download software Note If you disabled paper configuration messages on your printer control panel you cannot use AirPrint See the link ...

Page 62: ...asily Operating the Printer from a Smart device Epson Smart Panel on page 246 3 Connect your smart device to the wireless router 4 Start Epson Smart Panel 5 Select the print document menu on the home screen 6 Select the document you want to print 7 Start printing Printing Documents Using Epson Print Enabler You can wirelessly print your documents emails photos and web pages right from your Android...

Page 63: ...inting from Android smart phones or tablets 1 Install Mopria Print Service from Google Play 2 Load paper in the printer 3 Set up your printer for wireless printing See the link below http epson sn 4 Connect your Android device to the same wireless network that your printer is using 5 Print from your device to your printer Note For more details access the Mopria Web site at https mopria org Related...

Page 64: ...e pop up menu 6 Select Envelope as the Media Type setting 7 Set the other items as necessary 8 Click Print Printing Web Pages Printing Web Pages from a Computer Epson Photo allows you to display web pages crop the specified area and then edit and print them See the application s help for details Printing Web Pages from Smart Devices Note Operations may differ depending on the device 1 Load paper i...

Page 65: ...t When you send an email with attachments such as documents or images to an email address assigned to the printer you can print that email and the attachments from remote locations such as your home or office printer Epson iPrint This Application is for iOS and Android and allows you to print or scan from a smartphone or tablet You can print documents images and web sites by sending them directly ...

Page 66: ...register the printer 1 Select Settings on the control panel 2 Select General Settings Web Service Settings Epson Connect Services Unregister to print the registration sheet 3 Follow the instructions on the registration sheet to register the printer Printing Printing Using a Cloud Service Registering to Epson Connect Service from the Control Panel 66 ...

Page 67: ...Copying Available Copying Methods 68 Basic Menu Options for Copying 72 Advanced Menu Options for Copying 73 ...

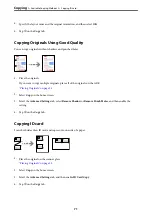
Page 68: ...riginals You can copy the originals of fixed size or custom size by color or monochrome 1 Load paper in the printer Loading Paper on page 31 2 Place the originals Placing Originals on page 35 3 Select Copy on the home screen 4 Select the Copy tab and then select B W or Color 5 Tap x Copying Available Copying Methods Copying Originals 68 ...

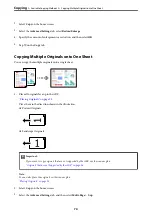
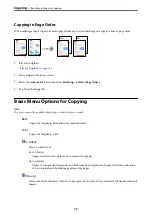
Page 69: ...e originals on the scanner glass Placing Originals on page 35 2 Select Copy on the home screen 3 Select the Copy tab and then select 2 Sided 1 2 Sided 4 Specify the original orientation and the binding position and then select OK 5 Tap x Copying by Enlarging or Reducing You can copy originals at a specified magnification 1 Place the originals If you want to copy multiple originals place all of the...

Page 70: ...riginals on page 35 Place them in the direction shown in the illustration Portrait Originals Landscape Originals cImportant If you want to copy originals that are not supported by the ADF use the scanner glass Originals that are not Supported by the ADF on page 36 Note You can also place the originals on the scanner glass Placing Originals on page 35 2 Select Copy on the home screen 3 Select the A...

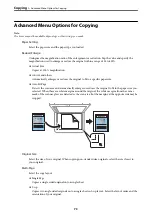
Page 71: ...nals on page 35 2 Select Copy on the home screen 3 Select the Advanced Settings tab select Remove Shadow or Remove Punch Holes and then enable the setting 4 Tap x on the Copy tab Copying ID card Scans both sides of an ID card and copies onto one side of a paper 1 Place the original on the scanner glass Placing Originals on page 35 2 Select Copy on the home screen 3 Select the Advanced Settings tab...

Page 72: ...e available depending on other settings you made B W Copies the original in black and white monochrome Color Copies the original in color 2 Sided Select 2 sided layout 1 1 Sided Copies one side of an original onto a single side of paper 1 2 Sided Copies two single sided originals onto both sides of a single sheet of paper Select the orientation of your original and the binding position of the pape...

Page 73: ...Page Detects the scan area and automatically enlarges or reduces the original to fit to the paper size you selected When there are white margins around the original the white margins from the corner mark of the scanner glass are detected as the scan area but the margins at the opposite side may be cropped Original Size Select the size of your original When copying non standard size originals selec...

Page 74: ...riginals collated in order and sorted into sets Original Orientation Select the orientation of your original Remove Shadow Removes shadows that appear around copies when copying thick paper or that appear in the center of copies when copying a booklet Remove Punch Holes Removes the binding holes when copying ID Card Copy Scans both sides of an ID card and copies onto one side of a paper Clear All ...

Page 75: ...Scanning Basic Information on Scanning 76 Scanning Originals to a Computer 79 Scanning Originals to the Cloud 80 Scanning Using WSD 82 Scanning Originals to a Smart Device 84 ...

Page 76: ...lutter By scanning important documents you can back them up to cloud services or another storage medium just in case they get lost You can send the scanned photos or documents to friends by email By scanning hand drawn illustrations and so on you can share them on social media at a much higher quality than by just taking a photo on your smart device By scanning your favorite pages from newspapers ...

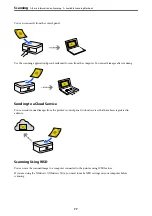
Page 77: ...d scanned images from the printer s control panel to cloud services that have been registered in advance Scanning Using WSD You can save the scanned image to a computer connected to the printer using WSD feature If you are using the Windows 7 Windows Vista you need to make WSD settings on your computer before scanning Scanning Basic Information on Scanning Available Scanning Methods 77 ...

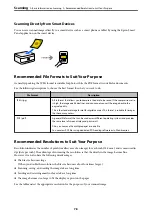
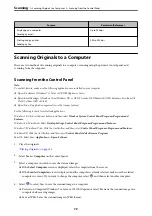
Page 78: ...ross different operating systems and provides the same level of screen display and print result Also you can save the multiple pages as a one file You can view PDF files using dedicated PDF reading software or in Web browsers Recommended Resolutions to Suit Your Purpose Resolution indicates the number of pixels smallest area of an image for each inch 25 4 mm and is measured in dpi dots per inch Th...

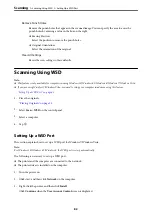
Page 79: ...ndows 8 Select Desktop Settings Control Panel Programs Programs and Features Windows 7 Windowes Vista Click the start button and then select Control Panel Programs Programs and Features Windows XP Click the start button and then select Control Panel Add or Remove Programs Mac OS Select Go Applications Epson Software 1 Place the originals Placing Originals on page 35 2 Select Scan Computer on the c...

Page 80: ...age 35 2 Start Epson ScanSmart Windows 10 Click the start button and then select Epson Software Epson ScanSmart Windows 8 1 Windows 8 Enter the application name in the search charm and then select the displayed icon Windows 7 Click the start button and then select All Programs Epson Software Epson ScanSmart Mac OS Select Go Applications Epson Software Epson ScanSmart 3 When the Epson ScanSmart scr...

Page 81: ...Note The items may not be available depending on other settings you made Scan Area Select the scan area To crop the white space around the text or image when scanning select Auto Cropping To scan at the maximum area of the scanner glass select Max Area Original Orientation Select the orientation of the original Original Type Select the type of your original Density Select the contrast of the scann...

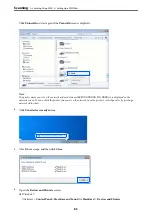
Page 82: ...uter in advance using this feature Setting Up a WSD Port on page 82 1 Place the originals Placing Originals on page 35 2 Select Scan WSD on the control panel 3 Select a computer 4 Tap x Setting Up a WSD Port This section explains how to set up a WSD port for Windows 7 Windows Vista Note For Windows 10 Windows 8 1 Windows 8 the WSD port is set up automatically The following is necessary to set up a...

Page 83: ...een You can check the printer s name set on the network from the printer s control panel or by printing a network status sheet 4 Click Your device is ready to use 5 Check the message and then click Close 6 Open the Devices and Printers screen Windows 7 Click start Control Panel Hardware and Sound or Hardware Devices and Printers Scanning Scanning Using WSD Setting Up a WSD Port 83 ...

Page 84: ...ore scanning install Epson Smart Panel on your smart device Epson Smart Panel screens are subject to change without notice Epson Smart Panel contents may vary depending on the product 1 Place the originals Placing Originals on page 35 2 Start Epson Smart Panel on your smart device 3 Select scan menu on the home screen 4 Follow the on screen instructions to scan and save the images Scanning Scannin...

Page 85: ...his Printer s Fax Features 86 Sending Faxes Using the Printer 89 Receiving Faxes on the Printer 92 Menu Options for Faxing 96 Menu Options for Inbox 99 Using Other Faxing Features 100 Sending a Fax from a Computer 100 Receiving Faxes on a Computer 104 ...

Page 86: ... on page 280 User Settings on page 264 Overview of this Printer s Fax Features Feature Sending Faxes Sending Methods Sending automatically When you scan an original by tapping x Send the printer dials the recipients and sends the fax Sending Faxes Using the Printer on page 89 Sending manually When you perform a manual check on the line connection by dialing the recipient tap x Send to start sendin...

Page 87: ...xes by Operating a Connected Phone You can receive faxes by only operating an external phone device Basic Settings on page 260 Making Settings When You Connect a Phone Device on page 289 Destinations of Received Faxes Received faxes are printed by default You can set up destinations for received faxes to the inbox If you save in the inbox you can check the contents on the screen Fax Output Setting...

Page 88: ...n Sending and Receiving Faxes You can use many security features such as Direct Dialing Restrictions to prevent sending to the wrong destination or Backup Data Auto Clear to prevent information leakage You can set a password for the inbox in the printer Security Settings on page 262 Save to Inbox on page 257 Features Other Useful Features Blocking Junk Faxes You can reject junk faxes Rejection Fax...

Page 89: ... a fax in color because the printer performs scanning and sending simultaneously While the printer is sending a fax in color you cannot use the other features Selecting Recipients You can specify recipients on the Recipient tab to send the fax using the following methods Entering Fax Number Manually Select Keypad enter a fax number on the screen displayed and then select OK To add a pause pause fo...

Page 90: ...s on page 89 4 Select the Fax Settings tab and then make settings as necessary Fax Settings on page 96 5 Select Preview on the fax top screen to scan check the scanned document image Moves the screen in the direction of the arrows Reduces or enlarges Moves to the previous or the next page Note When Direct Send is enabled you cannot preview If you leave the printer untouched for 20 seconds after pr...

Page 91: ...n sending a fax in monochrome the scanned document is temporarily stored in the printer s memory Therefore sending a lot of pages may cause the printer to run out of memory and stop sending the fax You can avoid this by enabling the Direct Send feature however it takes longer to send the fax because the printer performs scanning and sending simultaneously You can use this feature when there is onl...

Page 92: ...ax on the home screen 3 Specify the recipient Selecting Recipients on page 89 4 Select the Fax Settings tab and then tap ADF Continuous Scan to set this to On You can also make settings such as the resolution and the sending method as necessary 5 Tap x Send on the Recipienttab 6 When scanning the first set of originals is complete and a message is displayed on the control panel asking you to scan ...

Page 93: ...he ringing is for a voice call You can answer the phone as normal Receiving Faxes Using only the Connected Telephone When Remote Receive is set you can receive faxes by simply entering the Start Code When the telephone rings pick up the handset When you hear a fax tone baud dial the two digit Start Code and then hang up the handset Related Information Remote Receive on page 261 Usage of Auto Mode ...

Page 94: ...ou back Note Set the number of rings to answer for the answering machine to a lower number than the number set in Rings to Answer Otherwise the answering machine cannot receive voice calls to record voice messages For details on setting up the answering machine see the manual supplied with the answering machine Receiving Faxes by Making a Phone Call You can receive a fax stored on another fax mach...

Page 95: ...u want to view from the list The contents of the fax are displayed Moves the screen in the direction of the arrows Reduces or enlarges Rotates the image to the right by 90 degrees Moves to the previous or the next page To hide the operation icons tap anywhere on the preview screen except for the icons Tap again to display the icons 5 Select whether to print or delete the document you have viewed a...

Page 96: ...s Scan Settings Original Size Glass Select the size and orientation of the original you placed on the scanner glass Color Mode Select whether to scan in color or in monochrome Resolution Select the resolution of the outgoing fax If you select a higher resolution the data size becomes larger and it takes time to send the fax Density Sets the density of the outgoing fax makes the density darker and ...

Page 97: ...r in the outgoing fax or not to include the information Off Sends a fax with no header information Outside of Image Sends a fax with header information in the top white margin of the fax This keeps the header from overlapping with the scanned image however the fax received by the recipient may be printed across two sheets depending on the size of the originals Inside of Image Sends a fax with head...

Page 98: ...s General Settings Fax Settings Report Settings Fax Log Auto Print Fax Settings List Prints the current fax settings Protocol Trace Prints a detailed report for the previous fax that was sent or received Polling Receive When this is set to On and you call the sender s fax number you can receive documents from the sender s fax machine See the related information below for details on how to receive ...

Page 99: ...duces or enlarges Rotates the image to the right by 90 degrees Moves the screen in the direction of the arrows Moves to the previous or the next page To hide the operation icons tap anywhere on the preview screen except for the icons Tap again to display the icons Delete Deletes the document you are previewing Proceed to Print Prints the document you are previewing You can make settings such as 2 ...

Page 100: ...tall the FAX Utility using the EPSON Software Updater application for updating software Sending Documents Created Using an Application Windows By selecting a printer fax from the Print menu of an application like Microsoft Word or Excel you can directly transmit data such as documents drawings and tables you have created with a cover sheet Note The following explanation uses Microsoft Word as an e...

Page 101: ...ter tab B Select contacts from the list and click Add to proceed to Add to Recipient window C Select the contacts from the list displayed and then click Edit D Add the personal data such as Company Corp and Title as necessary and then click OK to return to the Add to Recipient window E As necessary select the checkbox of Register in the PC FAX Phone Book to save the contacts to PC FAX Phone Book F...

Page 102: ... font used for the text on the cover sheet Click Sender Settings if you want to change the sender information Click Detailed Preview if you want to check the cover sheet with the subject and the message you entered 10 Check the transmission content and click Send Make sure the name and fax number of the recipient are correct before transmitting Click Preview to preview the cover sheet and document...

Page 103: ...ecipient is added to the Recipient List displayed in the upper part of the window If you have selected Enter fax number twice in the PC FAX driver settings you need to enter the same number again when you click If your fax connection line requires a prefix code enter External Access Prefix Note If your printer s Line Type is set to PBX and the access code has been set to use hash instead of enteri...

Page 104: ... If the FAX Utility is not installed install the FAX Utility using the EPSON Software Updater application for updating software cImportant To receive faxes on a computer the Receive Mode on the printer s control panel must be set to Auto Contact your administrator for information on the printer settings status To make settings on the printer s control panel select Settings General Settings Fax Set...

Page 105: ...g the following naming format YYYYMMDDHHMMSS_xxxxxxxxxx_nnnnn Year Month Day Hour Minute Second_sender s number You can also open the received fax folder directly when you right click the icon For details see Optional Settings in the FAX Utility and its help displayed on the main window While the fax icon indicates that it is standing by you can check for new faxes instantly by selecting Check new...

Page 106: ...pen the save folder from the computer specified to receive faxes when selecting Save save faxes on this computer 1 Click the received fax monitor icon on the Dock to open Fax Receive Monitor 2 Select the printer and click Open folder or double click the printer name 3 Check the date and the sender in the file name and then open the PDF file Note Received faxes are automatically renamed using the f...

Page 107: ...Related Information Making Save to Computer Setting not to Receive Faxes on page 291 Faxing Receiving Faxes on a Computer Canceling the Feature that Saves Incoming Faxes to the Computer 107 ...

Page 108: ...er Feeding Problems 109 Improving Print Copy Scan and Fax Quality 111 Cleaning the Printer 121 Cleaning Spilled ink 121 Checking the Total Number of Pages Fed Through the Printer 122 Saving Power 122 Installing or Uninstalling Applications Separately 123 Transporting and Storing the Printer 128 ...

Page 109: ... of the maintenance box from the status monitor on the printer driver See the related information link below for details Related Information Application for Printing from a Computer Windows Printer Driver on page 243 Guide to Mac OS Printer Driver on page 245 Refilling the Ink Tank on page 193 Replacing a Maintenance Box on page 197 Cleaning the Paper Path for Paper Feeding Problems When paper is ...

Page 110: ...e ADF cover and the printer cover 5 Slide out the paper cassette and then remove the paper 6 Stand the printer on its side with the printer s ink tank at the bottom Caution Be careful not to trap your hand or fingers when standing the printer Otherwise you may be injured Maintaining the Printer Cleaning the Paper Path for Paper Feeding Problems 110 ...

Page 111: ...rtant Do not open the printer cover or turn off the printer during head cleaning If the head cleaning is incomplete you may not be able to print Head cleaning consumes ink and should not be performed more than necessary When ink is low you may not be able to clean the print head If print quality has not improved after repeating nozzle check and head cleaning 3 times wait for at least 12 hours with...

Page 112: ...nd head cleaning 3 times wait for at least 12 hours without printing and then run the nozzle check again and repeat the head cleaning if necessary We recommend turning off the printer by using the P button If print quality has still not improved run Power Cleaning Note You can also check and clean the print head from the printer driver See the related information link below for details Related Inf...

Page 113: ...you cannot run this feature Even in this case the levels and the free space for printing may remain 1 Select Maintenance on the printer s control panel 2 Select Power Cleaning 3 Follow the on screen instructions to run the Power Cleaning feature Note If you cannot run this feature solve the problems that are displayed on the screen Next follow this procedure from step 1 to run this feature again 4...

Page 114: ...of vertical lines or blurred images align the print head 1 Select Maintenance on the printer s control panel 2 Select Print Head Alignment 3 Select one of the alignment menus Vertical lines look misaligned or the printouts look blurry Select Vertical Alignment Horizontal banding occurs at regular intervals Select Horizontal Alignment 4 Follow the on screen instructions to load paper and print the ...

Page 115: ... to remove material use a small amount of glass cleaner and a soft cloth to remove it Wipe off all remaining liquid Do not press the glass surface too hard Be careful not to scratch or damage the surface of the glass A damaged glass surface can decrease the scan quality Cleaning the ADF When the copied or scanned images from the ADF are smeared or the originals do not feed in the ADF correctly cle...

Page 116: ...oth to clean the roller and the interior of the ADF cImportant Using a dry cloth may damage the surface of the roller Use the ADF after the roller has dried Maintaining the Printer Improving Print Copy Scan and Fax Quality Cleaning the ADF 116 ...

Page 117: ...e other hard to remove material use a small amount of glass cleaner and a soft cloth to remove it Wipe off all remaining liquid Do not press the glass surface too hard Be careful not to scratch or damage the surface of the glass A damaged glass surface can decrease the scan quality Maintaining the Printer Improving Print Copy Scan and Fax Quality Cleaning the ADF 117 ...

Page 118: ...lucent Film When the printout is not improved after aligning the print head or cleaning the paper path the translucent film inside the printer may be smeared Items required Cotton swabs several Water with a few drops of detergent 2 to 3 drops of detergent in 1 4 cup of tap water Light for checking smears Maintaining the Printer Improving Print Copy Scan and Fax Quality Cleaning the Translucent Fil...

Page 119: ...2 Open the printer cover 3 Check if the translucent film is smeared Smears are easier to see if you use a light If there are smears such as finger marks or grease on the translucent film A go to the next step A Translucent film B Rail Maintaining the Printer Improving Print Copy Scan and Fax Quality Cleaning the Translucent Film 119 ...

Page 120: ...he smear gently If you press the cotton swab too hard to the film the springs of the film may be dislocated and the printer may be damaged 5 Use a new dry cotton swab to wipe the film cImportant Do not leave any fibers on the film Note To prevent the smear from spreading frequently replace the cotton swab with a new one 6 Repeat steps 4 and 5 until the film is not smeared 7 Visually check that the...

Page 121: ...onents and the case These chemicals can damage them Do not touch the parts shown in the following illustration Doing so may cause a malfunction Cleaning Spilled ink If ink has been spilled clean it up in the following ways If ink adheres to the area around the tank wipe it off using a napless clean cloth or cotton swab If ink spills on the desk or floor wipe it off immediately When ink is dried it...

Page 122: ...ff automatically if no operations are performed for a set period You can adjust the time before power management is applied Any increase will affect the product s energy efficiency Please consider the environment before making any change Depending on the location of purchase the printer may have a feature that turns it off automatically if it is not connected to the network for 30 minutes Saving P...

Page 123: ...er and the computer are available for communication and the printer is connected to the Internet 2 Start EPSON Software Updater The screenshot is an example on Windows 3 For Windows select your printer and then click to check for the latest available applications 4 Select the items you want to install or update and then click the install button cImportant Do not turn off or unplug the printer unti...

Page 124: ...ters Printers and Faxes and then do the following to open the print server properties window Windows Windows 10 Windows 8 1 Windows 8 Windows 7 Windows Server 2019 Windows Server 2016 Windows Server 2012 R2 Windows Server 2012 Windows Server 2008 R2 Click the printer icon and then click Print server properties at the top of the window Windows Vista Windows Server 2008 Right click on the Printers f...

Page 125: ...lled on your computer Related Information Installing the Applications Separately on page 123 Adding the Printer for Mac OS Only 1 Select System Preferences from the Apple menu Printers Scanners or Print Scan Print Fax 2 Click and then select Add Other Printer or Scanner 3 Select your printer and then select your printer from the Use 4 Click Add Note If your printer is not listed check that it is c...

Page 126: ...ver 2003 R2 Windows Server 2003 Click Add or Remove Programs 5 Select the application you want to uninstall You cannot uninstall the printer driver if there is any print jobs Delete or wait to be printed the jobs before uninstalling 6 Uninstall the applications Windows 10 Windows 8 1 Windows 8 Windows 7 Windows Vista Windows Server 2019 Windows Server 2016 Windows Server 2012 R2 Windows Server 201...

Page 127: ...rmware You may be able to clear certain problems and improve or add functions by updating the applications and the firmware Make sure you use the latest version of the applications and firmware 1 Make sure that the printer and the computer are connected and the computer is connected to the internet 2 Start EPSON Software Updater and update the applications or the firmware cImportant Do not turn of...

Page 128: ... is off Otherwise the print head does not return to the home position causing the ink to dry and printing may become impossible 3 Disconnect all cables such as the power cord and USB cable 4 Remove all of the paper from the printer 5 Make sure there are no originals on the printer 6 Close the document cover if it is open 7 Open the printer cover Secure the print head to the case with tape Caution ...

Page 129: ... close the ink tank cap securely 10 Close the ink tank cover securely 11 Insert the accessory box that came with the printer with the opening flap facing forward as shown below Maintaining the Printer Transporting and Storing the Printer 129 ...

Page 130: ...12 Place the printer in the plastic bag and fold it closed 13 Pack the printer in its box using the protective materials Maintaining the Printer Transporting and Storing the Printer 130 ...

Page 131: ... in the plastic bag and fold it closed Avoid tilting the printer placing it vertically or turning it upside down otherwise ink may leak When lifting the printer place your hands in the positions shown below Maintaining the Printer Transporting and Storing the Printer 131 ...

Page 132: ...ons to prevent ink from leaking when transporting the bottle for example putting the bottle in a bag Do not put opened ink bottles in the box with printer When you use the printer again make sure you remove the tape securing the print head If print quality has declined the next time you print clean and align the print head Related Information Checking and Cleaning the Print Head on page 111 Aligni...

Page 133: ... as Expected 134 A Message is Displayed on the LCD Screen 183 Paper Gets Jammed 184 It is Time to Refill the Ink 192 It is Time to Replace the Maintenance Box 196 Printing Copying Scanning and Faxing Quality is Poor 198 Cannot Solve Problem 215 ...

Page 134: ...cord To prevent the print head from drying out turn the printer back on and turn it off by pressing the P button Power Turns Off Automatically The Power Off Settings or Power Off Timer feature is enabled Solutions Select Settings General Settings Basic Settings Power Off Settings and then disable the Power Off If Inactive and Power Off If Disconnected settings Select Settings General Settings Basi...

Page 135: ...ets specified for the paper Available Paper and Capacities on page 239 The paper settings on the printer are incorrect Solutions Make sure the paper size and paper type settings match the actual paper size and paper type loaded in the printer Paper Size and Type Settings on page 29 Paper slips when paper dust adheres to the roller Solutions Clean the roller Cleaning the Paper Path for Paper Feedin...

Page 136: ...per Available Paper and Capacities on page 239 The paper settings on the printer are incorrect Solutions Make sure the paper size and paper type settings match the actual paper size and paper type loaded in the printer Paper Size and Type Settings on page 29 Paper slips when paper dust adheres to the roller Solutions Clean the roller Cleaning the Paper Path for Paper Feeding Problems on page 109 S...

Page 137: ...lutions Do not load more than the maximum number of sheets specified for the paper Available Paper and Capacities on page 239 The paper settings on the printer are incorrect Solutions Make sure the paper size and paper type settings match the actual paper size and paper type loaded in the printer Paper Size and Type Settings on page 29 Paper slips when paper dust adheres to the roller Solutions Cl...

Page 138: ...tions on page 266 The originals are loaded incorrectly Solutions Load originals in the correct direction and slide the ADF edge guides against the edges of the originals Too many originals are loaded in the ADF Solutions Do not load originals above the line indicated by the triangle symbol on the ADF The original slips when paper dust adheres to the roller Solutions Clean the inside of the ADF Cle...

Page 139: ...er Connection Checker Windows 8 1 Windows 8 Enter the application name in the search charm and then select the displayed icon Windows 7 Click the start button and then select All Programs Epson Software Epson Printer Connection Checker 2 Follow the on screen instructions to check Note If the printer name is not displayed install a genuine Epson printer driver Checking if a genuine Epson printer dr...

Page 140: ... Solutions After moving the computer or the smart device and the printer closer to the wireless router turn off the wireless router and then turn it back on When changing the wireless router the settings do not match the new router Solutions Make the connection settings again so that they match the new wireless router When Replacing the Wireless Router on page 219 The SSIDs connected from the comp...

Page 141: ...ction on the wireless router See the manual provided with the wireless router for details The IP address is incorrectly assigned Solutions If the IP address assigned to the printer is 169 254 XXX XXX and the subnet mask is 255 255 0 0 the IP address may not be assigned correctly Select Settings General Settings Network Settings Advanced on the printer s control panel and then check the IP address ...

Page 142: ... below to disable IEEE802 3az for the printer and then connect 1 Remove the Ethernet cable connected to the computer and the printer 2 When IEEE802 3az for the computer is enabled disable it See the documentation provided with the computer for details 3 Connect the computer and the printer with an Ethernet cable directly 4 On the printer print a network connection report Printing a Network Connect...

Page 143: ... is not installed the available functions are limited We recommend using a genuine Epson printer driver If you are printing a large data size image the computer may run out of memory Print the image at a lower resolution or a smaller size If you have tried all of the solutions and have not solved the problem try uninstalling and then reinstalling the printer driver You may be able to clear the pro...

Page 144: ...e default printer Solutions Right click the printer icon in Control Panel View devices and printers or Printers Printers and Faxes and click Set as default printer Note If there are multiple printer icons see the following to select the correct printer Example USB connection EPSON XXXX Series Network connection EPSON XXXX Series network If you install the printer driver multiple times copies of th...

Page 145: ...it for about 10 seconds and then turn on the devices in the following order wireless router computer or smart device and then printer Move the printer and computer or smart device closer to the wireless router to help with radio wave communication and then try to make network settings again The printer is not connected to the network Solutions Select Settings General Settings Network Settings Conn...

Page 146: ...e default printer Solutions Right click the printer icon in Control Panel View devices and printers or Printers Printers and Faxes and click Set as default printer Note If there are multiple printer icons see the following to select the correct printer Example USB connection EPSON XXXX Series Network connection EPSON XXXX Series network If you install the printer driver multiple times copies of th...

Page 147: ...nsumables is displayed a connection has been successfully established between the computer and the printer Check the following if a connection has not been established The printer is not recognized over a network connection Cannot connect to a Network on page 147 The printer is not recognized using a USB connection The Printer Cannot Connect by USB Mac OS on page 150 Check the following if a conne...

Page 148: ...ttings do not match the new router Solutions Make the connection settings again so that they match the new wireless router When Replacing the Wireless Router on page 219 The SSIDs connected from the computer or smart device and computer are different Solutions When you are using multiple wireless routers at the same time or the wireless router has multiple SSIDs and devices are connected to differ...

Page 149: ...subnet mask assigned to the printer Restart the wireless router or reset the network settings for the printer Re setting the Network Connection on page 219 There is a problem with the network settings on the computer Solutions Try accessing any website from your computer to make sure that your computer s network settings are correct If you cannot access any website there is a problem on the comput...

Page 150: ...page 249 7 Select Advanced Settings from the list at the top right of the window 8 Select Network Settings Wired LAN 9 Select OFF for IEEE 802 3az 10 Click Next 11 Click OK 12 Remove the Ethernet cable connected to the computer and the printer 13 If you disabled IEEE802 3az for the computer in step 2 enable it 14 Connect the Ethernet cables that you removed in step 1 to the computer and the printe...

Page 151: ...use the software update tool Checking if a genuine Epson printer driver is installed Windows on page 124 Checking if a genuine Epson printer driver is installed Mac OS on page 125 Installing or Uninstalling Applications Separately on page 123 Updating Applications and Firmware on page 127 There is a problem with the status of the printer Solutions Make sure the printer status is not Pause Select S...

Page 152: ... accessing any website from your computer to make sure that your computer s network settings are correct If you cannot access any website there is a problem on the computer Check the network connection of the computer See the documentation provided with the computer for details The Print Settings Menu is Not Displayed The following causes can be considered The Epson Printer Driver has Not been Ins...

Page 153: ...devices you want to connect to the network Wait for about 10 seconds and then turn on the devices in the following order wireless router computer or smart device and then printer Move the printer and computer or smart device closer to the wireless router to help with radio wave communication and then try to make network settings again Devices cannot receive signals from the wireless router because...

Page 154: ...eparator on the wireless router is available Solutions Most wireless routers have a separator function that blocks communication between devices within the same SSID If you cannot communicate between the printer and the computer or smart device even if they are connected to the same network disable the separator function on the wireless router See the manual provided with the wireless router for d...

Page 155: ...Auto Display in the following menu Settings General Settings Printer Settings Paper Source Settings Paper Setup Auto Display AirPrint is disabled Solutions Enable the AirPrint setting on Web Config Application for Configuring Printer Operations Web Config on page 249 Suddenly the Printer Cannot Print over a Network Connection The problem could be one of the following issues The network environment...

Page 156: ...onnection of the computer See the documentation provided with the smart device for details Printing received faxes is disabled under the current settings If Save to Computer is set to Yes change the setting to Yes and Print Or disable Save to Inbox and Save to Computer allows printing to be performed You can find Save to Inbox and Save to Computer in Settings General Settings Fax Settings Receive ...

Page 157: ...en you cannot solve the problem check the following according to your situation The printer is not recognized over a network connection Cannot connect to a Network on page 157 The printer is not recognized using a USB connection The Printer Cannot Connect by USB Windows on page 143 The printer is recognized but scanning cannot be performed Cannot Scan Even Though a Connection has been Correctly Es...

Page 158: ...less router When Replacing the Wireless Router on page 219 The SSIDs connected from the computer or smart device and computer are different Solutions When you are using multiple wireless routers at the same time or the wireless router has multiple SSIDs and devices are connected to different SSIDs you cannot connect to the wireless router Connect the computer or smart device to the same SSID as th...

Page 159: ...twork settings are correct If you cannot access any website there is a problem on the computer Check the network connection of the computer See the documentation provided with the computer for details The printer has been connected by Ethernet using devices that support IEEE802 3az Energy Efficient Ethernet Solutions When you connect the printer by Ethernet using devices that support IEEE802 3az E...

Page 160: ...evices other than the printer may be causing the problem The Printer Cannot Connect by USB Windows The following causes can be considered The USB cable is not plugged into the electrical outlet correctly Solutions Connect the USB cable securely to the printer and the computer There is a problem with the USB hub Solutions If you are using a USB hub try to connect the printer directly to the compute...

Page 161: ...k connection Cannot connect to a Network on page 161 The printer is not recognized using a USB connection The Printer Cannot Connect by USB Mac OS on page 150 Check the following if a connection has been established The printer is recognized but scanning cannot be performed Cannot Scan Even Though a Connection has been Correctly Established Mac OS on page 164 Cannot connect to a Network The proble...

Page 162: ...less router When Replacing the Wireless Router on page 219 The SSIDs connected from the computer or smart device and computer are different Solutions When you are using multiple wireless routers at the same time or the wireless router has multiple SSIDs and devices are connected to different SSIDs you cannot connect to the wireless router Connect the computer or smart device to the same SSID as th...

Page 163: ...twork settings are correct If you cannot access any website there is a problem on the computer Check the network connection of the computer See the documentation provided with the computer for details The printer has been connected by Ethernet using devices that support IEEE802 3az Energy Efficient Ethernet Solutions When you connect the printer by Ethernet using devices that support IEEE802 3az E...

Page 164: ...devices other than the printer may be causing the problem The Printer Cannot Connect by USB Mac OS The following causes can be considered The USB cable is not plugged into the electrical outlet correctly Solutions Connect the USB cable securely to the printer and the computer There is a problem with the USB hub Solutions If you are using a USB hub try to connect the printer directly to the compute...

Page 165: ...devices you want to connect to the network Wait for about 10 seconds and then turn on the devices in the following order wireless router computer or smart device and then printer Move the printer and computer or smart device closer to the wireless router to help with radio wave communication and then try to make network settings again Devices cannot receive signals from the wireless router because...

Page 166: ...ator on the wireless router is available Solutions Most wireless routers have a separator function that blocks communication between devices within the same SSID If you cannot communicate between the printer and the computer or smart device even if they are connected to the same network disable the separator function on the wireless router See the manual provided with the wireless router for detai...

Page 167: ... cannot make or receive calls contact your telecommunication company There are some problems in connecting to the telephone line Solutions Select Settings General Settings Fax Settings Check Fax Connection on the control panel to run the automatic fax connection check Try the solutions printed on the report Communication error occurs Solutions Select Slow 9 600bps in Settings General Settings Fax ...

Page 168: ...rmation Your caller ID is blocked Solutions Contact your telecommunication company to unblock your caller ID Some phones or fax machines automatically reject anonymous calls The recipient s fax number is wrong Solutions Check that the recipient s number registered in your contacts list or that you entered directly using the keypad is correct Or check with the recipient that the fax number is corre...

Page 169: ...Number List Solutions Make sure that the sender s number can be deleted from the Rejection Number List before deleting it Delete it from Settings General Settings Fax Settings Basic Settings Rejection Fax Edit Blocked Number list Or disable the Rejection Number List in Settings General Settings Fax Settings Basic Settings Rejection Fax Rejection Fax Faxes sent from numbers that have not been regis...

Page 170: ...from the edge of the scanner glass You cannot scan the area within approximately 1 5 mm 0 06 in from the edge of the scanner glass Placing Originals on page 35 There is dust or dirt on the originals or the scanner glass Solutions Remove any dust or dirt that adheres to the originals and clean the scanner glass Cleaning the Scanner Glass on page 114 Received Faxes Are Not Printed The following caus...

Page 171: ...Enter the application name in the search charm and then select the displayed icon Windows 7 Click the start button and then select All Programs Epson Software Epson Printer Connection Checker 2 Follow the on screen instructions to check Note If the printer name is not displayed install a genuine Epson printer driver Checking if a genuine Epson printer driver is installed Windows on page 124 When y...

Page 172: ...inter closer to the wireless router turn off the wireless router and then turn it back on When changing the wireless router the settings do not match the new router Solutions Make the connection settings again so that they match the new wireless router When Replacing the Wireless Router on page 219 The SSIDs connected from the computer or smart device and computer are different Solutions When you ...

Page 173: ...ask assigned to the printer Restart the wireless router or reset the network settings for the printer Re setting the Network Connection on page 219 There is a problem with the network settings on the computer Solutions Try accessing any website from your computer to make sure that your computer s network settings are correct If you cannot access any website there is a problem on the computer Check...

Page 174: ...7 Select Advanced Settings from the list at the top right of the window 8 Select Network Settings Wired LAN 9 Select OFF for IEEE 802 3az 10 Click Next 11 Click OK 12 Remove the Ethernet cable connected to the computer and the printer 13 If you disabled IEEE802 3az for the computer in step 2 enable it 14 Connect the Ethernet cables that you removed in step 1 to the computer and the printer If the ...

Page 175: ...tem Control Panel View devices and printers in Hardware and Sound Windows 8 1 Windows 8 Select Desktop Settings Control Panel View devices and printers in Hardware and Sound or Hardware Windows 7 Click the start button and select Control Panel View devices and printers in Hardware and Sound or Hardware Windows Vista Click the start button and select Control Panel Printers in Hardware and Sound Win...

Page 176: ...ork connection Cannot connect to a Network on page 147 The printer is not recognized using a USB connection The Printer Cannot Connect by USB Mac OS on page 150 Check the following if a connection has been established The printer is recognized but printing cannot be performed Cannot Print Even Though a Connection has been Established Mac OS on page 151 Cannot connect to a Network The problem could...

Page 177: ...s router When Replacing the Wireless Router on page 219 The SSIDs connected from the computer or smart device and computer are different Solutions When you are using multiple wireless routers at the same time or the wireless router has multiple SSIDs and devices are connected to different SSIDs you cannot connect to the wireless router Connect the computer or smart device to the same SSID as the p...

Page 178: ...k settings are correct If you cannot access any website there is a problem on the computer Check the network connection of the computer See the documentation provided with the computer for details The printer has been connected by Ethernet using devices that support IEEE802 3az Energy Efficient Ethernet Solutions When you connect the printer by Ethernet using devices that support IEEE802 3az Energ...

Page 179: ...USB Mac OS The following causes can be considered The USB cable is not plugged into the electrical outlet correctly Solutions Connect the USB cable securely to the printer and the computer There is a problem with the USB hub Solutions If you are using a USB hub try to connect the printer directly to the computer There is a problem with the USB cable or the USB inlet Solutions If the USB cable cann...

Page 180: ...x function is set user authentication is performed with the user name and password set in the printer driver There are some problems with fax connection and fax settings Solutions Try the resolutions for fax connection and fax settings Cannot Operate the Printer as Expected Operations are Slow Printing Is Too Slow The following causes can be considered Unnecessary applications are running Solution...

Page 181: ... Fax and then select the printer Click Options Supplies Options or Driver Select Off as the Quiet Mode setting Printing Slows Down Dramatically During Continuous Printing The function that prevents the printer mechanism from overheating and being damaged is operating Solutions You can continue printing To return to normal printing speed leave the printer idle for at least 30 minutes Printing speed...

Page 182: ...wer is left off for a long time the clock may show the wrong time Set the date and the time correctly in Settings General Settings Basic Settings Date Time Settings on the control panel The Root Certificate Needs to be Updated The root certificate has expired Solutions Run Web Config and then update the root certificate Cannot Cancel Printing from a Computer Running Mac OS X v10 6 8 There is a pro...

Page 183: ...ctly Answering Machine Cannot Answer Voice Calls The printer s Rings to Answer setting is set to less than the number of rings for your answering machine Solutions Select Slow 9 600bps in Settings General Settings Fax Settings Basic Settings Rings to Answer and then set to a number higher than the number of rings for your answering machine A Lot of Junk Faxes Have Been Received The printer s featu...

Page 184: ...ult gateway Contact the person who setup the network for assistance To use cloud services update the root certificate from the Epson Web Config utility Run Web Config and then update the root certificate Check that the printer driver is installed on the computer and that the port settings for the printer are correct Make sure the printer port is selected correctly in Property Port from the Printer...

Page 185: ...ur hand is inside the printer If the printer starts operating it could cause an injury Be careful not to touch the protruding parts to avoid injury 1 Remove the jammed paper 2 Remove the rear cover 3 Remove the jammed paper Solving Problems Paper Gets Jammed Removing Jammed Paper 185 ...

Page 186: ...4 Remove jammed paper from the rear cover 5 Insert the rear cover in the printer 6 Open the front cover 7 Lower the output switch lever Solving Problems Paper Gets Jammed Removing Jammed Paper 186 ...

Page 187: ...the parts inside the printer Doing so may cause a malfunction 9 Raise the output switch lever 10 Close the front cover 11 Open the printer cover and then use the knob to fasten it to the top Solving Problems Paper Gets Jammed Removing Jammed Paper 187 ...

Page 188: ...ite flat cable translucent film and ink tubes inside the printer Doing so may cause a malfunction If you touch the translucent film make sure you clean it 13 Close the printer cover until it clicks Solving Problems Paper Gets Jammed Removing Jammed Paper 188 ...

Page 189: ...Removing Jammed Paper from the ADF 1 Open the ADF cover 2 Remove the jammed paper Solving Problems Paper Gets Jammed Removing Jammed Paper from the ADF 189 ...

Page 190: ...t tray cImportant Make sure that you open the ADF cover before raising the ADF input tray Otherwise the ADF may be damaged 4 Remove the jammed paper Solving Problems Paper Gets Jammed Removing Jammed Paper from the ADF 190 ...

Page 191: ...nded environmental conditions Environmental Specifications on page 271 Use the paper supported by this printer Available Paper and Capacities on page 239 Follow paper handling precautions Paper Handling Precautions on page 29 Load paper in the correct direction and slide the edge guide against the edge of the paper Loading Paper on page 31 Solving Problems Paper Gets Jammed Preventing Paper Jams 1...

Page 192: ...ours before using it Do not open the ink bottle package until you are ready to fill the ink tank The ink bottle is vacuum packed to maintain its reliability If you leave an ink bottle unpacked for a long time before using it normal printing may not be possible Once you open an ink bottle we recommend using it as soon as possible Handling precautions for refilling ink To ensure you receive premium ...

Page 193: ... quantity of ink and therefore these bottles may print fewer pages compared to subsequent ink bottles Quoted yields may vary depending on the images that you are printing the paper type that you are using the frequency of your prints and environmental conditions such as temperature Visually check ink levels in the actual ink tanks Prolonged use of the printer when the ink is expended could damage ...

Page 194: ... to spill any ink 7 Check the upper line a in the ink tank 8 Align the top of the ink bottle with the filling port and then insert it straight into the port to fill ink until it stops automatically at the upper line When you insert the ink bottle into the filling port for the correct color ink starts pouring and the flow stops automatically when the ink reaches the upper line Solving Problems It i...

Page 195: ...en the ink has reached the upper line otherwise ink may leak 9 When you have finished refilling the ink remove the ink bottle and then close the ink tank cap securely cImportant Do not leave the ink bottle inserted otherwise the bottle may be damaged or ink may leak Solving Problems It is Time to Refill the Ink Refilling the Ink Tank 195 ...

Page 196: ...t its best however fill ink tank up to the upper line and reset the ink level immediately Related Information Ink Bottle Codes on page 242 Ink Bottle Handling Precautions on page 192 Cleaning Spilled ink on page 121 It is Time to Replace the Maintenance Box Maintenance Box Handling Precautions Read the following instructions before replacing the maintenance box Do not touch the green chip on the s...

Page 197: ...k may be collected in the maintenance box To prevent ink leakage from the maintenance box the printer is designed to stop printing when the absorbing capacity of the maintenance box has reached its limit Whether and how often this is required will vary according to the number of pages you print the type of material that you print and the number of cleaning cycles that the printer performs When a m...

Page 198: ...o low to be seen in the ink tank windows refill the ink tanks to the upper lines and then use the Power Cleaning utility to replace the ink inside the ink tubes After you use the utility perform a nozzle check to see if print quality has improved Checking and Cleaning the Print Head on page 111 Running Power Cleaning on page 112 Colored Banding Appears at Intervals of Approximately 1 1 cm or 3 3 c...

Page 199: ...Alignment menu on the control panel to align the print head The bidirectional printing setting is enabled Solutions If print quality does not improve even after aligning the print head disable the bidirectional setting During bidirectional or high speed printing the print head prints while moving in both directions and vertical lines may be misaligned Disabling this setting may slow down printing ...

Page 200: ... of paper are fed into the printer at the same time Solutions See the following to prevent multiple sheets of paper being fed into the printer at the same time Several Sheets of Paper are Fed at a Time on page 136 Paper Is Smeared or Scuffed The following causes can be considered Paper is loaded incorrectly Solutions When horizontal banding perpendicular to the printing direction appears or the to...

Page 201: ... Extended Settings on the printer driver s Maintenance tab and then select Short Grain Paper When printing using automatic 2 sided printing the print density is too high and the drying time is too short Solutions When using the automatic 2 sided printing feature and printing high density data such as images and graphs set the print density to lower and the drying time to longer Printing on 2 Sides...

Page 202: ...on the paper type Try change the setting On the More Options tab select Custom in Color Correction and then click Advanced Change the Scene Correction setting from Automatic to any other option If changing the setting does not work use any color correction method other than PhotoEnhance in Color Management Adjusting the Print Color on page 53 The Position Size or Margins of the Printout Are Incorr...

Page 203: ...inted Solutions Cancel any paused print jobs The computer has been manually put into the Hibernate mode or the Sleep mode while printing Solutions Do not put the computer manually into the Hibernate mode or the Sleep mode while printing Pages of garbled text may be printed next time you start the computer You are using the printer driver for a different printer Solutions Make sure that the printer...

Page 204: ...olors Appear in Copies The print head nozzles may be clogged Solutions Perform a nozzle check to see if the print head nozzles are clogged Perform a nozzle check and then clean the print head if any of the print head nozzles are clogged If you have not used the printer for a long time the print head nozzles may be clogged and ink drops may not be discharged If you printed when the ink levels were ...

Page 205: ...using a higher quality setting Select Best in Quality The print head position is out of alignment Solutions Select the Maintenance Print Head Alignment Horizontal Alignment menu on the control panel to align the print head Blurry Copies Vertical Banding or Misalignment The following causes can be considered The print head position is out of alignment Solutions Select the Maintenance Print Head Ali...

Page 206: ...e sheets of paper are fed into the printer at the same time Solutions See the following to prevent multiple sheets of paper being fed into the printer at the same time Several Sheets of Paper are Fed at a Time on page 136 Paper Is Smeared or Scuffed The following causes can be considered Paper is loaded incorrectly Solutions When horizontal banding perpendicular to the printing direction appears o...

Page 207: ...er Solutions Make sure you are copying on the printable side If you have accidentally copied on the wrong side of the photo paper you need to clean the paper path Loading Paper on page 31 Cleaning the Paper Path for Ink Smears on page 114 The Position Size or Margins of the Copies are Incorrect The following causes can be considered The paper is loaded incorrectly Solutions Load paper in the corre...

Page 208: ...uses can be considered The paper path is dirty Solutions Load and eject paper without printing to clean the paper path Cleaning the Paper Path for Ink Smears on page 114 There is dust or dirt on the originals or the scanner glass Solutions Remove any dust or dirt that adheres to the originals and clean the scanner glass Cleaning the Scanner Glass on page 114 There is dust or dirt on the ADF or ori...

Page 209: ...n still appears place the original at a slightly different angle Advanced Menu Options for Copying on page 73 An Image of the Reverse Side of the Original Appears in the Copied Image The following causes can be considered When scanning thin originals images on the back may be scanned at the same time Solutions Place the original on the scanner glass and then place a piece of black paper over it Pl...

Page 210: ...canning from the Scanner Glass There is dust or dirt on the originals or the scanner glass Solutions Remove any dust or dirt that adheres to the originals and clean the scanner glass Cleaning the Scanner Glass on page 114 The original was pressed with too much force Solutions If you press with too much force blurring smudges and spots may occur Do not press with too much force on the original or t...

Page 211: ...place black paper or a desk pad over the original Placing Originals on page 35 Cannot Scan the Correct Area on the Scanner Glass The originals are not placed correctly Solutions Make sure the original is placed correctly against the alignment marks If the edge of the scanned image is missing move the original slightly away from the edge of the scanner glass You cannot scan the area within approxim...

Page 212: ...ation supplied with the scanner software 1 Start the Epson Scan 2 Utility Windows 10 Click the start button and then select EPSON Epson Scan 2 Utility Windows 8 1 Windows 8 Enter the application name in the search charm and then select the displayed icon Windows 7 Windows Vista Windows XP Click the start button and then select All Programs or Programs EPSON Epson Scan 2 Epson Scan 2 Utility Mac OS...

Page 213: ...he scanner glass Cleaning the Scanner Glass on page 114 The original was pressed with too much force Solutions If you press with too much force blurring smudges and spots may occur Do not press with too much force on the original or the document cover Placing Originals on page 35 Straight Lines Appear when Sending Faxes from the ADF The following causes can be considered There is dust or dirt on t...

Page 214: ...ettings Basic Settings and enable the ECM setting on the control panel This may clear errors that occur due to connection problems Note that the speed of sending and receiving faxes may be slower than when ECM is disabled An Image of the Reverse Side of the Original Appears in the Sent Fax The following causes can be considered When scanning thin originals images on the back may be scanned at the ...

Page 215: ...ot solve the problem after trying all of the solutions contact Epson support If you cannot solve printing or copying problems see the following related information Related Information Cannot Solve Printing or Copying Problems on page 215 Cannot Solve Printing or Copying Problems Try the following problems in order starting at the top until you solve the problem Make sure you match the paper type l...

Page 216: ...f the translucent film is smeared If there are smears on the translucent film carefully wipe off the smear Cleaning the Translucent Film on page 118 Make sure that there are no paper fragments left inside the printer When you remove the paper do not touch the translucent film with your hand or the paper Check the paper Check if the paper is curled or loaded with the printable side facing up Paper ...

Page 217: ...puter or Devices Connecting to a Printer that has been Connected to the Network 218 Re setting the Network Connection 219 Connecting a Smart Device and Printer Directly Wi Fi Direct 225 Checking the Network Connection Status 229 ...

Page 218: ...following website and then enter the product name Go to Setup and then start setting up http epson sn Setting up using the software disc only for the models that come with a software disc and users with Windows computers with disc drives Insert the software disc into the computer and then follow the on screen instructions Selecting the Printer Follow the on screen instructions until the following ...

Page 219: ...rinter You need to make these settings if you change your Internet service provider and so on Making Settings for Connecting to the Computer We recommend using the installer to connect the printer to a computer You can run the installer using one of the following methods Setting up from the website Access the following website and then enter the product name Go to Setup and then start setting up h...

Page 220: ...ion Method to the Computer This section explains how to change the connection method when the computer and the printer have been connected Changing the Network Connection from Ethernet to Wi Fi Change the Ethernet connection to Wi Fi connection from the printer s control panel The changing connection method is basically the same as the Wi Fi connection settings Related Information Making Wi Fi Set...

Page 221: ...at you want to use Connect via wireless network Wi Fi or Connect via wired LAN Ethernet and then click Next Note The displayed connection method differs depending on the model Follow the on screen instructions Making Wi Fi Settings from the Control Panel You can make network settings from the printer s control panel in several ways Choose the connection method that matches the environment and cond...

Page 222: ...e screen 2 Select Wi Fi Recommended If the printer has already been connected by Ethernet select Router 3 Tap Start Setup If the network connection is already set up the connection details are displayed Tap Change Settings to change the settings If the printer has already been connected by Ethernet tap Change to Wi Fi connection and then select Yes after checking the message 4 Select Wi Fi Setup W...

Page 223: ...onnection Status on page 229 Making Wi Fi Settings by Push Button Setup WPS You can automatically set up a Wi Fi network by pressing a button on the wireless routor If the following conditions are met you can set up by using this method The wireless router is compatible with WPS Wi Fi Protected Setup The current Wi Fi connection was established by pressing a button on the wireless router 1 Tap on ...

Page 224: ...Checking the Network Connection Status on page 229 Making Wi Fi Settings by PIN Code Setup WPS You can automatically connect to a wireless router by using a PIN code You can use this method to set up if a wireless router is capable of WPS Wi Fi Protected Setup Use a computer to enter a PIN code into the wireless router 1 Tap on the home screen 2 Select Wi Fi Recommended If the printer has already ...

Page 225: ...ttings screen Related Information Checking the Network Connection Status on page 229 Connecting a Smart Device and Printer Directly Wi Fi Direct Wi Fi Direct Simple AP allows you to connect a smart device directly to the printer without a wireless router and print from the smart device About Wi Fi Direct Use this connection method when you are not using Wi Fi at home or at the office or when you w...

Page 226: ...y to devices without a wireless router Note For iOS or Android users it is convenient to set up from Epson Smart Panel You only need to make these settings for the printer and the device that you want to connect to once Unless you disable Wi Fi Direct or restore the network settings to their defaults you do not need to make these settings again 1 Tap on the home screen 2 Tap Wi Fi Direct 3 Tap Sta...

Page 227: ...nter s control panel select Complete For devices that have been connected to the printer before select the network name SSID on the device s Wi Fi screen to connect them again Note If you are using an iOS device you can also connect by scanning the QR code with the standard iOS camera See the link below http epson sn Adding or Replacing the Computer or Devices Connecting a Smart Device and Printer...

Page 228: ...tings from Wi Fi Direct Start Setup and then the following menu items are displayed Change Network Name Change the Wi Fi Direct simple AP network name SSID used for connecting to the printer to your arbitrary name You can set the network name SSID in ASCII characters that is displayed on the software keyboard on the control panel You can enter up to 22 characters When changing the network name SSI...

Page 229: ...ection Report on page 230 Checking the Network Connection Status from the Control Panel You can check the network connection status using the network icon or the network information on the printer s control panel Checking the Network Connection Status using the Network Icon You can check the network connection status and strength of the radio wave using the network icon on the printer s home scree...

Page 230: ...on for Ethernet Wi Fi Wi Fi Direct and so on is printed on two or more pages Printing a Network Connection Report You can print a network connection report to check the status between the printer and the wireless router 1 Select Settings on the home screen 2 Select General Settings Network Settings Connection Check The connection check starts 3 Select Print Check Report 4 Print the network connect...

Page 231: ... Messages on the Network Environment Related Information E 1 on page 232 E 2 E 3 E 7 on page 232 E 5 on page 233 E 6 on page 233 E 8 on page 233 E 9 on page 234 E 10 on page 234 E 11 on page 234 E 12 on page 235 E 13 on page 235 Message on the Network Environment on page 236 Adding or Replacing the Computer or Devices Checking the Network Connection Status Printi 231 ...

Page 232: ... Makes sure your SSID uses only ASCII characters alphanumeric characters and symbols The printer cannot display an SSID that contains non ASCII characters Makes sure you know your SSID and password before connecting to the wireless router If you are using a wireless router with its default settings the SSID and password are located on a label on the wireless router If you do not know your SSID and...

Page 233: ...sing shared authentication with WEP security make sure the authentication key and index are correct If the number of connectable devices on the wireless router is less than the number of network devices that you want to connect make settings on the wireless router to increase the number of connectable devices See the documentation provided with the wireless router to make settings Related Informat...

Page 234: ...heck the IP address subnet mask and default gateway from the Network Status part on the network connection report If DHCP is enabled change the printer s Obtain IP Address setting to Auto If you want to set the IP address manually check the printer s IP address from the Network Status part on the network connection report and then select Manual on the network settings screen Set the subnet mask to...

Page 235: ...ted Information Network Settings on page 254 Making Settings for Connecting to the Computer on page 220 E 13 Solutions Check the following Network devices such as a wireless router hub and router are turned on The TCP IP Setup for network devices has not been set up manually If the printer s TCP IP Setup is set automatically while the TCP IP Setup for other network devices is performed manually th...

Page 236: ... of wireless devices which can be connected simultaneously and the number of connected devices by checking the network status sheet or the printer s control panel The same SSID as Wi Fi Direct exists in the environment Change the Wi Fi Direct SSID if you cannot connect a smart device to the printer On the printer s control panel go to Wi Fi Direct Setup screen and select the menu to change the set...

Page 237: ...re multiple DHCP servers on the same network you can find out the actual address assigned to the computer the referred DNS server etc Format ipconfig all Examples pathping command You can confirm the list of routers passing through the destination host and the routing of communication Format pathping xxx xxx xxx xxx Examples pathping 192 0 2 222 Adding or Replacing the Computer or Devices Checking...

Page 238: ...Product Information Paper Information 239 Consumable Products Information 242 Software Information 243 Settings Menu List 251 Product Specifications 265 Regulatory Information 272 ...

Page 239: ... print quality the printouts are printed using Standard or Normal Paper suitable for printing documents Media Name Size Loading Capacity Sheets Paper Cassette Rear Paper Feed Slot Epson Bright White Ink Jet Paper A4 200 1 Paper suitable for printing documents and photos Media Name Size Loading Capacity Sheets Paper Cassette Rear Paper Feed Slot Epson Photo Quality Ink Jet Paper A4 100 1 Epson Doub...

Page 240: ...on available paper types for 2 sided printing Paper for 2 Sided Printing on page 241 Plain papers Plain paper includes copy paper and letterhead 1 Size Loading Capacity Sheets Paper Cassette Rear Paper Feed Slot Letter A4 B5 A5 A6 B6 16K 195 270 mm 250 1 Legal Indian Legal 8 5 13 in 50 1 User Defined 2 mm 54x86 to 215 9x1200 1 User Defined 2 mm 89x127 to 215 9x1200 1 1 Paper on which information s...

Page 241: ...Paper Epson Bright White Ink Jet Paper Related Information Available Paper and Capacities on page 239 Commercially Available Paper Plain paper Copy paper Letter A4 B5 16K and user defined size 182x257 to 215 9x297 mm paper is supported for 2 sided printing Related Information Available Paper and Capacities on page 239 Unavailable Paper Types Do not use the following papers Using these types of pap...

Page 242: ...gned for this printer or any third party ink Other products not manufactured by Epson may cause damage that is not covered by Epson s warranties and under certain circumstances may cause erratic printer behavior Note Ink bottle codes may vary by location For the correct codes in your area contact Epson support Although the ink bottles may contain recycled materials this does not affect printer fun...

Page 243: ...omputer Windows Printer Driver The printer driver controls the printer according to the commands from an application Making settings on the printer driver provides the best printing results You can also check the status of the printer or keep it in top operating condition using the printer driver utility Note You can change the language of the printer driver Select the language you want to use fro...

Page 244: ...lect Control Panel Printers and Other Hardware Printers and Faxes Right click on your printer and select Printing preferences Accessing the printer driver from the printer icon on the task bar The printer icon on the desktop task bar is a shortcut icon allowing you to quickly access the printer driver If you click the printer icon and select Printer Settings you can access the same printer setting...

Page 245: ...nu and the operations for displaying the print screen may differ See the application s help for details Starting the utility Select System Preferences from the Apple menu Printers Scanners or Print Scan Print Fax and then select the printer Click Options Supplies Utility Open Printer Utility Guide to Mac OS Printer Driver Epson Printer Utility You can run a maintenance feature such as nozzle check...

Page 246: ...son Software Epson Photo Starting on Mac OS Select Go Applications Epson Software Epson Photo Related Information Installing the Applications Separately on page 123 Application for Easily Operating the Printer from a Smart device Epson Smart Panel Epson Smart Panel is an application that allows you to perform printer operations easily including printing copying or scanning from a smart device such...

Page 247: ... Utility FAX Utility is an application that allows you to configure various settings for sending faxes from a computer You can create or edit the contacts list to be used when sending a fax configure to save received faxes in PDF format on the computer and so on See the application s help for details Note Windows Server operating systems are not supported Make sure you have installed the printer d...

Page 248: ... the document See the application s help for details Accessing from Windows In the application select Print or Print Setup from the File menu Select your printer FAX and then click Preferences or Properties Accessing from Mac OS In the application select Print from the File menu Select your printer FAX as the Printer setting and then select Fax Settings or Recipient Settings from the pop up menu R...

Page 249: ...address Select the network icon on the printer s home screen and then select the active connection method to confirm the printer s IP address Note You can also check the IP address by printing the network connection report 2 Launch a Web browser from a computer or smart device and then enter the printer s IP address Format IPv4 http the printer s IP address IPv6 http the printer s IP address Examp...

Page 250: ...lies Show Printer Webpage Since the printer uses a self signed certificate when accessing HTTPS a warning is displayed on the browser when you start Web Config this does not indicate a problem and can be safely ignored Application for Setting up the Device on a Network EpsonNet Config EpsonNet Config is an application that allows you to set the network interface addresses and protocols See the ope...

Page 251: ... Windows 8 1 Windows 8 Enter the application name in the search charm and then select the displayed icon Windows 7 Windows Vista Windows XP Click the start button and then select All Programs or Programs Epson Software EPSON Software Updater Note You can also start EPSON Software Updater by clicking the printer icon on the task bar on the desktop and then selecting Software Update Starting on Mac ...

Page 252: ... specified period of time You can adjust the time before power management is applied Any increase will affect the product s energy efficiency Please consider the environment before making any change Power Off Settings Your product may have this feature or the Power Off Timer feature depending on the location of purchase Power Off If Inactive Select this setting to turn the printer off automaticall...

Page 253: ...ntrol panel as described below Settings General Settings Printer Settings Paper Source Settings Paper Setting Select the paper size and paper type you loaded in the paper source You can make Favorite Paper Settings in paper size and paper type A4 Letter Auto Switching Select On to feed paper from the paper source set as A4 size when there is no paper source set as Letter or feed from the paper sou...

Page 254: ... error occurs or prints only what the printer could process when a memory full error occurs Off Displays an error message and cancels printing Quiet Mode Select On to reduce noise during printing however this may lower the print speed Depending on the paper type and print quality settings you selected there may be no difference in the printer s noise level Ink Drying Time Select the ink drying tim...

Page 255: ... Wi Fi Start Setup Wi Fi Direct iOS Other OS Devices Menu Change Network Name Change Password Disable Wi Fi Direct Restore Default Settings Wired LAN Setup Set up or change a network connection that uses a LAN cable and router When this is being used Wi Fi connections are disabled Network Status Displays or prints the current network settings Wired LAN Wi Fi Status Wi Fi Direct Status Print Status...

Page 256: ...d below Settings General Settings Web Service Settings Epson Connect Services Displays whether the printer is registered and connected to Epson Connect You can register to the service by selecting Register and follow the instructions When you have registered you can change the following settings Suspend Resume Unregister For details see the following web site https www epsonconnect com http www ep...

Page 257: ...tructions Related Information Basic Settings on page 260 Making the Printer Ready to Send and Receive Faxes on page 286 Receive Settings Related Information Fax Output Settings on page 257 Print Settings on page 258 Fax Output Settings You can find the menu on the printer s control panel below Settings General Settings Fax Settings Receive Settings Fax Output Settings Save to Inbox Save to Inbox S...

Page 258: ... with large size documents reduced to fit on the paper in the paper source Reducing may not always be possible depending on the received data If this is turned off large documents are printed at their original size on multiple sheets or a blank second page may be ejected Split Page Settings Prints received faxes with the page split when the size of the received documents is larger than the size of...

Page 259: ...rinter s memory without printing them This feature can be used for noise prevention at night or to prevent confidential documents from being disclosed while you are away Before using this feature make sure there is enough free memory Time to Stop Stops printing documents Time to Restart Restarts printing documents automatically Quiet Mode Reduces the noise the printer makes when printing faxes how...

Page 260: ...ype of phone system to which you have connected the printer When set to Pulse you can temporarily switch the dialing mode from pulse to tone by pressing T is entered while entering numbers on the fax top screen This setting may not be displayed depending on your region or country Line Type Select the line type to which you have connected the printer When using the printer in an environment that us...

Page 261: ...u answer an incoming fax call on a phone connected to the printer you can start receiving the fax by entering the code using the phone Start Code Set the start code of Remote Receive Enter two characters using 0 9 Rejection Fax Rejection Fax Select options to reject receiving junk faxes Rejection Number List If the other party s phone number is in the rejection number list set whether to reject th...

Page 262: ...n automatically erases the backups when sending or receiving a document completes successfully and the backups become unnecessary Clear Backup Data Erases all backup copies temporarily stored in the printer s memory Run this before you give the printer to someone else or dispose of it Maintenance Select the menus on the control panel as described below Settings Maintenance Print Head Nozzle Check ...

Page 263: ...nformation Checking and Cleaning the Print Head on page 111 Running Power Cleaning on page 112 Refilling the Ink Tank on page 193 Cleaning the Paper Path for Ink Smears on page 114 Print Status Sheet Select the menus on the control panel as described below Settings Print Status Sheet Configuration Status Sheet Print information sheets showing the current printer status and settings Supply Status S...

Page 264: ...to their defaults Network Settings Copy Settings Scan Settings Fax Settings Clear All Data and Settings Firmware Update Select the menus on the control panel as described below Settings Firmware Update Update Check if the latest version of the firmware has been uploaded to the network server The firmware is updated when new firmware is found Once the update has started it cannot be interrupted Not...

Page 265: ...ter or the print quality may decline depending on the paper properties or quality Printable Area Printable Area for Single Sheets Print quality may decline in the shaded areas due to the printer s mechanism A 3 0 mm 0 12 in B 3 0 mm 0 12 in C 46 0 mm 1 81 in D 44 0 mm 1 73 in Printable Area for Envelopes Print quality may decline in the shaded areas due to the printer s mechanism A 3 0 mm 0 12 in ...

Page 266: ...cifications Available Paper Sizes A4 Letter Legal 8 5x13in Paper Type Plain Paper Weight of Paper 64 to 95 g m2 17 to 24lb Loading Capacity A4 Letter 35 sheets or 3 85 mm Legal 8 5x13in 10 sheets Auto Duplex Scanning Not supported Even when the original meets the specifications for media that can be placed in the ADF it may not feed from the ADF or the scan quality may decline depending on the pap...

Page 267: ...inute intervals Interface RJ 11 Phone Line RJ 11 Telephone set connection The specifications may differ by country or region Using Port for the Printer The printer uses the following port These ports should be allowed to become available by the network administrator as necessary Sender Client Use Destination Server Protocol Port Number Printer When Epson Connect is used Epson Connect Server HTTPS ...

Page 268: ...anSmart Printer Network Scan TCP 1865 Collecting the job information when push scanning from Epson ScanSmart Printer Network Push Scan 2968 Interface Specifications For Computer Hi Speed USB USB 3 0 cables are not supported Network Specifications Wi Fi Specifications Standards IEEE802 11b g n 1 Frequency Range 2 4 GHz Coordination Modes Infrastructure Wi Fi Direct Simple AP 2 3 Wireless Securities...

Page 269: ...ting EpsonNet Print Windows IPv4 Standard TCP IP Windows IPv4 IPv6 WSD Printing Windows IPv4 IPv6 Windows Vista or later Bonjour Printing Mac OS IPv4 IPv6 IPP Printing Windows Mac OS IPv4 IPv6 PictBridge Printing Wi Fi IPv4 Digital camera Epson Connect Email Print Remote Print IPv4 AirPrint iOS Mac OS IPv4 IPv6 iOS 5 or later Mac OS X v10 7 or later Network Scanning Epson Scan 2 IPv4 IPv6 Epson Sc...

Page 270: ... Mountain Lion or later Dimensions Dimensions Storage Width 375 mm 14 8 in Depth 347 mm 13 7 in Height 346 mm 13 6 in Printing Width 375 mm 14 8 in Depth 347 mm 13 7 in Height 346 mm 13 6 in Weight Approx 7 3 kg 16 1 lb Without the ink and the power cord Electrical Specifications ET 5170 Series L6490 Series Power Supply Rating AC 100 240 V AC 220 240 V Rated Frequency Range 50 60 Hz 50 60 Hz Rated...

Page 271: ...Standalone copying Approx 12 0 W ISO IEC24712 Ready mode Approx 5 3 W Sleep mode Approx 0 9 W Power off Approx 0 2 W Standalone copying Approx 12 0 W ISO IEC24712 Ready mode Approx 5 4 W Sleep mode Approx 0 9 W Power off Approx 0 2 W Note Check the label on the printer for its voltage For European users see the following Website for details on power consumption http www epson eu energy consumption...

Page 272: ... 6 8 or later Note Mac OS may not support some applications and features The UNIX File System UFS for Mac OS is not supported Regulatory Information Standards and Approvals Standards and Approvals for U S Model Safety UL60950 1 CAN CSA C22 2 No 60950 1 EMC FCC Part 15 Subpart B Class B CAN ICES 3 B NMB 3 B This equipment contains the following wireless module Manufacturer Seiko Epson Corporation T...

Page 273: ...e following radio equipment model is in compliance with Directive 2014 53 EU The full text of the EU declaration of conformity is available at the following website http www epson eu conformity C662B C653A For use only in Ireland UK Austria Germany Liechtenstein Switzerland France Belgium Luxemburg Netherlands Italy Portugal Spain Denmark Finland Norway Sweden Iceland Croatia Cyprus Greece Sloveni...

Page 274: ...cept no responsibility should difficulties arise in such circumstances This equipment shall not be set up to make automatic calls to the Telecom 111 Emergency Service Restrictions on Copying Observe the following restrictions to ensure the responsible and legal use of the printer Copying of the following items is prohibited by law Bank bills coins government issued marketable securities government...

Page 275: ...Administrator Information Connecting the Printer to the Network 276 Settings to Use the Printer 280 ...

Page 276: ...ynamically using the DHCP function this information is not required because it is set automatically Wi Fi connection information SSID Password These are the SSID network name and the password of the access point that the printer connects to If MAC address filtering has been set register the MAC address of the printer in advance to register the printer See the following for the supported standards ...

Page 277: ...k subnet mask default gateway DNS server and so on is set automatically so you can easily connect the device to the network If the device or the router is turned off or depending on the DHCP server settings IP address may change when re connecting We recommend managing devices other than the IP address and communicating with protocols that can follow the IP address Note When you use the IP address...

Page 278: ...ual for Obtain IP Address When you set the IP address automatically by using the DHCP function of router select Auto In that case the IP Address Subnet Mask and Default Gateway on step 5 to 6 are also set automatically so go to step 7 5 Enter the IP address Focus moves to the forward segment or the back segment separated by a period if you select l and r Confirm the value reflected on the previous...

Page 279: ...r the proxy server by IPv4 or FQDN format Confirm the value reflected on the previous screen 6 Enter the port number for the proxy server Confirm the value reflected on the previous screen 7 Tap Start Setup Connecting to LAN Connect the printer to the network by Ethernet or Wi Fi Connecting to Ethernet Connect the printer to the network by using the Ethernet cable and check the connection 1 Connec...

Page 280: ...stering a contacts list allows you to easily enter destinations You can register up to 100 entries and you can use the contacts list when you enter a fax number This feature is available only for ET 5170 Series L6490 Series Registering or Editing Contacts 1 Select Fax on the home screen 2 Select Contacts 3 Do one of the following To register a new contact select Add Entry and then select Add Conta...

Page 281: ...Name and the Index Word and then select Contact s Added to the Group Required 5 Select the contacts that you want to register in the group and then tap Close Note You can register up to 99 contacts To deselect a contact tap it again 6 Select OK Register Contacts on a Computer Using Web Config you can create a contact list on your computer and import it to the printer 1 Access Web Config 2 Select A...

Page 282: ...nced Settings from the list at the top right of the window 3 Select Contacts 4 Select the number that you want to register and then click Edit 5 Enter a Name and Index Word 6 Select a group from Type 7 Click Select for Contact s for Group The available destinations are displayed 8 Select the destination that you want to register to the group and then click Select Note Destinations can be registere...

Page 283: ... You may not be able to use the printer with the following phone lines or systems VoIP phone line such as DSL or fiber optic digital service Digital phone line ISDN Some PBX telephone systems When adapters such as terminal adapters VoIP adapters splitters or DSL router are connected between the telephone wall jack and the printer Connecting the Printer to a Phone Line Connect the printer to a tele...

Page 284: ...our Phone Device to the Printer When using the printer and your telephone on a single phone line connect the telephone to the printer Note If your phone device has a fax function disable the fax function before connecting See the manuals that came with the phone device for details Depending on the model of the phone device the fax function cannot be completely disabled so you may not be able to us...

Page 285: ... single phone line make sure you connect the phone device to the EXT port of the printer If you split the line to connect the phone device and the printer separately the phone and the printer do not work correctly 3 Select Fax on the printer s control panel Administrator Information Settings to Use the Printer Making Fax Features Available 285 ...

Page 286: ...irst time You can also display the wizard manually from the printer s control panel You need to run the wizard again in case the wizard is skipped when the printer is first turned on or when the connection environment has changed The items below are what you can set through the wizard Header Your Phone Number and Fax Header Receive Mode Auto or Manual Distinctive Ring Detection DRD Setting The ite...

Page 287: ...t On to use the distinctive ring feature 5 Make the Receive Mode setting If you do not need to connect a phone device to the printer Select No Receive Mode is set to Auto If you need to connect a phone device to the printer Select Yes and then select whether or not to receive faxes automatically 6 Check the settings you made on the screen displayed and then proceed to the next screen To correct or...

Page 288: ... such as 0 and 9 to get an outside line 1 Select Settings on the printer s control panel 2 Select General Settings Fax Settings Basic Settings 3 Select Line Type and then select PBX 4 When sending a fax to an outside fax number using hash instead of the actual external access code select the Access Code box to make this to Use The entered instead of the actual access code is replaced with the stor...

Page 289: ...y a Connected Phone You can start receiving incoming faxes by only picking up the handset and operating the phone without operating the printer at all The Remote Receive feature is available for telephones that support tone dialing 1 Select Settings on the printer s control panel 2 Select General Settings Fax Settings Basic Settings Remote Receive 3 Tap Remote Receive to set this to On 4 Select St...

Page 290: ...sword for the inbox Select Inbox Password Settings and then set the password Note You cannot set a password when Options when memory is full is set to Receive and print faxes Related Information Fax Output Settings on page 257 Viewing Received Faxes Saved in the Printer on the LCD Screen on page 95 Making Settings for Blocking Junk Faxes You can block junk faxes 1 Select Settings on the printer s ...

Page 291: ...inter s control panel 2 Select General Settings Fax Settings Receive Settings 3 Select Fax Output Settings Save to Computer Yes and Print Making Save to Computer Setting not to Receive Faxes To set the printer not to save received faxes on the computer change the settings on the printer Note You can also change the settings using the FAX Utility However if there are any faxes that have been unsave...

Page 292: ...SSL TLS SSL TLS has the Encryption Strength You can open Web Config by using a web browser that supports bulk encryptions as indicated below Check you are using the a supported browser 80bit AES256 AES128 3DES 112bit AES256 AES128 3DES 128bit AES256 AES128 192bit AES256 256bit AES256 CA signed Certificate is expired If there is a problem with the expiration date of the certificate The certificate ...

Page 293: ...ections LAN settings Proxy server and then configure not to use the proxy server for LAN local addresses Mac OS Select System Preferences Network Advanced Proxies and then register the local address for Bypass proxy settings for these Hosts Domains Example 192 168 1 Local address 192 168 1 XXX subnet mask 255 255 255 0 192 168 Local address 192 168 XXX XXX subnet mask 255 255 0 0 Administrator Inf...

Page 294: ...Where to Get Help Technical Support Web Site 295 Contacting Epson Support 295 ...

Page 295: ...act the dealer where you purchased your product Epson support will be able to help you much more quickly if you give them the following information Product serial number The serial number label is usually on the back of the product Product model Product software version Click About Version Info or a similar button in the product software Brand and model of your computer Your computer operating sys...

Page 296: ...n Helpdesk Phone 1300 361 054 Epson Helpdesk is provided as a final backup to make sure our clients have access to advice Operators on the Helpdesk can aid you in installing configuring and operating your Epson product Our Pre sales Helpdesk staff can provide literature on new Epson products and advise where the nearest dealer or service agent is located Many types of queries are answered here We ...

Page 297: ...ating system application programs and any information you feel is required Transportation of Product Epson recommends retaining product packaging for future transportation Securing the ink tank with tape and keeping the product upright is also recommended Help for Users in Singapore Sources of information support and services available from Epson Singapore are World Wide Web http www epson com sg ...

Page 298: ...y 84 8 3823 9239 84 8 3825 6234 29 Tue Tinh Quan Hai Ba Trung Hanoi City Vietnam Phone Hanoi City 84 4 3978 4785 84 4 3978 4775 Help for Users in Indonesia Contacts for information support and services are World Wide Web http www epson co id Information on product specifications drivers for download Frequently Asked Questions FAQ Sales Enquiries questions through e mail Epson Hotline Phone 62 1500...

Page 299: ...rat 40116 022 420 7033 bdg technical epson indonesia co id bdg admin epson indonesia co id MAKASSAR Epson Sales and Service Makassar Jl Cendrawasih NO 3A kunjung mae mariso MAKASSAR SULSEL 90125 0411 8911071 mksr technical epson indonesia co id mksr admin epson indonesia co id MEDAN Epson Service Center Medan Jl Bambu 2 Komplek Graha Niaga Nomor A 4 Medan SUMUT 061 42066090 42066091 mdn technical ...

Page 300: ...nado 95111 0431 8805896 MND ADMIN EPSON INDONESIA CO ID MND TECHNICAL EPSON INDONESIA CO ID CIREBON EPSON SERVICE CENTER Cirebon Jl Tuparev No 04 Depan Hotel Apita Cirebon JAWA BARAT 0231 8800846 cbn technical epson indonesia co id CIKARANG EPSON SALES AND SERVICE CIKARANG Ruko Metro Boulevard B1 Jababeka cikarang Jawa Barat 021 89844301 29082424 ckg admin epson indonesia co id ckg technical epson...

Page 301: ... esscibis support2 epson indonesia co id esscibis admin epson indonesia co id esscibis sales epson indonesia co id SURABAYA EPSON SALES AND SERVICE SURABAYA GUBENG JL RAYA GUBENG NO 62 SURABAYA JAWA TIMUR 031 99444940 99446299 99446377 esssby epson indonesia co id esssby support epson indonesia co id AMBON EPSON SERVICE CENTER AMBON Jl Diponegoro No 37 Samping Bank Mandiri Syariah Kel Ahusen Kec S...

Page 302: ... Toll Free Email websupport emsb epson com my Sales enquiries and product information Product usage questions or problems Enquiries on repair services and warranty Head Office Phone 603 56288288 Fax 603 5628 8388 603 5621 2088 Help for Users in India Contacts for information support and services are World Wide Web http www epson co in Information on product specifications drivers for download and ...

Page 303: ...Questions FAQ and E mail Enquiries are available Epson Philippines Customer Care Toll Free PLDT 1 800 1069 37766 Toll Free Digital 1 800 3 0037766 Metro Manila 632 8441 9030 Web Site https www epson com ph contact E mail customercare epc epson com ph Accessible 9am to 6pm Monday through Saturday Except public holidays Our Customer Care team can help you with the following over the phone Sales enqu...

Reviews: