
Start Here
Continued
Continued on back
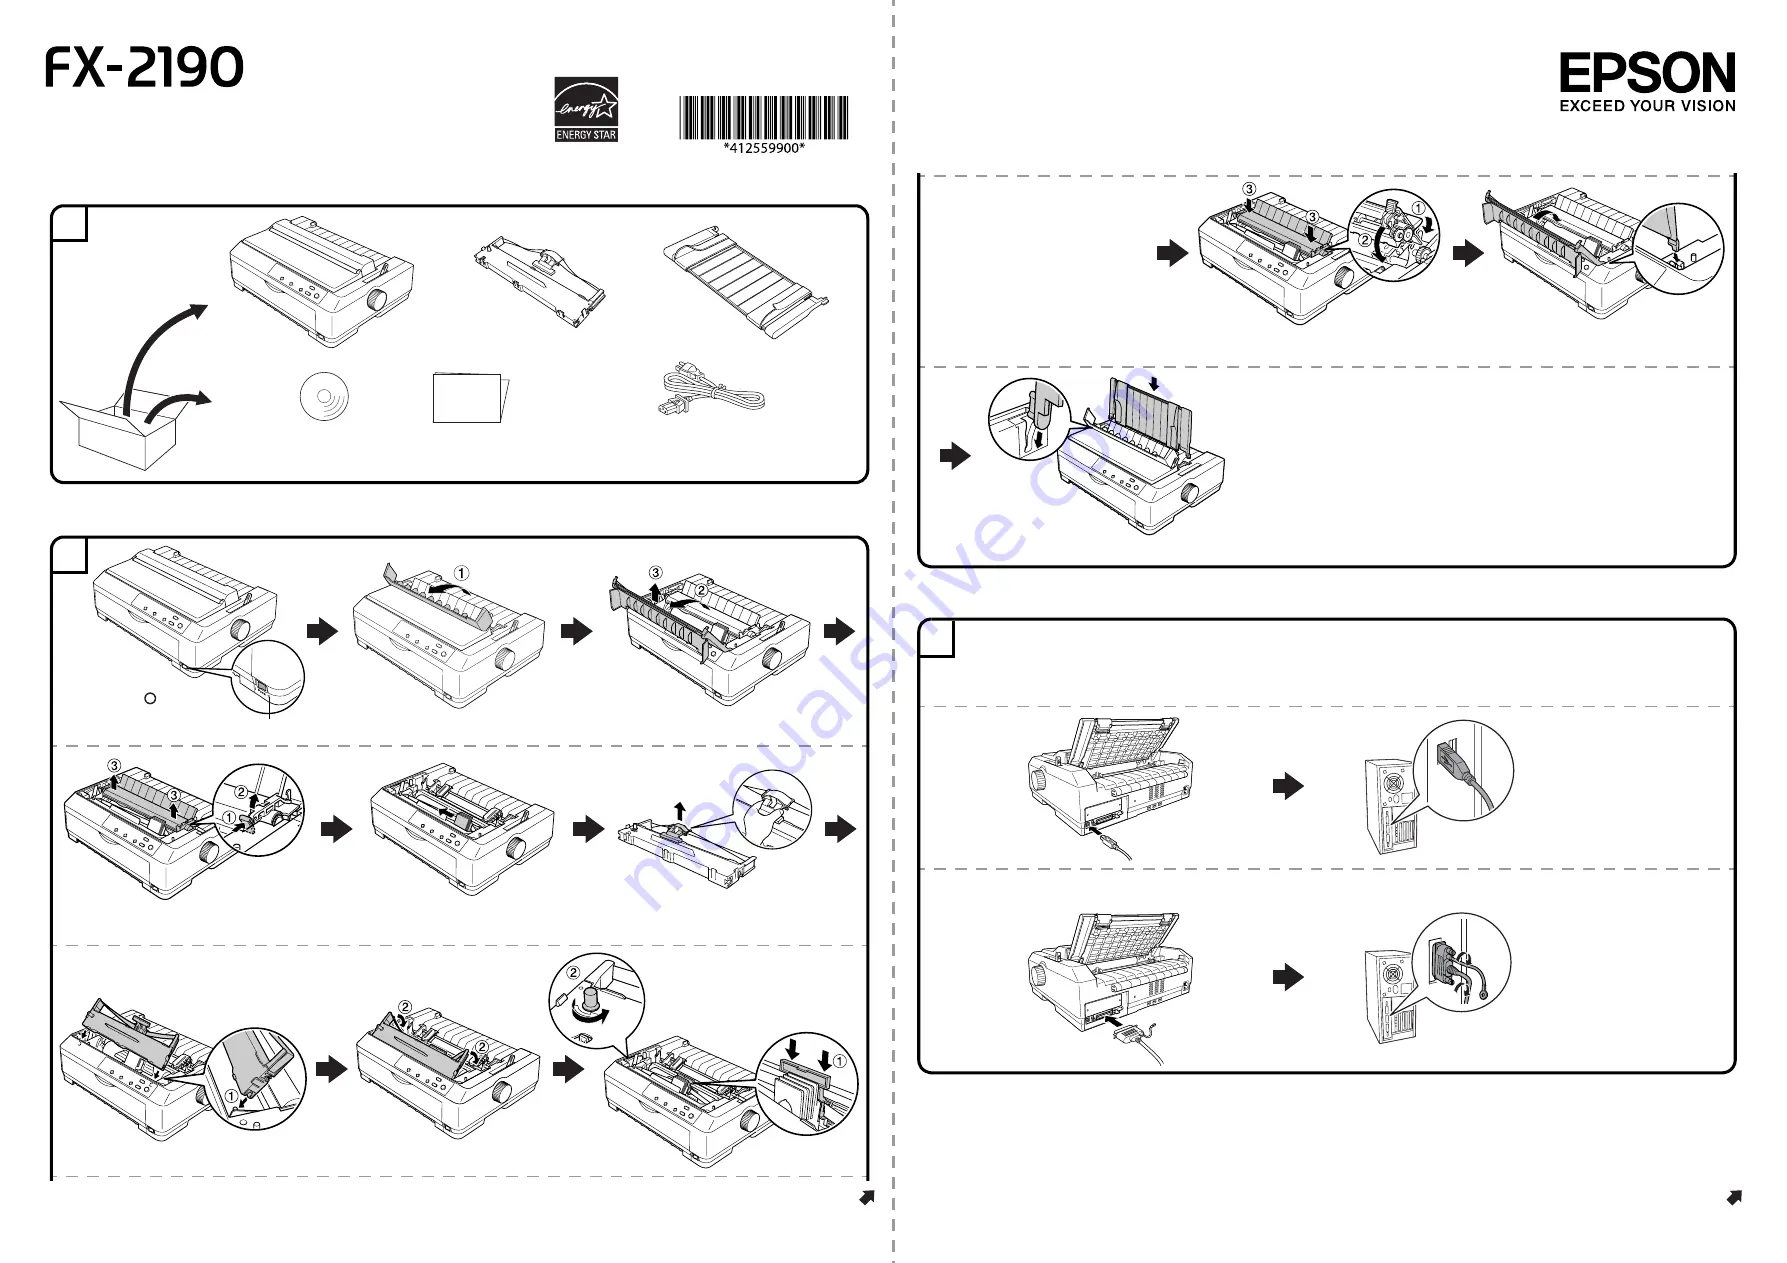
Unpacking
Assembling the Printer
Connecting the Printer to Your Computer
1
It may come attached to the printer in some
countries.
The shape of the plug may vary by location.
Start Here
It may come attached to the
printer in some countries.
2
OFF
Confirm the
(OFF)
Remove the paper tension unit
Slide the print head to the middle
of the printer by hand
Tense
Slide the ribbon guide into the
print head until it clicks in place
Remove the printer cover
Pull the ribbon guide until it is out
of the cartridge
Reinstall the paper tension unit
Replace the printer cover and
lowering the cover into place
Attach the paper guide
c
Caution:
❏
The ribbon should not be
twisted or creased.
❏
When inserting the ribbon
guide, press firmly until it
clicks.
3
c
Caution:
❏
The interface cable connectors have only one correct orientation. Make sure the orientation of the connector is correct
before inserting it into the appropriate port.
❏
Do not connect or disconnect the printer while it is turning on.
Connect firmly
IEEE1284 (PARALLEL)
Connect firmly and fasten
USB
Connect firmly
Connect firmly


