Maintenance 8. Arm #4
142
G3 Rev.14
U1 belt
Installation
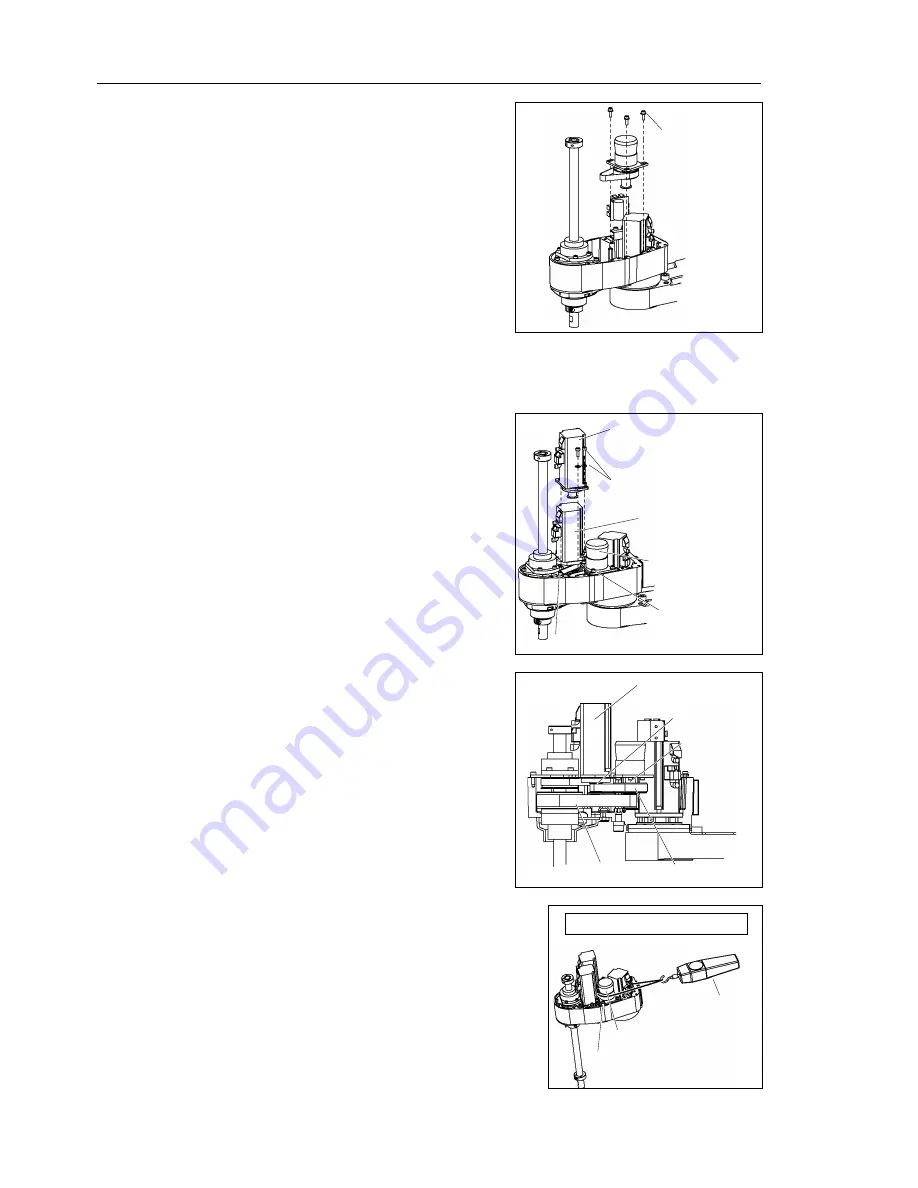
(1) Place the U2 belt in Arm #2 around the
small pulley and put it on the Arm #2.
At this point, keep the U1 belt on the large
pulley of Joint #4 intermediate unit.
Make sure the gear grooves of the belt are
fit into those of the pulleys completely.
3-M4
×
12
+ washer
(2) Loosely secure the Joint #4 intermediate unit.
Make sure the motor unit can be moved by hand, and it will not tilt when pulled.
If the unit is secured too loose or too tight, the belt will not have the proper tension.
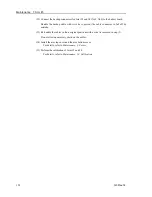
(3) Place the pulley in the U1 belt and put the
Joint #4 motor unit to Arm #2.
Make sure the gear grooves of the belt are
fit into those of the pulleys completely.
3-M4
×
12 + washer
Joint #4
motor unit
3-M4
×
12 + washer
Joint #3
motor unit
Joint #4
intermediate shaft
3-M4
×
12
+ washer
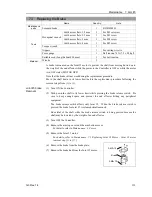
(4) Loosely secure the Joint #4 motor unit to
Arm #2.
Make sure the motor unit can be moved by
hand, and it will not tilt when pulled.
If the unit is secured too loose or too tight,
the belt will not have the proper tension.
Joint #4
motor unit
U2 belt
U1 pulley
U1 belt
U2 pulley
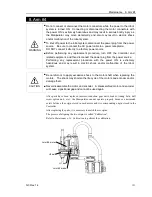
(5) Apply the proper tension to the U2 belt, and
then secure the Joint #4 intermediate shaft unit.
Pass a suitable cord or string around the Joint #4
intermediate unit near its mounting plate.
Then, pull the cord using a force gauge or
similar tool to apply the specified tension shown
in the figure on the right.
3-M4
×
12 + washer
U2 belt tension =10
±
1 kgf
Force gauge
Joint #4 intermediate shaft
NOTE
Summary of Contents for G3 Series
Page 1: ...Rev 14 EM183R3623F SCARA ROBOT G3 series MANIPULATOR MANUAL ...
Page 2: ...MANIPULATOR MANUAL G3 series Rev 14 ...
Page 8: ...vi G3 Rev 14 ...
Page 14: ......
Page 84: ...Setup Operation 5 Motion Range 72 G3 Rev 14 ...
Page 86: ...74 ...
Page 200: ...Maintenance 15 Maintenance Parts List 188 G3 Rev 14 ...


