LQ-670 Service Manual
Rev. A
3-6
3.2.2 Printer Mechanism Removal
1. Remove [HOUSING, UPPER] (See Section 3.2.1)
2. Disconnect all cables of the Printer Mechanism from the C214 MAIN board:
z
CN5 (
Õ
PW Detector (Top))
z
CN6 (
Õ
Printhead (Front))
z
CN7 (
Õ
Printhead (Rear))
z
CN8 (
Õ
PF Motor)
z
CN9 (
Õ
CR Motor)
z
CN10 (
Õ
REL Detector)
z
CN11 (
Õ
PG Detector)
z
CN12 (
Õ
HP Detector)
z
CN13 (
Õ
PE Detector (Rear))
z
CN14 (
Õ
PE Detector (Front))
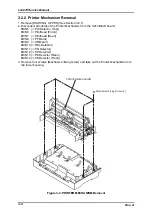
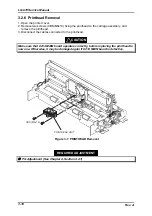
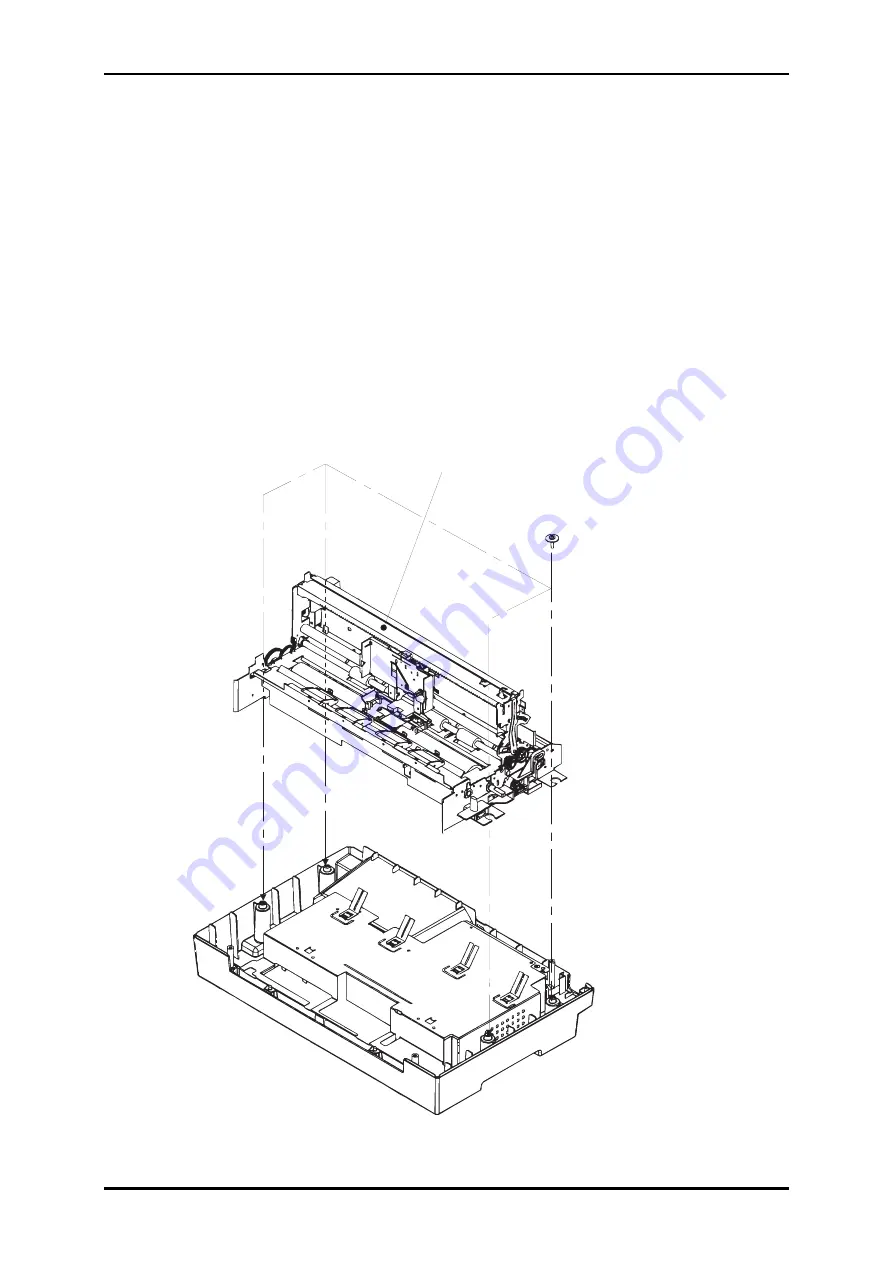
3. Remove four screws (Mechanism fixing screw) and take out the Printer Mechanism from
the lower housing.
PRINTER MECHANISM
Mechanism Fixing Screw (4)
Figure 3-3. PRINTER MECHANISM Removal
Summary of Contents for LQ 670 - B/W Dot-matrix Printer
Page 1: ...EPSON IMPACT DOT MATRIX PRINTER EPSON LQ 670 SERVICE MANUAL SEIKO EPSON CORPORATION 4007875 ...
Page 5: ...v REVISION SHEET Revision Issued Data Contents Rev A May 28 1997 First issue ...
Page 114: ...Chapter 6 Maintenance 6 1 Preventive Maintenance 6 1 ...
Page 116: ...LQ 670 Service Manual Rev A 6 2 Figure 6 1 Lubrication Points ...
Page 122: ...LQ 670 Service Manual Rev A A 5 A 2 Circuit Diagram Figure A 2 C214Main Board Circuit Diagram ...
Page 123: ...Appendix Rev A A 6 Heat Sink Q1 D51 Figure A 3 C214PSB Board Circuit Diagram ...
Page 124: ...LQ 670 Service Manual Rev A A 7 Heat Sink Q1 D51 Figure A 4 C214PSE Board Circuit Diagram ...
Page 125: ...Appendix Rev A A 8 A 3 Component Layout Figure A 5 C214 Main Board Component Layout ...
Page 127: ...Appendix Rev A A 10 A 4 Exploded Diagram Figure A 8 Exploded Diagram ...
Page 128: ...LQ 670 Service Manual Rev A A 11 Figure A 9 Exploded Diagram ...
Page 129: ...Appendix Rev A A 12 Figure A 10 Exploded Diagram ...
Page 135: ...EPSON SEIKO EPSON CORPORATION ...

