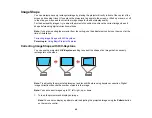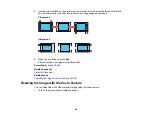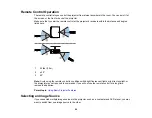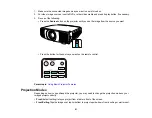
background image

42

3.

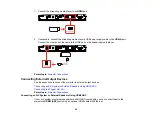
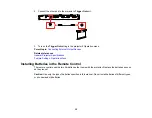
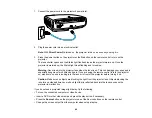
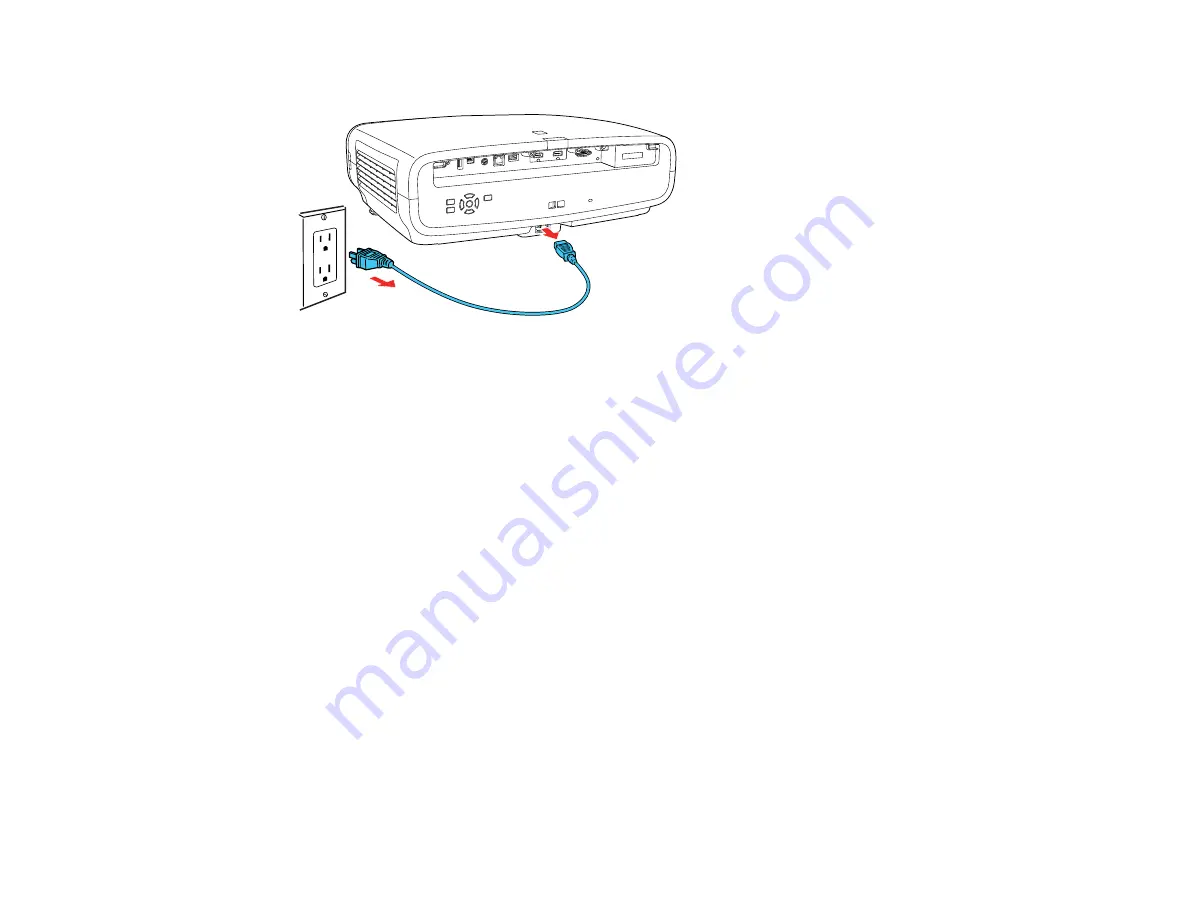
To transport or store the projector, make sure the Status light is off, then unplug the power cord.

Caution:

To avoid damaging the projector or laser, never unplug the power cord when the Status

light is on or flashing.

Parent topic:

Using Basic Projector Features

Related references

Display Settings - Display Menu

Related tasks

Transporting the Projector

Selecting the Language for the Projector Menus

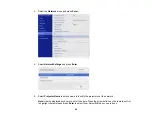
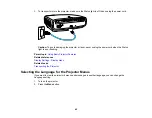
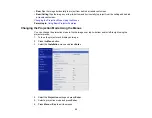
If you want to view the projector's menus and messages in another language, you can change the
Language setting.

1.

Turn on the projector.

2.

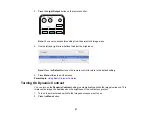
Press the

Menu

button.

Summary of Contents for LS11000

Page 1: ...Home Cinema LS11000 User s Guide ...

Page 2: ......

Page 3: ... Projector Parts Rear 16 Projector Parts Base 18 Projector Parts Remote Control 19 Setting Up the Projector 21 Projector Placement 21 Projector Setup and Installation Options 21 Projection Distance 23 Projector Connections 27 Connecting to an HDMI Video Source 28 Connecting to a Computer for HDMI Video 28 Connecting to a Streaming Media Player 29 Connecting External Output Devices 30 Connecting an...

Page 4: ...des 51 Changing the Projection Mode Using the Menus 52 Image Aspect Ratio 53 Changing the Image Aspect Ratio 53 Available Image Aspect Ratios 54 Color Mode 54 Changing the Color Mode 54 Available Color Modes 55 Adjusting Image Sharpness 55 Adjusting the Projector s Brightness Level 56 Turning On Dynamic Contrast 57 Adjusting the Color Temperature 58 Adjusting the RGB Offset and Gain 60 Adjusting G...

Page 5: ...justing the Menu Settings 89 Using the Projector s Menus 89 Image Quality Settings Image Menu 91 Input Signal Settings Signal I O Menu 96 Installation Settings Installation Menu 100 Display Settings Display Menu 102 Feature Settings Operation Menu 104 Administration Settings Management Menu 106 Network Settings Network Menu 109 Image Quality Memory Settings Memory Menu 111 Initial Settings and Res...

Page 6: ...age is Fuzzy or Blurry 135 Solutions When the Image Brightness or Colors are Incorrect 136 Solutions to Image and Sound Syncing Problems 136 Solutions to Sound Problems 137 Solving Projector or Remote Control Operation Problems 137 Solutions to Projector Power or Shut Off Problems 137 Solutions to Remote Control Problems 138 Solutions to HDMI Link Problems 139 Where to Get Help U S and Canada 140 ...

Page 7: ...mportant Safety Instructions 153 Restriction of Use 156 List of Safety Symbols corresponding to IEC60950 1 A2 156 FCC Compliance Statement 161 Binding Arbitration and Class Waiver 162 Trademarks 165 Copyright Notice 165 A Note Concerning Responsible Use of Copyrighted Materials 166 Copyright Attribution 166 ...

Page 8: ......

Page 9: ...9 Home Cinema LS11000 User s Guide Welcome to the Home Cinema LS11000 User s Guide For a printable PDF copy of this guide click here ...

Page 10: ...nditions Color light output measured in accordance with IDMS 15 4 white light output measured in accordance with ISO 21118 Full HD native resolution with 4K Enhancement for exceptional brightness color and detail Scene Adaptive Gamma Image Enhancement and Frame Interpolation features Images up to 300 inches 7 62 m for projection on any wall or screen Flexible connectivity Two HDMI ports for video ...

Page 11: ... Box Contents Save all the packaging in case you need to ship the projector Always use the original packaging or equivalent when shipping Make sure your product box included all of these parts 1 Projector 2 Remote control 3 Remote control batteries two AA alkaline 4 Power cord Parent topic Projector Features Additional Components Depending on how you plan to use the projector you may need to obtai...

Page 12: ...e External audio Speakers an audio video receiver or a video source with speaker connections and the cables necessary for connecting them Your projector does not have an internal speaker or audio out ports Parent topic Projector Features Optional Equipment and Replacement Parts U S and Canada You can purchase screens other optional accessories and replacement parts from an Epson authorized reselle...

Page 13: ...Projector Features Warranty and Registration Information Latin America Your projector comes with a basic warranty that lets you project with confidence For details see the warranty that came with your projector Register your product online at latin epson com support search for your product and select Register Registering also lets you receive special updates on new accessories products and service...

Page 14: ...is manual and any other sources listed here you can use the Epson PrivateLine Support service to get help fast U S and Canada only For details see Where to Get Help Parent topic Introduction to Your Projector Related references Where to Get Help U S and Canada Where to Get Help Latin America Projector Part Locations Check the projector part illustrations to learn about the parts on your projector ...

Page 15: ... Air exhaust vent 2 Lens 3 Lens shutter 4 Remote receiver 5 Front adjustable foot 6 Source button 7 Power button light 8 Air intake vent 9 Air filter cover 10 Indicator lights 11 Air intake vent Parent topic Projector Part Locations ...

Page 16: ...rojector Parts Rear 1 Control panel 2 Interface ports 3 AC power inlet 4 Cable holder slot 5 Kensington security slot 6 Remote receiver Interface ports 1 USB A 5V 2 0A port 2 Service port 3 Trigger Out port ...

Page 17: ... port Control panel 1 Menu button accesses projector menu system 2 Lens button cycles through lens adjustment options 3 Arrow buttons navigates on screen options displays H V Keystone screen 4 Enter button selects options 5 Esc button cancels exits functions Parent topic Projector Part Locations Related concepts Projector Connections Related tasks Installing a Security Cable ...

Page 18: ... bracket holes 4 3 Safety wire clamp fixing point 4 Rear foot 5 Optional cable cover screw holes 6 Air filter cover screws Note Use M6 10mm screws for mounting the projector Parent topic Projector Part Locations Related references Projector Dimension Specifications ...

Page 19: ...19 Projector Parts Remote Control 1 On button turns on projector 2 Standby button turns off the projector 3 Source buttons selects HDMI input sources ...

Page 20: ...ected setting to default value 13 Menu button accesses projector menu system 14 Memory button accesses the Memory menu 15 Frame Int button displays the Frame Interpolation menu 16 RGBCMY button displays the RGBCMY menu 17 HDR button displays the Dynamic Range menu 18 Pattern button displays a test pattern 19 Lens1 and Lens2 buttons loads the first or second saved lens position 20 Esc button cancel...

Page 21: ...ctor location Place the projector on a sturdy level surface or install it using a compatible mount Place the projector parallel to the screen Leave plenty of space around and under the projector for ventilation and do not place it on top of or next to anything that could block the vents Position the projector within reach of a grounded electrical outlet or extension cord Projector Setup and Instal...

Page 22: ...22 Front Rear Front Ceiling ...

Page 23: ...rom the rear be sure to select the correct Projection setting in the projector s Installation menu Parent topic Projector Placement Related references Installation Settings Installation Menu Projection Distance The distance at which you place the projector from the screen determines the approximate size of the image The image size increases the farther the projector is from the screen but can vary...

Page 24: ...n You can also use the Projection Distance Calculator here U S here Canada or here Caribbean 1 Projection distance 2 Distance from the center of the lens to the base of the screen 3 Center of the lens 16 9 Aspect Ratio Image or Screen Screen or image size Projection distance 1 Wide to Tele Offset from lens center 2 50 inches 58 to 123 inches 148 to 313 cm 35 9 to 11 3 inches 91 to 29 cm ...

Page 25: ...6 cm 200 inches 238 to 498 inches 604 to 1264 cm 143 4 to 45 4 inches 364 to 115 cm 250 inches 297 to 623 inches 756 to 1582 cm 179 3 to 56 7 inches 455 to 144 cm 300 inches 357 to 748 inches 908 to 1899 cm 215 2 to 68 1 inches 547 to 173 cm 4 3 Aspect Ratio Image or Screen Screen or image size Projection distance 1 Wide to Tele Offset from lens center 2 50 inches 72 to 151 inches 182 to 384 cm 43...

Page 26: ...46 to 141 cm 220 inches 321 to 671 inches 814 to 1704 cm 193 1 to 61 1 inches 491 to 155 cm 244 8 inches 357 to 746 inches 906 to 1896 cm 214 8 to 68 inches 546 to 173 cm 16 10 Aspect Ratio Image or Screen Screen or image size Projection distance 1 Wide to Tele Offset from lens center 2 50 inches 63 to 133 inches 160 to 339 cm 38 6 to 12 2 inches 98 to 31 cm 60 inches 76 to 160 inches 193 to 407 c...

Page 27: ...o 68 1 inches 546 to 173 cm Parent topic Projector Placement Projector Connections See these sections to connect the projector to a variety of projection sources Caution If you will use the projector at altitudes above 4921 feet 1500 m turn on High Altitude Mode to ensure the projector s internal temperature is regulated properly The cooling fans will run at a higher speed and will be slightly lou...

Page 28: ...he projector s Signal I O menu 1 Connect the HDMI cable to your video source s HDMI output port 2 Connect the other end to one of the projector s HDMI ports If you are connecting an optical HDMI cable you must also connect the cable s USB power connector to the Opt HDMI 300mA port Note When an audio video source that meets the HDMI CEC standard is connected to the projector s HDMI port you can use...

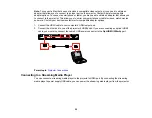
Page 29: ...ovies and more Contact your device manufacturer for compatible adapter options 1 Connect the HDMI cable to your computer s HDMI output port 2 Connect the other end to one of the projector s HDMI ports If you are connecting an optical HDMI cable you must also connect the cable s USB power connector to the Opt HDMI 300mA port Parent topic Projector Connections Connecting to a Streaming Media Player ...

Page 30: ...ions Connecting External Output Devices See these sections to connect the projector to external output devices Connecting an A V System or External Speakers Using HDMI ARC Connecting to a Trigger Out Port Parent topic Projector Connections Connecting an A V System or External Speakers Using HDMI ARC If your A V system or external speakers are eARC ARC compatible you can connect them to the project...

Page 31: ...al speakers See your device s documentation for more information Parent topic Connecting External Output Devices Connecting to a Trigger Out Port You can connect your projector to external devices such as motorized screens that support a trigger signal When active a 12V 200 mA maximum signal is sent to the connected device while the projector is powered on See the link below for cable specificatio...

Page 32: ...elated references General Projector Specifications Feature Settings Operation Menu Installing Batteries in the Remote Control The remote control uses the two AA batteries that came with the projector Replace the batteries as soon as they run out Caution Use only the type of batteries specified in this manual Do not install batteries of different types or mix new and old batteries ...

Page 33: ...rt the batteries with the and ends facing as shown Warning Make sure the batteries are inserted in the correct positions If the batteries are not inserted correctly they could explode or leak causing a fire injury or damage to the product ...

Page 34: ...cks into place Warning Dispose of used batteries according to local regulations Do not expose batteries to heat or flame Keep batteries out of the reach of children they are choking hazards and are very dangerous if swallowed Parent topic Setting Up the Projector ...

Page 35: ...a transmission use a Category 5 shielded cable or higher 1 Connect one end of the network cable to your network hub switch or router 2 Connect the other end of the cable to the projector s LAN port Parent topic Monitoring and Controlling the Projector Selecting Wired Network Settings Before you can control the projector on your network you must select the network settings for the projector using i...

Page 36: ...d press Enter 5 Select Projector Name to enter a name to identify the projector over the network Note Use the displayed keyboard to enter the name Press the arrow buttons on the remote control to highlight characters and press Enter to select them Select OK when you are done ...

Page 37: ...m Select OK when you are done 9 To prevent display of the IP address on the network information screen select Off as the IP Address Display setting 10 Select Projector Control and press Enter Choose from the available options 11 When you finish selecting settings return to the Network Settings screen Select Set and follow the on screen instructions to save your settings and exit the menus Projecto...

Page 38: ... status when the PJLink notification function is enabled Enter the addresses using 0 to 255 for each address field Do not use these addresses 127 x x x or 224 0 0 0 through 255 255 255 255 where x is a number from 0 to 255 AMX Device Discovery On Off Set to On to allow AMX Device Discovery to detect the projector Control4 SDDP On Off Set to On to allow device information to be acquired using Contr...

Page 39: ... the Image with the Zoom Feature Focusing the Image with the Lens Button Remote Control Operation Selecting an Image Source Projection Modes Image Aspect Ratio Color Mode Adjusting Image Sharpness Adjusting the Projector s Brightness Level Turning On Dynamic Contrast Adjusting the Color Temperature Adjusting the RGB Offset and Gain Adjusting Gamma Adjusting the Hue Saturation and Brightness Turnin...

Page 40: ...is especially dangerous for children and pets If you are using the remote control to turn the projector on make sure no one is looking into the lens or in front of the projector before turning it on Caution Make sure no objects are blocking the light from the projector lens Objects blocking the lens for an extended time can melt and light that is reflected back into the lens can cause the projecto...

Page 41: ...ary depending upon mode selected environmental conditions and usage Brightness decreases over time 1 Press the power button on the projector or the Standby button on the remote control The projector displays a shutdown confirmation screen Note You can turn off the shutdown confirmation screen in the projector s Display menu 2 Press the power button on the projector or the Standby button on the rem...

Page 42: ... when the Status light is on or flashing Parent topic Using Basic Projector Features Related references Display Settings Display Menu Related tasks Transporting the Projector Selecting the Language for the Projector Menus If you want to view the projector s menus and messages in another language you can change the Language setting 1 Turn on the projector 2 Press the Menu button ...

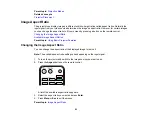
Page 43: ...e and press Enter 6 Press Menu or Esc to exit the menus Parent topic Using Basic Projector Features Adjusting the Image Height If you are projecting from a table or other flat surface and the image is too high or low you can adjust the image height using the projector s adjustable feet 1 Turn on the projector and display an image ...

Page 44: ...y rectangular you need to adjust the image shape Parent topic Using Basic Projector Features Related concepts Image Shape Adjusting the Image Position Using Lens Shift If you cannot install the projector directly in front of the screen you can adjust the position of the projected image using the lens shift feature 1 Turn on the projector and display an image 2 Press the Lens button on the control ...

Page 45: ...and vertical maximum values 5 When you are finished press the Esc button on the control panel or remote control Note When adjusting the image height position the image lower than where you want it to be and then move it up This will help prevent the image from moving down after adjustment The image is clearest when the lens is at the home position To move the lens to the home position press and ho...

Page 46: ...ceiling use the adjustment controls on the mount at the time of installation Correcting Image Shape with H V Keystone Parent topic Using Basic Projector Features Correcting Image Shape with H V Keystone You can use the projector s H V Keystone setting to correct the shape of an image that is unevenly rectangular on the sides Note Try adjusting the projector s placement and lens shift before using ...

Page 47: ...47 2 Press the Menu button 3 Select the Installation menu and press Enter 4 Select H V Keystone and press Enter Select Yes and press Enter again You see the H V Keystone adjustment screen ...

Page 48: ...ystone H Keystone 6 When you are finished press Esc After correction your image is slightly smaller Parent topic Image Shape Related concepts Projector Placement Related tasks Adjusting the Image Position Using Lens Shift Resizing the Image with the Zoom Feature You can adjust the size of the projected image using the zoom feature 1 Turn on the projector and display an image ...

Page 49: ...ic Projector Features Focusing the Image with the Lens Button You can adjust the sharpness of the projected image using the focus feature 1 Turn on the projector and display an image 2 Press the Lens button on the control panel or remote control 3 Press the Lens button repeatedly until Adjust Focus is displayed on the screen 4 Press and hold the left or right arrow button on the control panel or r...

Page 50: ...s listed here 1 32 feet 10 m 2 30 3 60 Note Avoid using the remote control in conditions with bright fluorescent lights or in direct sunlight or the projector may not respond to commands If you will not use the remote control for a long time remove the batteries Parent topic Using Basic Projector Features Selecting an Image Source If you connected multiple image sources to the projector such as a ...

Page 51: ...e image from the source you want Press the button for the source you want on the remote control Parent topic Using Basic Projector Features Projection Modes Depending on how you positioned the projector you may need to change the projection mode so your images project correctly Front default setting lets you project from a table in front of the screen Front Ceiling flips the image over top to bott...

Page 52: ...Parent topic Using Basic Projector Features Changing the Projection Mode Using the Menus You can change the projection mode to flip the image over top to bottom and or left to right using the projector menus 1 Turn on the projector and display an image 2 Press the Menu button 3 Select the Installation menu and press Enter 4 Select the Projection setting and press Enter 5 Select a projection mode a...

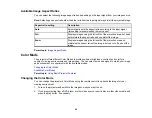
Page 53: ... control Changing the Image Aspect Ratio Available Image Aspect Ratios Parent topic Using Basic Projector Features Changing the Image Aspect Ratio You can change the aspect ratio of the displayed image to resize it Note The available aspect ratio setting varies depending on the input signal 1 Turn on the projector and switch to the image source you want to use 2 Press the Aspect button on the remo...

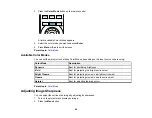
Page 54: ...he aspect ratio of the image but can cut off parts of the image Parent topic Image Aspect Ratio Color Mode The projector offers different Color Modes to provide optimum brightness contrast and color for a variety of viewing environments and image types You can select a mode designed to match your image and environment or experiment with the available modes Changing the Color Mode Available Color M...

Page 55: ...the input source you are using Color Mode Description Dynamic Best for prioritizing brightness Vivid Best for projecting in a bright environment Bright Cinema Best for projecting movies in a bright environment Cinema Best for projecting movies in a dark environment Natural Best for adjusting the image color Parent topic Color Mode Adjusting Image Sharpness You can adjust the outline of an image by...

Page 56: ... Enhancement enhances details such as hair and clothing patterns Thick Line Enhancement enhances backgrounds and larger elements 6 Use the left and right arrow buttons to adjust the sharpness values 7 Press Menu or Esc to exit the menus Parent topic Using Basic Projector Features Adjusting the Projector s Brightness Level You can adjust the brightness of your projector s light source 1 Turn on the...

Page 57: ... remote control to return to the default setting 4 Press Menu or Esc to exit the menus Parent topic Using Basic Projector Features Turning On Dynamic Contrast You can turn on the Dynamic Contrast setting to automatically optimize the image luminance This improves the image contrast based on the brightness of the content you project 1 Turn on the projector and switch to the image source you want to...

Page 58: ...tness at the standard speed High Speed to adjust brightness as soon as the scene changes 5 Press Menu or Esc to exit the menus Parent topic Using Basic Projector Features Adjusting the Color Temperature You can change the overall color tone if the image contains a bluish or reddish tone 1 Turn on the projector and display an image 2 Press the Menu button ...

Page 59: ...r Temp setting and press Enter 6 Use the left and right arrow buttons to adjust the color temperature Higher values increase the blue tint and lower values increase the red tint Note Press the Default button on the remote control to return to the default setting 7 Press Menu or Esc to exit the menus ...

Page 60: ...sting the Offset and Gain settings for the individual image colors Note These settings should be set by a professional color calibrator using specialized color calibration tools in a controlled lighting environment 1 Turn on the projector and display an image 2 Press the Menu button 3 Select the Image menu and press Enter 4 Select White Balance and press Enter ...

Page 61: ...on on the remote control to return to the default setting 7 Press Menu or Esc to exit the menus Parent topic Using Basic Projector Features Adjusting Gamma You can correct differences in projected image colors that occur between different image sources Note These settings should be set by a professional color calibrator using specialized color calibration tools in a controlled lighting environment...

Page 62: ...62 2 Press the Menu button 3 Select the Image menu and press Enter 4 Select Gamma and press Enter The projected image freezes ...

Page 63: ...ration for lighter areas may become weaker 6 If you want to make finer adjustments select Custom and press Enter 7 Press the left or right arrow button to select the tone you want to change then press the up or down arrow button to adjust the tone and press Enter Note Select Reset to reset the Gamma settings 8 Press Menu or Esc to exit the menus Parent topic Using Basic Projector Features Related ...

Page 64: ... calibrator using specialized color calibration tools in a controlled lighting environment 1 Turn on the projector and switch to the image source you want to use 2 Press the RBGCMY button on the remote control Note You can also access this setting from the projector s Image menu 3 Select the color to adjust and press Enter The selected color fills the screen and the adjustment menu appears ...

Page 65: ...ish adjust the Hue setting To adjust the overall vividness of the color adjust the Saturation setting To adjust the overall brightness of the color adjust the Brightness setting 5 Press Menu or Esc to exit the menus Parent topic Using Basic Projector Features Related references Image Quality Settings Image Menu ...

Page 66: ... Saved Settings Copying Menu Settings Between Projectors Operating Connected Devices Using the HDMI Link Features You can use the remote control to control certain features of devices connected to the projector s HDMI ports Note The connected device and cable must meet the HDMI CEC standard Up to three devices can be connected at the same time 1 Press the HDMI Link button on the remote control Not...

Page 67: ... PJ Device or Bidirectional to turn the linked device on when the projector is turned on or Device PJ or Bidirectional to turn the projector on when the linked device is turned on Power Off Link Select whether linked devices are turned off when the projector is turned off This option only works when the connected device s CEC power link function is enabled Note Some linked devices and their functi...

Page 68: ...o temporarily stop projection 2 To turn the picture back on press the Blank button again Parent topic Adjusting Projector Features Projector Security Features You can secure your projector to deter theft or prevent unintended use by setting up the following security features Lens lock to prevent changing the zoom focus or lens shift settings Button lock security to block operation of the projector...

Page 69: ... Press the Menu button 2 Select the Management menu and press Enter 3 Select one of these lock types and press Enter To lock the zoom focus and lens shift settings select Lens Lock To lock the projector s power button select Child Lock To turn the projector on you must press the power button for longer than three seconds You must restart the projector to enable this lock setting Note Child Lock do...

Page 70: ...es Unlocking the Projector s Buttons If the projector s buttons have been locked hold the Enter button on the projector s control panel for 7 seconds to unlock them You can also set the Control Panel Lock setting to Off in the Management menu Parent topic Locking the Projector s Lens Settings and Buttons Related references Administration Settings Management Menu Installing a Security Cable You can...

Page 71: ...ing the Color Convergence Panel Alignment Adjusting the Color Tone Color Uniformity Parent topic Adjusting Projector Features Using Frame Interpolation You can use the projector s Frame Interpolation feature to smooth fast moving video by comparing consecutive image frames and inserting an intermediate image frame between them Note This feature is only available when Image Processing is set to Fin...

Page 72: ...nu 2 Select the level of interpolation and press Enter 3 Press Menu or Esc to exit the menus Note If your resulting images contain noise turn off the Frame Interpolation setting Parent topic Using Advanced Image Adjustment Features Related references Input Signal Settings Signal I O Menu Image Quality Settings Image Menu ...

Page 73: ...ing them as a preset you can reuse later You can save up to five presets 1 Turn on the projector and switch to the image source you want to use 2 Press the Image Enh button on the remote control Note You can also access this setting from the projector s Image menu 3 Select the preset you want to adjust and press Enter ...

Page 74: ...lution images Adjust the Auto Contrast Enhancement setting to create a clearer and sharper image bu automatically adjusting the contrast The setting values in the preset option are overwritten as you make changes 5 Press Menu or Esc to exit the menus To quickly switch between image presets press the Image Enh button on the remote control select an image preset to use and press Enter Parent topic U...

Page 75: ...nt Note You can adjust only the red or blue color convergence Green is the standard color panel and cannot be adjusted Note Allow your projector to warm up for at least 10 to 15 minutes and make sure the image is in focus before you use the Panel Alignment feature For best results project an image sized at least 80 inches 203 cm diagonally in a dark room and on a projection surface that is not col...

Page 76: ...nd press Enter 8 Select Start Adjustments and press Enter 9 Select one of the following Select Shift the whole panel to adjust the whole panel at the same time This is not recommended as usually only certain areas of the panel need to be adjusted Go to the next step Select Adjust the four corners to adjust the corners of the panel one at a time This is recommended in most cases Skip to step 14 10 ...

Page 77: ... selected for the Select Color setting 12 When you are finished adjusting the screen press Enter Note The Shift the whole panel option affects the grid lines in the entire screen To fine tune your adjustments continue with the next steps 13 Select Adjust the four corners and press Enter Otherwise select Exit and press Enter ...

Page 78: ...ve to the next corner of the screen 16 When you are finished adjusting each corner of the screen press Enter 17 Do one of the following If your projector s panel alignment is now correct select Exit and press Enter to return to the Panel Alignment menu If your projector needs additional panel alignment select Select intersection and adjust and press Enter Use the arrow keys on the remote control t...

Page 79: ...anced Image Adjustment Features Adjusting the Color Tone Color Uniformity You can use the Color Uniformity feature to manually adjust the color tone balance in the projected image Note These settings should be set by a professional color calibrator using specialized color calibration tools in a controlled lighting environment Note The color tone may not be uniform even after adjusting the color un...

Page 80: ...tting and press Enter 4 Select the Color Uniformity setting again and press Enter 5 Select On and press Esc 6 Select the Adjustment Level setting and press Enter 7 Press the right and left arrow buttons to adjust the level and press Esc ...

Page 81: ...he entire screen 10 Select the color you want to adjust Use the left arrow button to weaken the color tone and the right arrow button to strengthen the color tone 11 Press Esc to return to the area selection screen 12 Repeat these steps for each area you want to adjust and for each adjustment level 13 Press Menu or Esc to exit the menus Parent topic Using Advanced Image Adjustment Features ...

Page 82: ...ou can save customized settings and select the saved settings whenever you want to use them 1 Turn on the projector and display an image 2 Press the Memory button on the remote control Note You can also access these settings from the projector s Memory menu ...

Page 83: ...ns2 button on the remote control Note Some slight adjustments may be needed after switching to a different lens position memory Note To clear all saved memories select Reset Memory Settings 4 Select one of the following options Save Memory saves your current settings to memory 10 memories with different names are available Note A memory name that has already been used is indicated by a blue mark S...

Page 84: ...s settings before you adjust the projected image using the projector s image adjustment settings Caution If the copy process fails due to a power failure communication error or for any other reason Epson will not be responsible for any repair costs incurred The following settings will not transfer between projectors if you set the Batch Setup Range setting to Limited EDID in the Signal I O menu Ne...

Page 85: ...projector enters standby mode Caution Do not unplug the power cord or remove the flash drive while the lights are flashing This could damage the projector 5 Once the projector enters standby mode remove the flash drive Note If the projector does not enter standby mode and the lights continue flashing see the link below for a solution Parent topic Copying Menu Settings Between Projectors Related re...

Page 86: ... lights stop flashing the power light turns blue and the projector enters standby mode Caution Do not unplug the power cord or remove the flash drive while the lights are flashing This could damage the projector 5 Once the projector enters standby mode remove the flash drive Note If the projector does not enter standby mode and the lights continue flashing see the link below for a solution Parent ...

Page 87: ...indows Open the My Computer Computer Windows Explorer or File Explorer utility Right click the name of your projector listed as a removable disk and select Eject Mac Drag the removable disk icon for your projector from the desktop into the trash The projector turns off when you disconnect the USB cable Note If the projector does not turn off and the lights continue flashing see the link below for ...

Page 88: ...emovable disk Note Do not copy any other files to the removable disk 7 Once the file has copied do one of the following Windows Open the My Computer Computer Windows Explorer or File Explorer utility Right click the name of your projector listed as a removable disk and select Eject Mac Drag the removable disk icon for your projector from the desktop into the trash All the lights start flashing to ...

Page 89: ...n Menu Display Settings Display Menu Feature Settings Operation Menu Administration Settings Management Menu Network Settings Network Menu Image Quality Memory Settings Memory Menu Initial Settings and Reset Options Initial All Settings Menu Using the Projector s Menus You can use the projector s menus to adjust the settings that control how your projector works The projector displays the menus on...

Page 90: ... menu settings 3 To change settings in the displayed menu press Enter 4 Press the up or down arrow button to move through the settings 5 To return all the menu settings to their default values select the Initial All Settings menu and select Reset All 6 When you finish changing settings on a menu press Esc 7 Press Menu or Esc to exit the menus Note The icon indicates that a setting contains sub set...

Page 91: ...e Color Mode Settings Setting Options Description Color Mode See the list of available Color Modes Adjusts the vividness of image colors for various image types and environments Brightness Varying levels available Lightens or darkens the overall image Contrast Varying levels available Adjusts the difference between light and dark areas of the image Color Saturation Varying levels available Adjusts...

Page 92: ...orrection makes fine adjustments to the color tone higher values tint the image green and lower values tint the image red Custom adjusts the individual RGB components of the offset and gain Grayscale adjusts the red green blue and brightness for the selected adjustment level Frame Interpolation Off Low Normal High Adjusts the smoothness of image movement only available when Image Processing is set...

Page 93: ...whether to convert interlaced to progressive signals for certain video image types only available when Image Processing is set to Fine in the Signal I O menu Off for fast moving video images Video for most video images Film Auto for movies computer graphics and animation ...

Page 94: ...resolution Sharpens blurred images when projecting low resolution images Fine Line Adjust enhances the contrast and outlines of complicated images Soft Focus Detail enhances the contrast and outlines of smooth backgrounds Auto Contrast Enhancement Automatically adjusts the contrast of the projected image to create a clearer and sharper image Reset Resets all settings in the Image Enhancement menu ...

Page 95: ... an input source make sure the source is connected and select that source Setting Options Description Source Displays the current input source selected Aspect See the list of available aspect ratios Sets the aspect ratio width to height ratio Reset to Defaults Resets all settings for the currently selected input source Note Select Reset Image Settings to reset all settings on the Image menu to the...

Page 96: ... If you need to customize the settings you can use the Signal I O menu The available settings depend on the currently selected input source To change settings for an input source make sure the source is connected and select that source Setting Options Description Source Displays settings selected for the current input source ...

Page 97: ...projecting a component signal Color Space Auto BT 709 BT 2020 Sets the conversion system for the color space set to Auto for most cases Dynamic Range Dynamic Range Signal Status HDR10 HDR10 Setting HLG Setting Dynamic Range changes the range of dark and bright areas in the image set to Auto for most cases Signal Status displays the detected input signal HDR10 HDR10 Setting adjusts the PQ curve of ...

Page 98: ...t Auto this is the recommended setting for most cases Low select if there is noise when using a short HDMI cable Medium select if the other settings do not reduce the noise High select if there is noise when using a long HDMI cable Reset to Defaults Resets all settings for the current input source EDID EDID HDMI1 EDID HDMI2 Describes the display capabilities of your projector if images are not dis...

Page 99: ...appens when you turn on the projector or a linked device Bidirectional automatically turns on the connected device when you turn on the projector and vice versa Device PJ automatically turns on the projector when you turn on the connected device PJ Device automatically turns on the connected device when you turn on the projector Power Off Link controls whether linked devices are turned off when th...

Page 100: ... Options Description Test Pattern Display Position Color Isolation R Color Isolation G Color Isolation B Displays a test pattern to assist in focusing and zooming the image and correcting image shape The color isolation options let you display the selected color component of the projected image These settings should be set by a professional color calibrator using specialized color calibration tool...

Page 101: ...anking Top Bottom Left Right Hides the edges of the screen if there is noise from the input signal High Altitude Mode On Off Regulates the projector s operating temperature at altitudes above 4921 feet 1500 m Note The cooling fans inside the projector run faster and may sound louder when this setting is enabled this is normal Reset Installation Settings Resets all settings on the Installation menu...

Page 102: ...ected input source and other settings Setting Options Description No signal Screen Black Blue Logo Select the screen color or logo to display when no input signal is detected Startup Screen On Off Controls whether a logo is displayed when the projector starts up Messages On Off Controls whether projector status and error messages are displayed on the projected image ...

Page 103: ...r misalignment in the projected image Select Color select the color to correct R or B Pattern Color select the pattern used for correction Start Adjustments starts panel alignment Memory saves loads renames or erases panel alignment settings Reset resets all panel alignment settings to their defaults Reset Display Settings Resets all settings on the Display menu to their default values Parent topi...

Page 104: ...d on the currently selected input source and other settings Setting Options Description Direct Power On On Off Controls whether the projector automatically turns on when you plug it in Sleep Mode On Off Automatically turns off the projector after an interval of inactivity Sleep Mode Timer sets the time from 1 to 30 minutes before the projector automatically turns off ...

Page 105: ...hts on the projector Trigger Out On Off Outputs a DC 12V signal at 200 mA maximum from the Trigger Out port whenever the projector is turned on Inv Direction Button On Off Inverts the direction of the arrow buttons on the control panel to match the projector s installation position Reset Operation Settings Reset all settings on the Operation menu to their default values Parent topic Adjusting the ...

Page 106: ...ze various projector administrative features Setting Options Description Lens Lock On Off Locks the focus zoom and lens shift settings Child Lock On Off Locks the power button on the projector s control panel only displayed when the Control Panel Lock setting is set to Except for Power or Off ...

Page 107: ...tones individually for the selected area Reset resets all Color Uniformity adjustment values to their defaults Log Save Destination Internal Memory USB and Internal Memory Selects where you want to save projector error and operation log files Batch Setup Range All Limited Selects which projector menu settings to copy using the batch setup feature select All to copy all the settings or select Limit...

Page 108: ... signal the displayed items vary depending on the current input source The Version option displays version numbers for the projector and other components Display Status System Version Network Wired Input Signal Displays status information for the projector Reset Management Settings Resets all settings on the Management menu to their default values except for the Language setting Parent topic Adjus...

Page 109: ...nu let you view network information and set up the projector for control over a network Setting Options Description Wired LAN Info Displays wired network status and details for the following Projector Name DHCP IP Address Subnet Mask Gateway Address MAC Address ...

Page 110: ...ify the projector over the network Wired LAN configures IP settings Projector Control selects settings for controlling the projector over a network PJLink AMX Device Discovery Control4 SDDP Reset Network Settings Resets all settings on the Network menu to their default values Parent topic Adjusting the Menu Settings Related references Projector Control Settings ...

Page 111: ...e projector s memory Setting Options Description Image Save Memory Load Memory Rename Memory Erase Memory Reset Saves loads renames erases or resets the current image settings Lens Position Save Memory Load Memory Rename Memory Erase Memory Reset Saves loads renames erases or resets the focus zoom and lens shift adjustments ...

Page 112: ... to their defaults Parent topic Adjusting the Menu Settings Initial Settings and Reset Options Initial All Settings Menu Settings on the Intial All Settings menu let you reset most projector settings to their default values You can also update the projector firmware from this menu ...

Page 113: ...e menus deselect them When you are ready select Execute and press Enter Note You cannot reset the Language setting using the Reset All option Select Firmware Update to enter firmware update mode using the USB A or Service port Note See the link below for details on updating the projector s firmware Parent topic Adjusting the Menu Settings Related concepts Updating the Firmware ...

Page 114: ...ojector uses a sealed laser light source which does not need servicing and cannot be replaced Warning Before cleaning any part of the projector turn it off unplug the power cord and let it cool down Never open any cover on the projector except as specifically explained in this manual Dangerous electrical voltages in the projector can injure you severely Warning Do not try to service this product y...

Page 115: ...r Maintenance Cleaning the Projector Case Before cleaning the projector case turn off the projector and unplug the power cord To remove dust or dirt use a soft dry lint free cloth To remove stubborn dirt use a soft cloth moistened with water and mild soap Do not spray liquid directly on the projector Caution Do not use wax alcohol benzine paint thinner or other chemicals to clean the projector cas...

Page 116: ...lter You need to clean the projector s air filter in the following situations The filter or vents get dusty You see a message telling you to clean it Note It is recommended that you clean the air filter every 5 000 hours Clean it more often if the projector is in a dusty environment 1 Turn off the projector and unplug the power cord 2 Carefully remove the dust from the air filter cover with a vacu...

Page 117: ...117 3 Loosen the screws and remove the air filter cover 4 Raise the stopper 5 Pull the air filter out of the projector ...

Page 118: ...lter or it may crack and become unusable Do not rinse the air filter in water or use any detergent or solvent to clean it Do not use canned air the gases may leave a residue or push dust and debris into the projector s optics or other sensitive areas 7 Vacuum the front of the air filter the side with the tabs to remove any remaining dust ...

Page 119: ... remove or the air filter is damaged replace the air filter 8 Place the air filter back in the projector as shown 9 Lower the stopper and press until it clicks into place 10 Replace the air filter cover and tighten the screws as shown ...

Page 120: ...ollowing situations After cleaning the air filter you see a message telling you to clean or replace it The air filter is torn or damaged You can replace the air filter while the projector is mounted to the ceiling or placed on a table 1 Turn off the projector and unplug the power cord 2 Loosen the screws and remove the air filter cover 3 Raise the stopper ...

Page 121: ...out of the projector Note Air filters contain polypropylene Dispose of used air filters according to local regulations 5 Place the new air filter in the projector as shown 6 Lower the stopper and press until it clicks into place ...

Page 122: ...ment and Replacement Parts Replacing the Remote Control Batteries The remote control uses two AA manganese or alkaline batteries Replace the batteries as soon as they run out Caution Use only the type of batteries specified in this manual Do not install batteries of different types or mix new and old batteries 1 Remove the battery cover as shown ...

Page 123: ...r hands wash them immediately to avoid injury 3 Insert the batteries with the and ends facing as shown Warning Make sure the batteries are inserted in the correct positions If the batteries are not inserted correctly they could explode or leak causing a fire injury or damage to the product 4 Replace the battery cover and press it down until it clicks into place ...

Page 124: ... check for firmware updates for your product Updating Projector Firmware Using a USB Storage Device Updating Projector Firmware Using a Computer and USB Cable Parent topic Maintaining and Transporting the Projector Updating Projector Firmware Using a USB Storage Device You can update the projector s firmware using a USB storage device 1 Download the projector firmware file from the Epson support w...

Page 125: ...stems when updating firmware Windows 8 1 32 and 64 bit Windows 10 32 and 64 bit macOS 10 13 x 64 bit macOS 10 14 x 64 bit macOS 10 15 x 64 bit 1 Download the projector firmware file from the Epson support website Make sure it is the correct firmware file for your model 2 Turn on the projector 3 Connect the USB cable to the computer s USB port and to the projector s Service port 4 Press the Menu bu...

Page 126: ...ecision parts some of which are glass Follow these guidelines to transport ship or store the projector safely Remove any equipment connected to the projector Center the lens position using the Lens button Caution If you transport the projector when the lens is not centered the lens shift mechanism may be damaged Make sure the lens shutter is closed When transporting the projector a long distance o...

Page 127: ...Projection Problem Tips If the projector is not working properly try turning it off and unplugging it Then plug it back in and turn it on If this does not solve the problem check the following The lights on the projector may indicate what the problem is The solutions in this manual can help you solve many problems If none of these solutions help you can contact Epson for technical support Parent t...

Page 128: ...e 1 Status light 2 Laser light 3 Temp temperature light 4 Power light Power light Status light Laser light Temp light Status and solution Off Off Off Off Standby or sleep mode Blue Blue Off Off Normal operation Blue Flashing blue Off Off Warming up wait for an image to appear all buttons are disabled Flashing blue Off Off Off Preparing for monitoring all features are disabled Blue Off Off Off Moni...

Page 129: ...down for about five minutes After the fan has stopped do the following Make sure that the vents and air filter are not clogged with dust or obstructed by nearby objects Clean or replace the air filter If operating the projector at high altitude turn on High Altitude Mode If the problem persists unplug the projector and contact Epson for help Off Flashing blue Off Flashing orange A fan or sensor ha...

Page 130: ...Copying settings may have failed and an error may have occurred in the projector s firmware Turn the projector off unplug it and contact Epson for help Note If the lights display a pattern not listed in the table above turn the projector off unplug it and contact Epson for help Parent topic Solving Problems Related references Installation Settings Installation Menu Where to Get Help U S and Canada...

Page 131: ... the USB power cable inside the projector Turn on the connected streaming device or video source and press the play button to start a video if necessary Make sure the connected device meets the HDMI CEC standard See the documentation supplied with the device for more information If necessary set the CEC function for the connected device again and restart the device Turn off the projector and the c...

Page 132: ...the projector and the connected computer or video source off and then on again Try a different video cable If you connected a streaming device try a different power cable or use external power If the other solutions do not solve the problem reset all of the projector settings using the options on the Initial All Settings menu Displaying From a PC Laptop Displaying From a Mac Laptop Parent topic So...

Page 133: ...olutions When No Signal Message Appears Solutions When Only a Partial Image Appears If only a partial computer image appears try the following solutions Try adjusting the image position using the Lens button on the remote control or control panel Press the Aspect button on the remote control to select a different image aspect ratio Check the Blanking setting in the Installation menu Check your com...

Page 134: ...heck the cables connecting your computer or video source to the projector They should be Separated from the power cord to prevent interference Securely connected at both ends Not connected to an extension cable Make sure you selected the correct Signal Format or EDID settings in the projector s Signal I O menu if available for your image source Adjust the Noise Reduction MPEG Noise Reduction and D...

Page 135: ...zzy or blurry try the following solutions Adjust the image focus Clean the projector lens Check the lens for condensation Note To avoid condensation on the lens after bringing the projector in from a cold environment let the projector warm up to room temperature before using it Position the projector close enough to the screen and directly in front of it Adjust the Sharpness setting to improve ima...

Page 136: ...rmat or EDID setting in the Signal I O menu if available for your video source For HDR images set the Dynamic Range setting to Auto Make sure all the cables are securely connected to the projector and your video device If you connected long cables try connecting shorter cables Position the projector close enough to the screen Parent topic Solving Image or Sound Problems Related concepts Projector ...

Page 137: ...are using an eARC ARC compatible A V system try the following solutions Make sure your A V system is connected to the projector s eARC ARC compatible HDMI port Make sure the cable meets the HDMI CEC standard Make sure the connected A V system meets the HDMI CEC standard See the documentation supplied with the device for more information Parent topic Solving Image or Sound Problems Solving Projecto...

Page 138: ...s batteries The power cord may be defective Try another power cord If that doesn t work disconnect the cord and contact Epson Parent topic Solving Projector or Remote Control Operation Problems Related references Feature Settings Operation Menu Input Signal Settings Signal I O Menu Projector Light Status Where to Get Help U S and Canada Where to Get Help Latin America Related tasks Unlocking the P...

Page 139: ...r the projector and connected video sources Make sure the cables meet the HDMI CEC standard Make sure the connected device meets the HDMI CEC standard See the documentation supplied with the device for more information Make sure the HDMI Link setting is set to On Check if the device is available in the Device Connections list in the Signal I O menu If the device does not appear it does not meet th...

Page 140: ...hours of support are subject to change without notice Toll or long distance charges may apply Before you call have the following information ready Product name Product serial number located on the bottom or rear of the projector or in the menu system Proof of purchase such as a store receipt and date of purchase Computer or video configuration Description of the problem Purchase Supplies and Acces...

Page 141: ...me Product serial number located on the bottom or rear of the projector or in menu system Proof of purchase such as a store receipt and date of purchase Computer or video configuration Description of the problem Then call Country Telephone Argentina 54 11 5167 0300 0800 288 37766 Bolivia 800 100 116 Brazil 0800 007 5000 Chile 56 2 2484 3400 Colombia Bogota 57 1 592 2200 Other cities 018000 915235 ...

Page 142: ... number from a mobile phone Note Toll or long distance charges may apply If your country does not appear on the list contact the sales office in the nearest country Purchase Supplies and Accessories You can purchase optional accessories and replacement parts from an Epson authorized reseller To find the nearest reseller go to latin epson com Or you can contact your nearest sales office as describe...

Page 143: ...of display Poly silicon TFT active matrix Resolution 1920 1080 3 pixels Full HD Lens F 2 0 to 3 0 Focal length 22 5 to 46 7 mm Color reproduction Full color up to 1 billion colors Brightness Normal Light Output White light output 2500 lumens ISO 21118 standard Color light output 2500 lumens ECO Light Output White light output 1000 lumens ISO 21118 standard Color light output 1000 lumens Note Color...

Page 144: ...Normal Light Output 22 dB ECO Light Output Keystone correction angle 30º vertical horizontal Service port compatibility USB 1 1 and 2 0 compliant for service and firmware update USB Mini B cable USB A port compatibility USB 1 1 and 2 0 compliant for connecting a streaming device saving error log files batch settings and firmware update with 5V 2A power supply Opt HDMI port compatibility USB 1 1 an...

Page 145: ...er life will vary depending upon mode selected environmental conditions and usage Brightness decreases over time Parent topic Technical Specifications Remote Control Specifications Reception range 32 feet 10 m Batteries Two 2 alkaline or manganese AA Parent topic Technical Specifications Projector Dimension Specifications Height excluding feet 6 7 inches 169 mm Width 20 5 inches 520 mm Depth 17 6 ...

Page 146: ...146 For mounting 1 Center of lens 2 Distance from center of lens to suspension bracket fixing point 3 8 inches 96 1 mm 3 0 7 inches 17 1 mm 4 7 6 inches 192 7 mm 5 6 7 inches 169 mm 6 10 2 inches 260 mm ...

Page 147: ... 1 Center of lens 2 11 8 inches 300 mm 3 17 1 inches 434 mm 4 1 7 inches 43 mm 5 6 3 inches 160 6 mm 6 4 4 inches 111 mm 7 6 3 inches 160 mm 8 10 1 inches 257 2 mm 9 4 3 inches 110 mm 10 8 5 inches 217 mm 11 17 6 inches 447 mm ...

Page 148: ... Normal Light Output 302 W ECO Light Output 198 W Standby 0 4 W Communication Off 2 W Communication On Parent topic Technical Specifications Projector Environmental Specifications Temperature Operating 41 to 95 F 5 to 35 C up to 7500 ft 2286 m Operating 41 to 86 F 5 to 30 C above 7500 ft 2286 m Storage 14 to 140 F 10 to 60 C Humidity relative non condensing Operating 20 to 80 Storage 10 to 90 Oper...

Page 149: ...that supports other computer display resolutions so your image will be resized to fit automatically Your computer s monitor port or video card refresh rate vertical frequency must be compatible with the projector See your computer or video card manual for details The table here lists the compatible refresh rate and resolution for each compatible video display format HDMI input signals Display form...

Page 150: ...tor lens when the laser is turned on the bright light can damage your eyes Never let children look into the lens when it is on Never open any cover on the projector except the filter covers Dangerous electrical voltages inside the projector can severely injure you Except as specifically explained in this User s Guide do not attempt to service this product yourself Refer all servicing to qualified ...

Page 151: ...tor at a distance using the remote control make sure no one is looking into the lens Do not allow small children to operate the projector Children must be accompanied by an adult Do not apply optical devices such as a magnifying glass or reflector to the projected image Using the projector may result in physical harm fire or an accident Do not block the light from the lens during projection The hi...

Page 152: ...152 As with any bright source do not stare into the beam RG2 IEC EN 62471 5 2015 Inside ...

Page 153: ...nstalling the specific Epson mount that supports your projector make sure you secure the mount to all of the projector s ceiling mount fixing points Also secure the projector and the mounts using wire that is strong enough to hold their weight Do not install in locations where salt damage could occur or in locations subject to corrosive gas such as sulphuric gas from hot springs Otherwise corrosio...

Page 154: ... not use liquid or aerosol cleaners any sprays containing flammable gas or solvents such as alcohol paint thinner or benzine Do not block the slots and openings in the projector case They provide ventilation and prevent the projector from overheating If the vents are covered the internal temperature could rise and cause a fire Do not place the projector in locations subject to high temperatures su...

Page 155: ...ain water or excessive humidity Do not use or store the projector where it may be exposed to smoke steam corrosive gases excessive dust vibration or shock Doing so may result in malfunction electric shock and fire Do not use or store the projector in places where smoke from oil or cigarettes may be present as it can adversely affect the quality of the projected images Do not use the projector wher...

Page 156: ...ist or pull it excessively Keep the power cord away from hot electrical appliances Always lower the volume before turning off the projector Turning on the projector with the volume too high can damage your ears When a still image is displayed for a long time image retention may occur on the screen Do not display images in the exact same position for long periods Restriction of Use Parent topic Not...

Page 157: ...hed on in order to bring it into the stand by condition 4 ISO7000 No 0434B IEC3864 B3 1 Caution To identify general caution when using the product 5 IEC60417 No 5041 Caution hot surface To indicate that the marked item can be hot and should not be touched without taking care 6 IEC60417 No 6042 ISO3864 B3 6 Caution risk of electric shock To identify equipment that has risk of electric shock 7 IEC60...

Page 158: ...cover for the battery compartment or the connector terminals 11 IEC60417 No 5002 Positioning of cell To identify the battery holder itself and to identify the positioning of the cell s inside the battery holder 12 Positioning of cell To identify the battery holder itself and to identify the positioning of the cell s inside the battery holder 13 IEC60417 No 5019 Protective earth To identify any ter...

Page 159: ... 17 IEC60417 No 5172 Class II equipment To identify equipment meeting the safety requirements specified for Class II equipment according to IEC 61140 18 ISO 3864 General prohibition To identify actions or operations that are prohibited 19 ISO 3864 Contact prohibition To indicate injury that could occur due to touching a specific part of the equipment 20 Never look into the optical lens while the p...

Page 160: ...rds 26 IEC 60417 No 6056 Caution moving fan blades To indicate that you must keep away from the moving fan blades 27 IEC 60417 No 6043 Caution sharp corners To indicate sharp corners that should not be touched 28 To indicate that looking into the lens while projecting is prohibited 29 ISO7010 No W027 ISO 3864 Warning optical radiation such as UV visible radiation IR Take care to avoid injury to ey...

Page 161: ...nt and receiver Connect the equipment into an outlet on a circuit different from that to which the receiver is connected Consult the dealer or an experienced radio TV technician for help This device complies with part 15 of the FCC Rules Operation is subject to the following two conditions 1 This device may not cause harmful interference and 2 this device must accept any interference received incl...

Page 162: ...ures then in effect for consumer related disputes but excluding any rules that permit joinder or class actions in arbitration for more detail on procedure see Section 1 6 below You and Epson understand and agree that a the Federal Arbitration Act 9 U S C 1 et seq governs the interpretation and enforcement of this Section 1 b this Agreement memorializes a transaction in interstate commerce and c th...

Page 163: ...thority to resolve all disputes arising out of or relating to the interpretation applicability enforceability or formation of this Agreement including any claim that all or any part of this Agreement is void or voidable Notwithstanding this broad delegation of authority to the arbitrator a court may determine the limited question of whether a claim or cause of action is for an IP Claim which is ex...

Page 164: ...rsuant to this Section 1 6d e Attorney s Fees Epson will not seek its attorney s fees and expenses for any arbitration commenced involving a Dispute under this Agreement Your right to attorney s fees and expenses under Section 1 6d above does not limit your rights to attorney s fees and expenses under applicable law notwithstanding the foregoing the arbitrator may not award duplicative awards of a...

Page 165: ...the United States and or other countries Mac macOS and OS X are trademarks of Apple Inc registered in the U S and other countries HDMI and High Definition Multimedia Interface are the trademarks or registered trademarks of HDMI Licensing LLC General Notice Other product names used herein are for identification purposes only and may be trademarks of their respective owners Epson disclaims any and a...

Page 166: ...s information is subject to change without notice A Note Concerning Responsible Use of Copyrighted Materials Copyright Attribution Parent topic Notices A Note Concerning Responsible Use of Copyrighted Materials Epson encourages each user to be responsible and respectful of the copyright laws when using any Epson product While some countries laws permit limited copying or reuse of copyrighted mater...

Reviews: