background image

Using the Printer Software       

53

Note:

You can change the shared printer’s name so that it appears only 
on the client computer.

Windows XP or 2000

Follow the steps below to set up clients in Windows XP or 2000.

Note:

You can install the driver of the shared printer if you have Power Users 
or more powerful access rights, even if you are not the Administrator.

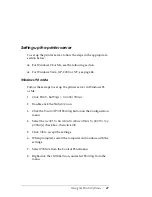
1. For Windows 2000 clients, click 

Start

Settings

 > 

Printers

.

For Windows XP Professional clients, click 

Start

Settings

 > 

Printers and Faxes

For Windows XP Home Edition clients, click 

Start

Printers and Faxes

.

2. For Windows 2000, double-click the 

Add Printer

 icon, then 

click 

Next

.

For Windows XP, click 

Add a printer

 in the Printer Tasks 

menu and click 

Next

.

Summary of Contents for LX-300+II RTP

Page 1: ...9 pin Dot Matrix Printer Reference Guide ...

Page 2: ...t misuse or abuse of this product or unauthorized modifications repairs or alterations to this product or excluding the U S failure to strictly comply with Seiko Epson Corporation s operating and maintenance instructions Seiko Epson Corporation shall not be liable for any damages or problems arising from the use ofany optionsor any consumableproductsotherthanthosedesignatedasOriginalEpson Products...

Page 3: ...g on Continuous Paper 11 Printing with the push tractor 12 Printing with the pull tractor 17 Adjusting the top of form position 22 Advancing paper to the tear off edge 23 Printing on Single Sheets 26 Printing on Special Paper 29 Adjusting the paper thickness lever 29 Multipart forms 30 Labels 31 Envelopes 32 Chapter 2 Using the Printer Software Accessing the Printer Driver 34 From Windows applicat...

Page 4: ...r driver and EPSON Status Monitor 3 59 Chapter 3 Using the Control Panel Control Panel Buttons and Lights 63 Selecting a built in font 65 Changing the Default Settings 67 Using Default Setting mode 72 Restoring the printer s default settings 73 Chapter 4 Maintenance and Troubleshooting Cleaning the Printer 74 Transporting the Printer 75 Troubleshooting 76 Using the error indicators 77 Problems and...

Page 5: ...ter 6 Product Information Printer Parts 109 Specifications 111 Mechanical 111 Electronic 113 Electrical 115 Environmental 115 Paper 115 Recommended printable area 119 Paper alignment 121 Command Lists 122 EPSON ESC P control codes 122 IBM 2380 Plus emulation control codes 123 Standards and approvals 125 Safety approvals 125 CE marking 125 ...

Page 6: ...cters per inch The CD ROM that came with your printer contains the printer driver for Microsoft Windows Vista XP 2000 Me 98 and NT 4 0 plus the EPSON Status Monitor 3 utility About This Manual This manual provides detailed information about your printer Chapter 1 Paper Handling explains how to load various types of paper Chapter 2 Using the Printer Software describes how to print using the printer...

Page 7: ...must be followed carefully to avoid bodily injury cCautions must be observed to avoid damage to your equipment Notes contain important information and useful tips on the operation of your printer Safety Instructions Read all of these safety instructions before using the printer and follow all warnings and instructions marked on the printer Hot parts caution symbol KThis symbol is placed on the pri...

Page 8: ...r area contact your local power company or consult your Epson reseller Connect all equipment to properly grounded electrical outlets Avoid using outlets on the same circuit as photocopiers or air control systems that regularly switch on and off Do not use a damaged or frayed power cord The power cord should be placed to avoid abrasions cuts fraying crimping kinking and other damage If you use an e...

Page 9: ...ctrical outlet that has the wrong voltage for your printer Never replace the print head yourself you may damage the printer Also other parts of the printer must be checked when the print head is replaced You may need to move the print head by hand to replace the ribbon cartridge If you have just used the printer the print head may be hot let it cool before touching it When handling paper Because l...

Page 10: ...efer servicing to qualified service personnel under the following conditions i If the power cord or plug is damaged ii If liquid has entered the printer iii If the printer has been dropped or the cabinet damaged iv If the printer does not operate normally or exhibits a distinct change in performance Do not use aerosol blowers which contain flammable gas inside or around this product Doing so may c...

Page 11: ...uous paper using the tractor in either the push or pull position Use the tractor in the push position if you want to be able to switch between printing on single sheets and continuous paper without removing the paper supply or if you will be tearing off continuous paper sheet by sheet Follow the instructions in the next section The printer comes with the tractor installed in the push position Use ...

Page 12: ...s to load continuous paper on the push tractor 1 Turn off the printer 2 Remove the printer cover and the paper guide and pull the paper release lever forward to the continuous paper position 3 Unlock the sprockets on the tractor by pulling the blue lock levers forward ...

Page 13: ...it is midway between the sprockets 5 Stack your continuous paper behind the printer Make sure there are no obstructions between the paper and the printer and that the paper is aligned squarely with the printer so it will feed in straight 6 Make sure your paper has a clean straight leading edge Then open the sprocket covers and fit the first holes of the paper over the sprocket pins 7 Close the cov...

Page 14: ...de See page 67 12 Press the LF FF button to feed the paper to the loading position When the printer receives data it begins printing automatically 13 After you finish printing follow the steps in the next section to tear off your printed document If the first printed line on your page appears too high or too low you can change its position using the Micro Adjust feature See Adjusting the top of fo...

Page 15: ...the tear off edge on the paper tension unit Note If your paper s perforation is not properly aligned with the tear off edge you can adjust the tear off position using the Micro Adjust feature See Adjusting the tear off position on page 25 cCaution Never use the paper feed knob to adjust the tear off position this may damage the printer or cause it to lose the tear off position 3 Close the printer ...

Page 16: ...s paper is loaded in the push tractor position follow these steps 1 Tear off your printed document cCaution Always tear off your printed document before you press the Load Eject button Reverse feeding several pages at a time may cause a paper jam 2 Press the Load Eject button to feed the paper backward to the standby position 3 Push the paper release lever back to the single sheet position 4 Follo...

Page 17: ...ibed below If your tractor is already installed in this position make sure the printer is turned off and skip to step 6 1 Turn off the printer 2 Remove the printer cover and the paper guide 3 Remove the paper tension unit by gently squeezing the lock tabs and pulling it out of the printer 4 Pull the paper release lever forward to the continuous paper position ...

Page 18: ...sh position gently squeeze the lock tabs on both sides and then rotate the tractor up to pull it away from the printer 6 Lower the tractor onto the mounting slots at the top of the printer as shown below and tilt it back until you feel it lock into place ...

Page 19: ... pulling the blue lock levers forward 8 Feed the paper into the rear paper slot as shown below and pull it up Position the paper using the scale on the printer as a guide Printing starts to the right of the position marked 0 under the paper now ...

Page 20: ...paper but do not lock it Move the paper supports midway between the two sprockets 10 Make sure your paper has a clean straight leading edge Open the sprocket covers Fit the first holes of the paper over the sprocket pins and then close the sprocket covers Slide the right sprocket to remove any slack in the paper and then lock it in place Note Remove any remaining slack by gently pulling the paper ...

Page 21: ...3 Replace the printer cover but leave it open 14 Turn on the printer 15 Set the Auto tear off feature in the Default Setting mode to Off otherwise the paper may jam See page 67 for more information When the printer receives data it begins printing automatically If you want to change the position where printing begins on the page press the LF FF button to advance the page to the next top of form po...

Page 22: ...ob to adjust the top of form position this may damage the printer or cause it to lose the top of form position 1 Make sure the printer is turned on and paper is loaded 2 Remove the printer cover 3 Hold down the Pause button for about three seconds The printer beeps and the Pause light starts flashing as the printer enters Micro Adjust mode 4 Press the LF FF D button to move the top of form positio...

Page 23: ...f you turn off the printer The top margin setting made in some software applications overrides the top of form position setting you make with the Micro Adjust feature If necessary adjust the top of form position in your software If you want to restore the printer s default top of form position you can reset the printer See page 73 for instructions Advancing paper to the tear off edge When the push...

Page 24: ... Font lights are flashing the paper is in the tear off position If you press the Tear Off Font button again the printer feeds your paper to the next top of form position Advancing paper to the tear off position automatically To automatically advance your printed documents to the tear off position you need to turn on the Auto tear off mode and select the appropriate page length for continuous paper...

Page 25: ...on 2 Open the printer cover 3 Hold down the Pause button for about three seconds The printer beeps and the Pause light begins to flash as the printer enters Micro Adjust mode 4 Press the LF FF D button to feed the paper backward or press the Load Eject U button to feed the paper forward until the paper perforation is aligned with the tear off edge on the paper tension unit Note The printer has a m...

Page 26: ...ts You can load single sheets of paper one at a time using the printer s paper guide Before printing on single sheet multipart forms envelopes or other special paper make sure the paper thickness lever is set to the correct position See Printing on Special Paper on page 29 Note Load only one sheet at a time To load a stack of single sheet paper use the optional cut sheet feeder See page 98 for mor...

Page 27: ...d Eject button to feed it back to the standby position 2 Push the paper release lever back to the single sheet position and make sure the paper guide is in the upright position as shown below 3 Slide the left edge guide until it locks in place at the guide mark Then adjust the right edge guide to match the width of your paper ...

Page 28: ...ives data it begins printing If the document is more than one page the printer beeps three times after printing each page Load the next sheet and the printer will continue printing cCaution Use the paper feed knob on the right side of the printer only to clear paper jams and only when the printer is off Otherwise you may damage the printer or cause it to lose the top of form position ...

Page 29: ...ations cCaution When printing on multipart forms thicker than normal paper labels or envelopes make sure your application software settings keep the printing entirely within the recommended printable area Printing past the edge of these papers can damage the print head Adjusting the paper thickness lever Before printing on special paper you need to make sure the paper thickness lever is set correc...

Page 30: ... lever to the correct position for your forms See page 29 Use continuous multipart forms that are joined only by spot gluing or side crimping Never load continuous multipart forms joined by metal staples tape or continuous gluing Use single sheet multipart forms that are line glued only at the top Insert the forms glued edge first into the printer Make sure that multipart forms are not wrinkled Pa...

Page 31: ...st use continuous paper loaded on the pull tractor Keep the following tips in mind Set the paper thickness lever to the correct position for labels See page 29 Choose labels mounted on a continuous backing sheet with sprocket holes designed for tractor use Do not print labels as single sheets because the shiny backing causes the paper to slip slightly Load labels the same way you load ordinary con...

Page 32: ... the proper position See page 29 To load an envelope follow the steps on page 26 for printing a single sheet Insert the wide edge of the envelope into the printer first printable side down When you insert the envelope between the edge guides push it firmly and hold it until it feeds into the printer Use envelopes only under normal temperature and humidity conditions Make sure the printing stays en...

Page 33: ...itor 3 lets you monitor the status of your printer alerts you when errors occur and provides you with troubleshooting tips It is automatically installed when you install the printer driver Note Before proceeding make sure you have installed the printer software on your computer as described in the User s Guide Make sure the software setting is set to ESC P The printer driver software and EPSON Sta...

Page 34: ...nter driver settings you make apply to all your applications See From the Start menu on page 36 for more information Note While many Windows applications override the settings made with the printer driver some do not Check your printer driver settings to make sure they are correct for your document From Windows applications Follow these steps to access the printer driver from a Windows application...

Page 35: ...lication and you may need to click a combination of these buttons Windows Vista s menu contains Layout Paper Quality User Defined Paper and Extension Settings menus The Properties window appears 4 To view a menu click the corresponding tab at the top of the window See Changing the Printer Driver Settings on page 38 for more information Windows 98 or Me Windows 2000 XP or NT 4 0 ...

Page 36: ...t Settings Printers and Faxes For Windows XP Home Edition click Start Printers and Faxes For Windows 98 Me 2000 or NT click Start Settings Printers 2 In Windows 98 or Me right click your printer icon and click Properties The screen displays the Properties window In Windows Vista right click the Layout Paper Quality User Defined Paper and Extension Settings menus In Windows 2000 or XP right click y...

Page 37: ...t Document Defaults You see the Document Properties window In Windows 2000 XP or NT you can also click Properties to display the Properties window 3 To view a menu click the corresponding tab at the top See Changing the Printer Driver Settings on page 38 for more information ...

Page 38: ...ce you have checked your printer driver settings and changed them if necessary you are ready to print Printer driver settings The following table shows the printer driver settings Note that not every setting is available in all versions of Windows For more details see Help for the printer driver Setting Explanation Paper Size Select the paper size you want to use If you don t see your paper size u...

Page 39: ...ing Select the type of halftoning to use when printing graphics To let the printer determine the best halftone quality use Auto Select Printer Font Setting Select a character table group to use Standard Expanded and None Bit Image printing When Standard or Expanded is selected the printer uses the device fonts Expanded includes more fonts than Standard When None is selected the printer uses bit ma...

Page 40: ...fonts Top Margin Priority Select which setting for the print start position is to be used the driver setting or printer setting For more details see Help for the printer driver Packet Mode Ordinarily there is no need to change this setting If you change the printer s Packet Mode settings change this setting to match If the printer and printer driver settings are different you may not be able to pr...

Page 41: ...ndows Vista or XP Professional x64 Edition To open the Server Properties screen in Windows Vista you need to use the Run as administrator option With Windows Vista and XP Professional x64 Edition 1 For Windows Vista click Start Control Panel Hardware and Sound then click Printers For Windows XP Professional x64 Edition click Start Settings Printers and Faxes 2 Right click your printer icon and cli...

Page 42: ...er server See Setting up EPSON Status Monitor 3 on page 43 and Setting up the printer server on page 47 Note When connecting to a shared printer beyond a router error and warning notifications for the shared printer during printing are not available in some cases because of the router s settings Before using EPSON Status Monitor 3 be sure to read the README file on the CD ROM This file contains th...

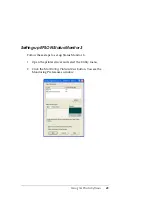
Page 43: ...are 43 Setting up EPSON Status Monitor 3 Follow these steps to set up Status Monitor 3 1 Open the printer driver and select the Utility menu 2 Click the Monitoring Preferences button You see the Monitoring Preferences window ...

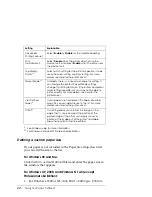
Page 44: ...ity menu and follow the instructions Open the Utility menu and click the EPSON Status Monitor 3 icon Setting Explanation Select Notification Click the Error and Communication Error check boxes to turn notification on or off Select Shortcut Icon The selected icon is displayed in the taskbar shown in the example box Click the Shortcut Icon check box for easy access to the Monitoring Preferences wind...

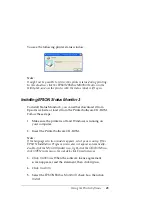
Page 45: ... it from the Printer Software CD ROM Follow these steps 1 Make sure the printer is off and Windows is running on your computer 2 Insert the Printer Software CD ROM Note If the language selection window appears select your country If the EPSON Installation Program screen does not appear automatically double click the My Computer icon right click the CD ROM icon click OPEN in the menu then double cl...

Page 46: ...ver See Setting up EPSON Status Monitor 3 on page 43 When you are using a shared printer in Windows 98 or Me on the server double click the Network icon in the Control Panel and make sure that the File and printer sharing for Microsoft Networks component is installed Then on the server and clients make sure that the IPX SPX compatible Protocol or the TCP IP Protocol is installed When connecting to...

Page 47: ...printer server in Windows 98 or Me 1 Click Start Settings Control Panel 2 Double click the Network icon 3 Click the File and Print Sharing button on the Configuration menu 4 Select the I want to be able to allow others to print to my printer s check box then click OK 5 Click OK to accept the settings 6 When prompted restart the computer and continue with the settings 7 Select Printers from the Con...

Page 48: ...server See Setting up EPSON Status Monitor 3 on page 43 10 Follow the instructions on page 50 to set up the client computers so they can use the printer on a network Windows Vista XP 2000 or NT 4 0 Follow the steps below to set up the printer server in Windows Vista XP 2000 or NT Note You must access Windows Vista XP 2000 or NT as the administrator of the local machine 1 In Windows Vista click Sta...

Page 49: ...lick Sharing from the menu If you see the following message in Windows XP click either Network Setup Wizard or if you understand the security risks but want to share printers without running the wizard click here In either case follow the on screen instructions 3 In Windows 2000 select Shared as In Windows NT select Shared Then type the name in the Share name box and click OK ...

Page 50: ... not use spaces or hyphens for the share name Follow the instructions on page 50 to set up the client computers so they can use the printer on a network Setting up the clients This section describes how to install the printer driver on the client computers by accessing the shared printer on a network Follow the instructions for your operating system Windows Vista see page 56 Windows XP or 2000 see...

Page 51: ...he shared printer from Network Neighborhood or My Network on the Windows desktop If you want to be able to use Status Monitor 3 on the clients you need to install both the printer driver and Status Monitor 3 on each client from the CD ROM Windows 98 or Me Follow these steps to set up Windows 98 or Me clients 1 Click Start Settings Printers 2 Double click the Add Printer icon then click Next 3 Sele...

Page 52: ...6 Click Next If the printer driver was installed on the client previously you need to select the new printer driver or the current printer driver when you are prompted If the operating system on the printer server is Windows 98 or Me go to the next step If the operating system on the printer server is not Windows 98 or Me go to Installing the printer driver from the CD ROM on page 62 7 Check the n...

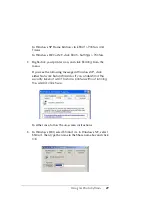
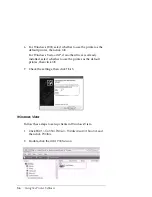
Page 53: ...red printer if you have Power Users or more powerful access rights even if you are not the Administrator 1 For Windows 2000 clients click Start Settings Printers For Windows XP Professional clients click Start Settings Printers and Faxes For Windows XP Home Edition clients click Start Printers and Faxes 2 For Windows 2000 double click the Add Printer icon then click Next For Windows XP click Add a...

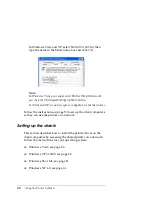
Page 54: ...lick Next 4 For Windows 2000 select Type the printer name or click Next to browse for a printer then click Next Note You can also type the shared printer s name or network path in the Name box such as the name of the computer that is locally connected to the shared printer the shared printer s name For Windows XP select Browse for a printer then click Next ...

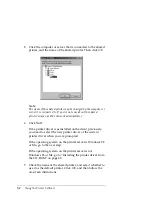
Page 55: ...inter To check the name of the shared printer ask the network administrator If the printer driver was installed on the client previously you need to select either the new printer driver or the current printer driver when prompted Proceed to the next step if the printer server and client have the same OS and the same architecture x64 x86 If the operating system on the printer server is Windows 98 M...

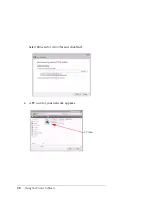
Page 56: ...ista or XP if another driver is already installed select whether to use the printer as the default printer then click OK 7 Check the settings then click Finish Windows Vista Follow these steps to set up clients in Windows Vista 1 Click Start Control Panel Hardware and Sound and then click Printers 2 Double click the Add Printer icon ...

Page 57: ...dd a network wireless or Bluetooth printer 4 Windows automatically searches for a shared printer If a shared printer is found click its icon and click Next 5 If no shared printer is found click the The printer that I want isn t listed button ...

Page 58: ...58 Using the Printer Software Select Browse for a printer and click Next 6 A PC icon for your network appears PC icon ...

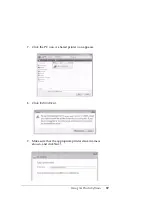
Page 59: ...Using the Printer Software 59 7 Click the PC icon A shared printer icon appears 8 Click Install driver 9 Make sure that the appropriate printer driver name is shown and click Next ...

Page 60: ...rinter Software If another printer driver already has been installed the Set as the default printer checkbox appears To set the printer shown as the default printer select the checkbox and click Next 10 Click Finish ...

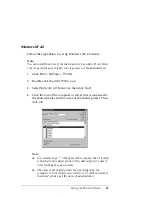
Page 61: ...nter icon 3 Select Network printer server then click Next 4 Click the icon of the computer or server that is connected to the shared printer and the name of the shared printer Then click OK Note You can also type the name of the computer that is locally connected to the shared printer the shared printer s name in Network path or queue name The name of the shared printer may be changed by the compu...

Page 62: ...er then click OK 6 Click Finish Installing the printer driver from the CD ROM This section describes how to install the printer driver on the clients when the server and clients use different operating systems Note When installing on Windows 2000 XP or NT clients you must access Windows as the Administrator If the computers of the server and clients use the same OS and the same architecture you do...

Page 63: ...propriate drive and folder names in which the printer driver for clients is located and click OK When installing drivers in Windows Vista XP or 2000 Digital Signature is not found may appear Click Yes for Windows 2000 or Continue Anyway for Windows XP or Install this driver software anyway for Windows Vista and continue installing ...

Page 64: ...ect the printer driver installed in Setting up the clients on page 50 If EPSON Status Monitor 3 is installed with the Windows Firewall feature turned on recommended the shared printer may not be able to be monitored If this occurs follow the steps below to enable monitoring 1 Add EPSON Status Monitor 3 to the Windows Firewall Exceptions list For Windows XP Click Start Control Panel Security Center...

Page 65: ...Drive Program Files x86 Common Files EPSON EBAPI eEBAgent exe 4 Check that eEBAgent exe appears in the Programs list and then click the OK button 5 Check that eEBAgent exe is added to the Program and Services list for Windows XP or the Program or port list for Windows Vista and that its checkbox is selected checked and then click the OK button If the client OS is Windows Vista error messages might...

Page 66: ... icon on the task bar 2 To cancel printing for a single document choose the document and select Cancel Printing Windows 98 or Me or Cancel Windows 2000 XP or NT on the Document menu To cancel printing of all documents select Purge Print Documents Windows 98 or Me or Cancel All Documents Windows 2000 XP or NT on the Printer menu ...

Page 67: ...or 3 from a multi user Windows XP 2000 environment remove the shortcut icon from all clients before uninstalling You can remove the icon by clearing the Shortcut Icon check box in the Monitoring Preferences dialog box Uninstalling the printer driver and EPSON Status Monitor 3 1 Quit all applications 2 Click Start Control Panel or Start Settings Control Panel 3 Double click the Add Remove Programs ...

Page 68: ...68 Using the Printer Software 4 Select EPSON Printer Software and click Add Remove or Change Remove 5 On the Printer Model tab select the LX 300 II icon and click OK 1 2 ...

Page 69: ...tatus Monitor 3 click Yes in the window that appears 8 Follow the on screen instructions Uninstalling the USB device driver If the printer is connected to your computer with a USB interface cable you also need to uninstall the USB device driver Note Uninstall the printer driver before uninstalling the USB device driver Once you have uninstalled the USB device driver you cannot access any other Eps...

Page 70: ...interface cable If the USB device driver is not installed correctly EPSON USB Printer Devices may not appear In this case you need to run the Epusbun exe file on the CD ROM Insert the Printer Software CD ROM access the CD ROM drive and open the Language WIN98 or Language WINME folder Then double click Epusbun exe 3 Follow the on screen instructions Now see the User s Guide to install the printer d...

Page 71: ... panel let you Adjust line and form feeding Load and eject paper Select a built in font Change the printer s default settings Control Panel Buttons and Lights 1 Tear Off Font lights Flash when continuous paper is in the tear off position otherwise the lights indicate the selected font 1 6 7 2 3 4 5 ...

Page 72: ...tinuous paper to the next top of form position when held down In Micro Adjust mode adjusts the top of form and tear off position 4 Load Eject button Loads a single sheet of paper Ejects a single sheet of paper Loads continuous paper from the standby position Feeds continuous paper backward to the standby position In Micro Adjust mode adjust the top of form and tear off position 5 Pause button Stop...

Page 73: ...ight On when the printer is paused Flashes when the printer is in Micro Adjust mode Flashes when the print head has overheated Selecting a built in font Usually you use your software application to select the font you want to use in a document However you can also select one of these built in fonts using the buttons on the printer s control panel Draft Draft Condensed Roman Roman Condensed Sans Se...

Page 74: ...two Tear Off Font lights show the current font selection 3 Press the Tear Off Font button repeatedly to cycle through the fonts and stop when the lights on the control panel indicate the font you want Your selection stays in effect until you change it again Note Settings you make in your application programs usually override settings you make from the printer s control panel For best results use y...

Page 75: ...he settings are explained in detail after the table For instructions on using Default Setting mode see page 80 Settings Options Page length for tractor Length in inches 3 3 5 4 5 5 6 7 8 8 5 11 70 6 12 14 17 Skip over perforation On Off Auto tear off On Off Auto line feed On Off Print direction Bi D Uni D Software ESC P IBM 2380 Plus 0 slash On Off High speed draft On Off I F mode Auto Parallel Se...

Page 76: ...table Standard model Italic PC 437 PC 850 PC 860 PC 863 PC 865 PC 861 BRASCII Abicomp Roman 8 ISO Latin 1 PC 858 ISO 8859 15 All other models Italic PC 437 PC 850 PC 437 Greek PC 853 PC 855 PC 852 PC 857 PC 866 PC 869 MAZOWIA Code MJK ISO 8859 7 ISO Latin 1T Bulgaria PC 774 Estonia ISO 8859 2 PC 866 LAT PC 866 UKR PC APTEC PC 708 PC 720 PC AR864 PC 860 PC 863 PC 865 PC 861 BRASCII Abicomp Roman 8 ...

Page 77: ...en auto line feed is on the printer accompanies each carriage return CR code received with a line feed code and the print position moves to the next line If the printer adds an extra line after every carriage return select Off Print direction You can select bidirectional printing Bi D or unidirectional printing Uni D Printing is normally bidirectional because it is faster Unidirectional printing h...

Page 78: ...rfaces depending on which one is receiving data Auto I F interface wait time This setting takes effect only when I F interface mode is set to Auto This setting determines how long the printer waits when it no longer receives data from an interface before it checks whether a print job is being sent through the other interface You can specify 10 seconds or 30 seconds for the auto interface wait time...

Page 79: ...ff this mode if you encounter connection problems when you are printing from applications based on other operating systems such as DOS Character table You can select among various character tables International character set for Italic table You can select among several international character sets for the Italic character table Each character set contains eight characters that vary depending on t...

Page 80: ...2380 Plus emulation mode When you select Table 1 hex codes 80H to 90H of the character tables are used for the control codes When you select Table 2 hex codes 80H to 90H are used for characters Using Default Setting mode Follow the steps below to enter Default Setting mode and change the printer s default settings Note To print the language selection instructions and Default Setting mode instructi...

Page 81: ...t Default Setting mode If you want to change any settings go to step 6 6 Press the Tear Off Font button The printer prints instructions for changing the settings 7 Press the LF FF button to scroll through the options for the selected setting until you see the one you want Then press the Tear Off Font button to select the next setting you want to change 8 When you finish making settings turn off th...

Page 82: ...ve any paper loaded in the printer and turn it off 2 Remove the paper guide If a pull tractor or an optional cut sheet feeder is installed remove it 3 Use a soft brush to carefully brush away all dust and dirt from the outer case and paper guide 4 If the outer case or paper guide is still dirty or dusty clean them with a soft clean cloth dampened with a mild detergent dissolved in water Keep the p...

Page 83: ...he original box and packing materials or equivalent packaging wWarning When transporting the printer do not lift it by the USB cable holder as the holder may detach and cause the printer to fall Hold the bottom left and right sides of the printer firmly to lift it You need to move the print head by hand to remove the ribbon cartridge If you have just used the printer the print head may be hot let ...

Page 84: ... hot Then remove the ribbon cartridge 7 Repack the printer and all the other items in their original packing materials and place them in the printer s original box Troubleshooting You can solve most printing problems by checking for the solutions in this section It explains How to read the control panel lights that indicate errors page 85 Problems and solutions page 87 Clearing paper jams page 101...

Page 85: ...paper release lever to the correct position and press the Load Eject button to clear the paper from the paper path Then set the lever to the position you want to use Press the Pause button to turn off the Pause light if necessary n Paper Out n Pause No paper is loaded in the selected paper source Load paper in the printer Then press the Pause button to turn off the Pause light if necessary The pap...

Page 86: ...on to turn off the Pause light if necessary A single sheet of paper is not fully ejected Press the Load Eject button to eject the sheet Then press the Pause button to turn off the Pause light if necessary Paper is jammed in the printer Clear the paper jam as described on page 101 f Pause The print head is overheated Wait a few minutes the printer resumes printing automatically once the print head ...

Page 87: ...problems between the printer and computer To print a hex dump turn off the printer Next hold down the Load Eject and LF FF buttons while you turn on the printer Then send data from your computer The printer prints all the codes it receives in hexadecimal format Power Supply Power is not being supplied The lights on the control panel do not come on Cause What to do The power cord may be unplugged C...

Page 88: ... is off but nothing is printed Cause What to do The software may not be installed properly Check that the software is installed properly for your printer as described in the User s Guide Theinterfacecablemaynot match the specifications of the printer or computer Check both ends of the interface cable Make sure the cable meets both the printer and computer specifications The printer port may not be...

Page 89: ...e times and stops printing abruptly Cause What to do The paper or ribbon may be jammed Turn off the printer and check for a paper jam or a ribbon jam The printer may have overheated Let the printer cool Then try to print again If it still does not print correctly see Where To Get Help on page 104 The printer beeps five times and all the lights flash Cause What to do An error has occurred Turn off ...

Page 90: ...The printout is faint Cause What to do The ribbon may be worn out Replace the ribbon cartridge as described on page 105 A line of dots is missing in the printout Cause What to do The print head is damaged Stop printing and contact Epson to have the print head replaced See Where To Get Help on page 104 Dots are missing in random positions Cause What to do Either there is too much slack in the ribbo...

Page 91: ... do Your software may be overriding your control panel setting Check the font setting in your application software Printing starts too high or too low on the page or the bottom part of one page is printed at the top of the next page Cause What to do Your application software settings may be incorrect Check the margin or top of form position setting in your application software Page length does not...

Page 92: ... in the printout Cause What to do One inch skip over perforation may be set Set skip over perforation to Off in Default Setting mode See page 67 Paper does not feed Cause What to do Continuous paper may be left in the printer Remove the continuous paper Set the paper release lever to the single sheet position Insert a new sheet The paper on the paper guide is positioned too far to the left or righ...

Page 93: ...e of paper See the paper specifications on page 115 Paper does not eject completely Cause What to do The paper may be too long Press the LF FF button to eject the page Use paper that is within the specified range See the paper specifications on page 115 The tractor does not feed the paper Cause What to do The paper release lever may be in the wrong position Check that the paper release lever is pu...

Page 94: ...per are misaligned Check that the holes on each side of the paper are aligned with each other Also make sure the sprockets are locked and their covers are closed Your paper may be the wrong size or thickness for the printer Make sure that the paper size and thickness are within the specified ranges See page 115 for continuous paper specifications When you use side crimped multipart forms the copie...

Page 95: ...ject the paper Then change the paper release lever position The paper does not feed Cause What to do The cut sheet feeder may be incorrectly installed Reinstall it as described on page 98 The paper release lever may be in the wrong position Check that the paper release lever is pushed back to the single sheet position You may have loaded too many sheets in the bin Remove some sheets Paper may be j...

Page 96: ...uides to match the width of your paper The paper may be old or creased Use only new clean sheets of paper There may be too much paper in the stacker Remove some sheets You may not be using the right type of paper for the cut sheet feeder For example your paper may be too heavy or too light Make sure your paper meets the requirements of your printer and cut sheet feeder See page 115 for paper speci...

Page 97: ...h the lever back to load single sheets Paper is feeding crooked or jams Cause What to do The pull tractor and push tractor sprockets are not aligned correctly When using both tractors make sure that the sprockets on both are positioned evenly The paper may have too much slack Adjust the position of the sprockets to take up any slack along the width of the paper Remove slack lengthwise by rotating ...

Page 98: ...ped with a USB port or that has been upgraded from Windows 95 to Windows 98 Me 2000 XP or Vista Make sure that EPSON USB Printer Devices appears in the Device Manager menu in Windows 98 and Me only If you canceled the plug and play driver installation before the procedure was complete either the USB device driver or the printer driver may be incorrectly installed Follow these steps to check the in...

Page 99: ... Manager menu If EPSON USB Printer Devices does not appear on the Device Manager menu click the plus sign beside Other devices to view the installed devices If USB Printer appears under Other devices the USB printer device driver is not installed correctly If EPSON LX 300 II appears the printer driver is not installed correctly ...

Page 100: ...r devices click Refresh or unplug the USB cable from the printer then plug it into the printer again 4 Under Other devices select USB Printer or EPSON LX 300 II and click Remove Then click OK 5 When you see the following window click OK Then click OK again to close the System Properties dialog box ...

Page 101: ...ing the USB printer device driver and the printer software First uninstall EPSON Printer Software using the Add Remove Programs utility in the Control Panel then uninstall EPSON USB Printer Devices Next reinstall the software as described in the User s Guide If EPSON USB Printer Devices is not registered in the Add Remove Programs list access the CD ROM and double click epusbun exe in the Language...

Page 102: ...unning the printer s self test helps you determine whether the printer or the computer is causing the problem If the self test results are satisfactory the printer is working properly and the problem is probably caused by your printer driver settings application settings computer or interface cable Be sure to use a shielded interface cable If the self test does not print properly there is a proble...

Page 103: ... printer The self test is printed in Draft characters when the LF FF button is held or in NLQ characters when the Load Eject button is held Note To temporarily stop the self test press the Pause button To resume printing press the Pause button again 4 To end the self test press the Pause button to stop printing If paper remains in the printer press the LF FF button to eject the printed page Then t...

Page 104: ...om and select your printer for solutions to common problems You can download drivers and documentation get FAQs and troubleshooting advice or e mail Epson with your questions Speak to a support representative Before you call for support please have the following information ready Product name Epson LX 300 II Product serial number located on the back of the printer Proof of purchase such as a store...

Page 105: ...acific Time Monday through Friday Toll or long distance charges may apply Purchase supplies and accessories You can purchase ribbon cartridges and other accessories from an Epson authorized reseller To find the nearest reseller call 800 GO EPSON 800 463 7766 Or you can purchase online at www epsonstore com U S sales or www epson ca Canada sales ...

Page 106: ...he optional single bin cut sheet feeder C806371 handles up to 50 sheets of standard bond paper 22 lb or 82 g m without reloading Follow these steps to install the cut sheet feeder 1 Make sure the printer is turned off Remove the paper guide and open the printer cover 2 If the tractor is installed in the pull tractor position remove it and reinstall it in the push tractor position 3 Make sure the p...

Page 107: ... the cut sheet feeder over the mounting posts on the printer Releasing the latch levers locks the cut sheet feeder in place 5 Slide the left paper guide so it is aligned with the triangle mark Then slide the right paper guide to roughly match the width of your paper Slide the paper support midway between the paper guides ...

Page 108: ...orms carbon paper or labels in the cut sheet feeder 8 Insert up to 50 sheets of paper along the left paper guide 9 Adjust the position of the right paper guide so that it matches your paper s width Make sure the position of the guide allows the paper to move up and down freely 10 Push the paper set levers back to clamp the paper against the guide rollers 11 Remove the paper supports from the edge ...

Page 109: ... release tabs and pull out the paper guide Make sure the printer cover is open when you print You can easily switch between continuous paper and cut sheet feeder paper See Switching between continuous paper and single sheets on page 16 for details Note When you print several pages of continuous paper fold the first printed page forward at the perforation after the perforation emerges from below th...

Page 110: ...load paper on the standard and optional tractor 1 Turn off the printer 2 Remove the printer cover and paper guide 3 Pull the paper release lever forward to the continuous paper position 4 Install the first tractor in the push tractor position 5 Remove the paper tension unit by squeezing its lock tabs gently and pulling it away from the printer 6 Lower the pull tractor into the mounting slots at th...

Page 111: ...ed so that the paper is not crooked 10 Open the sprocket covers Fit the holes of the paper over the tractor pins and adjust the sprockets as necessary Close the sprocket covers 11 If there is slack in the paper between the push and pull tractors push in and turn the paper feed knob on the right side of the pull tractor to remove the slack 12 Make sure the paper is not crooked or wrinkled and then ...

Page 112: ...ition the roll paper holder beneath the printer as shown below Fit the two holes in the base onto the two positioning pegs on the bottom of the printer wCaution Be careful to avoid dropping the roll paper holder when lifting the printer Only the printer s weight holds it in place 3 Push the paper release lever to the single sheet position 4 Cut the leading edge of the roll paper straight across Sl...

Page 113: ... paper guide Slide the left edge guide to the center until it stops at the guide mark Then slide the right edge guide to the opposite guide mark Replacing the Ribbon Cartridge When printing becomes faint you need to replace the ribbon cartridge 8750 Genuine Epson ribbon cartridges are designed and manufactured to work properly with your Epson printer They ensure proper operation and long life of t...

Page 114: ... cartridge 2 Open the printer cover to the upright position then pull it up to remove it 3 Make sure the print head is in the middle of the printer If not make sure it is not hot then use your hand to slide it to the middle 4 Remove the used ribbon cartridge from the printer 5 Remove the new ribbon cartridge from its package and turn the ribbon tightening knob in the direction of the arrow to remo...

Page 115: ...ibbon cartridge into the printer as shown then press both sides of the cartridge firmly to fit the plastic hooks into the printer slots 7 Use a pointed object such as a ball point pen to guide the ribbon between the print head and ribbon guide ...

Page 116: ...116 Options and Consumables 8 Turn the ribbon tightening knob in the direction of the arrow to help feed the ribbon into place it should not be twisted or creased 9 Replace and close the printer cover ...

Page 117: ...nformation This chapter identifies the printer parts and contains detailed specifications Printer Parts a edge guides e knob b paper supports f control panel c paper guide g printer cover d paper release lever h paper guide cover a c b d e f h g ...

Page 118: ...ct Information a serial interface f power cord b ribbon cartridge g USB cable holder c paper thickness lever h tractor d paper tension unit i USB interface e power switch j parallel interface a c b d e i j h g f ...

Page 119: ...25 cps at 15 cpi Draft condensed 191 cps at 17 cpi 225 cps at 20 cpi Draft emphasized 112 cps at 10 cpi NLQ 56 cps at 10 cpi 67 cps at 12 cpi 56 cps at 15 cpi 47 cps at 17 cpi 56 cps at 20 cpi Printing direction Bidirectional logic seeking for text and graphics printing Unidirectional text or graphics printing can be selected using software commands Line spacing 1 6 inch or programmable in 1 216 i...

Page 120: ...ontinuous 3 0 inches second 76 mm second Intermittent 63 msec line at 1 6 inch line spacing Reliability Total print volume 12 million lines except print head MTBF 6 000 POH 25 duty Print head life 400 million strokes per wire Dimensions and weight Height 6 26 inches 159 mm Width 14 4 inches 366 mm Depth 10 8 inches 275 mm excluding the knob paper release lever etc Weight approx 9 7 lb 4 4 kg Ribbo...

Page 121: ...84 nibble mode support one EIA 232D serial interface and one USB ver1 1 interface Buffer 64 KB Built in fonts Bitmap fonts EPSON Draft 10 12 15 cpi EPSON Roman 10 12 15 cpi proportional EPSON Sans Serif 10 12 15 cpi proportional Bar code fonts EAN 13 EAN 8 Interleaved 2 of 5 UPC A UPC E Code 39 Code 128 POSTNET ...

Page 122: ...ailable in some countries PC 437 Greek PC 852 Eastern Europe PC 853 Turkish PC 855 Cyrillic PC 857 Turkish PC 866 Russian PC 869 Greek MAZOWIA Poland Code MJK CSFR ISO 8859 7 Latin Greek ISO Latin 1T Turkish Bulgaria Bulgarian PC 774 LST 1283 1993 Estonia Estonian PC 771 Lithuanian ISO 8859 2 PC 866 LAT Latvian PC 866 UKR Ukrainian PC APTEC Arabic PC 708 Arabic PC 720 Arabic PC AR 864 Arabic PC437...

Page 123: ... wrinkled or curled 120 V Model 220 to 240 V Model Input voltage range AC 99 to 132 V AC 198 to 264 V Rated frequency range 50 to 60 Hz Input frequency range 49 5 to 60 5 Hz Rated current 0 6 A maximum 1 4 A depending on the character type 0 3 A maximum 0 7 A depending on the character type Power consumption Approx 23 W ISO IEC 10561 letter pattern Temperature without condensation Humidity without...

Page 124: ... sheet feeder 10 1 to 14 0 inches 257 to 356 mm Thickness Paper guide 0 0025 to 0 0055 inch 0 065 to 0 14 mm Cut sheet feeder 0 0028 to 0 0055 inch 0 07 to 0 14 mm Weight Paper guide 14 to 24 lb 52 to 90 g m Cut sheet feeder 18 to 24 lb 64 to 90 g m Width 3 9 to 10 1 inches 100 to 257 mm Length 3 9 to 14 3 inches 100 to 364 mm Copies 1 original up to 4 copies Thickness 0 0047 to 0 015 inch 0 12 to...

Page 125: ...h 0 16 to 0 52 mm Weight 12 to 24 lb 45 to 90 g m Width 4 0 to 10 0 inches 101 6 to 254 mm Length one page 4 0 to 22 0 inches 101 6 to 558 8 mm Copies 1 original up to 4 copies Thickness 0 0025 to 0 015 inch 0 065 to 0 39 mm Gathering area up to 0 035 inch 0 9 mm Weight not multipart 14 to 22 lb 52 to 82 g m Weight one sheet of multipart 12 to 15 lb 40 to 58 g m Binding Spot glued or crimp bound o...

Page 126: ...adius minimum Backing sheet width 4 0 to 10 0 inches 101 6 to 254 mm Backing sheet length 4 0 to 22 0 inches 101 6 to 558 8 mm Backing sheet thickness 0 0028 to 0 0035 inch 0 07 to 0 09 mm Total thickness 0 0063 to 0 0075 inch 0 16 to 0 19 mm Label weight 17 lb 64 g m Width 8 5 inches 216 mm Thickness 0 0028 to 0 0035 inch 0 07 to 0 09 mm Weight 14 to 22 lb 52 to 82 g m ...

Page 127: ... left and right margins are 0 12 inch 3 0 mm For single sheets the maximum paper width is 10 1 inches 257 mm The maximum printable width is 8 0 inches 203 2 mm If the paper size is substantially wider than this the side margins will be wider than the minimum but the printable width does not increase beyond 8 0 inches 203 2 mm C The minimum bottom margin is 0 17 inch 4 2 mm Recommended Printable Ar...

Page 128: ...nimum left and right margins are 0 51 inch 13 mm each The maximum paper width is 10 0 inches 254 mm The maximum printable width is 8 0 inches 203 2 mm If the paper size is substantially wider than this the side margins will be wider than the minimum but the printable width does not increase beyond 8 0 inches 203 2 mm Recommended Printable Area ...

Page 129: ... on the scale The unprintable area is to the left of the 0 A The minimum top margin is 0 17 inch 4 2 mm B The minimum left margin is 0 12 inch 3 0 mm The minimum right margin is 0 12 inch 3 0 mm The maximum printable width is 8 0 inches 203 2 mm Recommended Printable Area ...

Page 130: ...tware allows you to use advanced fonts and graphics General operation ESC ESC U ESC EM Paper feeding FF LF ESC 0 ESC 1 ESC 2 ESC 3 ESC A CR Page format ESC C ESC C ESC C 0 ESC Q ESC l ESC c ESC N ESC O ESC U Print position motion ESC ESC ESC D HT ESC B VT ESC J Font selection ESC k ESC x ESC y ESC P ESC M ESC g ESC p ESC 4 ESC 5 ESC E ESC F ESC Font enhancement ESC W DC4 SO DC2 SI ESC w ESC G ESC ...

Page 131: ... the IBM 2380 Plus reference manual Spacing ESC Space Character handling ESC t ESC t ESC R ESC ESC ESC ESC I ESC 6 ESC 7 Bit image ESC K ESC L ESC Y ESC Z ESC ESC Bar code ESC B General operation NUL DC3 ESC j BEL CAN DC1 ESC Q ESC K ESC U ESC F Paper feeding FF LF ESC 5 ESC A ESC 0 ESC 1 ESC 2 ESC 3 CR ESC Page format ESC C ESC C0 ESC X ESC N ESC O ESC 4 ...

Page 132: ...ont selection DC2 ESC P ESC ESC E ESC F ESC I ESC d ESC I Font enhancement DC4 SO ESC SO ESC W ESC SI ESC SI ESC G ESC H ESC T ESC S ESC ESC _ Spacing BS SP Character handling ESC 6 ESC 7 ESC T ESC ESC Bit image ESC K ESC L ESC Y ESC Z Bar code ESC f ESC p Download ESC only Draft mode ...

Page 133: ...SA60950 EMI FCC part 15 subpart B Class B CAN CSA CEI IEC CISPR22 class B 230 V version Safety standards EN60950 EMI AS NZS CISPR22 class B EMC EN55022 class B EN61000 3 2 EN61000 3 3 EN55024 230 V version Low Voltage Directive 73 23 EEC EN60950 EMC Directive 89 336 EEC EN55022 class B EN61000 3 2 EN61000 3 3 EN55024 ...

Reviews: