background image

LX-80 Printer

P8492037-0
Y560991020

Summary of Contents for LX-80

Page 1: ...LX 80 Printer P8492037 0 Y560991020 ...

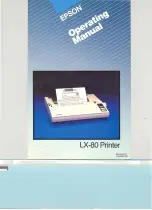
Page 2: ...EPSON LX SOPRINTER Operating Manual ...

Page 3: ...nce Problems This booklet is available from the U S Government Printing Office Washington DC 20402 Stock No 004 000 00345 4 WARNING The connection of a non shielded printer interface cable to this printer will invalidate the FCC certification of this device and may cause interference which exceeds the limits established by the FCC for this equipment If this equipment has more than one interface co...

Page 4: ...cType 15 Choosing Print Modes 15 Turning SelecType Mode On 17 Using SelecType 18 First SelecType Exercises 18 Testing Your Software for the Reset Code 20 Mode Combinations 21 SelecType Cautions and Tips 23 Summary of the steps in using SelecType 23 SelecType Setting Sequences 24 3 Elements of Dot Matrix Printing 25 The Print Head 25 Bidirectional Printing 26 Changing Pitches 26 NLQ Mode 28 4 Print...

Page 5: ...erscript and Subscript 51 Special Characters 51 International Characters 52 Graphics Character Set 54 7 Page Formatting 57 Top of Page and Page Length 57 Paper Out Sensor 58 Skip Over Perforation 59 Margins 59 Line Spacing 60 Justification with NLQ 62 8 User Defined Characters 63 Defining Your Own Characters 63 Designing Process 64 First definition program 65 Running the program 67 Second definiti...

Page 6: ...s Characters A 5 Draft International Characters A 7 C Command Summary C 1 Code Sequence and Function C 1 C l Near Letter Quality Mode C 2 C 2 Character Width Pitch C 3 C 3 Character Weight C 6 C 4 Print Enhancement C 8 C 5 Mode and Character Set Selection C 9 C 6 Special Printer Features C 13 C 7 Line Spacing C 15 C 8 Forms Control C 18 C 9 Page Format C 21 C l0 User Defined Characters C 25 C ll D...

Page 7: ...Other software F 6 Beeper Error Warnings F 6 Data Dump Mode F 6 Coding Solutions F 8 POKEing codes F 9 Special printer drivers F 10 Solutions for 7 Bit Systems F l1 Solutions for Specific Systems F 12 Applesoft BASIC solutions F 12 Apple II solutions F 12 TRS 80 solutions F 13 IBM PC solutions F 13 QX 10 multifont CP M solutions F 13 BBC BASIC solutions F 15 G Printer Maintenance G 1 Always G 1 No...

Page 8: ...The Parallel Interface Data Transfer Sequence Interface timing Signal relationships ...

Page 9: ...trike and double strike 45 6 3 Standard and enlarged characters 46 6 4 Pica and italic print 48 6 5 The underline mode 49 6 6 Special graphics characters 54 8 1 Grid for designing draft characters 64 8 2 Correct and incorrect designs 65 8 3 Design for sigma 66 8 4 Using the bottom eight rows 68 8 5 Grid for NLQ characters 70 8 6 Data numbers for one column 71 8 7 Arrow design and data numbers 72 9...

Page 10: ...nterface timing 1 3 2 1 The various typestyles possible with SelecType 2 2 SelecType modes 2 3 Mode combinations 2 4 SelecType sequence for setting typestyles 5 1 Summary of LX 80 pitches 6 1 International characters in NLQ mode 6 2 International characters in draft mode 6 3 International characters in draft italic 9 1 Graphics modes D l DIP switch functions D 2 International DIP switch settings I...

Page 11: ......

Page 12: ...X 80 offers Draft mode for quick printing of ordinary work Near Letter Quality mode for top quality printing A variety of print styles including Roman and italic six widths and two kinds of bold printing User definable characters so you can create and print your own symbols or characters High resolution graphics for charts diagrams and illustrations Eleven international character sets Easy paper l...

Page 13: ... in depth description of a particular func tion refer to the index As a preview of the type of output you can obtain from your LX 80 the following shows just a few of the functions NLQ standard NLQ emphasized ABCDEFGHIJKLMnopqrstuvwxyz ABCDEli GH I JKLMnopqrstuvwxyz F i c ll i E j t i J i I I 11 1 r1 i li t I I i El i te 8COc H jKi t ni pqr I I VW 2 L ond ns d ABCDEF6HLWl t1nDf rstllvfll YZ Italic...

Page 14: ...er This chapter will first show you how to print a test pattern and then lead you into doing more complicated work Familiarisation should not take more than about twenty minutes For the moment do not plug in or turn on your printer Printer Parts First see that you have all the parts you need In addition to this manual the printer box should contain the items shown in Figure 1 1 cIJ paperfeed knob ...

Page 15: ...al sockets that are controlled by wall switches Accidentally turning off a switch can wipe out valuable information in your computer s memory and disrupt your printing Avoid using a socket on the same circuit as any large electrical machines or appliances These can cause disruptive power fluctuations Keep your printer and computer away from base units for cord less telephones Protect the printer f...

Page 16: ...tion The LX 80 printer uses a continuous loop inked fabric ribbon which is enclosed in a cassette making ribbon installation and re placement a clean and easy job The parts of this cassette are label led in Figure 1 3 ...

Page 17: ... the assembly by hand to the centre of the printer so that the other parts of the printer will not get in your way Ensure that the paper bail rests against the black roller so it too will not be in your way Note Moving the print head by hand when the printer is turned on can harm the printer Always be sure that the printer is turned off before you move the print head ...

Page 18: ...assette in its holder by first sliding the pins at the back of the ribbon cassette under the small hooks on the holder See Figure 1 5 Then lower the front of the cassette so that the exposed section of ribbon can fit between the print head nose and the silver ribbon guide Push down until the cassette fits firmly in place ...

Page 19: ...ith a pen or a pencil Ribbon Replacement When your printing begins to fade and you need to replace the ribbon lift the front of the cassette to remove it and then follow the above instructions with a new cassette If you have been using your printer just before you change cassettes be aware that the print head becomes hot during use Be careful not to touch it Also remember never to move the print h...

Page 20: ...Paper Loading Now put a sheet of paper in your LX 80 so that you can test it Figure 1 7 shows the names of the parts that you need to know Paper feed knob ...

Page 21: ... paper is at least 3 4 inch above the ribbon guide Then push the paper bail against the paper If the paper becomes crooked pull the friction release lever forward straighten the paper and push the friction lever back If you have the optional tractor unit for continuous pin feed paper see Appendix E for instructions on its use Control Panel After the paper is loaded see that the power switch on the...

Page 22: ...es the printer between on line and off line status When the printer is on line the ON LINE light glows and the printer is ready to accept data The following two buttons work only when the printer is off line If the ON LINE light is on press the ON LINE button to put the printer off line before you use these buttons The FF Form Feed button advances the paper to the top of the next page The LF Line ...

Page 23: ... in Figure 1 9 123456789 ABCDEFGHIJKLMNOPORSTUVWXY 23456789 ABCDEFGHIJKLMNOPORSTUVWXVI 3456789 ABCDEFGHIJKLMNOPQRSTUVWXVZi 456789 A8CDEFGHIJKLMNOPQRS1UVWXVZ 56789 ABCDEFGHIJKLMNOPQRSTUVWXYZi L 6 7 H c I B CUE F h j I f i j i 1 L Li r3T i i I I X y Z i i 7 S9 1 HC Dr F 3H I f i L toflhICJI I SrU ii i V Z i 1 U H C 0 E F J 1 1 1 11 1 F Ci h r I Il 1 X Y i i13C D E F C II J f 1 t CIF C I r Ii j JXV Z...

Page 24: ...el interface is your computer manual or your dealer will tell you what you need Then once you have plugged your printer cable into your printer and computer you will probably never think about interfaces again If you do want the technical specifications however you can find them in Appendix 1 The first three steps in connecting your printer and computer are shown in Figure 1 10 Plug one end of you...

Page 25: ... print If you plan to use the LX 80 for printing program listings load a program and use the computer system s listing command LUST for Microsoft BASIC for ex ample Note The printing may not be correct One common problem is that all the lines of your text are printed on top of each other like this We au3e wfiatheappen n heD tnee I eswIDveMprinted Do not worry there is nothing wrong with the printe...

Page 26: ...ing on your needs and the capabili ties of your software The most common ways include placing print ing codes in your document using a programming language such as BASIC and giving print commands as part of the printing instruc tions for your software However these methods are not always convenient and software does not always allow you to make the changes you want to obtain the full facilities Th...

Page 27: ...upport all of them SelecType also lets you make print style choices when you print rather than when you edit If you would like a memo or letter to be in the NLQ mode a few taps on the panel buttons tell the printer what you want and you don t have to re edit the document to put in print instructions SelecType is also handy for selecting narrow pitches to put more characters onto a line If you find...

Page 28: ...LX 80 will beep to signal that it is in SelecType mode The READY light also goes out and the ON LINE light begins flashing Note that when the printer is in SelecType mode all the panel buttons have new functions also shown in Figure 2 1 Mode Set Exit SelecType In SelecType mode the ON LINE button selects printing functions the FF button sets the functions and the LF button turns SelecType off retu...

Page 29: ...ting emphasized mode as follows First turn the printer off and back on with the switch on the right side of the printer Then press the ON LINE and FF buttons at the same time The LX SObeeps to tell you that it is in SelecType mode the READY light goes out and the ON LINE light begins blinking Then press the ON LINE button twice to select empha sized The printer beeps each time that you press the O...

Page 30: ...lip I P 0 P i T II 1 L F H I I I r 1 1u t i c E t I E I i ili I F F I 1 I r r d d i k r c Co t h ii r i r t II If you are using another means of printing the text print it out that way now Now that you have a sample program to list or some text to print out follow these simple steps to print it in condensed mode 1 See that both the ON LINE and READY lights are on 2 Press the ON LINE and FF buttons...

Page 31: ... the printer you can still use SelecType Appendix F suggests ways of overcoming the problem The following test tells you whether your program resets the LX SO before printing First use the word processing or business program in the normal way to create a short file or document Print it in the usual way Save this first copy for comparison with the next versions you print Your test can be as simple ...

Page 32: ...em Mode Combinations In addition to the five nominal typestyles available with SelecType you can also use many more by combinations of the five An X in a box in Table 2 3 shows that the two modes can be combined Table 2 3 Mode combinations Mode NLQ Emphasized Double Condensed Elite strike NLQ X Emphasized X X Double strike X X X Condensed X X Elite X X To combine modes you simply select and set mo...

Page 33: ...mode which is set when you press the FF button At the end of the chapter is a summary chart which shows the possible ways of setting the combinations Practice different settings Another detailed example is outlined step by step below If you follow these steps you will combine NLQ with emphasized for a crisp bold effect 1 See that the ON LINE and READY lights are on Then press the ON LINE and FF bu...

Page 34: ...ally use SelecType on files that do not contain print codes but which you wish to print out totally in one mode Remember that if the LX 80 follows the SelecType instructions for only part of a document you may have print codes in the document that are conflicting with the SelecType modes Remember that any mode you turn on with SelecType stays in effect until the printer is turned off or receives a...

Page 35: ... and number of times indicated 1 0 1 1 1 Di t f i c E 1 1 1 1 Near Letter Quality 2 1 1 1 Emphasized 3 1 1 1 DClUb l f 1 l 1 i kE 4 1 1 1 Condensed 5 1 1 1 Elite 1 1 1 1 1 1 NLQ emphasized 2 1 1 1 1 1 Emphasized double strike 3 1 1 1 1 1 Double strike condensed 3 1 2 1 1 1 Double strike elite 3 1 1 1 1 1 1 1 Double strike condensed elite 4 1 1 1 1 1 Condensed elite Combinations other than those gi...

Page 36: ...red it strikes the inked ribbon and presses it against the paper to produce a dot This dot is about lI72nd of an inch in diameter The size varies slightly depend ing upon the age of the ribbon and the type of paper used As the head moves horizontally across the page these pins are fired time after time in different patterns to produce letters numbers sym bols or graphics For example to print a pic...

Page 37: ...n addition to pica in which there are 10 characters per inch the LX 80 can also print in other widths or pitches It does so by reducing the distance between pin firings In the elite mode it prints 12 characters per inch and in the condensed mode it prints slightly more than 17 characters per inch The pattern of the dots is not changed but the horizontal space between them is reduced Figure 3 2 sho...

Page 38: ... three pitches of the LX 80 The dot pattern of each character is carefully designed so that in pica mode no dot overlaps another in normal high speed printing of pica the pins cannot fire and retract and fire again quickly enough to print one dot overlapping another ...

Page 39: ...mples are in the LX 80 s draft mode but the LX 80 also offers the high quality NLQ Near Letter Quality mode that you have seen in previous chapters The NLQ letters are more fully formed than the draft letters be cause they are made up of many more dots Two differences be tween draft and NLQ printing enable the LX 80 to print such a large number of dots for each character In the NLQ mode the head m...

Page 40: ...ou print You can print ordinary work or preliminary drafts quickly in the draft mode and use the NLQ mode for final copies or special purposes SelecType makes it especially easy to change from draft to NLQ but you can also select and cancel the NLQ mode with a software command or with a special switch in the back of the printer Use of the software command is explained in Chapter 5 and the operatio...

Page 41: ......

Page 42: ...onding letters and numbers onto the paper The computer and the printer however do not use or understand letters of the alphabet They function by manipulating numbers Therefore when you press the A key for example the computer sends a number to its memory When the computer tells the printer to print that letter it sends the number to the printer which must then convert the number to a pattern of pi...

Page 43: ...rd was designed to use the de cimal numbers 0 through 127 computer and printer manufacturers soon extended this range to 0 through 255 in order to make room for more features On the LX 80 for example the codes from 160 through 254 are used for italic characters Because even this ex tended is not enough for all the features used on modem printers the range is further extended with a special code ca...

Page 44: ... here There are a number of ways of sending printer codes with commer cial software Using SelecType as described in Chapter 2 Instructing the program during an installation or setup procedure enabling you to use special codes that are typed in along with your text or data These will be referred to as software com mand codes Inserting LX 80 printer codes in the text enclosed by special instruction ...

Page 45: ...g You can see these on the screen as Ap and AQ They are not printed as such but when the Ap control P is reached in the text being sent to the printer the program sends the correct code to turn the italic mode on When the AQ control Q is reached the code to switch italic mode is sent It does not send the AP or AQ which are merely markers in the text telling the word processor program what to do Th...

Page 46: ...r the whole document It is only for special features that you will need to use embedded codes For example if you want to have headings in wide bold printing called enlarged emphasized you would probably have to use embedded codes For the program we mentioned above you would type Control V then the code for enlarged emphasized If the enlarged is to be switched off after one line ASCII 14 is the cod...

Page 47: ...ograms Just remember that with this method the printer control code stays in effect for the whole document you print This method works for a wide range of commands and is good for setting margins for example but does not work for italicizing a word It has the same drawback as Selec Type in this context and is only of use for whole documents Now you have some background on how printers work and how...

Page 48: ...un these programs Running the programs reading the explanations and looking at the printed examples show you how the LX SO responds to the messages the computer sends it by printing letters numbers symbols and graphics in various print modes Even if you never use BASIC again you will know the capabilities of the printer capabilities that can often solve your printing prob lems For example if you n...

Page 49: ...m to route information to the printer and PR O at the end to restore the flow of information to the screen BBC BASIC starts sending information to the printer with the VDU2 command and stops with VDU3 In both cases all output to the screen made by PRINT statements also goes to the printer If you have such a system use the command to turn the printer on and then use PRINT instead of LPRINT in the p...

Page 50: ...revious program This line uses the command ESC M to turn on elite mode Your printout should look like this Now add a line to the program to cancel elite with ESC P and turn on condensed with ASCII 15 30 LPIHNT CHH 27 P CHR 15 Cancelling Codes As you saw in the third version of the print pitch program you must cancel a code when you do not want it any more With very few exceptions the LX 80 modes s...

Page 51: ...ould be concerned with are it returns the printing to single strike pica unless you have set the DIP switch on the back of the printer to make the default NLQ or condensed mode thus cancell ing any other pitches or enhancements you may have turned on and the current position of the print head becomes the top of page setting It is also possible to use SelecType to return to single strike pica witho...

Page 52: ...turn off elite giving you the printout below If your printout is different you may need a WIDTH statement This is described further in Appendix F The format for your system may be different Consult your BASIC manual It willprobably take the form Near Letter Quality Mode The examples so far in this chapter are in the draft mode and you have already learned how to turn on the NLQ mode with Selec Typ...

Page 53: ... 00 ESe M Ese P Condensed print 17 16 15 18 Condensed elite print 20 00 ESe M 15 Ese P 18 Remember that you do not have to use BASIC to change modes you can use any method that sends the printer the proper codes You may wish to have NLQ as the default mode when you switch on This can be changed by altering a DIP switch on the back of the LX 80 See Appendix D for details of how to do this ...

Page 54: ...and condensed covered in Chapter 5 the LX 80 offers many other typestyles including two for bold printing emphasized and double strike Emphasized mode In the emphasized mode the LX 80 prints each dot twice with the second dot slightly to the right of the first In order to do this the print head must slow down so that it has time to fire retract and fire the pins quickly enough to produce the overl...

Page 55: ...ou can see that it asks you what codes you want to test and then prints a sample of printing after the code has been given so that you can see what the codes do Ensure that you have typed the blank spaces in lines 70 and 80 If you are using a BASIC which does not have the LPRINT command go to Appendix F to check how to modify the program 20 PRINT Which ESCape code do you 30 INPUT want to test A 40...

Page 56: ...nter prints each line then moves the paper up slightly and prints the line again Each dot is printed twice with the second one slightly below the first as you can see in Figure 6 2 Unlike emphasized double strike combines with any draft pitch but not with NLQ because it does not overlap dots horizontally Since each line in this mode is printed twice the speed of printing is slowed down The code fo...

Page 57: ...he mode and the letter and the numeral a together turn it off Thus ESC WI turns on enlarged and ESC WOturns it off Those of you who are programmers may be interested in another form of enlarged In this alternate form called one line enlarged the printing is the same as that in Figure 6 3 but it is turned on by ASCII 14 and is turned off by a line feed ASCII 20 or ESC WOo Mode Combinations If you h...

Page 58: ...mphasized enlarged to the two questions Your printout should be in the typestyle below showing that the two modes combine with no trouble You can experiment with other combinations if you wish or you can wait for the section later in this chapter that explains a special ESC code Master Select which allows you to combine as many as seven features with one ESC code When you have finished trying comb...

Page 59: ...f you who use this code in an applications program should remember that any number used in discussions of ESC codes is an alphanumeric character not a numerical value Underline Mode The LX 30 also has a mode that will underline characters and spaces You turn it on with ESC 1 and off with ESC 0 Note that the underline code is like the enlarged code in that it uses a character in this case the hyphe...

Page 60: ...spaces between characters If you prefer a continuous underline you may be able to use the underline mode through one of the methods we discussed in Chapter 4 Master Select The LX 80 has a special ESC code called Master Select that allows you to choose any possible combination of eight different modes pica elite condensed emphasized double strike enlarged italic and underline The format of the Mast...

Page 61: ... 50 LPRINT CHR 27 In this program you can use any number you have calculated with the formula above but remember that emphasized cannot combine with condensed or elite If you try to combine emphasized with either of the two narrow pitches you will not harm the printer it will simply use a priority list in its memory to determine which mode to use This priority list causes a combination of emphasiz...

Page 62: ...CII code 65 Superscript and Subscript Your LX SOcan also print superscripts and subscripts which you can use for mathematical formulae footnotes and other items that require numbers or letters above or below the usual print line ESC SOturns on superscript and ESC Sl turns on subscript ESC T turns off either one You can enter either ESC SOor ESC Sl in the master program but that will print the whol...

Page 63: ...Denmark II 5 Sweden You select the character set in one of two ways with an ESC code or with a switch in the back of the printer The ESC code in BASIC has the following format in which n stands for the appropriate number from the list above In other words the BASIC command to select the French character set is The other method of selecting an international character set is with the small switches ...

Page 64: ...3 e I e GERMANY A i i i i a 0 ij 13 UK DENMARK I IE III A iI a SWEDEN Q A i i A ij a 0 a i i ITALY 0 e a 0 e SPAIN f i n JAPAN NORWAY Q IE 0 A U e if a ij DENMARK II IE 0 A u e iP a II 35 36 64 91 92 93 94 96 123 124 125 126 USA L J l J FRANCE 0 e u e GERMANY A 0 l l a ii f3 UK f l DENMARK I If A z a SWEDEN 1 If A 0 A ij a 6 a ii ITALY 0 u 0 e i SPAIN II i l n JAPAN NORWAY 1 If If A D e E f a ii D...

Page 65: ...look down the column to find which character corresponds to that character in your country If your computer is using a standard ASCII set and you have set the international characters using the ESC R command when you print the character you have found on your keyboard it will be printed as the corresponding character for the country you have chosen If the result is wrong compare the table in Appen...

Page 66: ...LX 80 prints the codes from 128 through 159 as graphics characters You can change pitch and weight with the graphics characters just as you can with the other characters in the ROM of the LX 80 The characters in Figure 6 6 are printed in enlarged elite The printout below shows the characters in pica l T I f l I IHI 1 Iii Ir llliii jjl 1 mw llm l 1 1 1i r i 1 1 _JL r I I I r L__ 3 III I iIlfS II 4 ...

Page 67: ......

Page 68: ... of one of the sheets of paper the middle will be on the perforation and the end will be in the middle of the next sheet When you switch the printer on it assumes that the paper is in the correct position at the top of the page Consequently if you move the paper using the paper feed knob the printer or indeed your applications software does not know this has happened and gets out of step with the ...

Page 69: ... page length as a number of inches The full syntax for using these codes is given in Appendix C Paper Out Sensor Under the platen the black roller of the LX 80 printer is a small switch that senses whether or not paper is in the printer When the end of the paper passes this switch it sends a signal that sounds the beeper and stops the printing This is not only to save wear on the print head ribbon...

Page 70: ...nce a standard page is 66 lines this will give you one inch of blank space at the bottom of each page If you prefer to have half of the blank space at the top of the page and half at the bottom simply set the top of page approximately three lines 1 2 inch below the per foration as described above Margins The LX SOallows you to set the left and right margins with simple ESC sequences The left margi...

Page 71: ...ommand see Appendix B Line Spacing Ordinarily you don t have to concern yourself with how the printer moves the paper so that it doesn t print lines of text on top of one another The LX 80 takes care of this without any special instruc tions However if you want to understand how line spacing works or you need to change the line spacing for a special application such as graphics read this brief exp...

Page 72: ...e between lines The LX 80 has several commands to do this ESC a decreases the line spacing to 9 dot 9 n inch ESC 1 decreases it to 7 dot and ESC 2 returns it to 12 dot In addition there are commands to specify the line spacing in nnds of an inch and 216ths of an inch If you need to make such fine adjustments in the line spacing see Appendix B for the proper commands In the chapter on dot graphics ...

Page 73: ... Fill justification puts extra spaces between words where necessary so that both the left and right margins are even This is the way most magazines newspapers and books including this one are printed With this command you may need a WIDTH statement Since different systems use different WIDTH statements see the compu ter or programming language manual for the proper format In using justification mo...

Page 74: ...tout below displays a few such characters to give you an idea of what can be done These characters are truly user defined you create what you need or want It may seem that designing a character and telling the LX 80 how to print it is complicated In reality it is a routine procedure once you know what to do The task has been reduced to a simple three step process planning your character running on...

Page 75: ...lap another and either the top or the bottom row must be empty Look at the enlargements of the characters in Chapter 3 and Appendix A to see how the standard LX 80 characters are designed Designing Process Suppose you need the Greek letter sigma L in your work Although the LX 80 has a number of special symbols the sigma is not one of them You can however create and print such a symbol with ease Fi...

Page 76: ...r characters draw the dots as large as you see them in the example on the left in Figure 8 2 If you draw them smaller you may have overlapping dots without realizing it r 4 T It does not matter if you do accidentally make some of the dots overlapping The program will still work but only one of the dots will be printed First definition program Once you have drawn your dots on the grid type in the f...

Page 77: ...T CHR 27 300 LPRINT CHR 27 CHR 0 YOUR DATA NUMBERS 310 FOR K 1 TO 11 320 LPRINT F K F K 330 NEXT K CHR 0 CHR 0 CHR 0 CHR l CHR 0 CHR 0 To see how the program works look at the steps used to create the Greek letter sigma First is the grid used to design the character If you are only interested in running the program to obtain the numbers used to design your own characters you can move on to the nex...

Page 78: ...head If you want the bottom 8 pins to be used make this 0 instead of 128 Lines 240 260send the data corresponding to the way the pins are to be fired which has been stored in the array Lines 270 290 print the character out in normal pica and also in enlarged emphasized pica The remainder of the program shows you the values of the numbers in the arrays Running the program For each of the nine colum...

Page 79: ...ves you eleven numbers which you will use in the next program You should get the printout you see below YOUR CHARACTER IN PICA IS L L L L AND IN ENLARGED EMPHASIZED PICA YOUR DATA NUMBERS ARE F 1 130 F 2 68 F 3 170 F 4 16 F 5 130 F 6 I F 7 130 F 8 I F 9 130 F 10 0 F 11 0 When you get to this point with a character of your own you see how it looks and whether or not you like it If you want to make ...

Page 80: ...0 260 DATA 112 8 0 138 116 138 0 8 112 0 0 270 DATA 58 68 2 128 0 128 2 68 58 0 0 280 DATA XX This program works in a similar way to the previous program but instead of inputting the data from the keyboard the data is embed ded in the program as data statements You can use the previous program to design the characters and when you have it correct make a permanent program with this one The program ...

Page 81: ...rogram Then use the printout as your guide to which keys to press for your new characters Defining NLQ Characters Since NLQ characters use many more dots than draft characters defining NLQ characters is more complex than designing draft ones If you use the grid and the programs in this section however you should find it easy to do NLQ grid Because the NLQ characters can use as many as 18 dots vert...

Page 82: ...each vertical column must be divided into three sections for the calculation of data numbers The process is not difficult once you practice using it Figure 8 6 shows a single column to make it clear how the data numbers are calculated In designing NLQ characters you should use circles instead of dots to make it easier to keep track of overlap ping dots 128 128 64 64 First 32 32 data 16 number 8 22...

Page 83: ...wo dot positions and add together the values used there If no dots are used in a group the data number for that group is zero All zeros must be entered in the DATA statements for the NLQ definition programs Now as an example the previous program will be modified to pro duce an arrow in NLQ mode Figure 8 7 shows the design drawn on a grid and the data numbers printed at the top or bottom of each co...

Page 84: ...NT CHR 27 CHR 0 CHR 0 120 LPRINT CHR 27 CHR 1 CHR 0 130 READ A 140 IF A XX THEN END 150 LPRINT CHR 27 CHR 0 A A 155 LPRINT CHR 0 CHR 12 CHR 0 160 FOR K 1 TO 36 170 READ F LPRINT CHR F 180 NEXT K 190 REM DISPLAY CHARACTERS 200 LPRINT CHR 27 CHR 0 CHR 0 210 LPRINT A becomes 220 LPRINT CHR 27 CHR l CHR 0 230 LPRINT A 240 GOTO 130 250 DATA 4 O O 8 O O 16 O O 32 O O 260 DATA 64 0 0 255 255 192 64 0 0 3...

Page 85: ......

Page 86: ...e Instead of using the standard letters numerals and symbols stored in the LX 80 s ROM Read Only Memory the graphics mode prints columns of dots on a line and the picture is built up from the dots For large pictures more than one line will be necessary L lIL II liP L __ iIt 0 _ 0 t 11 4110 7 0 0 1 tMf J v 0 4 1 l I i r lll f OO 111 1 o 1 7 11111 4J 111 11 1 I 1lJlln L U J EPSOl1 r 1 f 4 _ ...

Page 87: ...printed in about 10 minutes You should check before you buy the software that it does allow a screen dump to an Epson printer Because the graphics commands on the LX SOare compatible with previous printers it does not specifically have to mention the LX SOeither in the docu mentation or on the screen If in doubt use an MX SO RX SOor FX SOoption in that order If on the other hand you wish to do you...

Page 88: ... head corres ponds to one of the data lines There is also a graphics mode which allows all nine pins of the head to be used When you want to print figures more than eight dots high it is necessary to print on a new line advancing the paper and printing another line just as you would with text To keep the print head from leaving gaps between the graphics lines as it does between the text lines the ...

Page 89: ...ics data to be printed on a line You can calculate the values of nl and n2 from the number of columns n as follows nl remainder on dividing n by 256 n2 the integer i e the whole number part of the division of n by 256 In Microsoft BASIC these values would be obtained from the ex pressions nl n MOD 256 n2 INT n 256 Some versions of BASIC do not have the MOD function In this case the expressions use...

Page 90: ...numbers it cannot accept decimal numbers larger than 255 The number of columns has to be split into a 16 bit number with the low byte sent after the command and then the high byte Pin Numbering Once you have put the printer into graphics mode and reserved the number of columns you want your next step is to tell the print head which pins to fire in each column There are 256 possible combina tions o...

Page 91: ... 16 16 160 160 80 8 8 80 40 40 4 4 2 2 2 2 20 1 1 10 1 0 147 0 14 0 5 not used not used not used Figure 9 2 Calculating numbers for pin patterns With this numbering system any combination of the eight pins adds up to a unique decimal number between 0 and 255 Although you use a decimal number to determine which pins are to be fired since you send the ASCII code corresponding to the number the print...

Page 92: ...sult is Although it is not as interesting or as complex as the examples at the beginning of this chapter it does allow you to see exactly how the mode works Multiple Line Exercise Having found out how to enter and run a simple graphics program the next exercise shows how the LX 80 combines several lines of graphics for a figure taller than eight dots Start with a line for 100 columns of single den...

Page 93: ...ogram down into steps Line 10 changes to a 7 dot line spacing which is the height of the dot patterns used in the program thereby removing the space between the print lines Line 20 begins a loop to produce multiple print lines Lines 30 and 40 are the same as above but an LPRINT is added to line 50 to produce a line feed after line 40 Lines 60 and 70 are like lines 30 and 40 except that line 70 use...

Page 94: ...tive dots in a row 3 Quadruple ESC Z 240 dot positions inch 1920 dot positions 8 line Does not print consecutive dots in a row 4 Epson none 80 dots inch QX 10 640 dots 8 line Matches the screen density of the QX 1 0 which makes it easy to do screen dumps 5 One to one none 72 dots inch plotter 576 dots 8 line Produces the same density hori zontally as vertically which makes circles look round 6 90 ...

Page 95: ...ally insert the control codes for a carriage return and a line feed after every 80 characters This inser tion is usually no problem with text but it can spoil your graphics In the graphics mode they may insert the control codes as extra charac ters which could be in the middle of a line You can usually prevent these unwanted control codes with a WIDTH statement such as the one below The format for...

Page 96: ...g in different densities In this figure you can see the main rules for graphics design in the three densities In single density no dots can be placed on vertical lines In high speed double density dots can be placed on vertical lines but no dots can overlap In low speed double density dots can be placed on vertical lines and they can overlap Now look at the figure designed for high speed double de...

Page 97: ...23 4 1 0 0 4100000000000000000082000 The numbers for the second and third lines were calculated in the same manner Once the numbers for the pin patterns are calculated they go in DATA statements separated by commas First we ll give you the whole program and its printout then we ll explain two techniques we have not used before 90 WIDTH LPRINT 255 100 LPRINT CHR 27 1 590 FOR K l TO 3 600 LPRINT CHR...

Page 98: ...raightforward graphics program that uses 7 dot line spacing and reads numbers from DATA statements and sends them to the printer If you want to see the figure in other densities change the yO in line 600 to L or Z Graphics Programming Tips Now that we ve shown you how to design your own graphics we ll review and emphasize a few elements of graphics programming As usual Microsoft BASIC has been use...

Page 99: ...raphics and the two CHR numbers specify 50 columns of dots Once that command is given the next 50 codes sent to the printer are inter preted as numbers corresponding to a pin pattern and printed on the paper Since there is no semi colon at the end of the line the num bers 13 and lO the codes for carriage return and line feed are sent to the printer after CHR O Because the graphics command has been...

Page 100: ...is case it leaves the graphics mode and resumes interpreting numbers as printable characters or print commands Since the incorrect program has sent many extra numbers mainly 10sand 13s the 50 columns reserved are filled before the loop in line 40 has been executed 50 times Therefore during the last passes of the loop the LX SOinterprets CHR 74 as the ASCII code for and prints that character each o...

Page 101: ... 0 20 A CHR 85 CHR 42 30 B CHR 42 CHR 85 40 LPRINT CHR 27 1 50 FOR R 1TO 3 60 LPRINT G 70 FOR X l TO 50 LPRINT A NEXT X 80 LPRINT 90 I PRINT G 100 FOR X 1 TO 50 LPRINT B NEXT X 110 LPRINT NEXT R 120 LPRINT CHR 27 Notice that the first line stores the whole graphics command in a single string variable In order to do this you must put plus signs between the elements of the command Once you have done...

Page 102: ...end a 12 to fire pins 3 and 4 the computer system will intercept that 12 and send several lOs instead You can see how this would ruin your graphics You would get pins 2 and 4 whose sum is 10 several times instead of pins 3 and 4 only once If your computer system removes or changes any codes sent to it you can often design around these problems by using other numbers with similar patterns and you c...

Page 103: ......

Page 104: ...computer manual or a software manual referring to them you can see to which code they corres pond Following that is a table which shows which control codes actually function in the LX SO Since many software packages re quire that you input control characters by pressing the CONTROL or CTRL key on your keyboard together with another key a table is also included to show you which keys to press Final...

Page 105: ... 18 ESC 91 58 155 98 t 219 D8 28 lC none 92 5C 156 9C I 220 DC 29 10 none 93 5D 157 9D 221 DD 30 lE none 94 5E 158 9E 222 DE 31 IF none 95 5F 159 9F 223 DF 32 20 96 60 160 AO 224 EO 33 21 97 61 a 161 Al 225 El a 34 22 98 62 b 162 A2 226 E2 b 35 23 II 99 63 c 163 A3 I 227 E3 c 36 24 f 100 64 d 164 A4 1 228 E4 d 37 25 101 65 e 165 A5 l 229 E5 e 38 26 102 66 f 166 A6 230 E6 l 39 27 103 67 g 167 A7 23...

Page 106: ...ee Hex Symbol Function 0 128 80 NUL Terminates horizontal and vertic al tab setting ESC sequence 7 135 87 BEL Sounds beeper 8 136 88 BS Backspace 9 137 89 HT Horizontal tab 10 138 8A LF Line feed 11 139 8B VT Vertical tab 12 140 8C FF Form feed 13 141 8D CR Carriage return 14 142 8E SO Shift out turns expanded mode ON 15 143 8F SI Shift in turns condensed mode ON 18 146 92 DC2 Device control 2 tur...

Page 107: ...u press the control key and A at the same time to send the ASCII code 1 Some programs that use this system cannot use Control and many programs use the control keys for their own distinctly different purpose Decimal Hexadecimal Control key 0 00 1 01 A 2 02 B 3 03 C 4 04 D 5 05 E 6 06 F 7 07 G 8 08 H 9 09 I 10 OA J 11 OB K 12 OC L 13 OD M 14 OE N 15 OF 0 16 10 P 17 11 Q 18 12 R 19 13 S 20 14 T 21 1...

Page 108: ...raphics Characters Dec Hex Character Dec Hex Character 129 81 I 137 89 I 130 82 I 138 8A I 131 83 I II 139 88 f II 132 84 I 140 8e II I 133 85 I141 80 I 134 86 I 142 8E I I 135 87 I 143 8F I 136 88 I I 144 90 I ...

Page 109: ...Dec Hex Character Dec Hex Character 145 91 I 154 98 I 146 92 I 155 9C I 147 93 156 9C I 148 94 I157 9D I 149 95 I 158 9E I 150 96 ii I 159 9F I 151 97 I 152 98 I 153 9A I I J ...

Page 110: ...Roman characters e 0 i 0 IIIIIIII n Q f A 3 C IIIIIIII iliilill b u b U IIIIIIII Italic characters e j i t IIIIIIII i N q i IIIIIIII s e E j 1 III1IIII 6 Li3 u C 1 IIIIIIII ...

Page 111: ......

Page 112: ... A ESC B Sounds buzzer Backspace Executes horizontal TAB Line feed Executes vertical TAB Form feed Carriage return Enlarged print one line Condensed pitch Cancels condensed mode Cancels enlarged print Cancels data in the print buffer Same as SO Same as SI Cut sheet feeder mode Selects print mode Selects ROM RAM character set Defines downloaded character Bit image elect Underline Selects vertical t...

Page 113: ...1 ESC Q Sets right margin ESe 82 Ese R Selects character set ESe 83 Ese S Super subscript ESe 84 Ese T Cancels super subscript ESC 85 ESe U Unidirectional printing ESe 87 Ese w Enlarged print ESe 89 ESC Y Double speed double density bit image ESC 90 ESe z Quadruple density bit image ESe 94 ESC A 9 pin bit image Ese 97 ESC a Sets format justification ESC 98 ESC b Presets vertical format ESC 101 ESe...

Page 114: ...n the ASCII table A term such as n c or m denotes a variable ASCII code The values of the variable are given in the explanation The decimal value of that code The hexadecimal value mainly for machine code use An abbreviated description of the effect of issuing the command The key that must be pressed with CTRL to obtain the code Ctrl E is not the same code as Ctrl e If Ctrl is not specified use th...

Page 115: ...t ASCII code Decimal Hexadecimal ESC x 27 120 18 78 Explanation Selects draft mode if n 0 or Near Letter Quality NLQ mode if n 1 Format ASCII code Decimal Hexadecimal ESC 27 18 Explanation See Chapter 7 for the use and control of justification ...

Page 116: ... only effective in draft mode It produces charac ters which are half the width of the normal draft characters Format ASCII code Decimal Hexadecimal ESC 27 18 SI 15 OF Explanation Duplicates the SI command Format ASCII code Decimal Hexadecimal Control OC2 18 12 Ctrl R Explanation This command cancels the condensed printing set by SI and ESC SI ...

Page 117: ...is cancelled by a carriage return unless deliberately cancelled sooner by DC4 Format ASCII code Decimal Hexadecimal ESC SO 27 14 18 OE Explanation Duplicates the SO command Format ASCII code Decimal Hexadecimal Control OC4 20 14 Ctrl T Explanation Cancels the one line enlarged printing set by SO or ESC SO but not the enlarged printing set by ESe W or ESC ...

Page 118: ...tched off when n 0 Format ASCII code Decimal Hexadecimal ESC 27 18 Explanation Selects elite pitch 12 characters per inch Format ASCII code Decimal Hexadecimal ESC 27 18 Explanation Selects pica pitch 10 characters per inch This is the default character width and so this command is normally used to cancel the elite pitch ...

Page 119: ...along the line It may be used in conjunction with double strike mode Format ASCII code Decimal Hexadecimal ESC 27 18 Explanation Turns off the emphasized mode set by ESC E Format ASCII code Decimal Hexadecimal ESC 27 18 Explanation Causes the character to be printed twice thus making the charac ter bolder It may be used in conjunction with emphasized print It causes the printer speed to reduce bec...

Page 120: ...Format ASCII code Decimal Hexadecimal Ese 27 18 Explanation Turns off double strike mode set by ESC G ...

Page 121: ...uperscript when n 0 or subscript when n 1 Format ASCII code Decimal Hexadecimal ESC 27 18 Explanation Turns off either superscript or subscript Format ASCII code Decimal Hexadecimal ESC 27 18 45 20 Explanation When the value of n 1 underlining is turned on when n 0 underlining is turned off ...

Page 122: ...line mode until the select printer code DCl is received Format ASCII code Decimal Hexadecimal Control OC1 17 11 Ctrl Q Explanation Returns the printer to the on line mode if it has been switched off by the printer deselect code DC3 It will not switch the printer on line if it has been switched off using the ON LINE switch on the control panel ...

Page 123: ...s the combination to be used Full details of the values and examples are given in Chapter 6 and Appendix B Format ASCII code Decimal Hexadecimal ESC 27 18 Explanation This command causes characters to be printed using the italic character set The italic characters can also be obtained if a code with the eighth bit set is sent to the printer Format ASCII code Decimal Hexadecimal ESC 27 18 Explanati...

Page 124: ...code Decimal Hexadecimal ESC R 27 82 18 52 Explanation Some character codes produce different characters for different countries The characters are outlined in Chapter 6 The value of n determines which character set is printed The countries corres ponding to the values of n are n Country n Country 0 USA 6 Italy 1 France 7 Spain 2 Germany 8 Japan 3 United Kingdom 9 Norway 4 Denmark I 10 Denmark II ...

Page 125: ...Format ASCII code Decimal Hexadecimal Ese m 27 109 18 60 Explanation This code allows ASCII codes 128 to 159 to print special graphics characters See Chapter 6 for details ...

Page 126: ...s are printed together without an actual backspace movement taking place The character is ignored when the carriage is at the left of the printer or if the printer is in bit image mode Format ASCII code Decimal Hexadecimal Control ESC 27 18 Ctrl EM 25 19 Ctrl Y Explanation This command is used with the optional cut sheet feeder When n 0 the feeder is turned off when n 4 it is turned on Using DIP S...

Page 127: ... image printing is always unidirectional Format ASCII code Decimal Hexadecimal ESC 27 18 Explanation Sets unidirectional printing for more accurate positioning during text printing If n 1 unidirectional mode is enabled while n 0 disables the feature Bit image printing is always unidirectional Format ASCII code Decimal Hexadecimal ESC 5 27 115 18 73 Explanation Selects half speed printing if n n O ...

Page 128: ...current line spacing Format ASCII code Decimal Hexadecimal ESC 27 18 Explanation Sets the line spacing to 1 8of an inch 22 dots for subsequent line feed commands The 0 is the digit zero and not the character with ASCII code O Format ASCII code Decimal Hexadecimal ESC 27 18 Explanation Sets the line spacing to 7 72 of an inch 18 dots for subsequent line feed commands The 1 is the digit one and not ...

Page 129: ...n Sets the line spacing to 01216of an inch n dots for subsequent LF commands The 3 is the digit three and not the character with ASCII code 3 The vertical spacing of the dots on the LX 80 is 1 216of an inch The value of n should be in the range 0 to 255 Format ASCII code Decimal Hexadecimal ESC 27 18 J 74 4A Explanation Advances the paper by one line at a spacing of n 216 of an inch n dots The val...

Page 130: ...exadecimal Ese 27 13 Explanation Sets the line spacing to 0 60 of an inch nx3 dots for subsequent line feed commands The vertical spacing of the dots on the LX 80 is 1 180 of an inch The value of n should be in the range 0 to 85 ...

Page 131: ...according to the current page length Format ASCII code Decimal Hexadecimal ESC 27 18 Explanation Turns off the paper sensor so that you can print right to the base of a single sheet of paper This command temporarily duplicates the function of DIP switch SWl 2 Format ASCII code Decimal Hexadecimal ESC 27 18 Explanation Turns on paper out sensor so that the printer buzzer sounds when the printer run...

Page 132: ...e Decimal Hexadecimal Control ESC 27 18 Ctrl NUL o 00 Ctrl Explanation Sets the page length to n inches where n has a value of 1 to 22 Format ASCII code Decimal Hexadecimal ESC 27 18 Explanation Sets a margin at the bottom of the page Apart from the ability to set the margin this command is useful to prevent printing over the perforations on fanfold paper ...

Page 133: ...cimal Ese 27 18 Explanation The bottom margin is set to zero lines This means printing will continue to print over the perforation when printing a listing for example when no counting of the lines is being carried out by the computer ...

Page 134: ...spacing after giving this command does not affect the absolute position of the tab setting Ese b c n1 n2 0 Set Vertical Tabs in Channels Format ASCII code ESC b c n1 n2 NUL Decimal 27 66 c n1 n2 0 Hexadecimal 18 42 c n1 n2 00 Explanation This command allows setting of up to 16 vertical tabs The tabs can be set in 8 channels the range of cis 0 to 8 The channel set by ESC b is channel O These are en...

Page 135: ... Control VT 11 08 Ctrl K Explanation Advances the paper to the next tab setting in the channel selected by ESC c If no channel has been set channnel 0 is used If no vertical tabs have been set the paper advances one line Format ASCII code Decimal Hexadecimal Control HT 9 9 Ctrll Explanation When this command is given the print head is advanced to the next horizontal tab setting ...

Page 136: ... The tab settings can be cleared by executing the command with n1 set to zero The set tings on power up or after an ESC command are every eight characters Format ASCII code Decimal Hexadecimal ESC e 27 101 18 65 Explanation This command sets the horizontal or vertical tab increments When n is 0 the horizontal tabs are set at intervals of s spaces Maximum values are 21 in pica 25 in elite and 36 in...

Page 137: ... lost and the right margin is set to n columns of the current character width When the right margin is reached a carriage return and line feed is added to the characters being printed Format ASCII code Decimal Hexadecimal ESC 27 18 I 108 6C Explanation The character I is a lower case L as in hello This command should be placed at the beginning of a line The data in the print buffer is lost and the...

Page 138: ...mat ASCII code Decimal Hexadecimal ESC NUL datal data2 data n 27 38 0 datal data2 data n 18 26 00 datal data2 data n Explanation This command allows characters to be re defined in the currently selected mode The mode to be used must be selected before down loading the character s Chapter 8 gives an outline of the method used and the significance of the codes Format ASCII code Decimal Hexadecimal E...

Page 139: ... dots required n1 and n2 are calculated thus n1 d MOD 256 and n2 INT d 256 and are followed by d data bytes Format ASCII code ESC L n1 n2 data1 data2 Decimal 27 76 n1 n2 data1 data2 Hexadecimal 18 4C n1 n2 data1 data2 data d data d data d Explanation Turns on Low Speed Double Density Graphics Mode Printing 960 dots per 8 inch line Where d is the total number of dots required n1 and n2 are calculat...

Page 140: ... Where d is the total number of dots required n1 and n2 are calculated thus n1 d MOD 256 and n2 INT d 256 and are followed by d data bytes Format ASCII code ESC Z n1 n2 data1 data2 Decimal 27 90 n1 n2 data1 data2 Hexadecimal 1B 5A n1 n2 data1 data2 data d data d data d Explanation Turns on Quadruple Density Graphics Mode Printing 1920 dots per 8 inch line Where d is the total number of dots requir...

Page 141: ...s the total number of dots required nl and n2 are calculated thus nl d MOD 256 and n2 INT d 256 and are followed by d data bytes Format ASCII code Decimal Hexadecimal ESC 27 18 s n 63 s n 3F s n Explanation Change one graphics mode to another The mode s is the ASCII code for the character K L Y or Z which is to reassigned to a mode 0 6 as in the ESC command Details of the modes are given on page 8...

Page 142: ... data d data d Explanation Turns on 9 Pin Graphics Mode Where m defines density of print 0 for single and 1 for double and d is the total number of dots required nl and n2 are calculated thus nl d MOD 256 and n2 INT d 256 and are followed by two times d data bytes The printer expects two data items for each column of print ...

Page 143: ...er SWl 3 is ON or the AUTO FEED XT line on the parallel printer interface is held LOW Format ASCII code Decimal Hexadecimal Control BEL 7 7 Ctrl G Explanation Sounds the LX 80 buzzer for a quarter of a second Format ASCII code Decimal Hexadecimal DEL 127 7F Explanation Deletes the previous character in the buffer unless that character has already been printed It cannot be guaranteed to function if...

Page 144: ...Format ASCII code Decimal Hexadecimal Control CAN 24 18 Ctrl X Explanation Deletes all data on the same line ahead of this character ...

Page 145: ......

Page 146: ...witches on the back of the LX 80 printer They control a number of important printer func tions such as page length the international character set and NLQ or draft mode printing For most uses they can be left as they were set at the factory but you may need to change some settings to suit your computer system or the type of work you are doing with the LX 80 The design of the LX 80 gives you easy a...

Page 147: ...ternational character set 1 5 Inactive Paper out sensor Active 1 4 12 inch Form length 11 inch 1 3 Active Cut sheet feeder Inactive 1 2 NLQ NLQ draft Draft 1 1 Condensed Print width Pica No UP ON Functions DOWN OFF 2 4 Silent Beeper Sounds 2 3 CR LF Automatic line feed CRonly 2 2 Active Printer select Inactive 2 1 0 Slashed zero 0 Switches 1 6 1 7 and 1 8 defermine the active international charac ...

Page 148: ... ESC code seCluence Switch 1 1 selects condensed or pica printing Up ON is con densed down OFF is pica Regardless of the setting you can still select condensed and all of the other modes with SelecType and with ESC codes Switch 2 4 enables the beeper to sound when it is down OFF when it is up ON the beeper cannot sound Switch 2 3 controls line feeds When it is up ON the LX 80 per forms an automati...

Page 149: ...ceives the proper software code The code for selection is ASCII code 17 DC1 and for deselection is ASCII code 19 DC3 Unless you understand this function or your computer or software manual tells you how to use it leave the switch down OFF Switch 2 1 controls the printing of zeros When it is up ON the zeros are slashed 0 when it is down OFF they are not 0 ...

Page 150: ...X 80 where the paper can flow freely in and out of the printer Use a printer stand or any other arrangement that fits your working area Make sure that the paper coming out of the printer does not inter fere with the paper going in and that the paper going in does not catch on the printer cable Because of the cable it is usually best for the paper that feeds into the printer to be stacked somewhat ...

Page 151: ...Tractor Unit Installation To install the removable tractor unit first pull the friction lever toward the front of the printer Then hold the tractor with the gears to the right as shown in Figure E 3 ...

Page 152: ...the paper separator and pull out the paper guide as shown in Figure EA Fit the notches in the bottom corners of the separator over the pins at the front of the paper slot The separator keeps the paper that is coming out of the printer from being pulled back in Pull out the paper guide at the back of the printer This guide helps keep the incoming paper from catching on the printer cable NOTE THIS G...

Page 153: ... Then move the print head to the centre of the printer and pull the paper bail away from the platen the black roller just as you did for single sheet loading Look back at Figure 1 7 if you need to check on the names of any of these parts Now using Figure E 6 as your guide pull the locking levers forward so that you can move the pin feed holders at the left and right Put the left holder approximate...

Page 154: ...Next open the pin feed covers as shown in Figure E 7 and feed the paper under the paper separator and into the paper slot Push the paper through until it comes up between the ribbon guide and the platen ...

Page 155: ...s is approximately level with the top of the ribbon guide as you see in Figure E 8 When you turn on your LX 80 it will remember this top of page setting and will use it when any program tells it to move to the top of the next page If you later find that your word processing or other applications program is putting your printing too high or too low on the page or is printing on the perforations che...

Page 156: ...rk and you are also setting the margin set margins before setting the tabs not after If horizontal tabs do not work it may be that your computer will not allow the ASCII code 9 to be sent to the printer or it may be interpretting the ASCII code 9 as a tab command but substituting a series of spaces instead This is likely to happen with CP M based machines There may be other computers which also ha...

Page 157: ...sure that no other commands or carriage returns come between the graphics command and its data See Chapter 9 If the printer freezes in graphics mode you have sent a different number of data codes from the one you specified in the command The printer expects a certain number of pin patterns determined by n1 and n2 It will wait patiently until the quota is fulfilled Take extra care with 9 pin graphi...

Page 158: ... printer has run out of paper Some software monitors printer cable pin 11 and will halt because it thinks the printer is busy It is not possible to modify the cable for this problem although the cable is signalling to the computer that the printer is off line be cause this would result in data being lost by the printer SelecType Solutions If you have found that your software sends a resetting code...

Page 159: ...ON LINE button once give your computer system the signal to resume printing Method 4 This is a variation of Method 3 Try giving the print command for your program and then pressing the ON LINE button to take the LX 80 off line before printing actually starts Then follow the proce dure in Method 3 Cancelling Functions with SelecType If you want to cancel the modes you have set with SelecType you ca...

Page 160: ...dividual modes with SelecType if you wish You do this with the same procedure that sets them When a mode is already set selecting it again cancels it as demonstrated in the example below Suppose that you have set emphasized and NLQ modes and then you decide that you don t want emphasized You can either cancel all the modes and reset NLQ or you can use the following steps to cancel emphasized and l...

Page 161: ...ates that the prin ter is out of paper The beeper can also be sounded by any program that sends the ASCII 7 code and by certain error conditions in the printer itself If the printer beeps and stops printing when it is not out of paper turn the printer off and check to see if the paper is loaded correctly If the paper is loaded correctly turn the printer back on and try to print again If the printe...

Page 162: ...11nOt1 11 4lil 1 1 11 1 dl 1 WIVl l h You can consult Appendix A or the Quick Reference Card to see the meaning of the hexadecimal codes The following explanation of the first line will help you to understand what is happening The first code in line 0000 is hex 46 which is the same as decimal 70 the code for the letter F The F is printed in the first position in the guide section Then because ther...

Page 163: ...des before it sends them to the printer For example in the line below which is the first line of he printout of the test program run on a QX lO you can see that in this case MBASIC changes hex 09 which is the code for horizontal tabbing to several 20s the code for a space Therefore you know that if you use this system you must be careful about sending a decimal 9 hex 09 The data dumping capability...

Page 164: ...ne if you can do the same on your system A fourth approach is to change the printer driver program in your system This requires a knowledge of machine language and of the way your computer works If you don t have this knowledge your computer dealer may be able to help you or suggest someone who can The sample printer driver below following the examples of POKEing codes The idea is to pass the code...

Page 165: ...ctly to the printer without any PEEKs or POKEs If you do not want to write such a driver yourself your computer dealer may be able to help you or you may find one in a computer magazine or from a computer user group The following printer driver for instance was written for the TRS 80 Model I by Bob Boothe and reprinted with the kind permission of 80 Micro Wayne Green Publishers The program POKEs a...

Page 166: ... this you are using an 8 bit system If you have a 7 bit system you need to understand what happens to the control codes you send The LX 80 automatically interprets these codes the way your system sends them as the lower half of the range There is something you may be able to do when you want to send the upper half 128 255 have your program convert all codes outside of the active range to their equ...

Page 167: ... bit computer but works mainly with 7 bits The eighth bit is often set permanently to a 1 ON This means that most printer interfaces only handle 7 bits because of the need to remove the 1 from the eighth bit The second type of problem is that the interface normally has its own use for ASCII code 9 These problems restrict you in sending graphics data Should you need an 8 bit system the simplest sol...

Page 168: ...y need updating TRS 80 solutions A routine to POKE codes to the memory of a Modell is given in the POKEing codes subsection A spec Iprinter driver for either the Model I or the Model III is shrw I 1fl He Special printer drivers subsection One of those II o J should solve any problems with the programs in this manual IBM_PC solutions There are two problems in using the IBM Personal Computer BASIC t...

Page 169: ...has also been corrected in subsequent versions QX IO multifont CP M solutions There are two problems you may experience when using the Multi font CP M system Firstly it is not possible to send control charac ters in the range 0 31 without first giving the BIT ON command in Multifont BASIC You may have trouble in sending control charac ters using software in the CP M environment not just BASIC In t...

Page 170: ...d go to the screen before anything is sent to the printer In these programs leave the first lines as they are and after the INPUT and or PRINT statements add a line that states VDU 2 Then change all the instances of LPRINT to PRINT and put a line that states VDU 3 at the end of the program This switches all output to screen only When using the VDU 1 command to send codes to the LX 80 remember a I ...

Page 171: ......

Page 172: ... and furnaces Safe temperature range is 5 C 41 F to 35 C 95 F Now and Then Clean particles and dust from the printer every so often with a soft cloth or brush Use a mild cleanser for the outside framework and after removing the ribbon cassette denatured alcohol for the inside See your Epson dealer for replacement ribbon cassettes ...

Page 173: ......

Page 174: ...in graphics mode Character set 96 Roman characters 96 italic characters 32 international characters 32 italic international characters 32 graphic characters 96 NLQ characters 32 NLQ international characters Mode Pica Pica enlarged Elite Elite enlarged Condensed Condensed enlarged Super Subscript Width inches 083 in 166 in 059 in 118 in 041 in 083 in Height inches 122 in 122 in 122 in 122 in 122 in...

Page 175: ...e sheet up to 8 5 Friction feed Number of copies One original plus one copy total thickness not to exceed 0 005 Printer Ribbon Cassette ribbon black MCBF 3 million lines excluding print head life Print head life 100 million characters Dimensions and Weight Height 3 3 in Width 16 6 in Depth without paper separator 12 4 in Weight 11 51bs Power 120 VAC 10 US models 220 240 VAC 10 European models Powe...

Page 176: ...5Hz maximum Storage 0 50 G 55Hz maximum Insulation resistance 10 megaohms between AC power line and chassis Dielectric strength No trouble when 1 kilovolt R M S 50 or 60 Hz is applied for more than 1 minute between AC power line and chassis Interface Interface Centronics compatible 8 bit parallel Synchronization By externally supplied STROBE puls_e_s _ Handshaking By ACKNLG or BUSY signals Logic l...

Page 177: ......

Page 178: ...ion of 3 21 DATA2 IN the 1st to 8th bits of parallel data 4 22 DATA3 IN respectively Each signal is at HIGH 5 23 DATM IN level when data is logical 1 and LOW 6 24 DATA5 IN when it is logical O 7 25 DATA6 IN 8 26 DATA7 IN 9 27 DATA8 IN 10 28 ACKNLG OUT Approximately 12 microsecond pulse LOW indicates that data has been received and that the printer is ready to accept more data 11 29 BUSY OUT A HIGH...

Page 179: ...inal 32 ERROR OUT This level becomes LOW when the printer is in 1 Paper end state 2 Off line 3 Error state 33 GND Same as for pins 19 30 34 NC Unused 35 Pulled up to 5V through 3 3K ohm resistance 36 SLCTIN IN Data entry to the printer is possible only when this level is LOW DIP switch 2 2 is set for this at the factory Notes 1 The column heading Direction refers to the direction of signal flow as...

Page 180: ... the timing for the parallel interface DATA STROBE BUSY ACKNLG 0 5 J1S Imin 0 5 J1S Imin l 0 5 J1S Imin Approx 5 J1S Approx 7 J1S Signal relationships Table 1 2 shows the way data entry is handled in the on line and off line states by showing the relationships between seven signal sets On Line SLCTIN ERROR BUSY ACKNLG DATA ENTRY OFF HIGH LOW LOW HIGH Not generated Disabled ON HIGH HIGH LOW HIGH Ge...

Page 181: ......

Page 182: ...double strike emphasized Button 11 Buzzer See beeper Cable 13 14 Cancelling codes 39 Centronics 4 13 1 1 3 Changing pitch 26 Character sets international 52 table 53 Codes See ASCII codes Control codes ESC codes Embedded codes Inserted codes Combining print modes 46 Commercial software use with 33 Computer connection to 13 Condensed mode margin settings in 59 60 Condensed mode 19 26 27 39 ASCII 15...

Page 183: ... C 15 ESC 1 Sets line spacing to 7 72 inch 60 61 C 15 ESC 2 Sets line spacing to 1 6 inch 60 61 C 16 ESC 3 Sets line spacing in 216ths 60 61 C 16 ESC 4 Turns italic mode on 47 48 C 10 E C 5 Turns italic mode off 47 48 C 10 ESC 8 Turns paper out sensor off 58 C 18 F 3 ESC 9 Turns paper out sensor on 58 C 18 F 3 ESC Copies ROM characters to RAM area 63 73 C 25 ESC Turns one line unidirectional mode ...

Page 184: ...bs in channels C 21 ESC I Sets left margin 59 C 24 ESC sO Turns half speed mode off C 14 ESC sl Turns half speed mode on C 14 ESC x Selects NLQ or draft mode 41 42 C 2 ESC Turns nine pin graphics mode on C 29 ESC code decimal value 27 32 ESCape code listed by function Appendix C ESCape code listed by number Appendix B Elite mode 20 39 C 5 ESC M turns it on ESC P turns it off Can also be set with S...

Page 185: ...Personal Computer F 13 14 Inserted codes 35 Installation programs 38 Interface 13 1 1 3 International characters 52 54 A 7 C 11 Italic mode 47 48 C lO ESC 4 turns it on ESC 5 turns it off LF 11 LUST 14 LPRINT 38 Languages programming 36 Left margin See margins Lever See friction lever Lid 9 Line feed 60 C 16 Line spacing 60 61 Loading paper 9 10 Location of printer 4 E 1 2 ...

Page 186: ...uttons selecting typestyles with See SelecType Paper bail 6 9 Paper continuous E 1 6 Paper loading 9 10 E 4 6 Paper separator 3 E 3 Paper single sheet 9 10 Paper slot 10 Paper feeding problems with F 3 Paper feeding guide F 3 Paper feed knob 4 5 Paper out light 11 Paper out sensor 58 F 3 ESC 9 turns it on ESC 8 turns it off Can also be controlled by DIP switch Parallel interface 13 Parts Printer 3...

Page 187: ... defined characters 70 Resetting the printer 38 default settings on reset 40 Ribbon installation and replacement 5 8 Right margin See margins Script mode 51 ESC SOturns superscript mode on ESC SI turns subscript mode on ESC T turns either mode off SelecType feature 15 24 cancelling functions with F 4 6 combining modes 21 22 print modes 18 setting print modes 18 troubleshooting F 3 4 turning on 17 ...

Page 188: ...Temperature H 3 Test for reset code 20 Test for seven bit system F ll Test pattern 12 Top of page E 6 Tractor optional E 1 6 Troubleshooting 14 23 F 1 16 Typestyle selection See SelecType Underline mode 48 49 C 8 ESC 1 turns it on ESC 0 turns it off Unidirectional mode one line C 14 User defined characters 63 73 C 25 ESC defines characters ESC downloads ROM characters into RAM ESC selects a charac...

Page 189: ......

Page 190: ......

Page 191: ...ble strike mode ON ESC H Turns double strike mode OFF Forms Control ESC 8 ESC 9 ESC CO ESC C ESC N ESC 0 Print Enhancement ESC SO Turns superscript mode ON ESC SI Turns subscript mode ON ESC T Turns either script mode OFF ESC 0 Turns underline mode OFF ESC 1 Turns underline mode ON Page Format ASCII 9 or 137 ASCII 11 ESC 0 ESC Q ESC I Mode and Character Set Selection ESC Master select ESC 4 Turns ...

Page 192: ...graphics density Turns single density graphics mode ON Turns double density graphics mode ON Turns high speed double density graphics mode ON Turns quadruple density graphics mode ON Turns 9 pin graphics mode ON Mode o Reset 1 NLQ 2 Emphasized 3 Double strike 4 Condensed 5 Elite r ElCnE I 1 H J I1 1 i lI it p cw c t II I y ABCDEFGH IJKLMNopqrst uvwxyz ABCDEFGH I JI l MNopqrstuvwx yz ABCDEFGHIJKLMN...

Page 193: ...9 217 09 I 17 11 Q 26 lA none 90 5A Z 154 9A 218 OA Z 18 12 R 27 18 ESC 91 58 155 98 1 219 08 28 lC none 92 5C 156 9C I 220 DC 19 13 S 29 10 none 93 50 J 157 90 221 00 T 30 1E none 94 5E 158 9E 222 OE 20 14 31 1F none 95 5F 159 9F 223 OF 21 15 U 32 20 96 60 160 AD 224 EO 22 16 V 33 21 97 61 a 161 A1 I 225 El a 34 22 98 62 b 162 A2 226 E2 t 23 17 W 3 23 II 99 63 c 163 A3 II 227 E3 c 18 X 3 24 100 6...

Reviews: