Maintenance 5. Actuator Units
N6 Rev.2
321
Installation
Joint #5 and #6
Unit
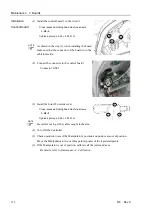
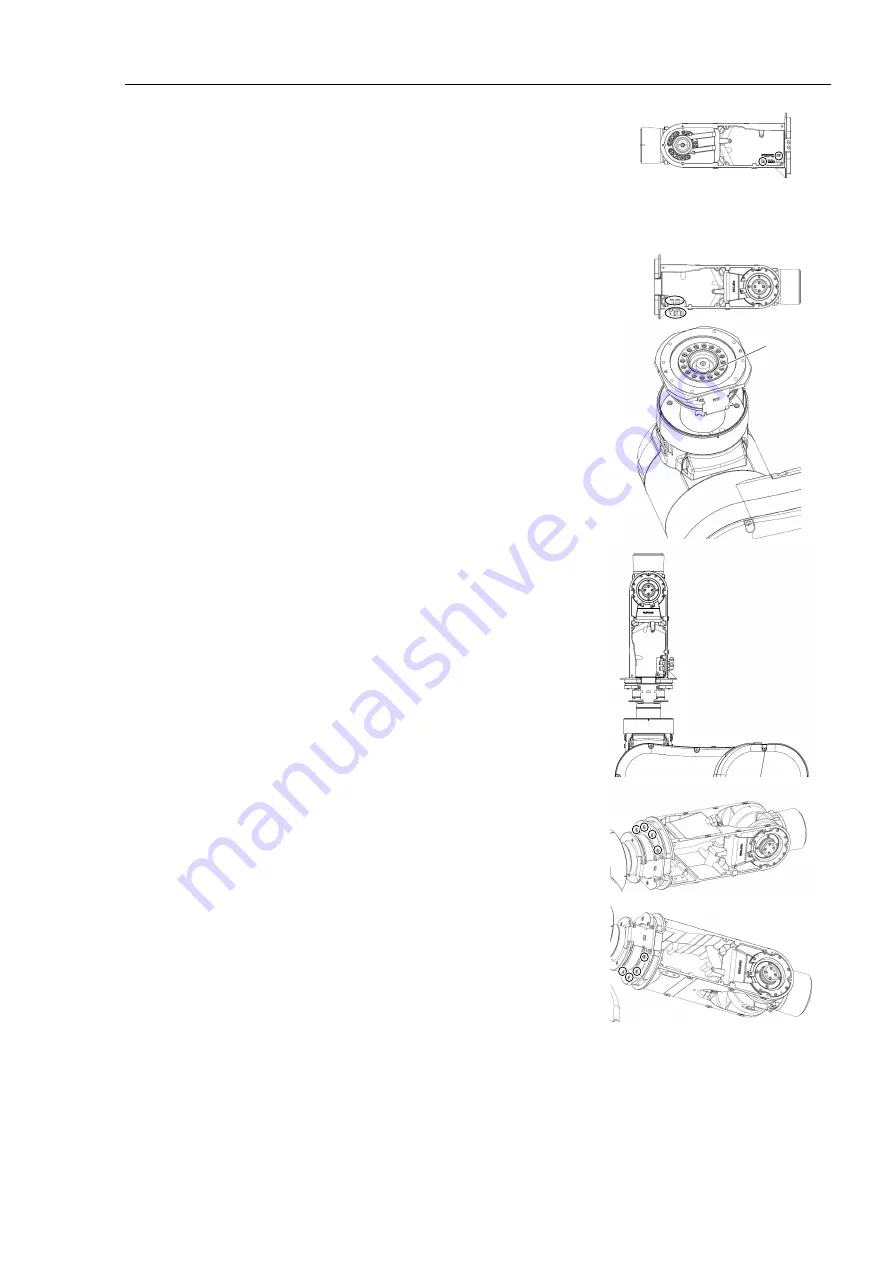
(1) Install the encoder board #4 to the Joint #5 and
#6 units.
Cross recessed binding head machine screws:
2-M3×6
Tightening torque: 0.45
±
0.05 N·m
(2) Install the air tube fittings to the Joint #5 and #6
units.
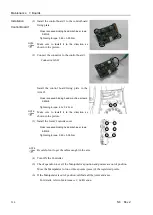
(3) Install the O-ring to the Joint #4 flange.
O-ring Inner diameter ø 47.5 mm
Wire diameter ø 2.0 mm
Apply a thin coat of grease to the O-ring.
Grease: SK-1A
O-ring
(4) Install the Joint #5 and #6 units on the Joint #4
actuator unit.
Hexagon socket head cap bolts:
8-M4×20 (with plain washer)
Tightening torque: 5.5±0.25 N·m
Be sure to have at least 2 people to perform the
operation since the parts being heavy.
Confirm that the two pins are installed on the
Joint #4 flange. When installing it, make sure to
align the pins with the Joint #5 and #6 units.
Be sure to install the O-ring properly.
Be careful not to get the cables caught in the
units and the actuator unit.
NOTE
NOTE
Summary of Contents for N6 Series
Page 1: ...Rev 2 EM187R3735F 6 Axis Robots N6 series MANIPULATOR MANUAL ...
Page 2: ...Manipulator manual N6 series Rev 2 ...
Page 8: ...vi N6 Rev 2 ...
Page 14: ......
Page 27: ...Setup Operation 1 Safety N6 Rev 2 15 N6 A850 R C A D F G F E H G F B G F G F F F N6 A850 BR F ...
Page 34: ...Setup Operation 2 Specifications 22 N6 Rev 2 N6 A850 BR Cable direction Upward ...
Page 52: ...Setup Operation 3 Environment and Installation 40 N6 Rev 2 N6 A850 R Maximum motion range 802 ...
Page 66: ...Setup Operation 4 End Effectors 54 N6 Rev 2 N6 A850 R Unit mm ...
Page 104: ......
Page 274: ...Maintenance 4 Cable 262 N6 Rev 2 4 7 1 Signal Power cable ...
Page 275: ...Maintenance 4 Cable N6 Rev 2 263 ...
Page 276: ...Maintenance 4 Cable 264 N6 Rev 2 4 7 2 User Cable ...


