background image

42

Managing Data

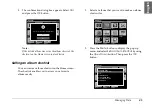
Copying to the album starts.

Note:

You can make a new album by selecting 

New

. See the 

following “Creating a new album” for details.

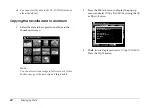
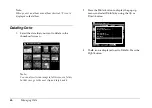
Creating a new album

1.

Follow steps 1 through 4 of “Copying the favorite 
data to an album” on page 40.

2.

Select 

New

 and press the 

OK 

button.

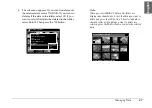
3.

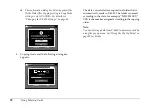
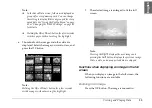
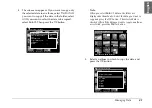
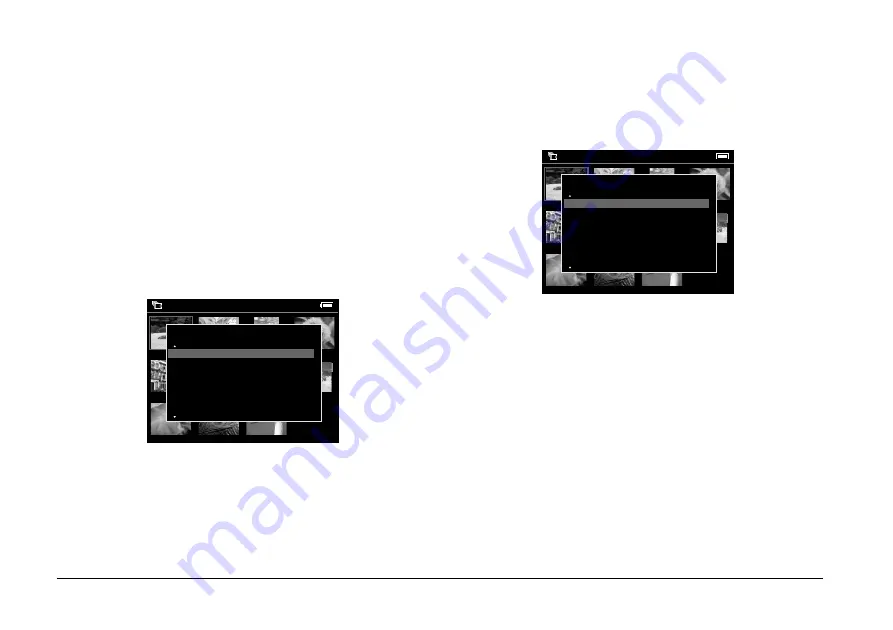
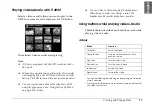
If you want to use one of the preset album names, 
select the album’s name from the displayed list, 
and press the 

OK 

button. Copying data to the 

album starts.

Note:

When you select a name which already exists, the new 
album is named with a number at the end of its name.

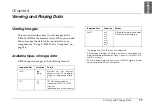
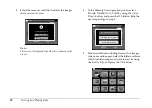
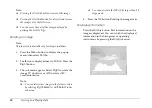
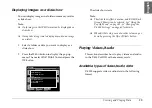
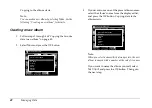
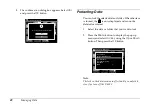
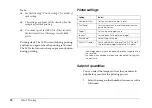
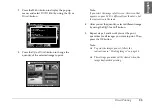
If you want to name the album yourself, select 

Text Input

 and press the 

OK 

button. Then go to 

the next step.

Saved Data / 2004.08.26

DSC00331.JPG

DSC00330.mpg

DSC00329.JPG

DSC00328.JPG

DSC00327.JPG

DSC00326.JPG

DSC00325.JPG

DSC00324.JPG

DSC00323.JPG

DSC00322.JPG

DSC00321.JPG

Please select an album

New

PC_DATA

Scenary

Flower

Travel

Album1

Travel2

Saved Data / 2004.08.26

DSC00331.JPG

DSC00330.mpg

DSC00329.JPG

DSC00328.JPG

DSC00327.JPG

DSC00326.JPG

DSC00325.JPG

DSC00324.JPG

DSC00323.JPG

DSC00322.JPG

DSC00321.JPG

Please select album name

Text Input

Album

Family

Children

Travel

Snapshot

Favorites

Summary of Contents for P4000 - Multimedia Storage Viewer

Page 1: ...1 English User s Guide ...

Page 2: ...any consumable products other than those designated as Original Epson Products or Epson Approved Products by Seiko Epson Corporation Seiko Epson Corporation shall not be held liable for any damage resulting from electromagnetic interference that occurs from the use of any interface cables other than those designated as Epson Approved Products by Seiko Epson Corporation EPSON is a registered tradem...

Page 3: ...ing Started Unpacking Your P 4000 14 Parts 15 Setting Up the P 4000 17 Charging the battery 17 Turning the power on 20 Turning the power off 21 Holding the button operations 22 How to use the Home screen 22 About the stand 23 Chapter 3 Using Memory Cards Setting and Removing a Memory Card 24 Available types of memory cards 24 Setting a memory card into the CF Card slot 25 Removing a memory card fr...

Page 4: ...s available in the pop up menu 49 Chapter 6 Direct Printing Preparing to Print 51 Supported printers 51 Available types of paper 51 Connecting P 4000 to a printer 51 Printing Images 53 Printer settings 54 Set print quantities 54 Chapter 7 Using P 4000 With Other Devices Using P 4000 With a Computer 56 Connecting P 4000 to a computer 56 Disconnecting P 4000 from a computer 58 Using A V Out 58 Chapt...

Page 5: ...s 68 Viewing and playing problems 68 Data operation problems 69 Printing problems 70 Resetting P 4000 70 Contacting Customer Support 71 Technical Support Web Site 71 Appendix A Appendix Standards and Approvals 72 P 4000 Model G941B 72 AC adapter Model A351H 72 Battery Model D111A 73 Specifications 73 General 73 Electrical 74 Interface 74 Battery 74 AC adapter 74 About Optional Accessories 75 ...

Page 6: ...r or other special device You can play videos and audio easily anywhere anytime without a computer or other special device You can print images directly to your Epson printer that supports USB DIRECT PRINT You can save images videos and audio in P 4000 Note Do not expose the P 4000 to severe impact doing so may cause malfunctions especially during turning operations We strongly recommend you back ...

Page 7: ...le ensure the correct orientation of the connectors Each connector has onlyone correct orientation Inserting aconnector in the wrong orientation may damage both devices connected by the cable Do not insert objects into the slots or openings on this product Do not touch the components inside this product unless instructed to do so in the user documentation Never force this product s components into...

Page 8: ...r and seek medical treatment If a battery is swallowed seek medical treatment immediately Use only an Epson Li ion battery for P 4000 according to the directions in the user documentation Use only AC adapter model A351H and P 4000 Model G941B to charge batteries Do not use the battery that comes with this product for other devices To protect against short circuiting do not remove the outside case ...

Page 9: ...eating discoloration or distortion occur remove the battery from this product and do not use it Charge the battery before using it if it has not been used for a long period When Storing the batteries When not using this device for a long period remove the batteries from this product and store them separately Do not store batteries where the temperature or humidity is very high Store batteries out ...

Page 10: ...re the power cord can be easily unplugged TheACadapterandAC powercablearedesigned for use and provided with this product Do not attempt to use them with other electronic devices unless specified Do not remove the AC adapter from this device during operations connecting the AC adapter during operations is possible The AC adapter included is designed for use with thisproduct Useofanyotheradaptercoul...

Page 11: ...er appliances that may cause voltage fluctuations Avoid using outlets on the same circuit as photocopies or air control systems that regularly switch on and off To prevent fire or electric shock do not cover the AC adapter with a blanket or similar covering Position this product s power cord so that it will not be stepped on or run over Do not place any objects on the power cord and the AC adapter...

Page 12: ... hands wash them thoroughly with soap and water If it gets into your eyes flush them immediately with water If discomfort or vision problems remain after a thorough flushing see a doctor immediately Only use a soft dry cloth to clean the display Do not use liquid or chemical cleaners When storing maintaining or transporting P 4000 Do not store this product outdoors Do not store this product near w...

Page 13: ...e for the voltage and check that the appliance voltage corresponds to the supply voltage Important The wires in the mains lead fitted to this appliance are colored in accordance with the following code Blue Neutral Brown Live As the colours of the wires in the mainslead of this appliance may not correspond with the coloured markings identifying the terminals in your plug proceed as follows The blu...

Page 14: ... that all of the items shown below were included in the box with your P 4000 The plug type for the power cable may vary depending on the local standards P 4000 Stand Carrying case USB cable Strap Lithium ion battery Power cable AC adapter User s Guide this guide Software CD ROM ...

Page 15: ...rts Front Back CF Card slot Powerswitch with Hold function Control panel LCD SD Card slot Reset button CF Card slot eject button Battery cover A V Out connector USB connector AC adapter connector Headphone connector USB connector rubber cover Speaker ...

Page 16: ...accessing data on the HDD or a memory card 4 way ring Up Down Left Right button Press this button to move the cursor or highlight You can select an object by pressing this button to the right left up or down Illumination lamp Blue Flashes during such operations as turning the power on or during printing The light also flashes when P 4000 is in the LCD power off mode OK button Press this button to ...

Page 17: ... battery and turn the power on and off Charging the battery Installing the battery 1 Slide the battery cover to the left The battery cover opens 2 Insert the battery into the compartment in the direction of the arrow on the battery 3 Close the battery cover and slide it to the right until it clicks Home button Press this button to go back to the Home screen arrow BATT ...

Page 18: ... outlet The Charge lamp is on during charging When the battery is fully charged the Charge lamp turns off It takes about 3 hours to fully charge the battery when P 4000 is off It takes more when you are operating it Note P 4000 stops charging if the battery becomes hot when operating it during charging In that case it starts charging again when it cools down Indicates sufficient battery power Indi...

Page 19: ...adapter if it is connected to P 4000 Never remove the battery while P 4000 is turned on Doing so may cause data in the card or HDD to be lost or damaged 2 Open the battery cover 3 Push the catch down The battery is pushed out 4 Pull out the battery Then close the battery cover w Warning Do not carry loose batteries in your pockets ...

Page 20: ...re displayed Follow the instructions below 1 The Language setting screen appears Select the language you want to use with the 4 way ring and press the OK button 2 The Date and time settings screen appears Press the Right or Left button on the control panel to change the value of the selected item illumination lamp Italiano Francais Espanol Language setting English Intl Nederlands Deutsch Date and ...

Page 21: ...the date and time settings are erased the Date and time settings screen is displayed when you turn on P 4000 next time After changing the battery make sure that the date and time is set correctly If necessary set the date and time again You can change the settings later See Changing the P 4000 Settings on page 60 for details about setting the date and time settings Turning the power off 1 Make sur...

Page 22: ...ful function when you put P 4000 in your bag while listening to audio with the headphones How to use the Home screen When turning P 4000 on the Home screen appears first All the operations can be started from thisscreen You can return to the Home screen by pressing the Home button Battery icon Indicates the remaining charge in the battery See Charging the battery on page 17 for details Home Latest...

Page 23: ...ay folders that include data saved in P 4000 from memory cards Latest Data Select to display the latest data saved in P 4000 from a memory card Albums Select to display albums See Using the Albums on page 39 to find information on the albums Album shortcut Select to access a favorite album You can set a shortcut icon for an album See Setting an album shortcut on page 45 for details Memory Card Sel...

Page 24: ... may cause data in the card or HDD to be lost or damaged Do notputstickersonmemorycards Thesticker may peel off preventing the card from being ejected and damaging P 4000 Avoid using or storing the card in direct sunlight or in places that are extremely hot humid or dusty Available types of memory cards The following memory cards are available CF CompactFlash memory card Type1 Type2 and 3 3 V incl...

Page 25: ...card fully into the slot Note Insert memory cards in the correct direction Otherwise the memory card and P 4000 may be damaged Removing a memory card from the CF Card slot 1 Make sure that the Access lamp is off c Caution Never remove a memory card while the Access lamp flashes Doing so may cause data in the card to be lost or damaged 2 Push theeject buttondownandit comesout Then push it again 3 T...

Page 26: ...mory cardintothememorycardslotwith the back side up to the LCD side Then push the memory card fully into the slot Note Insert memory cards in the correct direction Otherwise the memory card and P 4000 may be damaged Removing a memory card from the SD Card slot 1 Make sure that the Access lamp is off c Caution Never remove a memory card while the Access lamp flashes Doing so may cause data in the c...

Page 27: ...card from which you wish to copy the data 4 In the Memory Card operation screen select Copy Data from Memory Card by using the Up or Down button and press the OK button Note If you wish to make an album after copying select Create Album After Copying Data and press the OK button Then select an album in which to copy the data or create a new album See Creating a new album on page 42 for instruction...

Page 28: ...cally made in P 4000 The folder is named according to the date for example 20030325 XXX XXX is the number assigned according to the copying order Note You can also copy data from P 4000 to a memory card by using the pop up menu See Using the Pop Up Menu on page 49 for details Home Latest Data Settings Albums Memory Card Saved Data YES NO Do you want to delete data on the memory card after copying ...

Page 29: ...mat is not supported P 4000 supports images in RAW format that you have taken with a digital camera produced by Nikon Canon KONICAMINOLTA PENTAX or Epson RAW formatted images taken with an OLYMPUS digital camera can be displayed only as thumbnails Supported Files Extension Details JPEG jpg jpeg Minimum size 160 120 pixels Maximum size 17 8 megapixels Maximum image aspect ratio 8 1 TIFF tif tiff TI...

Page 30: ...bout the PC_DATA folder on page 39 for details b Indicates the battery status See Charging the battery on page 18 for details c Indicates a folder that includes an audio file and does not include image or video files d Indicates that the album is set as an album shortcut e Indicates a folder that was made on a computer and copied to an album in P 4000 f Indicates a supported movie file g Indicates...

Page 31: ...en you press the Display button Displaying images You can display all images in the Saved Data Albums or memory cards as thumbnails You can also display an image in full screen format by selecting the specified image from the listed images 1 If you want to view images in a memory card make sure that you set the memory card in the card slot 2 For images in P 4000 select Saved Data or Albums in the ...

Page 32: ...a such as images videos oraudio appear Selectthefolderoralbum which includes images you want to view by using the 4 way ring and press the OK button Home Latest Data Settings Albums Memory Card Saved Data SD Memory Card CompactFlash Select a memory card Home Latest Data Settings Albums Memory Card Saved Data Browse the Memory Card Create Album After Copying Data Copy Data from Memory Card Saved Da...

Page 33: ...ress the OK button Note Holding the Up or Down button for a few seconds switches pages without moving the highlight 7 The selected image is enlarged to fit the full screen Note Pressing the Right displays the next image and pressing the Left button displays the previous image Video audio and unsupported data are skipped Functions when displaying an image in the full screen When you display an imag...

Page 34: ...con is displayed next to Rotate Press the Right button 3 The sub menu appears Select Right to rotate the image 90 clockwise or Left to rotate it 90 counterclockwise Note You can select other images in the folder to rotate by selecting Right Select or Left Select in the sub menu You cannot rotate the JPEG files larger than 8 9 megapixels 4 Press the OK button Rotating the image starts Displaying in...

Page 35: ...how starts Note The slide show effect duration and BGM Back Ground Music can be selected See Using the Pop Up Menu on page 49 or Changing the P 4000 Settings on page 60 for details When BGM is set you can turn the volume up or down by pressing the Up or Down button Playing Videos Audio This section describes how to play videos and audio in the P 4000 s HDD or the memory cards Available types of vi...

Page 36: ...e 3 Mbps MOV MPEG4 Simple Profile AAC Minimum resolution 160 112 pixels Maximum resolution 640 480 pixels Maximum bit rate 2 5 Mbps Ave at 30 fps Motion JPEG ALaw µLaw PCM Minimum resolution 160 112 pixels Maximum resolution 640 480 pixels Maximum bit rate 3 Mbps MP4 MPEG4 Simple Profile AAC Minimum resolution 160 112 pixels Maximum resolution 640 480 pixels Maximum bit rate 2 5 Mbps Ave at 30 fps...

Page 37: ...dio using the headphones When doing so make sure that you insert the headphone cable into the headphone connector Using buttons while playing videos audio Thetables belowdescribe how thebuttons work while playing videos audio videos You can start playing the video again by pressing the OK button while it is paused Pressing the Left Rightbutton for a few seconds rewinds forwards the video continuou...

Page 38: ... audio Button Function OK button Pause the audio Cancel button Stop the audio and return to the previous screen Up button Turn the volume up Down button Turn the volume down Left button Skip back to the beginning of the audio that is currently playing If you press the button at the beginning of the audio the audio is skipped back to the previous one Right button Skip to the next audio ...

Page 39: ...ault and you can also name albums as you like For easy operation you can create album shortcuts on the Home screen See Setting an album shortcut on page 45 for details About the PC_DATA folder In the Albums PC_DATA folder exists as a default When you copy data from your computer to P 4000 using the Explorer or Finder copy data to the PC_DATA folder Note The name of the PC_DATA folder cannot be cha...

Page 40: ...u andselectCopy to Albumby usingthe Up or Down button 3 The r icon is displayed next to Copy to Album Press the Right button Saved Data 2004 08 26 DSC00321 JPG DSC00322 mpg DSC00323 JPG DSC00324 JPG DSC00325 JPG DSC00326 JPG DSC00327 JPG DSC00328 JPG DSC00329 JPG DSC00330 JPG DSC00331 JPG Saved Data 2004 08 26 DSC00331 JPG DSC00330 mpg DSC00329 JPG DSC00328 JPG DSC00327 JPG DSC00326 JPG DSC00325 J...

Page 41: ...lbum in which to copy the data and press the OK button Saved Data 2004 08 26 DSC00331 JPG DSC00330 mpg DSC00329 JPG DSC00328 JPG DSC00327 JPG DSC00326 JPG DSC00325 JPG DSC00324 JPG DSC00323 JPG DSC00322 JPG DSC00321 JPG Delete Copy to Album Set as Folder Thumbnail Lock Copy to Memory Card Start Slide Show Print Order This Data All Select Press Menu to finish selection Select Image for Album DSC003...

Page 42: ...ch already exists the new album is named with a number at the end of its name If you want to name the album yourself select Text Input and press the OK button Then go to the next step Saved Data 2004 08 26 DSC00331 JPG DSC00330 mpg DSC00329 JPG DSC00328 JPG DSC00327 JPG DSC00326 JPG DSC00325 JPG DSC00324 JPG DSC00323 JPG DSC00322 JPG DSC00321 JPG Please select an album New PC_DATA Scenary Flower T...

Page 43: ... screen and press the OK button 5 After you input the name select OK on the screen by using the 4 way ring and press the OK button to fix it Changing an album s name 1 Select an album that you want to change the name of in the Albums 2 Press the Menu button to display the pop up menu Saved Data 2004 08 26 DSC00331 JPG DSC00330 mpg DSC00329 JPG DSC00328 JPG DSC00327 JPG DSC00326 JPG DSC00325 JPG DS...

Page 44: ...Down button Then press the OK button Albums New Album3 Photo Favorite Album4 PC_DATA Scenery Flower Travel Album1 Travel2 Edit Album Name Set as Album Shortcut Lock Start Slide Show Sort by Album Name Copy to Memory Card Delete Album Albums New Album3 Photo Favorite Album4 PC_DATA Scenery Flower Travel Album1 Travel2 Albums New Album3 Photo Favorite Album4 PC_DATA Scenery Flower Travel Album1 Trav...

Page 45: ...ou want to make an album shortcut for 2 Press the Menu button to display the pop up menu andselectSet as Album Shortcutby using the Up or Down button Then press the OK button Albums New Album3 Photo Favorite Album4 PC_DATA Scenery Flower Travel Album1 Travel2 Yes No Are you sure you want to delete the data Albums New Album3 Photo Favorite Album4 PC_DATA Scenery Flower Travel Album1 Travel2 Albums ...

Page 46: ...and select Delete by using the Up or Down button 3 The r icon is displayed next to Delete Press the Right button Saved Data 2004 08 26 DSC00321 JPG DSC00322 mpg DSC00323 JPG DSC00324 JPG DSC00325 JPG DSC00326 JPG DSC00327 JPG DSC00328 JPG DSC00329 JPG DSC00330 JPG DSC00331 JPG Saved Data 2004 08 26 DSC00331 JPG DSC00330 mpg DSC00329 JPG DSC00328 JPG DSC00327 JPG DSC00326 JPG DSC00325 JPG DSC00324 ...

Page 47: ... and press the OK button The selected data is checked After all the data you want to delete are selected press the Menu button to delete the selected data Saved Data 2004 08 26 DSC00331 JPG DSC00330 mpg DSC00329 JPG DSC00328 JPG DSC00327 JPG DSC00326 JPG DSC00325 JPG DSC00324 JPG DSC00323 JPG DSC00322 JPG DSC00321 JPG Copy to Album Set as Folder Thumbnail Lock Copy to Memory Card Start Slide Show ...

Page 48: ... OK button Note The lock on the data remains in effect until you unlock it even if yo turn off the P 4000 Saved Data 2004 08 26 DSC00331 JPG DSC00330 mpg DSC00329 JPG DSC00328 JPG DSC00327 JPG DSC00326 JPG DSC00325 JPG DSC00324 JPG DSC00323 JPG DSC00322 JPG DSC00321 JPG Yes No Are you sure you want to delete the data Saved Data 2004 08 26 DSC00331 JPG DSC00330 mpg DSC00329 JPG DSC00328 JPG DSC0032...

Page 49: ...le for details Settings available in the pop up menu Saved Data 2004 08 26 DSC00331 JPG DSC00330 mpg DSC00329 JPG DSC00328 JPG DSC00327 JPG DSC00326 JPG DSC00325 JPG DSC00324 JPG DSC00323 JPG DSC00322 JPG DSC00321 JPG Delete Copy to Album Set as Folder Thumbnail Lock Copy to Memory Card Start Slide Show Print Order Setting Detail Copy from Memory Card Copy the selected data in a memory card to the...

Page 50: ...ry saved date Print Order Set how many copies you wish to print of the selected images See Set print quantities on page 54 for details Register to Slide show BGM Register the selected audio data as the slide show BGM Rotate Rotate a selected image in the album 90 If a image is locked or has the auto rotation Exif tag whose value is 2 3 4 5 6 7 or 8 it cannot be rotated Setting Detail Set as Album ...

Page 51: ...tsprintersthatarecompatiblewith USB DIRECT PRINT Available types of paper P 4000 supports the following sizes and types of paper Note For details about paper see your printer s manuals Connecting P 4000 to a printer The following procedure shows how to connect the P 4000 to the Stylus Photo R300 310 For other printers refer to your printer s manual Paper Size Premium Glossy Photo Paper 4 6 in 10 1...

Page 52: ... rubber cover 2 Connect the USB cable to the P 4000 3 Connect the other end of the USB cable to the connector on the printer Note See your printer s manual for the location of the cable connector on your printer Remove the USB cable when you operate P 4000 if it is not connected to a computer or printer ...

Page 53: ...mages to Print the following screen appears You can add some images to the previously set images to print See Set print quantities on page 54 for details 4 In the Print Settings screen make the appropriate settings by using the 4 way ringand press the OK button Print Print This Image Print All Image Select Images to Print Number of Print Orders 2 Select Photos for print order Press OK for the Prin...

Page 54: ...the date information the date of the file is printed The value which has been set becomes the default setting from the next time Set print quantities You can select the images and set the quantities to print before you start the printing process 1 Select the image in the thumbnails screen or in the full screen Setting Detail Number of Prints Set the number of copies to print Print Date Set whether...

Page 55: ...5 Repeat steps 3 and 4 until you set the print quantities for all images you want to print Then press the OK button Note To print the images you set follow the instructions in Printing Images on page 53 The settings you made will be cleared when the image has finished printing Saved Data 2004 08 26 DSC00331 JPG DSC00330 mpg DSC00329 JPG DSC00328 JPG DSC00327 JPG DSC00326 JPG DSC00325 JPG DSC00324 ...

Page 56: ...000 or from P 4000 to the computer The computer recognizes P 4000 as an external HDD When using P 4000 with your computer install the software from the software CD ROM For details see Installing the Software on page 63 Note When using P 4000 while it is connected to a computer use the AC adapter Connecting P 4000 to a computer 1 Connect the AC adapter to P 4000 Then turn on P 4000 and your compute...

Page 57: ...lay orcopy data with EPSON Photo 4 See the online EPSON Photo 4 User s Guide for instructions Note You cannot move data in the memory card to your computer When you see HDD of P 4000 in your computer the Albums folder corresponds to Albums and the Cards folder corresponds to Saved Data Do not change the name of the album folder Albums card folder Cards and the folders under these two folders When ...

Page 58: ...ing the cable 3 Remove the USB cable from P 4000 For Macintosh users 1 Drag and drop the P 4000 icon to the trash can on the computer screen 2 Turn off P 4000 and remove the USB cable from the computer 3 Remove the USB cable from P 4000 Using A V Out P 4000 has an A V Out connector You can play slide shows and videos on the monitor just like on the LCD of P 4000 by connecting P 4000 to a monitor d...

Page 59: ...e TV Then connect the other end of the AV cable to P 4000 3 Set the TV display to video input from P 4000 Note You can connect the AV cable to P 4000 even when P 4000 is on The LCD turns off when you connect an AV cable to P 4000 Some monitors cannot display full images and the top and bottom parts may be missing ...

Page 60: ...ode Power Save Copy Mode Sound LCD Brightness Slide Show LCD Brightness setting LCD Brightness Change the brightness of the LCD Select an appropriate brightness by using the Right or Left button Sound settings Button Beep When this setting is set to ON a beep sounds when you do some operations Volume You can set the volume for playing audio and video Slide Show settings Effects Select one of the f...

Page 61: ...ng the slidebar from 1 minute to 10 minutes Time before power off Set the time until the power is shut down automatically if there are no operations to save the battery You can set the time by moving the slidebar from 1 minute to 15 minutes View Mode settings Auto rotation Set whether to rotate the images automatically according to the Exif information Folder view mode Set how to display the folde...

Page 62: ...rd disk 50 MB or more free space is required for installation 1 GB or more free space is required for operation Display SVGA 800x600 or higher 16 bit color or higher Port USB port type A connector Mac OS 9 1 or later Mac OS X 10 2 or later Processor PowerPC G3 233MHz or higher PowerPC G3 700MHz or higher Memory 128 MB or more 256 MB or more Hard disk 50 MB or more free space is required for instal...

Page 63: ...and Windows 2000 you need the administrative privilege to install the software 1 The installer starts automatically If necessary start it by double clicking the EPSON CD ROM icon 2 If a message appears to prompt you to disable your antivirus software click Continue 3 If you are prompted to select a language select your preferred language 4 On the Software Installation screen click Install Follow t...

Page 64: ...n instruction until all of the software is installed For Mac OS X users If the Authenticate window appears click the key icon enter the administrator s name and password and then click OK 5 When a message appears to indicate that installation is complete click Exit or Restart Now Note When Restart Now appears click this button to restart your computer Starting the Software This section describes h...

Page 65: ...ss the online EPSON Photo 4 or EPSON PhotoQuicker User s Guide using the Start menu in Windows or in Macintosh double click the MANUAL folder in each of the software s program folders and then double click INDEX HTM Software Menu EPSON Photo 4 Double click the EPSON Photo 4 icon in the EPSON Photo 4 program folder EPSON PhotoQuicker Double click the EPSON PhotoQuicker iconin theEPSON PhotoQuickerp...

Page 66: ... an error message or icon usually appears in the LCD Refer to the following section to solve the problem Error messages Icons Error message Icon Description A file access error has occurred Do not eject the memory card if it is being accessed Wait until the Access lamp turns off and reinsert the memory card and try again An error occurred while verifying Files will not be deleted Some files failed...

Page 67: ...ble is connected correctly Check your printer and printer s manual You must set the date and time to ensure correct operation See Changing the P 4000 Settings on page 60 and set the date and time Wait until P 4000 cools down The battery power is running out Charge the battery See Charging the battery on page 17 for details Press the reset button See Resetting P 4000 on page 70 to find how to use t...

Page 68: ...ypes of image data on page 29 and make sure the image format is supported The data is not displayed Cause What to do The video or audio data you selected is not supported See Available types of video audio data on page 35 and make sure the data is supported The data is broken Copy the data again The LCD Brightness setting is too dark See Changing the P 4000 Settings on page 60 and make sure the LC...

Page 69: ...The Audio Codec of the data is not supported Check the file format See Availabletypesofvideo audio data on page 35 for details Cannot copy Cause What to do The space available on the HDD is not sufficient to copy all of the data in the memory card Delete unnecessary data in the HDD or reduce the number of data to copy from the memory card Cannot copy Cause What to do The data may be broken Try to ...

Page 70: ...as shown below Cannot print Cause What to do The printer is not supported See Supported printers on page 51 and make sure that your printer supports direct print with P 4000 The printer s power is off Turn on the printer The USB cable is not connected correctly See Connecting P 4000 to a printer on page 51 and reconnect P 4000 to the printer The data is broken Try to copy a different data ...

Page 71: ...ation Product serial number The serial number label is usually on the back of the product Product model Product software version Click About Version Info or similar button in the product software Brand and model of your computer Your computer operating system name and version Names and versions of the software applications you normally use with your product Technical Support Web Site Go to http ww...

Page 72: ...art B Class B CSA C108 8 Class B EMC Directive 89 336 EEC EN 55022 Class B EN 55024 EN 61000 3 2 Use with AC adapter EN 61000 3 3 Use with AC adapter EMC CNS13438 Class B Safety UL60950 CSA C22 2 No 60950 EMC FCC Part 15 Subpart B Class B CSA C108 8 Class B Low Voltage Directive 73 23 EEC EMC Directive 89 336 EEC EN 60950 EN 55022 Class B EN 55024 EN 61000 3 2 EN 61000 3 3 EMC CNS13438 Class B ...

Page 73: ...ons and weight Height 84 mm 3 3 inches Width 147 mm 5 8 inches Depth 31 4 mm 1 2 inches Weight Approx 415 g 0 9 lb including the battery Temperature Operating 5 to 35 C Non operating 20 to 60 C Humidity without condensation Operating 30 to 80 Non operating 10 to 80 Altitude Operating 3048 m 10000 ft or less Non operating 12192 m 40000 ft or less Memory card CompactFlash memory card Type1 Type2 and...

Page 74: ...ce for Slave A V Out connector Quadrupole mini pin jack Ø 3 5 mm Headphone Out Connector M3 stereo mini pin jack Ø 3 5 mm CF Card slot One slot Type1 Type2 3 3V for CompactFlash memory card and MicroDrive SD Card slot One slot for SD memory card and MultiMedia card Type Lithium Ion Battery Model D111A Size H W L 22 45 mm 20 4 mm 71 mm Ratings 3 7 V 2600 mAh Typ Temperature Storing 20 to 40 C Model...

Page 75: ...A A English About Optional Accessories The following options are available for P 4000 The asterisk is a substitute for the last digit which varies by country optional product product code Lithium Ion Battery Model D111A B32B81826 ...

Page 76: ...on standard that can compress data to the ratio of 10 without decreasing sound quality NTSC PAL Broadcast analog color TV standards NTSC is used mainly in Japan North America and various South American countries PAL is used mainly in Western Europe except France China and some other Asian countries pixel Short for picture element Each image is composed of a number of pixels Pixels are also counted...

Page 77: ...audio data 35 B Battery charging 18 installing 17 removing 19 C Changing P 4000 settings 60 Charging the battery 18 Cleaning P 4000 66 Connecting to a computer 56 to a printer 51 Contacting EPSON 71 Customer support 71 Customizing settings 60 D Data copying from a memory card to P 4000 27 copying image 40 deleting 46 displaying on the computer s monitor 56 Direct printing 51 Displaying images 29 E...

Page 78: ...rint quantity 54 Problems and solutions 67 R Removing a memory card 25 26 Resetting P 4000 70 S Setting copy mode settings 60 date and time settings 60 language setting 60 LCD brightness setting 60 power save settings 60 slide show settings 60 sound setting 60 video out setting 60 view mode settings 60 Setting up P 4000 17 Software finding more information 65 installing 63 starting 64 system requi...

Page 79: ...on problems 69 power supply problems 68 printing problems 70 viewing and playing problems 68 Turning the power off 21 Turning the power on 20 U Uninstalling software 65 Unpacking P 4000 14 Using albums 39 pop up menu 49 video output 58 V Video available types 35 playing 37 ...

Page 80: ...80 Index ...
Reviews: