background image

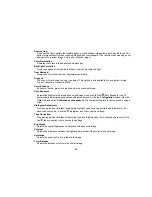
Color Palette

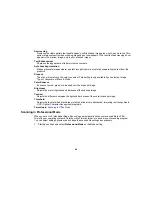
Provides a graphical interface for adjusting mid-tone levels, such as skin tones, without affecting the

highlight and shadow areas of the image. (For advanced users only.) Click the

Color Palette icon

to access the settings.

Threshold

Adjusts the level at which black areas in text and line art are delineated, improving text recognition in
OCR (Optical Character Recognition) programs.

Parent topic:

Scanning in Professional Mode

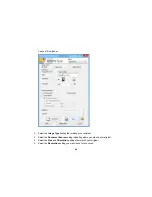
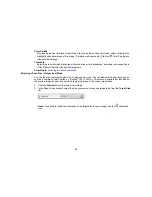
Selecting a Scan Size - Professional Mode

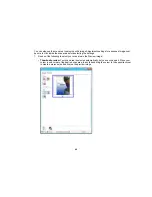
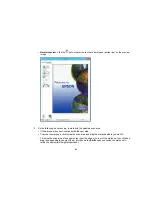
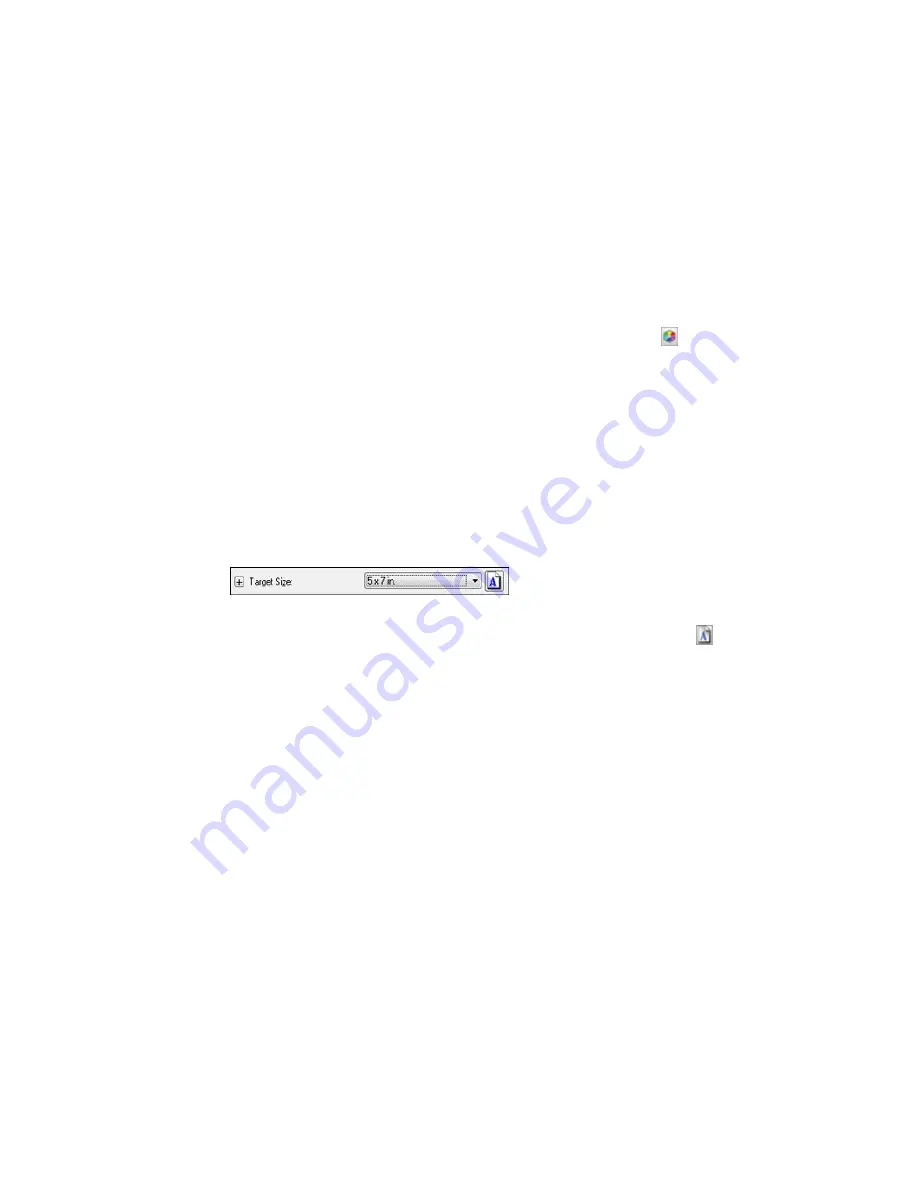
You can reduce or enlarge the size of your image as you scan. You can also select a specific scan size,
such as a common photo size like 4 × 6 inches (102 × 152 mm). This places a scan area of that size on
the preview image so you can use it to help crop the image in the correct proportions.

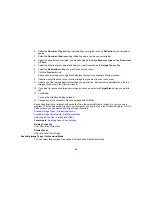
1.

Click the

Preview

button to preview your image.

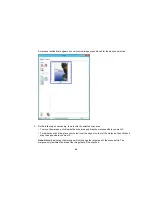
2.

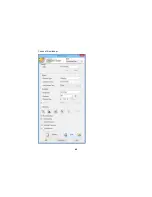
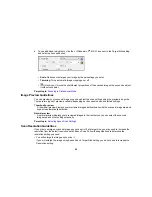
In the Epson Scan window, select the size you want your scanned image to be from the

Target Size

list.

Note:

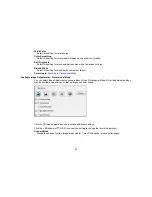
If you need to rotate the orientation of the target size for your image, click the

orientation

icon.

53

Summary of Contents for Perfection V19

Page 1: ...Perfection V19 V39 User s Guide ...

Page 2: ......

Page 3: ...n Using the Epson Scan Icon 27 Scanning with Document Capture Pro and Document Capture 28 Starting a Scan from a Scanning Program 31 Selecting Epson Scan Settings 33 Scan Modes 33 Selecting the Scan Mode 34 Scanning in Full Auto Mode 34 Available Image Adjustments Full Auto Mode 37 Scanning in Home Mode 37 Selecting a Scan Area Home Mode 39 Available Image Adjustments Home Mode 42 Scanning in Offi...

Page 4: ...ges to a Folder 74 Epson JPEG File Settings 75 Epson TIFF and Multi TIFF File Settings 77 Restoring Photo Colors as You Scan 78 Scanning to a SharePoint Server or Cloud Service 78 Scanning Multi Page Originals as Separate Files Windows 80 Scanning Two Originals onto One Sheet Stitching Images Windows 82 Scanning to a PDF File Using a Scanner Button 83 Available Image Adjustments Scan to PDF Settin...

Page 5: ...al Colors 101 Scan Area is Not Adjustable in Thumbnail Preview 101 Scanned Image Edges are Cropped 102 Characters are not Recognized During Conversion to Editable Text OCR 102 When to Uninstall Your Scanner Software 102 Uninstalling Scanner Software Windows 102 Uninstalling Scanner Software OS X 103 Where to Get Help 104 Technical Specifications 105 Windows System Requirements 105 Mac System Requi...

Page 6: ...Restrictions on Copying 110 Trademarks 111 Copyright Notice 111 libTIFF Software Acknowledgment 112 A Note Concerning Responsible Use of Copyrighted Materials 112 Copyright Attribution 113 6 ...

Page 7: ...Perfection V19 V39 User s Guide Welcome to the Perfection V19 V39 User s Guide For a printable PDF copy of this guide click here 7 ...

Page 8: ...Scanner Basics See these sections to learn about the basic features of your scanner Scanner Parts Scanner Buttons and Lights Using the Scanner Stand Scanner Parts 1 Scanner cover 8 ...

Page 9: ...1 Document mat 2 Scanner glass 3 Carriage beneath scanner glass 9 ...

Page 10: ...1 USB port 1 Scanner stand Parent topic Scanner Basics 10 ...

Page 11: ... 2 The send button 3 The copy button 4 The start button 5 The status light Parent topic Scanner Basics Related references Scanner Light Status Using the Scanner Stand The scanner can be used in an upright position if surface space is limited 11 ...

Page 12: ...1 Stand the scanner upright 12 ...

Page 13: ...2 Extend the scanner stand from the back of the scanner until it clicks into place 13 ...

Page 14: ...3 Tilt the scanner until it rests on the scanner stand 14 ...

Page 15: ...4 To put the scanner stand away rotate it into the back of the scanner Parent topic Scanner Basics 15 ...

Page 16: ...ginals on the Scanner Glass Placing Originals While Using the Scanner Stand Placing Thick Documents Placing Originals on the Scanner Glass You can place originals directly on the scanner glass Caution Do not place heavy objects on the scanner glass and do not press on the glass with too much force or it may damage the scanner Do not leave photos on the scanner glass for an extended period or they ...

Page 17: ...1 Open the scanner cover 17 ...

Page 18: ...dicated corner Note You can place multiple originals on the scanner glass Make sure they are at least 0 8 inch 20 mm away from each other Note The edges of your original may be cropped by 0 1 inch 2 5 mm from the left side and top edges If you are scanning in Full Auto mode or using thumbnail preview in another mode in Epson 18 ...

Page 19: ...asks Scanning in Full Auto Mode Placing Originals While Using the Scanner Stand You can place originals directly on the scanner glass while the scanner stand is extended Caution Do not place heavy objects on the scanner glass and do not press on the glass with too much force or it may damage the scanner Do not leave photos on the scanner glass for an extended period or they may stick to the glass ...

Page 20: ...1 Open the scanner cover 20 ...

Page 21: ...dge facing as shown Slide the original to the edges of the indicated corner Note The edges of your original may be cropped by 0 1 inch 2 5 mm from the left side and top edges If you are scanning in Full Auto mode or using thumbnail preview in another mode in Epson 21 ...

Page 22: ...l may be cropped by about 0 24 inch 6 mm from the top and side edges 3 Close the scanner cover gently and hold it to keep your original in place Parent topic Placing Originals on the Scanner Related tasks Using the Scanner Stand 22 ...

Page 23: ... near the hinges and pull straight up keeping the cover horizontal 2 Place your document facedown on the scanner glass Note Press down on your document gently to flatten it and hold the document down as you scan 3 When you are finished scanning replace the scanner cover in the reverse order that you removed it Parent topic Placing Originals on the Scanner 23 ...

Page 24: ... Icon Scanning with Document Capture Pro and Document Capture Starting a Scan from a Scanning Program Parent topic Scanning Starting a Scan from a Scanner Button You can scan using a button on your scanner This automatically starts a default scanning program but you can reassign the buttons to different programs Your product automatically selects suitable default scan settings but you can view or ...

Page 25: ...loud destination 3 The copy button starts the Copy Utility so you can scan your original and print it on a printer connected to your computer 4 The start button starts Epson Scan so you can select your scan mode settings and scanned file destination on your computer The designated scan program starts Changing Default Scan Button Settings Parent topic Starting a Scan Related tasks Placing Originals...

Page 26: ...nd actions performed by each scanner button You do this using the Event Manager program 1 Do one of the following to open Event Manager Windows 8 x Navigate to the Apps screen and select Event Manager Windows other versions Click or Start All Programs or Programs Epson Software Event Manager OS X Open the Applications folder click Epson Software and click Event Manager You see a window like this 2...

Page 27: ...nd select All Programs or Programs Select EPSON or EPSON Software and click EPSON Scan OS X Open the Applications folder open the Epson Software folder and double click the EPSON Scan icon Note With OS X in addition to scanning with Image Capture you can download and install Epson Scan scanning software Epson Scan provides additional image adjustment and photo correction features for enhancing sca...

Page 28: ...ment Capture Pro and Document Capture When you scan with Document Capture Pro Windows or Document Capture OS X the program automatically saves your scanned file on your computer in the folder you specify You can select settings preview and change the scanned file settings as necessary 28 ...

Page 29: ...ment Capture Pro Windows or Document Capture OS X Windows 8 x Navigate to the Apps screen and select Document Capture Pro Windows other versions Click or Start and select All Programs or Programs Select EPSON Software then select Document Capture Pro OS X Open the Applications folder select the Epson Software folder and select Document Capture You see a window like this 2 Click the Scan icon 29 ...

Page 30: ...reen the Epson Scan main window opens instead of the Scan screen 3 Select any displayed scan settings you want to use Note See the Help information in Document Capture Pro or Document Capture for details 4 If you want to select detailed scan settings do one of the following Windows Close the Scan window Open the Scan menu at the top of the screen select Scan Settings Screen and choose Use EPSON Sc...

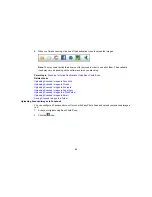
Page 31: ...uld like to scan additional originals and add them to the current captured images click the Add Page button select Acquire from Scanner and repeat steps 2 through 6 8 Check the scanned images and edit them as necessary 9 Click one of the Destination icons to choose where to send your scanned files If you cannot see all of the icons below click the arrow next to the icons 10 Depending on the destin...

Page 32: ...ur product as the source first If you see a Select Source option choose it and select your product You see an Epson Scan window like this Note In certain programs you may see the program s scan window instead of the Epson Scan window Select scanning options as necessary 32 ...

Page 33: ...etects the type of content you are scanning selects settings for it and saves your scanned image You can also select various image adjustment options Home Mode You can select setting groups based on the type of content you are scanning You can also select various image adjustment options and preview and size your scanned image Office Mode You can quickly scan text documents and adjust them on a pr...

Page 34: ...tings Scanning in Full Auto Mode When you scan in Full Auto Mode Epson Scan automatically saves your scanned file in JPEG format in your operating system s Pictures or My Pictures folder or opens it in your scanning program You can change the scanned file settings and select various image adjustment options before you scan if necessary 1 Start Epson Scan and select Full Auto Mode as the Mode setti...

Page 35: ...You see this window 35 ...

Page 36: ...o change the scanned file settings click File Save Settings 3 Click Scan Epson Scan scans your original and saves the file in the selected folder or opens it in your scanning program If the file was saved directly to your computer you see the file in the Windows Explorer or OS X Finder where you can view and print the image if desired Available Image Adjustments Full Auto Mode Parent topic Selecti...

Page 37: ...r faces the sky and other features and then correctly rotates the photo when it is scanned if necessary If your photo is not oriented correctly using this option deselect this option and scan again Parent topic Scanning in Full Auto Mode Scanning in Home Mode When you scan in Home Mode Epson Scan automatically saves your scanned file in JPEG format in your operating system s Pictures or My Picture...

Page 38: ...You see this window 2 Select the Document Type setting that matches your original such as Photograph or Text Line Art 3 Select the Image Type setting that matches your original 38 ...

Page 39: ... use Before making adjustments click the image or scan area in the Preview window 9 If you want to reduce or enlarge your image as you scan select the Target Size setting you want to use 10 Click Scan You see the File Save Settings window 11 Change any of the necessary file save settings and click OK Epson Scan scans your original and saves the file in the selected folder or opens it in your scann...

Page 40: ...re selecting the settings 1 Do one of the following to select your scan area in the Preview image Thumbnail preview Your scan area is selected automatically but you can change it Place your cursor in one corner of the desired scan area then click and drag the cursor to the opposite corner to create a marquee dotted line on the preview image 40 ...

Page 41: ...f the marquee is correct continue with the next step To move the marquee click inside the scan area and drag the marquee where you want it To resize the scan area place your cursor over the edge or corner of the marquee then click and drag the edges where you want them Hold down the Shift key as you resize the marquee to retain the same width height proportions 41 ...

Page 42: ...n Home Mode Available Image Adjustments Home Mode You can select these Image Adjustments options in Epson Scan Home Mode Note Select the Image Option checkbox if you need to set any of the grayed out image adjustments Not all adjustment settings may be available depending on the Document Type and Image Type setting Click the Brightness button to access additional settings Descreening Removes the r...

Page 43: ...nd dark areas of the overall scanned image Threshold Adjusts the level at which black areas in text and line art are delineated improving text recognition in OCR Optical Character Recognition programs Parent topic Scanning in Home Mode Scanning in Office Mode When you scan in Office Mode Epson Scan automatically saves your scanned file in JPEG format in your operating system s Pictures or My Pictu...

Page 44: ...setting that matches your original 3 Select the Document Source setting indicating where you placed your original 4 Select the Size and Orientation settings that match your original 5 Select the Resolution setting you want to use for your scan 44 ...

Page 45: ...ed directly to your computer you see the file in the Windows Explorer or OS X Finder where you can view and print the image if desired Selecting a Scan Area Office Mode Available Image Adjustments Office Mode Parent topic Selecting Epson Scan Settings Related concepts Scan Resolution Guidelines Related tasks Selecting Scan File Settings Selecting a Scan Area Office Mode You can select a specific a...

Page 46: ...eate a marquee dotted line on the preview image 2 Do the following as necessary to work with the selected scan area If the marquee is correct continue with the next step To move the marquee click inside the scan area and drag the marquee where you want it 46 ...

Page 47: ...ete a marquee click the marquee then click the Delete Marquee icon To rotate your original in your scan click one of the Rotate icons 3 Click inside each scan area and make any necessary settings in the Epson Scan window Parent topic Scanning in Office Mode Available Image Adjustments Office Mode You can select these Image Adjustments options in Epson Scan Office Mode Not all adjustment settings m...

Page 48: ...r Enhance Enhances the red green or blue shades in the scanned image Brightness Adjusts the overall lightness and darkness of the scanned image Contrast Adjusts the difference between the light and dark areas of the overall scanned image Threshold Adjusts the level at which black areas in text and line art are delineated improving text recognition in OCR Optical Character Recognition programs Pare...

Page 49: ...You see this window 49 ...

Page 50: ... adjustments click the image or scan area in the Preview window 10 If you want to reduce or enlarge your image as you scan select the Target Size setting you want to use 11 Click Scan You see the File Save Settings window 12 Change any of the necessary file save settings and click OK Epson Scan scans your original and saves the file in the selected folder or opens it in your scanning program If th...

Page 51: ...ent topic Scanning in Professional Mode Available Image Adjustments Professional Mode You can select these Adjustments options in Epson Scan Professional Mode Not all adjustment settings may be available depending on other settings you have chosen Click the image adjustment icon to access additional settings Click the Windows or OS X icon next to a setting to change the level of adjustment Unsharp...

Page 52: ...djusts the image exposure settings when you click the Auto Exposure icon To automatically adjust image exposure settings continuously click the Configuration button click the Color tab and select Continuous auto exposure You can adjust the level of auto exposure using a slider Histogram Adjustment Provides a graphical interface for adjusting highlight shadow and gamma levels individually For advan...

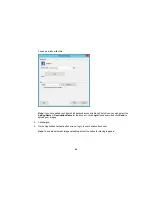
Page 53: ...nning in Professional Mode Selecting a Scan Size Professional Mode You can reduce or enlarge the size of your image as you scan You can also select a specific scan size such as a common photo size like 4 6 inches 102 152 mm This places a scan area of that size on the preview image so you can use it to help crop the image in the correct proportions 1 Click the Preview button to preview your image 2...

Page 54: ... the marquee click inside the scan area and drag the marquee where you want it To resize the scan area place your cursor over the edge or corner of the marquee then click and drag the edge where you want it Note Manually adjusting the marquee will not change the target size of the scanned file The marquee only indicates the area of the image that will be scanned 54 ...

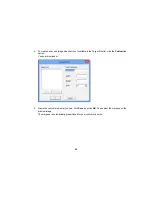
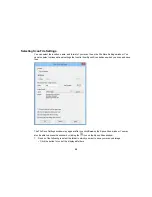
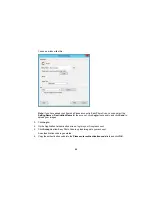
Page 55: ...ble in the Target Size list click the Customize option You see this window 5 Name the custom size enter the size click Save and click OK Then adjust the marquee on the preview image The marquee is automatically proportioned for your custom scan size 55 ...

Page 56: ...mode and selected settings Thumbnail preview A thumbnail preview displays your previewed images as thumbnails with the scanned image area and exposure automatically selected Normal preview A normal preview displays your previewed images in their entirety so you can select the scanned image area and other settings manually Parent topic Selecting Epson Scan Settings Scan Resolution Guidelines If you...

Page 57: ...ple if the resolution is 300 dpi dots per inch and you will double the image size later change the Resolution setting to 600 dpi You will scan the image at 100 or smaller size Select Epson Scan s Resolution setting based on how you will use the scanned image Email view on a computer screen post on the web 96 to 150 dpi Print convert to editable text OCR 300 dpi Fax 200 dpi Parent topic Selecting E...

Page 58: ...ontrol how Epson Scan behaves when you scan and save files The File Save Settings window may appear after you click Scan on the Epson Scan window You may also be able to access the window by clicking the icon on the Epson Scan window 1 Do one of the following to select the folder in which you want to save your scanned image Click the button for one of the displayed folders 58 ...

Page 59: ...ptional settings on the File Save Settings window in Epson Scan File Formats Bitmap bmp A standard image file format for most Windows programs JPEG jpg An image format that lets you highly compress image data However the higher the compression the lower the image quality The TIFF format is recommended when you need to modify or retouch your scanned image Multi TIFF tif A TIFF file format when mult...

Page 60: ...pt for scanning additional pages after the first page is scanned Parent topic Selecting Scan File Settings Scanning Special Projects Your product s scanning software offers various options to help you quickly complete special scan projects Scanning to Online Destinations Using Easy Photo Scan Restoring Photo Colors as You Scan Scanning to a SharePoint Server or Cloud Service Scanning Multi Page Or...

Page 61: ...nning software Epson Scan provides additional image adjustment and photo correction features for enhancing scanned images and provides an interface for TWAIN compliant OCR scanning software To download Epson Scan visit Epson s driver download site U S downloads or Canadian downloads 1 Place your original on your product for scanning 2 Do one of the following to open Easy Photo Scan Windows 8 x Nav...

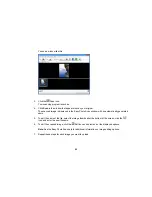
Page 62: ...dow with an automatically generated name 5 To edit the name of the file select the image thumbnail at the bottom of the screen click the icon and enter the new filename 6 To edit the scanned image click the Edit icon and select one of the displayed options Note See the Easy Photo Scan help for additional information on image editing options 7 Repeat these steps for each image you want to upload 62...

Page 63: ...ing Easy Photo Scan Related tasks Uploading Scanned Images to Facebook Uploading Scanned Images to Picasa Uploading Scanned Images to Evernote Uploading Scanned Images to SugarSync Uploading Scanned Images to a Web Folder Uploading Scanned Images to Email Saving Scanned Images to a Folder Uploading Scanned Images to Facebook You can configure a Facebook account for use with Easy Photo Scan and upl...

Page 64: ...you can select the Setting Name or Destination Name for the account click Login if necessary and click Send to upload your images 3 Click Login 4 On the Application Authentication screen log in to your Facebook account Note To enable automatic image uploading select the option for staying logged in 64 ...

Page 65: ...al folder select the Copy the image s to a local folder checkbox and select a folder 9 If you want to save the current settings click Edit or the Setting Name or Destination Name field and select Save As Enter a name for the setting and click OK 10 Click Send to upload the images to your Facebook account or click Cancel to cancel the operation Parent topic Scanning to Online Destinations Using Eas...

Page 66: ... account click Login if necessary and click Send to upload your images 3 Click Login 4 On the Application Authentication screen log into your Google account 5 Click Accept to allow Easy Photo Scan to upload images to your account An authentication code is generated 6 Copy the authentication code into the Please enter authentication code field and click OK 66 ...

Page 67: ... the images to a local folder select the Copy the image s to a local folder checkbox and select a folder 12 If you want to save the current settings click Edit or the Setting Name or Destination Name field and select Save As Enter a name for the setting and click OK 13 Click Send to upload the images to your Picasa account or click Cancel to cancel the operation Parent topic Scanning to Online Des...

Page 68: ...ting Name or Destination Name for the account and click Send to upload your images 3 Select a notebook from the Notebook list Note If you want to create a new notebook you must create it directly in Evernote 4 Select the image format for the uploaded files from the File or File Type list 5 If there are options for the selected file format click Options or Option and select the options you want 68 ...

Page 69: ...etting and click OK 8 Click Send to upload the images to your Evernote account or click Cancel to cancel the operation Parent topic Scanning to Online Destinations Using Easy Photo Scan Related references Epson JPEG File Settings Related tasks Scanning Using Easy Photo Scan Uploading Scanned Images to SugarSync You can configure a SugarSync account for use with Easy Photo Scan and upload your scan...

Page 70: ... information in the E Mail Address and Password fields 4 Select a Place option for the uploaded images Note In SugarSync the Magic Briefcase is now called My SugarSync Uploads to the Magic Briefcase appear in the My SugarSync folder 5 Enter a folder name in the Folder field If you enter the name of an existing folder the images are uploaded to that folder If the folder does not exist a new folder ...

Page 71: ...age s to a local folder checkbox and select a folder 11 If you want to save the current settings click Edit or the Setting Name or Destination Name field and select Save As Enter a name for the setting and click OK 12 Click Send to upload the images to your SugarSync account or click Cancel to cancel the operation Parent topic Scanning to Online Destinations Using Easy Photo Scan Related reference...

Page 72: ... the login information in the User Name and Password fields 5 If you want to replace existing files with the same name with the uploaded images click the Overwrite file s with the same name checkbox 6 Click Check Connection to test whether the account information is correct 7 Select the image format for the uploaded files from the File or File Type list 8 If there are options for the selected file...

Page 73: ...sing Easy Photo Scan Related references Epson JPEG File Settings Epson TIFF and Multi TIFF File Settings Related tasks Scanning Using Easy Photo Scan Uploading Scanned Images to Email You can save your scanned images to a local network folder and send them by email using Easy Photo Scan Note With Windows Easy Photo Scan supports Microsoft Outlook 2000 2002 2003 2007 2010 x86 2013 x86 and Windows M...

Page 74: ...s Then click OK to save the images to the folder and launch your email program or click Cancel to cancel the operation OS X If you also want to save the images to a local folder select the Copy the image s to a local folder checkbox and select a folder Then click Send or click Cancel to cancel the operation Parent topic Scanning to Online Destinations Using Easy Photo Scan Related references Epson...

Page 75: ...ose the folder where you want to save the images 6 Click OK to save the images to the folder or click Cancel to cancel the operation Parent topic Scanning to Online Destinations Using Easy Photo Scan Related references Epson JPEG File Settings Epson TIFF and Multi TIFF File Settings Related tasks Scanning Using Easy Photo Scan Epson JPEG File Settings You can select from the following settings in ...

Page 76: ...es are rendered from the top to the bottom when displayed on a web browser Progressive Images are rendered in low resolution in a web browser then replaced with a higher resolution Embed ICC Profile Allows the ICC profile information on color reproducibility of scanned image to be embedded in the image Programs that use color management software will display the colors of the image using the ICC p...

Page 77: ...ystem where the scanned image will be used Compression Specifies the compression format and level for Color Grayscale and B W images The file size increases with higher quality Embed ICC Profile Allows the ICC profile information on color reproducibility of scanned image to be embedded in the image Programs that use color management software will display the colors of the image using the ICC profi...

Page 78: ... the Epson Scan window if necessary Epson Scan scans your original and saves the color restored file in the selected folder or opens it in your scanning program If the file was saved directly to your computer you see the file in the Windows Explorer or OS X Finder where you can view and print the image if desired Parent topic Scanning Special Projects Scanning to a SharePoint Server or Cloud Servi...

Page 79: ...ument Capture Pro or Document Capture for details 4 Click Scan You see a preview of your scan in the Document Capture Pro or Document Capture window 5 Click one of the cloud service Destination icons to choose where to save your scanned file If you cannot see all of the icons below the service software may not be installed or you need to click the arrow next to the icons Web Folder WebDAV Microsof...

Page 80: ...apture Pro Windows only to scan multi page originals as separate scanned files You indicate where you want the new scanned files to start by inserting a blank page or barcode between the pages of your original Note The settings may vary depending on the software version you are using See the Help information in Document Capture Pro for details 1 Load a multi page original with blank pages or barco...

Page 81: ...o for details 5 Click Scan You see a preview of your scan in the Document Capture Pro window 6 Click one of the Destination icons to choose where to send your scanned files If you cannot see all of the icons below click the arrow next to the icons 7 Click File Name Separation Settings 8 Select Apply Job Separation and click Separation Settings 81 ...

Page 82: ...scan both sides of a double sided or folded original with ArcSoft Scan n Stitch Deluxe Perfection V39 1 Do one of the following to start ArcSoft Scan n Stitch Deluxe Windows 8 x Navigate to the Apps screen and select Scan n Stitch Windows other versions Click or Start and select All Programs or Programs Select ArcSoft Scan n Stitch Deluxe then select Scan n Stitch Deluxe You see a window like this...

Page 83: ...F button on your scanner You can select the following options as you scan to PDF Scan multiple pages to one PDF file Scan multiple pages to multiple PDF files Create a searchable PDF file 1 Place your original on your product for scanning 2 Press the PDF button on your scanner You see this window 3 Click Settings 83 ...

Page 84: ...elect the Image Type setting for the type of original you are scanning 5 Select the Size Orientation and Resolution settings for your scan 6 Select any of the available Image Adjustments settings 7 Click File save settings 84 ...

Page 85: ...You see this window 8 To change any of the displayed PDF Image Format settings click the Options button 85 ...

Page 86: ...e with all pages To create multiple PDF files of groups of scanned pages select Select number to make file Enter the number of pages you want in each file in the number field For example with a 20 page original enter 4 to create 5 PDF files of 4 pages each Note To create a searchable PDF file select the Text tab and select Create searchable PDF then select the language of the original document 86 ...

Page 87: ... Note Not all adjustment settings may be available depending on the Image Type setting Select the Image Option checkbox to access additional settings Unsharp Mask Makes the edges of certain image areas clearer Turn off this option to leave softer edges Descreening Removes the ripple pattern that might appear in subtly shaded image areas such as skin tones This option improves results when scanning...

Page 88: ...ng the Scanner as a Copier Copy Utility You can use your scanner along with a printer connected to your computer just like you would use a copy machine Using the Copy Utility you can enlarge or reduce restore faded colors and adjust a variety of other settings as you copy 1 Do one of the following to start Copy Utility Windows 8 x Navigate to the Apps screen and select Copy Utility Windows other v...

Page 89: ...You see a window like this 2 Click the Scan icon 89 ...

Page 90: ... the scan from a scanner button the Epson Scan window opens automatically If you have previously used Epson Scan it may start in a different mode 3 Select any scan settings you want to use Note See the Help information in Epson Scan for details 90 ...

Page 91: ...again 6 Rotate the images if necessary by selecting the thumbnail and clicking the rotate buttons at the bottom of the window 7 Select the image s you want to print and click the Print button 8 Choose a printer from the drop down list and select settings Click Printer Settings to select specific printer settings Note See the Help information in Copy Utility for details 9 Click Print to print your ...

Page 92: ...ged glass surface can decrease the scan quality 1 Disconnect the USB cable 2 Clean the outer case with a cloth dampened with mild detergent and water 3 If the scanner glass gets dirty clean it with a soft dry cloth If the glass surface is stained with grease or some other hard to remove material use a small amount of glass cleaner on a soft cloth to remove it Wipe off all remaining liquid Note Do ...

Page 93: ... scanner and wait until the carriage moves to the home position 2 Disconnect the USB cable 3 Place the scanner in its original packing materials if possible or use equivalent materials with cushioning around the scanner Caution Avoid turning the scanner upside down when transporting Parent topic Cleaning and Transporting Your Scanner 93 ...

Page 94: ...your product Scanner Light Status Solving Scanning Problems Solving Scanned Image Quality Problems When to Uninstall Your Scanner Software Where to Get Help Scanner Light Status You can often diagnose problems with your scanner by checking the status light Light 1 The status light 94 ...

Page 95: ...d off Parent topic Solving Problems Solving Scanning Problems Check these solutions if you have problems scanning with your product Scanner Does Not Turn On or Turns Off Unexpectedly Scanner Buttons Do Not Work as Expected Scanning Software Does Not Operate Correctly Cannot Start Epson Scan Scanning is Slow Cannot Scan Using Thumbnail Preview Parent topic Solving Problems Scanner Does Not Turn On ...

Page 96: ...ndow Windows Vista Open the menu and select Control Panel Hardware and Sound Scanners and Cameras Select the scanner and click Properties Windows XP Double click My Computer right click the scanner name and select Properties Click the Events tab and make sure Take no action is not selected Also make sure the scanner buttons are selected in the Select an event list box and that Start this program i...

Page 97: ...ep or standby If so wake your system and restart Epson Scan If you connected the scanner using a USB cable make sure it is connected directly to your computer or through only one USB hub Make sure you do not have multiple versions of Epson Scan installed If you do uninstall both versions and install one version If you upgraded your operating system but did not reinstall Epson Scan try reinstalling...

Page 98: ... Straight Lines in an Image Appear Crooked Image is Distorted or Blurry Image Colors are Patchy at the Edges Image is Too Dark Back of Original Image Appears in Scanned Image Ripple Patterns Appear in an Image Image is Scanned Upside Down Scanned Image Colors Do Not Match Original Colors Scan Area is Not Adjustable in Thumbnail Preview Scanned Image Edges are Cropped Characters are not Recognized ...

Page 99: ...d Image Quality Problems Image is Distorted or Blurry If a scanned image appears distorted or blurry try these solutions Make sure your original is not wrinkled or warped This may prevent the original from laying flat on the scanner glass Do not move your original or your product during scanning Place it on a flat stable surface that extends beyond the base of the product in all directions Adjust ...

Page 100: ... back of the original and scan it again Parent topic Solving Scanned Image Quality Problems Ripple Patterns Appear in an Image You may see a ripple pattern called a moiré in scanned images of printed documents This is caused by interference from differing pitches in the scanner s screen and your original s halftone screen To reduce this effect adjust these Epson Scan settings if available and try ...

Page 101: ...try scanning again Change the Image Type setting and experiment with different combinations of the next settings Adjust the Tone Correction setting Adjust the Auto Exposure setting Click Customize then select the Color tab and adjust the Display Gamma setting to match your output device monitor or printer Select JPEG jpg or TIFF tif as the Type setting on the File Save Settings window Click Option...

Page 102: ...pson Scan settings if available and try scanning again Select Text Enhancement Select the correct Image Type setting Adjust the Threshold setting Set the scanning resolution between 200 and 600 dpi If you are using OCR software check the manual for any additional adjustments Parent topic Solving Scanned Image Quality Problems When to Uninstall Your Scanner Software If you have a problem that requi...

Page 103: ...ntact Epson Parent topic When to Uninstall Your Scanner Software Uninstalling Scanner Software OS X In most cases you do not need to uninstall your scanner software before re installing it However you can download the Uninstaller utility from the Epson support website to uninstall your scanner software as described here Note If you find that re installing your scanner software does not solve a pro...

Page 104: ...te of purchase Computer configuration Description of the problem Then call U S 562 276 4382 6 AM to 8 PM Pacific Time Monday through Friday and 7 AM to 4 PM Pacific Time Saturday Canada 905 709 3839 6 AM to 8 PM Pacific Time Monday through Friday and 7 AM to 4 PM Pacific Time Saturday Days and hours of support are subject to change without notice Toll or long distance charges may apply Note For he...

Page 105: ...ecifications Windows System Requirements Make sure your system meets these requirements before using it with your scanner System Microsoft Windows 8 x Windows 7 Windows Vista Windows XP Service Pack 2 or later Interface USB 2 0 Type B standard connector Parent topic Technical Specifications Mac System Requirements Make sure your system meets these requirements before using it with your scanner Sys...

Page 106: ...anning resolution 4800 dpi main scan 4800 dpi sub scan 9600 dpi with Micro Step Output resolution 50 to 4800 7200 and 9600 dpi 50 to 4800 dpi in 1 dpi increments Image data 16 bits per pixel per color internal 8 bits per pixel per color external Interface One Hi Speed USB port Light source LED Parent topic Technical Specifications Dimension Specifications Height 1 6 inches 39 mm Width 9 9 inches 2...

Page 107: ...o 140 F 20 to 60 C Humidity Operating 20 to 80 RH non condensing Storage 20 to 80 RH Operating conditions Ordinary office or home conditions Note Avoid operating the scanner in direct sunlight near a strong light source or in extremely dusty conditions Parent topic Technical Specifications USB Interface Specifications Interface type Universal Serial Bus Specifications Revision 2 0 Electrical stand...

Page 108: ...ent topic Technical Specifications Safety and Approvals Specifications United States EMC FCC part 15 Subpart B class B Canada EMC CAN CSA CEI IEC CISPR 22 Class B Parent topic Technical Specifications 108 ...

Page 109: ... only one correct orientation Inserting a connector in the wrong orientation may damage both devices connected by the cable Do not insert objects into any opening as they may touch dangerous voltage points or short out parts Beware of electrical shock hazards Place the product on a flat stable surface that extends beyond the base of the product in all directions If you place the product by the wal...

Page 110: ...ting instructions Parent topic Notices Default Delay Times for Power Management for Epson Products This product will enter sleep mode after a period of nonuse The time interval has been set at the factory to ensure that the product meets Energy Star standards of energy efficiency and cannot be modified by the consumer Parent topic Notices Restrictions on Copying Observe the following restrictions ...

Page 111: ...ed in any form or by any means electronic mechanical photocopying recording or otherwise without the prior written permission of Seiko Epson Corporation The information contained herein is designed only for use with this Epson product Epson is not responsible for any use of this information as applied to other products Neither Seiko Epson Corporation nor its affiliates shall be liable to the purch...

Page 112: ... software without the specific prior written permission of Sam Leffler and Silicon Graphics THE SOFTWARE IS PROVIDED AS IS AND WITHOUT WARRANTY OF ANY KIND EXPRESS IMPLIED OR OTHERWISE INCLUDING WITHOUT LIMITATION ANY WARRANTY OF MERCHANTABILITY OR FITNESS FOR A PARTICULAR PURPOSE IN NO EVENT SHALL SAM LEFFLER OR SILICON GRAPHICS BE LIABLE FOR ANY SPECIAL INCIDENTAL INDIRECT OR CONSEQUENTIAL DAMAG...

Page 113: ...Copyright Attribution 2015 Epson America Inc 1 15 CPD 42186 Parent topic Copyright Notice 113 ...

Reviews: