background image

User's Guide

NPD5337-00 EN

Summary of Contents for PictureMate PM-401

Page 1: ...User s Guide NPD5337 00 EN ...

Page 2: ...urred by the purchaser or third parties as a result of accident misuse or abuse of this product or unauthorized modifications repairs or alterations to this product or excluding the U S failure to strictly comply with Seiko Epson Corporation s operating and maintenance instructions Seiko Epson Corporation and its affiliates shall not be liable for any damages or problems arising from the use of an...

Page 3: ...poration Apple Macintosh Mac OS OS X Bonjour Safari iPad iPhone iPod touch and iTunes are trademarks of Apple Inc registered in the U S and other countries AirPrint and the AirPrint logo are trademarks of Apple Inc Google Cloud Print Chrome Chrome OS and Android are trademarks of Google Inc Adobe Adobe Reader Acrobat and Photoshop are trademarks of Adobe systems Incorporated which may be registere...

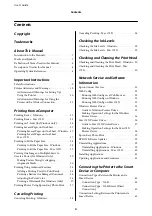
Page 4: ...r Windows Only 27 Printing Photos Using Epson Easy Photo Print 27 Canceling Printing Canceling Printing Windows 28 Canceling Printing Mac OS X 28 Checking the Ink Levels Checking the Ink Levels Windows 29 Checking the Ink Levels Mac OS X 29 Checking and Cleaning the Print Head Checking and Cleaning the Print Head Windows 30 Checking and Cleaning the Print Head Mac OS X 30 Network Service and Softw...

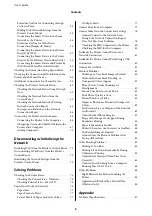
Page 5: ...us Mac OS X 76 Paper Does Not Feed Correctly 76 Paper Jams 77 Paper Feeds at a Slant 77 Several Sheets of Paper are Fed at a Time 77 No Paper Feeds 77 Cannot Print from a Computer 77 Cannot Make Network Connection Settings 78 Cannot Connect to the Network Even Though the Network Connection Report Does Not Show Any Problems 78 Checking the SSID Connected to the Printer 80 Checking the SSID for the ...

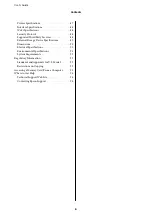
Page 6: ...e Specifications 89 Dimensions 90 Electrical Specifications 90 Environmental Specifications 91 System Requirements 92 Regulatory Information 92 Standards and Approvals for U S Model 92 Restrictions on Copying 92 Accessing a Memory Card From a Computer 93 Where to Get Help 94 Technical Support Web Site 94 Contacting Epson Support 94 User s Guide Contents 6 ...

Page 7: ...settings and solving problems when using the printer on a network You can obtain the latest versions of the above manuals with the following methods Paper manual Visit the Epson worldwide support website at http support epson net Digital manual Start EPSON Software Updater on your computer EPSON Software Updater checks for available updates of Epson software applications and the digital manuals an...

Page 8: ...se a Pre Shared Key and so on according to the access point or security system being used We use Password in this manual Descriptions Used in this Manual Screenshots of the printer driver are from Windows 8 1 or Mac OS X v10 10 x The content displayed on the screens varies depending on the model and situation Operating System References Windows In this manual terms such as Windows 8 1 Windows 8 Wi...

Page 9: ...direct sunlight near heaters inside cars or other locations that are subject to high temperatures The printer may be deformed or ink may leak Take care not to spill liquid on the printer and the AC adapter and not to handle the printer and the AC adapter with wet hands The AC adapter model A461H or A462E is designed for use with the printer with which it was included Do not attempt to use it with ...

Page 10: ...rovide adequate short circuit protection and over current protection for the printer When connecting the printer to a computer or other device with a cable ensure the correct orientation of the connectors Each connector has only one correct orientation Inserting a connector in the wrong orientation may damage both devices connected by the cable Place the printer on a flat stable surface that exten...

Page 11: ...all posted warnings and directions on the medical equipment Radio waves from this printer may negatively affect the operation of automatically controlled devices such as automatic doors or fire alarms and could lead to accidents due to malfunction When using this printer near automatically controlled devices follow all posted warnings and directions on these devices Follow the instructions given b...

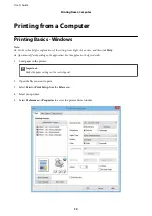
Page 12: ...r depending on the application See the application s help for details 1 Load paper in the printer cImportant Make the paper settings on the control panel 2 Open the file you want to print 3 Select Print or Print Setup from the File menu 4 Select your printer 5 Select Preferences or Properties to access the printer driver window User s Guide Printing from a Computer 12 ...

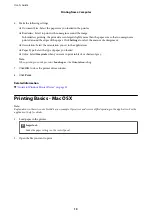
Page 13: ...pe of paper you loaded Color Select Grayscale when you want to print in black or shades of gray Note When printing on envelopes select Landscape as the Orientation setting 7 Click OK to close the printer driver window 8 Click Print Related Information Guide to Windows Printer Driver on page 33 Printing Basics Mac OS X Note Explanations in the section use TextEdit as an example Operations and scree...

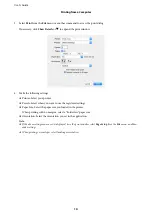
Page 14: ...e the registered settings Paper Size Select the paper size you loaded in the printer When printing with no margins select a borderless paper size Orientation Select the orientation you set in the application Note If the above setting menus are not displayed close the print window select Page Setup from the File menu and then make settings When printing on envelopes select landscape orientation Use...

Page 15: ...llowing to add a printer http epson sn 6 Make the following settings Media Type Select the type of paper you loaded Expansion Available when selecting a borderless paper size In borderless printing the print data is enlarged slightly more than the paper size so that no margins are printed around the edges of the paper Select the amount of enlargement Grayscale Select to print in black or shades of...

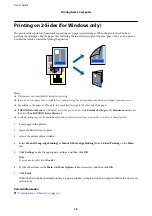
Page 16: ...river click Extended Settings on the Maintenance tab and then select Enable EPSON Status Monitor 3 2 sided printing may not be available when the printer is accessed over a network or is used as a shared printer 1 Load paper in the printer 2 Open the file you want to print 3 Access the printer driver window 4 Select Manual Long edge binding or Manual Short edge binding from 2 Sided Printing on the...

Page 17: ...ct 2 Up or 4 Up as the Multi Page setting on the Main tab 5 Click Page Order make the appropriate settings and then click OK to close the window 6 Set the other items on the Main and More Options tabs as necessary and then click OK 7 Click Print Related Information Printing Basics Windows on page 12 Printing Several Pages on One Sheet Mac OS X 1 Load paper in the printer 2 Open the file you want t...

Page 18: ... for borderless printing 1 Load paper in the printer 2 Open the file you want to print 3 Access the printer driver window 4 Make the following settings on the More Options tab Document Size Select the paper size you set in the application Output Paper Select the paper size you loaded in the printer Fit to Page is selected automatically Note If you want to print a reduced image at the center of the...

Page 19: ...lect the paper size you loaded in the printer as the Destination Paper Size setting 8 Set the other items as necessary 9 Click Print Related Information Printing Basics Mac OS X on page 13 Printing One Image on Multiple Sheets to Create a Poster for Windows Only This feature allows you to print one image on multiple sheets of paper You can create a larger poster by taping them together Note This f...

Page 20: ...lows you to print a cutting guide 6 Set the other items on the Main and More Options tabs as necessary and then click OK 7 Click Print Related Information Printing Basics Windows on page 12 Making Posters Using Overlapping Alignment Marks Here is an example of how to make a poster when 2x2 Poster is selected and Overlapping Alignment Marks is selected in Print Cutting Guides User s Guide Printing ...

Page 21: ...t 1 along the vertical blue line through the center of the top and bottom cross marks 2 Place the edge of Sheet 1 on top of Sheet 2 and align the cross marks then temporarily tape the two sheets together from the back User s Guide Printing from a Computer 21 ...

Page 22: ...e vertical red line through the alignment markers this time the line to the left of the cross marks 4 Tape the sheets together from the back 5 Repeat steps 1 to 4 to tape Sheet 3 and Sheet 4 together User s Guide Printing from a Computer 22 ...

Page 23: ...ntal blue line through the center of the left and right side cross marks 7 Place the edge of Sheet 1 and Sheet 2 on top of Sheet 3 and Sheet 4 and align the cross marks and then temporarily tape them together from the back User s Guide Printing from a Computer 23 ...

Page 24: ... the taped sheets in two along the horizontal red line through the alignment markers this time the line above the cross marks 9 Tape the sheets together from the back User s Guide Printing from a Computer 24 ...

Page 25: ... features available on the printer driver Related Information Windows Printer Driver on page 33 Mac OS X Printer Driver on page 36 Adding a Printing Preset to Print Easily If you create your own preset of frequently used print settings on the printer driver you can print easily by selecting the preset from the list User s Guide Printing from a Computer 25 ...

Page 26: ...the application See the application s help for details Select Page Setup or Print from the File menu Select the printer from Format For select the paper size and then enter a percentage in Scale Close the window and then print following the basic printing instructions Adjusting the Print Color You can adjust the colors used in the print job PhotoEnhance produces sharper images and more vivid color...

Page 27: ...less printing Click Watermark Features on the More Options tab and then select a watermark Click Settings to change details such as the density and position of the watermark Printing Photos Using Epson Easy Photo Print Epson Easy Photo Print lets you lay out and print photos easily on various types of paper See the application s help for details Note By printing on genuine Epson photo paper the in...

Page 28: ... network you may not be able to cancel printing from the computer In this case cancel the print job by using the printer s control panel Canceling Printing Windows 1 Access the printer driver window 2 Select the Maintenance tab 3 Click Print Queue 4 Right click on the job you want to cancel and then select Cancel Related Information Windows Printer Driver on page 33 Canceling Printing Mac OS X 1 C...

Page 29: ...evels are not displayed Click Extended Settings on the Maintenance tab and then select Enable EPSON Status Monitor 3 Related Information Windows Printer Driver on page 33 Checking the Ink Levels Mac OS X 1 Select System Preferences from the menu Printers Scanners or Print Scan Print Fax and then select the printer 2 Click Options Supplies Utility Open Printer Utility 3 Click EPSON Status Monitor U...

Page 30: ... printing and then run the nozzle check again and repeat the head cleaning if necessary We recommend to turn off the printer If print quality has still not improved contact Epson support To prevent the print head from drying out do not unplug the printer while the power is on Checking and Cleaning the Print Head Windows 1 Load 3 5 5 in 9 13 cm size or larger paper in the printer 2 Access the print...

Page 31: ...ails https www epsonconnect com http www epsonconnect eu Europe only Web Config Web Config is an application that runs in a web browser such as Internet Explorer and Safari on a computer or smart device You can confirm the printer status or change the network service and printer settings To use the Web Config connect the printer and the computer or device to the same network Note The following bro...

Page 32: ...printer using WSD follow the steps below to run Web Config 1 Access the devices and printers screen in Windows Windows 8 1 Windows 8 Select Desktop Settings Control Panel View devices and printers in Hardware and Sound or Hardware Windows 7 Click the start button and select Control Panel View devices and printers in Hardware and Sound Windows Vista Click the start button and select Control Panel P...

Page 33: ...ct Control Panel View devices and printers in Hardware and Sound Right click on your printer and select Printing preferences Windows Vista Click the start button and select Control Panel Printers in Hardware and Sound Right click on your printer and select Printing preferences Windows XP Click the start button and select Control Panel Printers and Other Hardware Printers and Faxes Right click on y...

Page 34: ...You can also make settings for printing both sides of the paper or printing multiple pages on one sheet User s Guide Network Service and Software Information 34 ...

Page 35: ...More Options Tab You can select additional layout and printing options such as changing the size of a printout or making color corrections User s Guide Network Service and Software Information 35 ...

Page 36: ...ded Settings on the Maintenance tab 3 Make the appropriate settings and then click OK See the online help for explanations of the setting items Related Information Windows Printer Driver on page 33 Mac OS X Printer Driver The printer driver controls the printer according to the commands from an application Making settings on the printer driver provides the best printing results You can also check ...

Page 37: ...Options Supplies Utility Open Printer Utility Guide to Mac OS X Printer Driver Print dialog Switch the pop up menu on the center of the screen to show more items Pop up Menu Descriptions Print Settings You can make the basic print settings such as paper type and print quality Layout You can select a layout for printing several pages on one sheet or select to print a border Paper Handling You can r...

Page 38: ...ion Making Operation Settings for the Mac OS X Printer Driver Accessing the Operation Settings Window of the Mac OS X Printer Driver Select System Preferences from the menu Printers Scanners or Print Scan Print Fax and then select the printer Click Options Supplies Options or Driver Operation Settings of the Mac OS X Printer Driver Warning Notifications Allows the printer driver to display warning...

Page 39: ...Software Updater is an application that checks for new or updated software on the internet and installs it You can also update the printer s firmware and manual Starting on Windows Windows 8 1 Windows 8 Enter the application name in the search charm and then select the displayed icon Except for Windows 8 1 Windows 8 Click the start button and select All Programs or Programs Epson Software EPSON So...

Page 40: ...lling Applications Mac OS X 1 Download the Uninstaller using EPSON Software Updater Once you have downloaded the Uninstaller you do not need to download it again each time you uninstall the application 2 Press the P button to turn off the printer 3 To uninstall the printer driver select System Preferences from the menu Printers Scanners or Print Scan Print Fax and then remove the printer from the ...

Page 41: ... until you are instructed to do so 3 Install the applications by following the instructions on the website below http epson sn Related Information Uninstalling Applications on page 39 Updating Applications and Firmware You may be able to clear certain problems and improve or add functions by updating the applications and the firmware Make sure you use the latest version of the applications and fir...

Page 42: ...ting through an Access Point on page 43 Connection Type Wi Fi Direct Direct Connection Use this connection method when you are not using Wi Fi at home or at the office or when you want to connect the printer and the smart device directly There are two Wi Fi Direct modes The illustrations may vary by model Simple AP Mode In this mode the printer acts as an access point and you can connect up to fou...

Page 43: ...on should only be used as a temporary measure Your smart device must be Wi Fi Direct capable See the manual provided with your smart device for details Related Information Procedure Outline for Wi Fi Direct Connection Simple AP Mode on page 56 Connection Settings Between the Printer and a Smart Device Procedure Outline for Connecting through an Access Point Connect the printer to the access point ...

Page 44: ...s the Printer on page 56 Checking the Connection Using Epson iPrint on page 62 Making Wi Fi Network Settings from the Printer s Control Panel Making Wi Fi Settings Manually from the Control Panel You can manually set up the information necessary to connect to an access point from the printer s control panel To set up manually you need the SSID and password for an access point Note If you are using...

Page 45: ...Select Wi Fi Recommended and then press the OK button 3 Press the OK button 4 Select Wi Fi Setup Wizard and then press the OK button User s Guide Connecting the Printer to the Smart Device or Computer 45 ...

Page 46: ... use the SSID written on the label 6 Enter the password and then select Done Press the OK button Note The password is case sensitive If you do not know the password check if it is written on the label of the access point If you are using the access point with its default settings use the password written on the label The password may also be called a Key a Passphrase and so on If you do not know t...

Page 47: ...Device to the Same Network as the Printer on page 56 Adding Computers on page 72 Making Wi Fi Settings by Push Button Setup WPS from the Control Panel You can automatically set up a Wi Fi network by pressing a button on the access point If the following conditions are met you can set up by using this method The access point is compatible with WPS Wi Fi Protected Setup The current Wi Fi connection ...

Page 48: ... Wi Fi Setup on the home screen and then press the OK button 2 Select Wi Fi Recommended and then press the OK button 3 Press the OK button User s Guide Connecting the Printer to the Smart Device or Computer 48 ...

Page 49: ... until the security light flashes WPS If you do not know where the WPS button is or there are no buttons on the access point see the manual provided with your access point for details 6 Press the OK button on the printer s control panel User s Guide Connecting the Printer to the Smart Device or Computer 49 ...

Page 50: ...the printer Related Information Messages and Solutions on the Network Connection Report on page 66 Connecting the Smart Device to the Same Network as the Printer on page 56 Adding Computers on page 72 Making Wi Fi Settings by PIN Code Setup WPS from the Control Panel You can automatically connect to an access point by using a PIN code You can use this method to set up if an access point is capable...

Page 51: ...the home screen and then press the OK button 2 Select Network Settings and then press the OK button 3 Select Wi Fi Setup and then press the OK button User s Guide Connecting the Printer to the Smart Device or Computer 51 ...

Page 52: ... See the manual provided with your access point for details on entering a PIN code 6 Press the OK button Setup is complete when the setup completion message is displayed Note If connection fails restart the access point move it closer to the printer and try again If it still does not work print a connection report and check the solution User s Guide Connecting the Printer to the Smart Device or Co...

Page 53: ...page 56 Adding Computers on page 72 Making Wi Fi Settings by Simple AP Mode from the Control Panel This method allows you to connect the printer directly to devices without an access point The printer acts as an access point 1 Select Wi Fi Setup on the home screen and then press the OK button 2 Select Wi Fi Direct and then press the OK button User s Guide Connecting the Printer to the Smart Device...

Page 54: ...3 Press the OK button 4 Press the OK button to start the setup 5 Press the d button User s Guide Connecting the Printer to the Smart Device or Computer 54 ...

Page 55: ...assword displayed on the printer s control panel on the smart device 8 After the connection is established press the OK button on the printer s control panel Check the connection between the printer and the smart device using Epson iPrint Related Information Making Wi Fi Settings by Simple AP Mode from the Control Panel on page 53 User s Guide Connecting the Printer to the Smart Device or Computer...

Page 56: ...een on the printer s control panel or by printing a network connection report For the SSID and password contact the person who set up the access point or see the manual provided with the access point 4 After establishing a connection return to the home screen on the smart device You can check the connection between the printer and the smart device using Epson iPrint Related Information Checking th...

Page 57: ...ectly Install Epson iPrint on your smart device and then connect it to the printer Epson iPrint is a free application for smart devices This allows you to print photos and other content from the smart device Checking the Connection Using Epson iPrint Check the connection between the printer and the smart device using Epson iPrint Related Information Making Wi Fi Settings by Simple AP Mode from the...

Page 58: ... that is displayed on the printer s control panel on the smart device Printer Smart Devices 8 Enter the password displayed on the printer s control panel in the smart device and connect 9 After the connection is established press the OK button on the printer s control panel You can check the connection between the printer and the smart device using Epson iPrint Related Information Checking the Con...

Page 59: ... again 1 Install Epson iPrint on your smart device from the following URL or QR code http ipr to 2 Open the Wi Fi Direct settings screen on your smart device Select the printer s device name and then connect using Wi Fi Direct Note See the manual provided with your smart device for the operating instructions 3 Check the message on the printer s control panel and then select whether or not to conne...

Page 60: ...art Device and Printer by Wi Fi Direct Mode for Android Only on page 60 Checking the Connection Using Epson iPrint on page 62 Checking the Printer s Network Status on page 65 Connecting the Smart Device and Printer by Wi Fi Direct Mode for Android Only Connect the smart device to the printer in Wi Fi Direct mode The smart device needs to support Wi Fi Direct to connect See the manual provided with...

Page 61: ...the Wi Fi Direct devices only from Connection Mode 6 Press Next check the settings and then press OK on the next screen Note The printer is set to connect in Wi Fi Direct mode This setting is available until the next time you change the mode setting You do not need to make settings every time 7 Select Wi Fi Setup on the printer s home screen and then press the OK button 8 Select Wi Fi Direct and t...

Page 62: ...Direct You can check the connection between the printer and the smart device using Epson iPrint Related Information Checking the Connection Using Epson iPrint on page 62 Checking the Printer s Network Status on page 65 Checking the Connection Using Epson iPrint Make printer settings from a printing application and check the connection Epson iPrint is used here as an example 1 Run Epson iPrint If E...

Page 63: ...2 Tap Printer is not selected at the top of the screen or tap the printer name 3 Tap Printer User s Guide Connecting the Printer to the Smart Device or Computer 63 ...

Page 64: ...n Wi Fi Direct mode and run Web Config Change the Connection Mode to OFF or Simple AP from Advanced Settings Services Wi Fi Direct Related Information Procedure Outline for Connecting through an Access Point on page 43 Procedure Outline for Wi Fi Direct Connection Simple AP Mode on page 56 Connecting the Smart Device to the Printer Directly by Wi Fi Direct for Android Only on page 59 Connecting th...

Page 65: ...nabled Checking the Network Status from the Control Panel You can also view other network related information by pressing the network menus you want to check 1 Select Setup on the home screen and then press the OK button 2 Select Network Settings Network Status 3 To check other information press the l or r button to select the menu you want to check and then press the OK button Wi Fi Status Displa...

Page 66: ...d Solutions on the Network Connection Report Check the messages and error codes on the network connection report You can check the solutions from the URL or QR code printed on the network connection report Connecting the Printer and a Computer Connecting the Printer to the Computer Connect the printer to the computer You can make Wi Fi settings or USB settings You need an Internet connection to se...

Page 67: ...puter that is connected to the Internet and then enter the product s model number http epson sn 2 Go to the Support page and then click Download from Save Software Windows 3 Copy the file you have downloaded to a USB flash drive and so on 4 Connect the USB flash drive to the computer you want to connect to the printer and then double click the file you copied to run the software Follow the on scre...

Page 68: ...ite and then enter the product s model number http epson sn Note If the computer cannot connect to the Internet see the page in this manual that explains what to do when you cannot connect to the Internet 3 Go to Setup and then download the software 4 Run the software and then follow the on screen instructions 5 Select Change the connection method only on the Select Software Installation screen Us...

Page 69: ...lect Printer and Computer on the Select Which to Set Up screen 8 Follow the on screen instructions Related Information If the Computer does not have an Internet Connection for Windows only on page 67 User s Guide Connecting the Printer to the Smart Device or Computer 69 ...

Page 70: ...the printer and a computer with a USB cable when the printer is connected to Wi Fi You can add a USB connection even when the printer is on a network Adding a USB Connection Windows 1 Access the following website and then enter the product s model number http epson sn Note If the computer cannot connect to the Internet see the page in this manual that explains what to do when you cannot connect to...

Page 71: ...tion method only on the Select Software Installation screen 5 Select USB connection on the Connecting your Printer screen 6 Follow the on screen instructions User s Guide Connecting the Printer to the Smart Device or Computer 71 ...

Page 72: ...as a network printer that can be used from another computer Adding Computers from the Website Windows Download the software from the website and then make connection settings for adding a computer 1 Access the following website from the computer you want to add and then enter the product s model number http epson sn 2 Go to Setup and then download the software 3 Run the software and then follow th...

Page 73: ...nection according to your printer s connection setup 5 Select Computer Only on the Select Which to Set Up screen and then select the printer you want to connect to from the list 6 Follow the on screen instructions User s Guide Connecting the Printer to the Smart Device or Computer 73 ...

Page 74: ...ite from the computer you want to add and then enter the product s model number http epson sn 2 Go to Setup and then download the software 3 Run the software and then follow the on screen instructions 4 Select Additional Computer on the Connection Type screen 5 Follow the on screen instructions User s Guide Connecting the Printer to the Smart Device or Computer 74 ...

Page 75: ...cific device disconnect from the device instead of the printer If you disconnect Wi Fi Direct mode from the printer or from a device the network is returned to its original setup 1 Select Setup on the home screen and then press the OK button 2 Select Network Settings Wi Fi Setup Wi Fi Direct Setup Disconnect 3 After checking the message select Yes and then press the OK button Initializing the Netw...

Page 76: ...r 2 Click Options Supplies Utility Open Printer Utility 3 Click EPSON Status Monitor Paper Does Not Feed Correctly Check the following points and then take the appropriate actions to solve the problem Place the printer on a flat surface and operate in the recommended environmental conditions Use paper supported by this printer See the Operation Guide for a list of supported paper Follow the paper ...

Page 77: ...uide for details Cannot Print from a Computer Connect the USB cable securely to the printer and the computer If you are using a USB hub try to connect the printer directly to the computer If you cannot print over a network see the page that describes the network connection method from the computer If you are printing a large data size image the computer may run out of memory Print the image at a l...

Page 78: ...then turn on the devices in the following order access point computer or smart device and then printer Move the printer and computer or smart device closer to the access point to help with radio wave communication and then try to make network settings again Select Setup Network Settings Connection Check and then print the network connection report If the report shows that the network connection fa...

Page 79: ...printer because the printer only supports communication over 2 4 GHz Connect the computer or smart device to the same SSID as the printer 5GHz SSID XXXXXX_A 2 4GHz SSID XXXXXX_G 5GHz SSID XXXXXX_A 2 4GHz SSID XXXXXX_G SSID XXXXXX_A SSID XXXXXX_G SSID XXXXXX_G SSID XXXXXX_G Most access points have a privacy separator feature that blocks the communication from unauthorized devices If you cannot conn...

Page 80: ...network and Wi Fi Direct network Checking the SSID for the Computer Windows Select Control Panel Network and Internet Network and Sharing Center Mac OS X Click the Wi Fi icon at the top of the computer screen A list of SSIDs is displayed and the connected SSID is indicated with a check mark User s Guide Solving Problems 80 ...

Page 81: ...rect in Printer propaties Port Select Setup Network Settings Connection Check and then print the network connection report If the report shows that the network connection failed access the website from the QR code or URL on the network connection report and then solve the problem Try accessing any website from your computer to make sure that your computer s network settings are correct If you cann...

Page 82: ...ed Related Information Checking and Cleaning the Print Head on page 30 Printouts Become Faint Banding or Unexpected Colors Appear The print head nozzles may be clogged Perform a nozzle check to check if the print head nozzles are clogged Clean the print head if any of the print head nozzles are clogged Related Information Checking and Cleaning the Print Head on page 30 Blurry Prints Vertical Bandi...

Page 83: ...lem continues use any other color correction feature other than PhotoEnhance Related Information Adjusting the Print Color on page 26 The Position Size or Margins of the Printout Are Incorrect If there are partially printed characters on the paper the paper width may not be recognized correctly and printouts may not be correct Load paper in the correct direction and slide the edge guides against t...

Page 84: ...leaning method Make sure that you print on the printable side of the paper Use paper with a thickness within 0 05 to 0 6 mm Even when the paper thickness is within this range the paper may be smeared or scuffed depending on the hardness of the paper When performing manual 2 sided printing make sure that the ink is completely dry before reloading the paper Printed Characters Are Incorrect or Garble...

Page 85: ...in six months of opening the package When printing images or photos Epson recommends using genuine Epson paper rather than plain paper Print on the printable side of the genuine Epson paper When printing from a computer try uninstalling and then reinstalling the printer driver Related Information Uninstalling Applications on page 39 Installing Applications on page 41 Other Printing Problems Printi...

Page 86: ...s are the same as for basic printing Make the print settings in the printer driver before printing Do not clear the Reduce Enlarge Document setting on the More Options tab Related Information Printing Basics Windows on page 12 Cannot Cancel Printing from a Computer Running Mac OS X v10 6 8 If you want to stop printing from your computer make the following settings Run Web Config and then select Po...

Page 87: ... g m2 20 to 24 lb Even when the paper thickness is within this range the paper may not feed correctly or you may not be able to print correctly depending on the hardness or transparency of the paper Printable Area Printable Area for Single Sheets Print quality may decline in the shaded areas due to the printer s mechanism Normal printing A 3 0 mm 0 12 in B Smaller than A5 3 0 mm 0 12 in A5 10 0 mm...

Page 88: ...odes Infrastructure Ad hoc 2 Wi Fi Direct 3 4 Wireless Securities WEP 64 128bit WPA2 PSK AES 5 1 Complies with either IEEE 802 11b g n or IEEE 802 11b g depending on location of purchase 2 Not supported for IEEE 802 11n 3 Not supported for IEEE 802 11b 4 Simple AP mode is compatible with Wi Fi connection infrastructure 5 Complies with WPA2 standards with support for WPA WPA2 Personal Security Prot...

Page 89: ...d External Storage Device Specifications Compatible External Storage Devices Maximum Capacities CD R Drive 1 DVD R Drive 1 Blu ray Drive 1 CD ROM 2 CD R 700 MB DVD ROM 2 DVD R 4 7 GB CD RW DVD R DVD RW DVD RAM and Blu ray Disc are not supported MO Drive 1 1 3 GB HDD 1 USB Flash Drive 2 TB formatted in FAT FAT32 or exFAT 1 We do not recommend using external USB devices that are powered by USB Use o...

Page 90: ... If the number of files exceeds 999 the files are displayed in groups Note is displayed on the LCD screen when the printer cannot recognize the image file In this situation if you select a multiple image layout blank sections will be printed Dimensions Dimensions Storage Width 249 mm 9 8 in Depth 176 mm 6 9 in Height 85 mm 3 3in Printing Width 249 mm 9 8 in Depth 383 mm 15 1 in Height 201 mm 7 9in...

Page 91: ...leep mode Approx 1 5 W Power off Approx 0 2 W Note Check the label on the printer for its voltage Environmental Specifications Operation Use the printer within the range shown in the following graph Temperature 10 to 35 C 50 to 95 F Humidity 20 to 80 RH without condensation Storage Temperature 20 to 40 C 4 to 104 F Humidity 5 to 85 RH without condensation You can store for one month at 40 C 104 F ...

Page 92: ...e protection requirements resulting from a non recommended modification of the product Operation is subject to the following two conditions 1 this device may not cause harmful interference and 2 this device must accept any interference received including interference that may cause undesired operation of the device To prevent radio interference to the licensed service this device is intended to be...

Page 93: ...e or read data on an external storage device such as a memory card that has been inserted in the printer from a computer cImportant You cannot use this feature when the printer is connected to a computer using a USB cable Insert a memory card after removing write protection If an image is saved to the memory card from a computer the image and the number of photos are not refreshed on the LCD scree...

Page 94: ...l number The serial number label is usually on the back of the product Product model Product software version Click About Version Info or a similar button in the product software Brand and model of your computer Your computer operating system name and version Names and versions of the software applications you normally use with your product Note Depending on the product the dial list data for fax ...

Page 95: ...Users can access our World Wide Web home page at http www epson com hk Technical Support Hotline You can also contact our technical staff at the following telephone and fax numbers Phone 852 2827 8911 Fax 852 2827 4383 User s Guide Appendix 95 ...

Reviews: