154
Maintenance
4
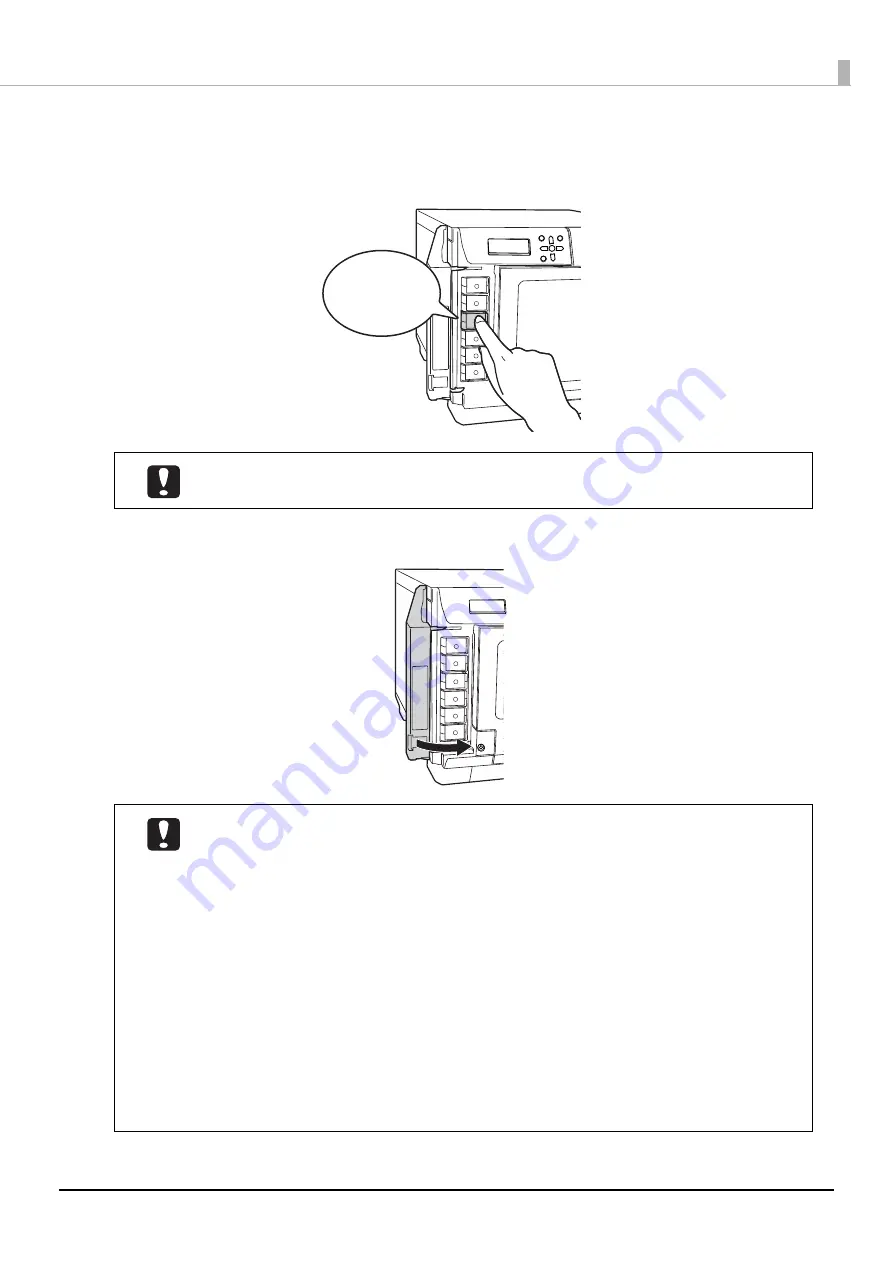
Use the label color to check where to set the ink cartridge, and gently push the new ink
cartridge into the ink cartridge holder on this product until you hear a click.
5
Close the ink cartridge cover.
Do not repeatedly take out and put in an ink cartridge which has been set. Ink could stain the
ink cartridge or the product.
•
Do not turn off the power or open the ink cartridge cover while the power LED is flashing.
These actions make the ink be charged again, which results in a noticeable consumption of
ink. In addition, there is a risk that you will not be able to print properly.
•
If the ink cartridges are not recognized even though they are set properly, dirt may be stuck
on the green IC chip surface. Wipe it off with a soft cloth, and then set it again.
•
If you cannot print even though the ink cartridges are set properly, run print head cleaning.
See “Cleaning the print head” on page 158 in this guide for head cleaning procedure.
•
If you turn the power off using the power button on the unit, the print head is
automatically capped, which prevents the ink from drying. After installing the ink
cartridges, be sure to turn the power off using the power button on the unit when you are
not using the product. Do not pull out the power plug or trip the breaker while the power is
on.
•
If you move or transport this product after you have installed the ink cartridges, leave the
ink cartridges as they are when you move or transport it.
•
Do not take out the ink cartridges unless you are replacing them.
Click


