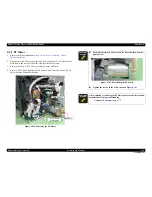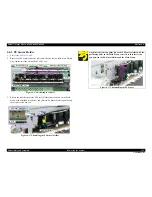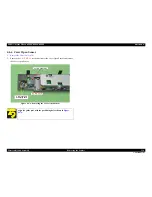
background image

EPSON Stylus Photo R1900/R2880/R2000

Revision E

Adjustment

Adjustment Items and Overview

142

Confidential

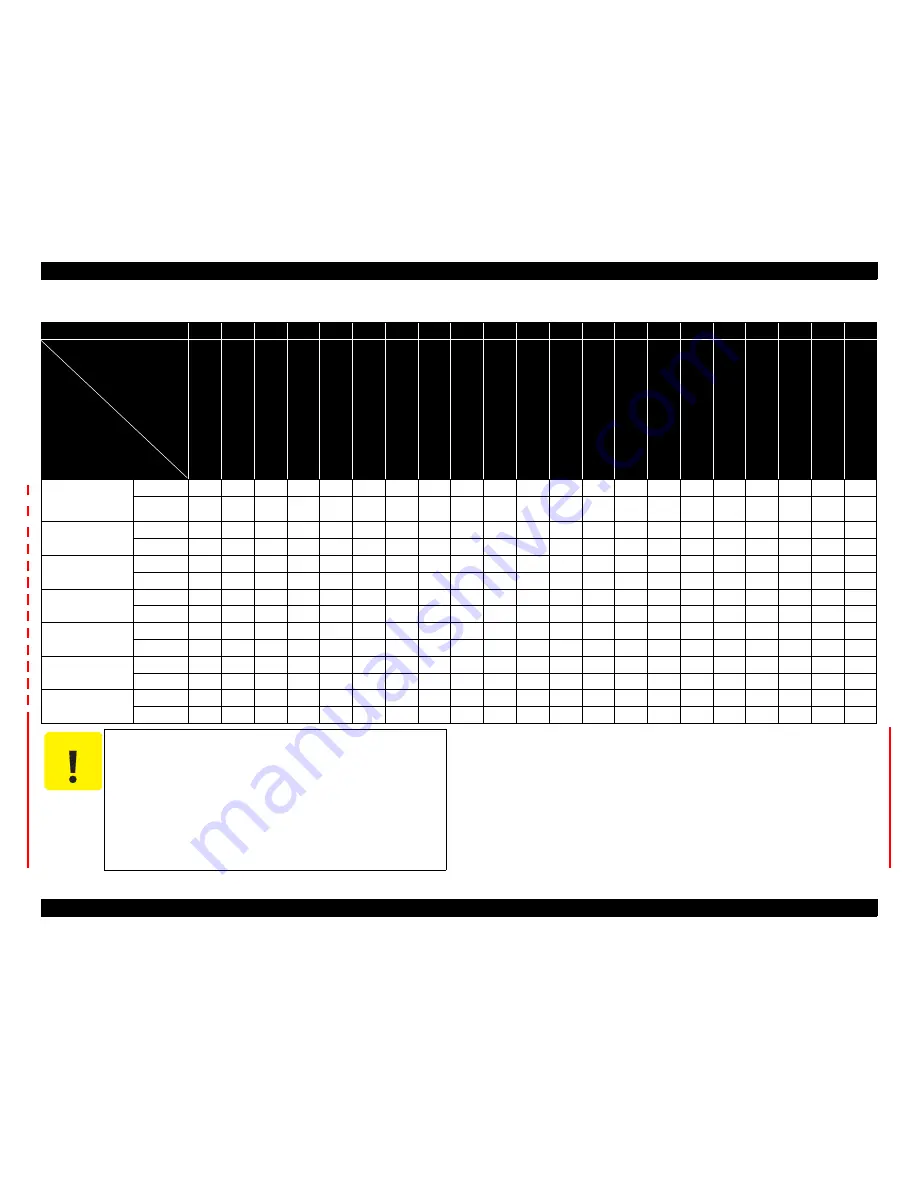
Note :

“O” indicates that the adjustment must be carried out. “---” indicates that the adjustment 
is not required. If you have removed or replaced multiple parts, make sure to check the 
required adjustments for the all parts. And when multiple adjustments must be carried 
out, be sure to carry out them in the order given in the “Priority” row.

Note "*1" :When only removing the ASF Assy, you do not need to perform the adjustment. In 

that case, mark the installing positions before removing them, and make sure to align 
the markings when installing. See 

"4.4.6 ASF Assy" 

(p106)

.

"*2" :Replacing the Waste Ink Tray Assy is necessary when resetting waste ink pad counter.
"*3"  :When only removing the Carriage Shaft, you do not need to perform the adjustment. 

In that case, mark on the Parallelism Adjust Bushing (Left/Right) before removing 
them, and make sure to align the markings when installing. See 

"4.4.5 Carriage Shaft 

/ Carriage Unit" 

(p98)

.

Waste Ink Pad/
Front Paper Guide 
Pad

Remove

---

---

---

---

---

---

---

---

---

---

---

---

---

---

---

---

---

---

---

---

O

Replace

---

---

---

---

---

---

---

---

O

---

---

---

---

---

---

---

---

---

---

---

O

Carriage shaft

Remove

---

---

---

*3

---

---

---

---

---

---

---

---

---

---

---

---

---

---

---

---

O

Replace

---

---

---

O

---

---

---

---

---

---

---

---

O

O

O

---

O

---

---

---

O

Carriage Unit

Remove

---

---

---

O

---

---

---

---

---

---

---

---

---

---

---

---

---

---

---

---

O

Replace

---

---

---

O

---

---

---

---

---

---

---

---

O

O

O

---

O

---

---

---

O

Paper EJ Frame 
Assy

Remove

---

---

---

---

---

---

---

---

---

---

---

---

---

O

---

---

---

O

---

---

O

Replace

---

---

---

---

---

---

---

---

---

---

---

---

---

O

---

---

---

O

---

---

O

Printer Mechanism

Remove

---

---

---

---

---

---

---

---

---

---

---

---

---

---

---

---

---

---

---

---

O

Replace

O

---

O

O

---

---

---

---

---

---

O

---

O

O

O

O

O

O

O

---

O

PW Sensor

Remove

---

---

---

---

---

---

---

---

---

---

---

---

---

O

---

---

---

---

---

---

O

Replace

---

---

---

---

---

---

---

---

---

---

---

---

---

O

---

---

---

---

---

---

O

Ink Mark Sensor

Remove

---

---

---

---

---

---

---

---

---

---

---

---

---

O

---

O

---

---

---

---

O

Replace

---

---

---

---

---

---

---

---

---

---

---

---

---

O

---

O

---

---

---

---

O

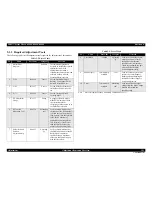
Table 5-4. Required Adjustment List

Priority

1

2

3

4

5

6

7

8

9

10

11

12

13

14

15

16

17

18

19

20

21

PF Belt tension 

adjustment

PF Roller Sh

aft 

Cen

ter 

Suppo

rt Position 

adjustment

ASF Guide Roll

er

 LDs 

Position Adjustment

PG Adjustment

High Voltage 

Module

 inspe

cti

on

EEPROM Data 

Copy

Init

ial 

setti

ng

/USB

 ID Input

Head ID in

put

Cons

umable

s mainte

nanc

coun

ter

Ink charge

Initialize PF 

deteriorat

ion

offset

Disenable PF 

deterioration

offset

First dot

 positio

n

 adjustm

ent

PW a

d

justment

Head angular 

adjust

ment

Multi Sensor Adjustment


(Ink

 M

ark 

Sensor Ad

ju

stm

en

t)

Bi-D adjustment

PF adj

u

stment

CR 

motor heat protection

con

tr

ol

Color

ime

tr

ic ca

libra

tion

Final 

ch

ec

k patter

n print

C A U T I O N

When the EEPROM Data Copy cannot be made for the main 
board that needs to be replaced, the Waste Ink Tray Assy must 
be replaced after replacing the main board with a new one.

After all required adjustments are completed, use the “Final 
check pattern print” function to print all adjustment patterns 
for final check. If you find a problem with the printout 
patterns, carry out the adjustment again.

When using a new main board for replacing the Printer 
Mechanism, the Initial setting must have been made to the 
main board.

Adjustment

Item

Part Name

Summary of Contents for R1900 - Stylus Photo Color Inkjet Printer

Page 1: ...EPSONStylusPhotoR1900 R2880 R2000 Color Inkjet Printer SEIJ07010 SERVICE MANUAL Confidential ...

Page 2: ...of this manual However should any errors be detected SEIKO EPSON would greatly appreciate being informed of them The above not withstanding SEIKO EPSON CORPORATION can assume no responsibility for any errors in this manual or the consequences thereof EPSON is a registered trademark of SEIKO EPSON CORPORATION General Notice Other product names used herein are for identification purpose only and may...

Page 3: ...RKING ON POWER SUPPLY AND OTHER ELECTRONIC COMPONENTS 4 WHEN DISASSEMBLING OR ASSEMBLING A PRODUCT MAKE SURE TO WEAR GLOVES TO AVOID INJURIER FROM METAL PARTS WITH SHARP EDGES WARNING 1 REPAIRS ON EPSON PRODUCT SHOULD BE PERFORMED ONLY BY AN EPSON CERTIFIED REPAIR TECHNICIAN 2 MAKE CERTAIN THAT THE SOURCE VOLTAGES IS THE SAME AS THE RATED VOLTAGE LISTED ON THE SERIAL NUMBER RATING PLATE IF THE EPS...

Page 4: ...tion for reference Connector pin assignments Stylus Photo R2000 Provides information of Stylus Photo R2000 Symbols Used in this Manual Various symbols are used throughout this manual either to provide additional information on a specific topic or to warn of possible danger present during a procedure or an action Be aware of all symbols when they are used and always read NOTE CAUTION or WARNING mes...

Page 5: ...f Ink Cartridges p 11 Table 1 6 Print Mode Color p 14 has been added Table 1 7 Print Mode Monochrome p 15 has been added Made changes in Table 1 8 Supported Paper p 16 Made changes in Table 1 9 Printing Area Margins p 20 Table 1 10 Printing Area Margins p 20 has been added Made changes in Table 1 12 Device ID p 21 Made changes in Table 1 13 Primary Power Specifications p 21 Made changes in Table 1...

Page 6: ...using Printer Mechanism p96 Chapter 5 Made changes in 5 1 1 Servicing Adjustment Item List p138 Made changes in 5 1 2 Replacement Part Based Adjustment Priorities p142 Made changes in 5 1 3 Required Adjustment Tools p143 Made changes in 5 2 2 PG Adjustment p145 Made changes in 5 2 4 Colorimetric Calibration p153 Chapter 6 Made changes in 6 1 2 Service Maintenance p162 Made changes in 6 1 3 Lubrica...

Page 7: ...3 1 Overview 34 3 1 1 Troubleshooting according to Error Messages 34 3 1 2 Troubleshooting based on Observed Faults 60 Chapter 4 Disassembly And Assembly 4 1 Overview 70 4 1 1 Precautions 70 4 1 2 Tools 71 4 1 3 Screws 71 4 1 4 Making a Special Tool for CSIC Board 71 4 1 5 Work Completion Checklist 72 4 1 6 Locking Unlocking the Carriage and Opening Closing the CDR Tray Base 73 4 1 7 Disassembly 7...

Page 8: ...vicing Adjustment Item List 138 5 1 2 Required Adjustments 141 5 1 3 Required Adjustment Tools 143 5 2 Adjustment 144 5 2 1 PF Belt Tension Adjustment 144 5 2 2 PG Adjustment 145 5 2 3 PF Roller Shaft Center Support Position Adjustment 149 5 2 4 Colorimetric Calibration 153 5 2 5 ASF Guide Roller LDs Position Adjustment 159 Chapter 6 Maintenance 6 1 Overview 162 6 1 1 Cleaning 162 6 1 2 Service Ma...

Page 9: ...Confidential C H A P T E R 1 PRODUCTDESCRIPTION ...

Page 10: ...oto R2880 is designed based on the Stylus Photo R1900 printer mechanism however there are some differences between them such as ink color configuration The table below lists the major differences Dimensions Dimensions 616 mm W x 322 mm D x 214 mm H Paper support and stacker are closed Rubber feet are included Weight 12 2 kg Stylus Photo R1900 12 3 kg Stylus Photo R2880 without ink cartridges CDR T...

Page 11: ...printing Print resolution Horizontal x Vertical dpi 360 x 180 2 1440 x 720 360 x 360 SMGA 5760 x 1440 720 x 720 1440 x 1440 Stylus Photo R2880 only Control code ESC P Raster command ESC P R RGB command EPSON Remote command Internal font Character code Alphanumeric with expanded graphics PC437 ASCII 20H to 7FH only Font EPSON original font Alphanumeric font Courier Input buffer size T B D Kbytes Pa...

Page 12: ... Fine 720x720 VSD1 2 220cps ON ON Photo 1440x720 VSD2 200cps ON ON Super Photo 5760x1440 VSD3 200cps ON ON Premium Presentation Paper Matte EAI Matte Paper Heavy weight others Photo 1440x720 VSD2 200cps ON ON Super Photo 5760x1440 VSD3 200cps ON ON Archival Matte Paper EAI Enhanced Matte Paper others Photo 1440x720 VSD2 200cps ON ON Super Photo 5760x1440 VSD3 200cps ON ON Double sided Matte Paper ...

Page 13: ... 2 220cps ON ON Photo 1440x720 VSD2 200cps ON ON Super Photo 5760x1440 VSD3 200cps ON ON Premium Presentation Paper Matte EAI Matte Paper Heavy weight others Photo 1440x720 VSD2 200cps ON ON Super Photo 5760x1440 VSD3 200cps ON ON Archival Matte Paper EAI Enhanced Matte Paper others Photo 1440x720 VSD2 200cps ON ON Super Photo 5760x1440 VSD3 200cps ON ON Double sided Matte Paper Photo 1440x720 VSD...

Page 14: ...720x720 VSD2 220cps ON ON Photo 1440x720 VSD2 220cps ON ON Super Photo 5760x1440 VSD2 220cps ON ON Matte Paper Heavyweight Double sided Matte Paper Photo 1440x720 VSD2 220cps ON ON Super Photo 5760x1440 VSD2 220cps ON ON Photo Quality Inkjet Paper Photo 1440x720 VSD2 220cps ON ON Watercolor Paper Radiant White Velvet Fine Art Paper Ultra Smooth Fine Art Paper Enhanced Matte Paper Archival matte pa...

Page 15: ...D2 220cps ON ON Photo 1440x720 VSD2 220cps ON ON Super Photo 5760x1440 VSD2 220cps ON ON Matte Paper Heavyweight Double sided Matte Paper Photo 1440x720 VSD2 220cps ON ON Super Photo 5760x1440 VSD2 220cps ON ON Photo Quality Inkjet Paper Photo 1440x720 VSD2 220cps ON ON Watercolor Paper Radiant White Velvet Fine Art Paper Ultra Smooth Fine Art Paper Enhanced Matte Paper Archival matte paper EAI Ma...

Page 16: ...per A3 297 x 420 mm 0 08 0 11 64 90 17 24 Y Y Y US B 279 4 x 431 8 mm 11 x 17 Y B4 257 x 364 mm Y Y Y Legal 215 9 x 355 6 mm 8 5 x14 Y Y Y Letter 215 9 x 279 4 mm 8 5 x11 Y Y Y A4 210 x 297 mm 8 3 x11 7 Y Y Y B5 182 x 257 mm 7 2 x10 1 Y Y A5 148 x 210 mm 5 8 x8 3 Y Y Half Letter 139 7 x 215 9 mm 5 5 x8 5 Y A6 105 x 148 mm 4 1 x5 8 Y Y Y User Defined 89 x 127 329 x 1117 6 mm 3 56 x 5 08 13 16 x44 7...

Page 17: ... Y Roll paper 329 x 1 000 mm Y Y Y Y Y Y Photo Paper Glossy EAI Glossy Photo Paper others A3 SuperA3 329 x 483 mm 0 25 258 68 Y Y US B 279 4 x 431 8 mm 11 x 17 Y Y Letter 215 9 x 279 4 mm 8 5 x11 Y Y A4 210 x 297 mm 8 3 x11 7 Y Y Y Y Y Y 5 x 7 127 x 178 mm Y 3 Y 3 Y Y Y 3 Y 3 4 x 6 101 6 x 152 4 mm Y Y Y Y Y Y Premium Photo Paper Semi gloss EAI Premium Semigloss Photo Paper others A3 SuperA3 329 x...

Page 18: ...11 Y Y A4 210 x 297 mm 8 3 x11 7 Y Y Y Y 8 x 10 203 2 x 254 mm Y Y Archival Matte Paper EAI Enhanced Matte Paper others A3 SuperA3 329 x 483 mm 0 26 192 Y Y Y Y Y Y A3 297 x 420 mm Y Y Y Y Y Y Letter 215 9 x 279 4 mm 8 5 x11 Y Y A4 210 x 297 mm 8 3 x11 7 Y Y Y Y Double sided Matte Paper Letter 215 9 x 279 4 mm 8 5 x11 0 22 185 49 Y A4 210 x 297 mm 8 3 x11 7 Y Y Presentation Paper Matte EAI Photo Q...

Page 19: ...Paper A3 SuperA3 329 x 483 mm 0 46 325 86 Y Y PremierArt Matte Scrapbook Photo Paper 12 x12 305 x 305 mm 0 30 205 52 Y 5 Y 5 Photo Quality Self Adhesive Sheet A4 210 x 297 mm 8 3 x11 7 0 19 167 44 Y Y Y CD DVD CD DVD Premium Surface ø 12cm ø 12cm Y Y Y ø 8cm ø 8cm Y Y Y Enhanced Matte Posterboard 6 A3 329 x 483 mm 1 2 Y 5 Table 1 8 Supported Paper Paper Name Paper Size Thickness Weight EAI EUR Asi...

Page 20: ...0 mm 21 mm Borderless print A3 A3 SuperA3 3 5 mm 3 5 mm 3 mm 4 52 mm A4 Letter to 5 x 7 2 5 mm 2 5 mm 3 mm 4 02 mm 4 x 6 2 54 mm 2 54 mm 1 34 mm 2 54 mm Roll paper 0 mm 0 mm 30 mm 21 mm Table 1 10 Printing Area Margins Print Mode Paper Size Margin Left LM Right RM Top TM Bottom BM Standard print Any size 3 mm 3 mm 3 mm 3 mm Roll paper 3 mm 3 mm 40 mm 21 mm Board paper 3 mm 3 mm 20 mm 20 mm Borderl...

Page 21: ...r less Table 1 12 Device ID Prod uct When IEEE 1284 4 is Enabled When IEEE 1284 4 is Disabled Stylus Photo R1900 EJL SP ID CR LF MFG EPSON CMD ESCPL2 BDC D4 D4PX ESCPR1 MDL Stylus SP Photo SP R1900 CLS PRINTER DES EPSON SP Stylus SP Photo SP R1900 EJL SP ID CR LF MFG EPSON CMD ESCPL2 BDC MDL Stylus SP Photo SP R1900 CLS PRINTER DES EPSON SP Stylus SP Photo SP R1900 Stylus Photo R2880 EJL SP ID CR ...

Page 22: ...o NOM 019 SCFI 1998 Taiwan CNS13438 Class B CNS14336 EU EN60950 1 EN55022 Class B EN61000 3 2 EN61000 3 3 EN55024 Germany EN60950 1 Russia GOST R IEC60950 1 CISPR 22 Singapore IEC60950 1 Korea K60950 1 KN22 Class B KN61000 4 2 3 4 5 6 11 China GB4943 GB9254 Class B GB17625 1 Argentina IEC60950 1 Australia AS NZS CISPR22 Class B Hong Kong IEC60950 1 Table 1 14 Environmental Conditions Condition Tem...

Page 23: ... Buttons Button Function Power Turns the power ON OFF Paper Feeds or ejects paper Ink Runs a sequence of ink cartridge replacement or cleaning Roll Paper Prints the cutting line on the roll paper or feeds the paper backwards out of the printer Table 1 16 Indicators LEDs LED Function Power LED green Lights at power on Flashes during some sequence is in progress Flashes at high speed during power OF...

Page 24: ...olor error 2 occurs The carriage moves to set the ink cartridge to the position for replacement When an ink cartridge has been set in the ink replacement position moves the carriage to the home position During CDR printing Recovers from a paper jam error Cancels the print job during printing Ink when held for three seconds or longer On Runs a head cleaning Runs a sequence of ink cartridge replacem...

Page 25: ...e are nozzle numbers The numbers and color names are not printed on an actual nozzle check pattern 720 dpi VSD1 32 dots 0 141 mm 1 180 inch Yellow Magenta Matte Black Red Photo Black Cyan Orange 1 1 1 1 1 1 1 180 180 180 180 180 180 180 1 180 720 dpi VSD2 32 dots 0 141 mm 1 180 inch Note The numbers shown in the figure are nozzle numbers The numbers and color names are not printed on an actual noz...

Page 26: ...rnately 2 Repeats turning Off and On every 1 25 seconds Table 1 18 Indicators LEDs Function Printer Status Indicators LEDs Pri ority 1 Power Paper Ink Power OFF Flashes at high speed OFF OFF 1 Fatal error OFF Flashes at high speed Flashes at high speed 2 Maintenance request OFF Flashes alternately 1 Flashes alternately 2 3 CDR guide error Flashes 2 Flashes at high speed 4 Paper path error Flashes ...

Page 27: ...he jammed paper and press the Paper button 1 When printing on CDR Remove the jammed CDR tray and press the Paper button No paper Failed to feed paper Load paper correctly and press the Paper button 1 Multi feed Multiple sheets of paper were fed at the same time Press the Paper button to eject the multiple sheets 1 Ink out The cartridge has run out of ink Replace the cartridge with a new one 2 No i...

Page 28: ...Confidential C H A P T E R 2 OPERATINGPRINCIPLES ...

Page 29: ...tor DC motor with brushes Drives the Paper loading rollers at the time of fixed value paper loading or paper feed eject operation To grasp the paper feed pitch the precision gear surface is fitted with the PF scale and the PF encoder sensor is used to control the motor APG Motor DC motor with brushes Drives the Carriage Unit at the time of PG setting The two APG Sensors are driven vertically to co...

Page 30: ...ptimizer H Cyan 31 89mm 41 66mm Carriage moving direction Paper feeding direction 0 071mm 1 360inch 0 141mm 1 180inch Line A Line B 7 620mm 216 720inch 2 258mm 64 720inch 2 258mm 64 720inch 2 258mm 64 720inch 2 258mm 64 720inch 7 620mm 216 720inch 7 620mm 216 720inch Line C Line D Line E Line F Line G Line H Table 2 3 Nozzle Lines and the Corresponding Ink Color Stylus Photo R2880 Line Ink A Light...

Page 31: ... Application PG Position PG PG PG Typ PG PG Release Printing Photo paper A4 Letter Roll paper Photo Matte paper Plain paper Exclusive paper PG rub avoidance Envelope PG Typ rub avoidance CD DVD Non printing Standby position after power on When the CDR Tray Base is closed At power off Ink Mark Sensor reading Auto Bi D Ink Mark Sensor reading Detection of dot missing Initialization at power on Clean...

Page 32: ...r output High In the domain of each PG position Low Between PG positions 3 APG Sensor 2 Type Transmissive photo interrupter Drive voltage 3 3VDC 5 Sensor output High In the domain of large PG Low In the domain of small PG 4 ASF Sensor Type Transmissive photo interrupter Drive voltage 3 3VDC 5 Sensor output High Home position Low Other than home position 5 PE Sensor Type Transmissive photo interrup...

Page 33: ...Confidential C H A P T E R 3 TROUBLESHOOTING ...

Page 34: ...ce Different device from specified Attempting to connect to a different device from that specified in the driver Check the driver settings and the device Printer cover open error Flash Printer cover open Close the printer cover Refer to Table 3 3 Troubleshooting of Printer Cover Open Error P 39 CDR Guide error Flash 2 Flashes at high speed Front paper feed guide open Remove the CD DVD tray then cl...

Page 35: ...X You may continue printing or click the How to button to change the ink cartridge now Refer to Table 3 9 Troubleshooting of Ink Low P 48 Ink Color error 1 Flashes at high speed 2 Ink cartridges cannot be replaced There are two possible causes Because there is only a small amount of ink remaining you cannot replace it with a different type of black ink cartridge However you may be able to replace ...

Page 36: ...artridge replacement instructions Refer to Table 3 12 Troubleshooting of No Ink Cartridge CSIC Error P 49 No ink cartridge CSIC error Light 2 Ink cartridges cannot be recognized Black XXXX 2 Color XXXX Epson recommends the genuine Epson cartridges listed above Click the How to button for ink cartridge installation instructions Maintenance request Off Flashes alternately 1 Flashes alternately 2 Ser...

Page 37: ...h a new one Panel Board 1 Check the Panel Board for damages 1 Replace the Panel Board with a new one Power Supply Board 1 Check that the connector cable of the Power Supply Board is connected to the Main Board connector CN60 1 Connect the connector cable of the Power Supply Board to the Main Board connector CN60 2 Check that the blue colored pin of the Power Supply Board connector cable is inserte...

Page 38: ...Motor are not connected to the wrong connector causing a short circuit 1 Connect the Relay connector of the ASF Motor and the Relay connector of the Pump Motor correctly and replace the Main Board with a new one At operation Operation at power on is normal but the error appears when the print job is sent to the printer Interface cable 1 Check that the Interface cable is connected between the PC an...

Page 39: ...justment Program Refer to Chapter 5 Adjustment Table 3 3 Troubleshooting of Printer Cover Open Error Occurrence Timing Phenomenon Detail Faulty Part Part Name Check Point Remedy During printing A Printer Cover Open Error is indicated during printing Cover Open Sensor 1 Check that the Printer Cover is not open 1 Close the Printer Cover 2 Check that the connector cable of the Cover Open Sensor is co...

Page 40: ... the CDR Sensor is installed correctly 1 Install the CDR Sensor correctly 2 Check that the connector cable of the CDR Sensor is connected to the CDR Sensor and the connector on the Panel Board 2 Connect the connector cable of the CDR Sensor to the CDR Sensor and the Panel Board 3 Using a tester check that the CDR Sensor is normal CDR Tray Base open 3 3V CDR Tray Base closed 0V 3 Replace the CDR Se...

Page 41: ...d Roller The procedure is as follows 1 Place the cleaning sheet upside down and put it into the ASF Assy 2 Press the Paper Switch to start paper feed 3 Repeat the above steps several times To remove persistent contamination staple an alcohol dampened cloth to a postcard and clean the rollers in the following method 1 Place the alcohol dampened cloth toward the LD Roller surface of the ASF Assy 2 H...

Page 42: ...d to the Mechanical frame correctly 2 Install the Sensor Holder correctly 3 Move the Detection Lever manually as when the paper passes and check that the Detection Lever returns to the original position automatically by the Torsion Spring when released Refer to the above photo 3 Replace the PE Sensor Holder Unit with a new one 4 Using a tester check that the PE Sensor is normal Paper absent 2 4V o...

Page 43: ...e ASF Assy several times to remove the contamination 3 Check that the HP detection position or white markings of the CDR Tray are not chipped 3 Replace the CDR Tray with a new one The Paper Switch was pressed at the setting of the CDR Tray Though the CDR Tray is fed toward the ASF Assy but is ejected immediately PW sensor 1 Check the PW Sensor for paper dust ink etc 1 Clean the PW Sensor surface 2...

Page 44: ...positions and does not make contact with any parts 1 Place the PW Sensor FFC in the specified routing positions correctly 2 Check that the PW Sensor FFC is connected to the CR Encoder Board and PW Sensor connectors Refer to the above photo 2 Connect the FFC to the CR Encoder Board and PW Sensor connectors correctly 3 Check the PW Sensor or PW Sensor FFC for damages 3 Replace the PW Sensor or the P...

Page 45: ...inter Paper is not ejected completely and causes a jam near the Paper Eject Frame ASF Assy 1 Check that the paper is fed along the Right Edge Guide 1 Feed the paper along the Right Edge Guide Paper EJ Frame Assy 1 Check that the Star Wheel Units have not come off the Paper EJ Frame Assy 1 Securely install the Star Wheel Units to the Paper EJ Frame Assy 2 Check the Paper EJ Frame Assy for deformati...

Page 46: ...e PE Sensor to the PE Sensor and connector CN2 on the Relay Board correctly 2 Check that the Sensor Holder is mounted to the Mechanical frame correctly 2 Install the Sensor Holder correctly 3 Move the Detection Lever manually as when the paper passes and check that the Detection Lever returns to the original position automatically by the Torsion Spring when released Refer to the above photo 3 Repl...

Page 47: ...Sensor and the connector on the Panel Board 2 Connect the connector cable of the CDR Sensor to the CDR Sensor and the Panel Board 3 Using a tester check that the CDR Sensor is normal CDR Tray Base open 3 3V CDR Tray Base closed 0V 3 Replace the CDR Sensor with a new one 4 Check the CDR Sensor or connector cable for damages 4 Replace the CDR Sensor with a new one Table 3 7 Troubleshooting of Paper ...

Page 48: ...lty Part Part Name Check Point Remedy At operation or during printing A message is displayed on the LED and STM3 during printing Ink Cartridge 1 Look at the remaining ink indication of the STM3 to check the amount of the ink remaining in the Ink Cartridge 1 Prepare a new Ink Cartridge Table 3 10 Troubleshooting of Ink Color Error Stylus Photo R2880 only Occurrence Timing Phenomenon Detail Faulty P...

Page 49: ...artridge 1 Replace the Ink Cartridge with a new one Table 3 12 Troubleshooting of No Ink Cartridge CSIC Error Occurrence Timing Phenomenon Detail Faulty Part Part Name Check Point Remedy At power on After the Carriage has detected the HP an error is displayed on the LED and STM3 Ink Cartridge 1 Check that the Ink Cartridge is installed correctly 1 Install the Ink Cartridge correctly 2 Check that t...

Page 50: ... new one Table 3 13 Troubleshooting of Maintenance Request Occurrence Timing Phenomenon Detail Faulty Part Part Name Check Point Remedy At power on At power on the printer does not operate at all Waste Ink Pads 1 Using the Adjustment Program check if the values of the Protection Counter A and B have exceeded the values shown below Protection Counter A 21 500 Stylus Photo R1900 22 500 Stylus Photo ...

Page 51: ...nector 1 Connect the CR Motor connector to the Relay connector 2 Check the CR Motor connector cable for damages 2 Replace the CR Motor with a new one 3 Check if the CR Motor operates normally 3 Replace the CR Motor with a new one Relay connector cables for the CR Motor 1 Check that the Relay connector cable is connected to the Main Board connector CN15 1 Connect the Relay connector cable to the Ma...

Page 52: ...r to Chapter 6 Maintenance At power on the PF Motor does not operate at all PF Motor 1 Check that the connector cable of the PF Motor is connected to the Main Board connector CN116 1 Connect the PF Motor connector cable to the Main Board connector CN116 2 Check the PF Motor connector cable for damages 2 Replace the PF Motor with a new one 3 Check if the PF Motor operates normally 3 Replace the PF ...

Page 53: ...mally 3 Replace the APG Motor with a new one At power on the Pump Motor does not operate at all Pump Motor 1 Check that the Pump Motor connector cable is connected to the Relay connector 1 Connect the Pump Motor connector cable to the Relay connector 2 Using a tester check the resistance value of the Pump Motor Value of resistance 10 3 10 2 If the resistance value is abnormal replace the Ink Syste...

Page 54: ... for damages 2 Replace the Relay connector cable with a new one While the power on sequence is being executed Fatal error is displayed APG Sensor 1 Check that the APG Sensor connector cables are connected to the APG Sensors and Relay Board connector CN4 and CN5 1 Connect the APG Sensor connector cables to the APG Sensors and Relay Board connector CN4 and CN5 2 Check the APG Sensors for damages 2 R...

Page 55: ...ce 7 0 10 2 If the resistance value is abnormal replace the ASF Motor with a new one 3 Check the ASF Motor connector cable for damages 3 Replace the ASF Motor with a new one Relay connector cable for the ASF Motor 1 Check that the Relay connector cable is connected to the Main Board connector CN119 1 Connect the Relay connector cable to the Main Board connector CN119 2 Check the Relay connector ca...

Page 56: ...bumps against the right of the Frame then hits the left of the Frame CR Scale 1 Check that the CR Scale is inserted in the slit of the CR Encoder Sensor 1 Insert the CR Scale into the slit of the CR Encoder Sensor 2 Check the CR Scale for damages and dirt 2 Wipe off the dirt completely or replace the CR Scale with a new one CR Encoder Sensor Board 1 Check the CR Encoder Sensor for paper dust etc 1...

Page 57: ... about a half turn PF Encoder Sensor Holder 1 Check that the PF Encoder Sensor Holder is mounted correctly 1 Install the PF Encoder Sensor Holder correctly 2 Check that the FFC of the PF Encoder Sensor is securely connected to the PF Encoder Sensor Board connector and Relay Board connector CN6 2 Connect the PF Encoder Sensor FFC to the PF Encoder Sensor Board and Relay Board connector CN6 3 Check ...

Page 58: ...cale with a new one During printing After receiving a print data or while performing the CDR Tray home position detection sequence an error is displayed on the LED and STM3 Head FFC Sensor FFC 1 Check that the Head FFC and the Sensor FFC are securely connected to the Main Board connectors CN9 CN11 CN12 CN13 and CN14 1 Connect the Head FFC and the Sensor FFC to the Main Board connectors CN9 CN11 CN...

Page 59: ...nectors CN11 CN12 CN13 and CN14 1 Connect the Head FFC to the Print Head connector and Main Board connectors CN11 CN12 CN13 and CN14 2 Check the Head FFC for damages 2 Replace the Head FFC with a new one Ink is not ejected from most nozzles Print Head 1 Check for occurrence of Head Hot 1 Replace the Print Head with a new one Table 3 14 Troubleshooting of Fatal Error Occurrence Timing Phenomenon De...

Page 60: ... Check Point Remedy Dot missing and mixed colors Inks are not ejected from the Print Head to the Cap Ink System Unit Cap 1 Check for foreign matter around the Seal Rubber on the Cap Unit 1 Remove the foreign matter around the Seal Rubber completely 2 Check that the Ink Tube is connected to the Pump Tube 2 Connect the Ink Tube to the Pump Tube securely 3 Check that the Extension Spring 1 19 IS is c...

Page 61: ...connector and Main Board connectors CN11 CN12 CN13 and CN14 2 Connect the Head FFC to the Print Head connector and Main Board connectors CN11 CN12 CN13 and CN14 3 Check if the Head FFC is not damaged 3 Replace the Head FFC with a new one If the trouble still occurs after replacing it replace the Print Head with a new one Ink System Unit Cleaner Blade 1 Check if the Cleaner Blade is covered with pa...

Page 62: ... and Main Board connectors CN10 CN12 CN13 and CN14 1 Connect the Head FFC to the Print Head connector and Main Board connectors CN10 CN12 CN13 and CN14 Print Head 1 Check if the print quality recovers after running a cleaning or replacing the Ink Cartridges 1 Run the cleaning and replace the Ink Cartridges several times If the trouble still occurs replace the Print Head with a new one Main Board 2...

Page 63: ... a dry soft cloth and then apply G 71 grease Refer to Chapter 6 Maintenance 3 Check that the Carriage Shaft is mounted horizontally 3 Reassemble the Carriage Shaft correctly 4 Check the Carriage Shaft for damages 4 Replace the Carriage Shaft with a new one Narrow stripes of the same width appear horizontally to the CR moving direction If the trouble still occurs after doing all measures described ...

Page 64: ...he Printer Driver Print Head 1 Using the Adjustment Program check that the correct Head ID has been written to the EEPROM 1 Using the Adjustment Program enter the 29 digit code of the Head ID to the EEPROM Refer to Chapter 5 Adjustment The bottom of the printout is not evenly colored Adjustment 1 Check if the Positioning Adjustment of PF Roller Shaft Retainer has been performed properly 1 Make adj...

Page 65: ...of the fed paper data are printed on the Front Paper Guide extending off the paper PW sensor 1 Check that the PW Sensor FFC is connected 1 Connect the PW Sensor FFC 2 Check that the PW Sensor is not faulty 2 Replace the PW Sensor with a new one Ink smudges appear on the blank area of the printout Paper EJ Frame Assy 1 Check the Star Wheel Rollers for ink stain 1 Clean the Star Wheel Rollers with a...

Page 66: ...d Rear Paper EJ Roller Assys with a soft cloth Driven Roller Shaft 1 Check the Driven Roller Shaft for ink stain 1 Clean the Driven Roller Shaft with a soft cloth Ink System Unit 1 Check that wiping operation was performed properly 1 Install the Cleaner blade correctly or replace it with a new one Table 3 15 Print Quality Troubles Observed Faults Details of the Fault Faulty Part Part Name Check Po...

Page 67: ...ents have been made correctly check whether PW Sensor has been adjusted properly 1 Make the adjustment according to the specified adjustment priority Refer to Chapter 5 Adjustment 2 Print the adjustment check patterns and check if the printed images are still poor or grainy 2 If the image quality does not improve after the adjustment replace the Print Head and Main Board in this order and check th...

Page 68: ...erns 2 If it is judged that the clip function is not executed normally replace the PW sensor with a new one Refer to Chapter 5 Adjustment Table 3 15 Print Quality Troubles Observed Faults Details of the Fault Faulty Part Part Name Check Point Remedy Table 3 16 Abnormal Noise Occurrence Timing Details of the Fault Faulty Part Part Name Check Point Remedy Printing operation is performed normally but...

Page 69: ...Confidential C H A P T E R 4 DISASSEMBLYANDASSEMBLY ...

Page 70: ...ING and CAUTION carefully W A R N I N G Before starting the disassembling reassembling work of this product always disconnect the power cable When the power supply cable must be connected for voltage measurement or like be extremely careful not to get an electric shock and follow the procedures in this manual to do your work Wear protective goggles to protect your eyes from ink If ink gets in your...

Page 71: ...ssy refer to p 94 can be easily removed The method for making the tool is described below 1 Prepare a handle part of a clip or a similar metal wire piece Figure 4 1 Making the Special Tool for CSIC Board 1 2 Bend the metal wire as shown below Figure 4 2 Making the Special Tool for CSIC Board 2 Table 4 1 List of Tools Tool Name Code Phillips Screw Driver No 1 1080530 Phillips Screw Driver No 2 Flat...

Page 72: ...ssary Paper Feeding Mechanism Is paper advanced smoothly Checked Not necessary No paper jamming Checked Not necessary No paper skew Checked Not necessary No multiple sheet feeding Checked Not necessary Is the PF Motor at correct temperature Not too hot to touch Checked Not necessary No abnormal noises Checked Not necessary Is the paper path free of obstructions Checked Not necessary Adjustment Spe...

Page 73: ...ge 4 1 6 Locking Unlocking the Carriage and Opening Closing the CDR Tray Base Locking releasing the Carriage and opening closing the CDR Tray Base are mutually related The CDR Tray Base cannot be opened when the Carriage Lock is released Lock the Carriage in the following procedure when opening the CDR Tray Base 1 Remove the Decoration Plate Right Refer to 4 2 6 Decoration Plate Left Right p 80 2 ...

Page 74: ...with the Front Cover and CD R Tray Base opened turn the PG CAM Right beforehand so that PG points downwards to release the PG in order to prevent interference between the Paper EJ Frame Assy and Carriage Unit Figure 4 5 Interference between the Frame and Carriage Unit PG position PG Cam Right Paper EJ Frame Point of Interference Carriage Unit ...

Page 75: ... CDR Sensor p 134 Front Paper Guide Paper EJ Roller Front Paper Guide Pad Tray p 119 PF Encoder p 132 Upper Paper Guide Assys p 127 PF Roller Shaft p 122 Ink Mark Sensor PW sensor p 133 CR Encoder p 132 Carriage Shaft Carriage Unit p 98 APG Assy p 89 LED Board p 86 CR Scale p 90 Upper Paper Guide Assys p 127 PE Sensor Holder p 135 FLAG Release Assy p 126 Release Holder Assy p 125 APG Assy p 89 ASF...

Page 76: ...emove the Paper Support Assy Figure 4 7 Removing the Paper Support Assy 4 2 2 Stacker Assy 1 To disengage the guide pin on the right of the Stacker Assy push the Stopper in the direction of the arrow with a flathead screwdriver or similar tool 2 Pull out the left guide pin of the Stacker Assy and remove the Stacker Assy Figure 4 8 Removing Stacker Assy Paper Support Assy Guide pin Guide pin Stoppe...

Page 77: ...ration Plate Left Right 4 2 4 Rear Housing 1 Remove the two C B P M3 x 10 screws and the C B S M3 x 6 screw that secure the Rear Housing 2 Disengage the two tabs from the Upper Housing and remove the Rear Housing Figure 4 11 Removing the Rear Housing When installing the Front Decoration Plate L R insert the two hooks at the bottom of them into the holes of the Lower housing then secure the Front D...

Page 78: ...h on the left right on the Upper Housing Align the positioning tabs three each on the left right with the positioning holes three each on the left right on the Decoration Plate Left Right and the Lower Housing Figure 4 12 Reinstalling the Rear Housing Positioning tab Hook this to the Upper Housing Positioning tab C A U T I O N Before opening the Front Cover and CDR Tray Base unlock the Carriage Re...

Page 79: ... Disconnect the Panel FFC and CDR Sensor cable from the Panel Board connectors and remove the Panel Unit Figure 4 14 Removing the Panel Unit 2 Hook Tab Connector CDR Sensor cable Panel FFC Panel Unit Be careful not to get the Panel FFC caught underneath the hooks on the Panel Unit Secure the Panel FFC with double sided Tape on the Panel Unit Route the CDR Sensor cable as shown in the following fig...

Page 80: ...e then remove the Decoration Plate Right 4 In the same way remove the Decoration Plate Left Figure 4 16 Removing the Decoration Plate Left Right Decoration Plate Right Hook x3 Tab Guide pin x4 When installing the Decoration Plate L R first align the hooks of the Decoration Plate L R two each with the ribs of the Lower Housing two each on the left right and then align the tab inside the Decotrative...

Page 81: ... Upper Housing 5 Remove the Upper Housing while pulling out the CDR Sensor cable and the Panel FFC through the cutout of the Upper Housing Figure 4 18 Remove the Upper Housing C B P M3x10 C B P M3x10 C B P M3x10 C B P M3x10 C B P M3x10 Upper Housing Route the Panel FFC and CDR Sensor cable correctly as shown in the following Figure Install the Upper Housing so that the Grounding Plate properly pro...

Page 82: ...side down 3 2 Pull the Printer Cover in the direction of the red arrow so as to prevent the parts of the Printer Cover Holder Right and Upper Housing shown below from interfering Figure 4 21 Removing the Printer Cover 1 Insert the tabs two each on the left right shown in Figure 4 20 into the holes on the Upper Housing Tabs Tabs 1 C B P M3x10 6 1 kgf cm 1 C B P M3x10 6 1 kgf cm Upper Housing Printe...

Page 83: ...t secure the Upper Housing Support Assy and remove the Upper Housing Support Assy Figure 4 23 Removing the Upper Housing Support Assy C A U T I O N When performing the following steps be careful not to damage the tabs of the Printer Cover Holder Right A D J U S T M E N T R E Q U I R E D If the Printer Cover creaks when opening closing it make sure to lubricate the Printer Cover Holder Left Right C...

Page 84: ...igure 4 25 Board Assy 2 5 6 3 C B S P2 M3x10 6 1 kgf cm 2 C B S M3x6 8 1 kgf cm 1 3 4 14 C B S M3x10 8 1 kgf cm 7 C A U T I O N When performing the following procedure prevent the FFC and the cables from being scratched If having trouble disassembling remove the High Voltage Module Cover to make the work easier refer to 4 3 3 High Voltage Module Step2 p87 No Connector No Connector CN1 PictBridge C...

Page 85: ...rews that secure the Main Board and remove the Main Board from the Board Assy Figure 4 30 Removing the Main Board Confirm that the FFCs do not cross each other first then connect the FFCs and the cables to the Main Board while paying attention to the edge of the Shield Plate Take care not to place the Board Assy onto the three Ground Plates Figure 4 28 Reinstalling the Board Assy Board Assy Ground...

Page 86: ...l off the piece of acetate tape from the LED Sheet Figure 4 33 Removing the LED Board 1 3 Release the three tabs from the LED sheet and open the LED sheet 4 Disconnect the LED FFC from the connector on the LED Board Figure 4 34 Removing the LED Board 2 C A U T I O N When disconnecting the Power Board cable be sure to unlock CN60 on the Main Board Figure 4 31 Handling the Power Board cable CN60 A D...

Page 87: ...re below Figure 4 36 Reinstalling the LED Board 6 C B S P4 M3x8 6 1 kgf cm LED Board Tabs and positioning holes 160mm 18mm Attachment Position Acetate Tape W A R N I N G High voltage is applied in the High Voltage Module The following must be strictly observed when you handle the High Voltage Module Do not turn the power on with the Upper Housing removed To avoid electrical shock do not make or le...

Page 88: ...ew and remove the High Voltage Module Board Figure 4 38 Removing the High Voltage Module Board 2 Wind the High Voltage Module cable on the hook one time as shown in Figure 4 38 Route the electrode cable as shown in the figure below Figure 4 39 Routing the Electrode Cable 4 C B P M3x8 High Voltage Module cable Hook CN1 Electrode cable terminal Acetate Tape Wind it on the hook Electrode cable 55 2mm...

Page 89: ...onnectors Figure 4 40 Disconnecting the Cables 4 Remove the three C B S M3 x 6 screws that secure the APG Assy and remove the APG Assy from the Main Frame Figure 4 41 Removing the APG Assy Referring to Figure 4 40 correctly route the APG connector cable Hook the APG Motor cable on the two tabs of the ASF Assy APG Assy APG Motor APG Sensor connectors CN118 When installing the APG Assy confirm the F...

Page 90: ...rds the left direction from the rear of the Carriage Unit Figure 4 44 Pulling out the CR Scale Match the phase of the APG Assy in the following procedure 1 Match the delta marks of Spur Gear 16 and Combination Gear 22 28 8 32 4 2 At the position where the tab can be identified through the notch of the PG Frame match the delta marks of Spur Gear 16 and PG Cam Left Figure 4 43 Phase Matching Tighten...

Page 91: ...le by the following procedure 6 1 Stand the coil section 6 2 Lower the coil section downwards to remove Foot 1 from the notch on the Left CR Shaft Mounting Plate 6 3 Turn the coil section counterclockwise 6 4 Remove Torsion Spring 24 7 from the hole on the CR Scale Figure 4 46 Removing the Torsion Spring 24 7 2 7 Turn the CR Scale 90º and remove it from the tab on the Left CR Shaft Mounting Plate ...

Page 92: ...lower part of the Hinge Cover Cartridge using a pair of Tweezers and remove the lower part of the Hinge Cover Cartridge Figure 4 51 Removing the Hinge Cover Cartridge Pass the CR Scale through the slot on the CR Encoder Figure 4 48 Reinstalling the CR Scale 1 Set the left end of the CR Scale with the black mark facing upwards Figure 4 49 Reinstalling the CR Scale 2 Place the right end of the CR Sc...

Page 93: ...O I N T The Hinge Cover Cartridge can not be removed without damaging it Whenever replacing the Printhead the Hinge Cover Cartridge must be also replaced with a new one Figure 4 52 Hinge Cover Cartridge Engage the two dowels of the Ink Cartridge Cover with the installation holes on the Carriage Unit and Hinge Cover Cartridge one each Figure 4 53 Reinstalling the Ink Cartridge Cover Hinge Cover Car...

Page 94: ...C Assy 1 10 Using the special tool see p 71 disengage the two hooks of the CSIC Assy on the right and left on the rear of the Carriage Unit and remove the CSIC Assy upward Figure 4 56 Removing the CSIC Assy 2 C A U T I O N Before performing the following procedure be sure to disconnect the CSIC FFC from the connector on the CSIC board If not the CSIC Assy can not be removed and the CSIC FFC may be...

Page 95: ...rinthead Figure 4 58 Remove the Head FFC 7 C B P M2 6x8 3 0 5 kgf cm 1 2 3 Head Printhead Head FFCs Confirm that the pad is attached at the position in Figure 4 59 Figure 4 59 Attaching the Pad The Printhead must be installed with its positioning holes aligned with the guide pins of the Carriage Unit Figure 4 60 Reinstalling the Printhead 1 A D J U S T M E N T R E Q U I R E D After replacing or re...

Page 96: ...3 x 10 screw and the C B S P2 M3 x 10 screw that secure the Shield Plate Holder and remove the Shield Plate Holder 7 Remove the five screws and one washer that secure the Printer Mechanism four C B P M3 x 10 screws one P W 4 3 x 0 8 x 8 washer attached with one of the C B P screws and one C B S P2 M3 x 10 screw Figure 4 62 Screws that Secure the Printer Mechanism C A U T I O N following steps be e...

Page 97: ...he Printer Mechanism Holding Positions 0 Digit Side Ink Tube joint 130 Digit Side Ink Tube 0 Digit Side Waste Ink Tube Longer 130 Digit Side Waste Ink Tube Shorter Install the Printer Mechanism to the Lower Housing as follows refer to Figure 4 62 1 Align the guide pins x2 with the positioning holes as shown below Figure 4 65 Reinstalling the Printer Mechanism 2 Place the Printer Mechanism on the L...

Page 98: ...4 Remove the APG Assy p 89 5 Rotate the PG Cam Right to adjust its positions other than PG downside Figure 4 67 Adjusting the PG Cam Attach the Label Ink Position B at the position in the figure below Figure 4 66 Attaching the Label Ink Position B A D J U S T M E N T R E Q U I R E D After replacing the Printer Mechanism always make the required adjustments referring to the following Chapter 5 Adju...

Page 99: ...d remove the coil section from tab B to remove the Right PG Torsion Spring from the Main Frame Figure 4 70 Removing the Right PG Torsion Spring Insert the Left Frame Support Plate into the notch on the Main Frame See Figure 4 68 Align the two tabs on the Main Frame and the tab on the Paper EJ Frame Assy with the three positioning holes on the Frame Support Plate Left See Figure 4 68 Align the tab ...

Page 100: ... Removing the Extension Spring for the Driven Pulley Holder 11 Slide Driven Pulley Holder to the right end of the notch on the Main Frame and Remove the Driven Pulley Holder toward you Figure 4 74 Removing the Driven Pulley Holder Place the feet of Left PG Torsion Spring and Right PG Torsion Spring on the Carriage Shaft Figure 4 71 Reinstalling PG Torsion Springs Insert the foot of CR Shaft Mounti...

Page 101: ...tween the Flag of the Parallelism Adjust Bushing and the Left PG Cam Figure 4 77 Rotating the Left Parallelism Adjust Bushing 15 Slide the Left CR Shaft Mounting Plate upwards and release the tab on the Left CR Shaft Mounting Plate from the notch on the Main Frame to rotate the Mounting Plate toward you Figure 4 78 Rotating the Left CR Shaft Mounting Plate Align the positioning holes on the CR Gui...

Page 102: ...oward you to remove the Bushing on the Left CR Shaft Mounting Plate from the Carriage Shaft Figure 4 80 Removing the Left CR Shaft Mounting Plate 18 Lift the Carriage Shaft within the hole on the Main Frame and remove the Spacer and Left PG Cam from the Carriage Shaft Figure 4 81 Removing Left PG Cam 19 Remove the Spacer and Right PG Cam from the Carriage Shaft Figure 4 82 Removing Right PG Cam Ca...

Page 103: ...g with the rear of the Carriage Unit slide the Carriage Shaft to the left side and pull out its right end from the Main Frame and pull out the Carriage Shaft from the Main Frame and Carriage Unit Figure 4 85 Removing the Carriage Shaft Install the Right PG Cam so that one of these positions marked 0 or faces downward Figure 4 83 Right PG Cam Installation Direction Right CR Shaft Mounting Plate Tab...

Page 104: ...the CR Encoder Board Holder from the three Tabs to remove it from the Carriage Unit Figure 4 89 Removing the Belt Holder Set the longer end of the Carriage Shaft to the left side When the Carriage Shaft is removed the Plain Spring and Leaf Spring that are attached to the right end of the Carriage Shaft may drop off In such case be sure to attach them in the order as shown in the figure below Figur...

Page 105: ...arriage Unit Figure 4 90 Removing the Carriage Unit When the Carriage Unit is removed from the Printer Mechanism the CR Pad may drop off In such case correctly install it referring to the figure below Figure 4 91 Reinstalling the CR Pad CR Encoder Board Sensor FFC CR Pad A D J U S T M E N T R E Q U I R E D After replacing or removing the Carriage Shaft and Carriage Unit always make the required ad...

Page 106: ...nect the FFC bundled by the acetate tape from the CN6 to CN22 on the Main Board and release it from the groove on the ASF Assy 7 Disconnect the APG Motor cable and PE Sensor cable from the ASF Assy 8 Peel off the PF Encoder FFC secured by two pieces of double sided adhesive tape from the ASF Assy Figure 4 93 Releasing the Cables 2 Secure the two Earth cables together with the screw Referring to Fi...

Page 107: ...F Assy Referring to Figure 4 93 correctly route each of the cables and FFCs C H E C K P O I N T When only removing the ASF Assy you do not need to perform 5 2 5 ASF Guide Roller LDs Position Adjustment p159 In that case mark the installing positions of the Guide Roller LDs before removing them and make sure to align the markings when installing the Guide Roller LDs Figure 4 94 Marking Position Fro...

Page 108: ... positioning holes on the Main Frame so that there is no gap between the ASF Assy and the Main Frame Figure 4 97 Reinstalling the ASF Assy Tighten the screws in the order shown in Figure 4 96 Tab Tab Guide pins Tab Tab A D J U S T M E N T R E Q U I R E D After replacing or removing the ASF Assy always make the required adjustments referring to the following Chapter 5 Adjustment p 137 ...

Page 109: ... Front Paper Guide Paper Guide Pad Front Paper Guide Pad Protection After installing the Front Paper Guide Pads and Front Paper Guide Pad Protection lift the Printer Mechanism and check the following points 1 Make sure that the tabs on the Pads are not cut midway 2 Make sure that all tabs are in place on the Front Paper Guide and that they are facing down towards the Waste Ink Pads without any fol...

Page 110: ...the Lower Housing 4 Remove the Waste Ink Tube Left Right from the Lower Housing Figure 4 101 Removing the Waste Ink Pad 4 C B P M3x8 6 1 kgf cm Waste Ink Pad Ink Tube Holder Check the positions and the routing of the upper and lower Waste Ink Tubes 0 digit side Lower side 130 digit side Upper side Figure 4 102 Positions of Waste Ink Tubes A D J U S T M E N T R E Q U I R E D After replacing or remo...

Page 111: ...Mechanism Refer to 4 4 4 Lower Housing Printer Mechanism p 96 2 Remove the two C B P M3 x 8 screws that secure the PictBridge Holder Assy and remove the PictBridge Holder Assy Figure 4 104 Removing the PictBridge Holder Assy Foot Match the positioning slit of the Grounding Plate with the tab of the Lower Housing as shown in Figure 4 104 Route the PictBridge cable through the groove of the Lower Ho...

Page 112: ...cure the Paper EJ Frame Assy Figure 4 106 Screws that Secure the Paper EJ Frame Assy 7 Remove the two guide pins on the CDR Tray Base from the Left and Right CDR Release Lever Sub Assy 8 Pull the Star Wheel Roller toward you and remove the CDR Tray Base and the Paper EJ Frame Assy from the Printer Mechanism keeping the Assy from coming in contact with the Right CDR Release Lever Sub Assy and the t...

Page 113: ...oth rear ends of the Paper EJ Frame Assy onto the tabs on the Main Frame Align the bearing of the CDR Release Level Sub Assy with the Paper EJ Release Shaft Figure 4 110 Reinstalling the Paper EJ Frame Assy Attach the LABEL CAUTION CDR B parts code 1470311 at the position as shown below Figure 4 111 Attaching Position of the CDR Caution Label Match the tabs with the five positioning holes See Figu...

Page 114: ...ease Lever Sub Assy 1 3 Remove the C B S M3 x 6 screw that secures the Right CDR Release Lever Sub Assy Figure 4 113 Removing the Right CDR Release Lever Sub Assy 2 4 To prevent parts from dropping refit the shaft on the Right CDR Release Base into the CDR Release Lever 5 Press the guide pin that secures the Right CDR Release Lever Sub Assy with tweezers and remove it upwards from the Main Frame F...

Page 115: ...ead screwdriver and remove the Left CDR Release Lever Sub Assy upward from the Main Frame Figure 4 116 Removing the Left CDR Release Lever Sub Assy Spur Gear 68 Tabs Small tab 9 C B P M3x6 6 1 kgf cm Make sure that the Left CDR Release Lever Sub Assy is correctly assembled as shown in the figure below Figure 4 117 Reinstalling the Left CDR Release Lever Sub Assy 1 Align the Shaft and Bushing Figur...

Page 116: ...onnect the Pump Motor connector from the Relay connector Figure 4 119 Disconnecting the Pump Motor Connector 5 Remove the two C B S M3 x 4 screws that secure the Ink System Guide Plate and remove it Figure 4 120 Removing the Ink System Guide Plate Be sure to screw the two Earth cables together Referring to Figure 4 119 correctly route the Relay connector cable Relay connector 5 C B S M3x8 8 1 kgf ...

Page 117: ... Frame and remove the Right Support Frame from the Main Frame Figure 4 123 Removing the Right Support Frame Tighten the screws in the order shown in Figure 4 122 2 Rear 1 Front 2 C B S M3x6 8 1 kgf cm Align the positioning holes on the Right Support Frame with the guide pins on the Main Frame Figure 4 124 Installing the Right Support Frame Tighten the screws in the order shown in Figure 4 123 Righ...

Page 118: ...se Cam may drop off In such case correctly install it referring to the figure below Figure 4 126 Installing the Paper EJ Lock Release Cam Paper EJ Transmission Lock Lever Ink System Unit Paper EJ Lock Release Cam Place the Paper EJ Lock Release Cam on the rear side of the Paper EJ Transmission Lock Lever Figure 4 127 Reinstalling the Ink System Unit 1 Align the positioning hole on the Main Frame w...

Page 119: ...moving the EJ Grounding Spring 4 Remove the Spacer from the EJ Roller Shaft 5 Remove the guide pins on Left Bushing 8 from the Main Frame using tweezers and turn Left Bushing 8 toward you to align with the notches on the Main Frame Figure 4 131 Removing the Spacer and Rotating the Left Bushing 8 6 Slide the Front Paper EJ Roller to the left and remove the Left Bushing 8 from the Main Frame Figure ...

Page 120: ...t Paper Guide together with the Paper EJ Roller Figure 4 133 Removing the Front Paper Guide and Paper EJ Rollers 10 Pull out the Shaft of the Left Front Frame from the bushing of the Front Paper Guide and remove the Left Front Frame Figure 4 134 Removing the Front Paper Guide Paper EJ Rollers 2 11 Remove the Front Paper Guide Pad Tray in the direction of the arrow Figure 4 135 Removing the Front P...

Page 121: ...Tray Figure 4 136 Removing the Waste Ink Pad Engage the two tabs of the Front Paper Guide Pad Tray with the holes of the Front Paper Guide as shown in Figure 4 135 Waste Ink Pad Front Paper Guide Pad Tray Align the bushing of the Front Paper Guide with the PF Roller Shaft Figure 4 137 The PF Roller Shaft and the bushing of the Front Paper Guide Align the positioning holes on the Main Frame with th...

Page 122: ...the tabs on the Paper Guide Pad are not cut midway 2 Make sure that all the tabs are facing down toward the Waste Ink Pads without any folds 3 Make sure that the tab foldbacks are protruding completely from the Front Paper Guide Figure 4 139 Checking the Front Paper Guide Pad A D J U S T M E N T R E Q U I R E D After replacing the following parts be sure to apply G 45 grease to the area specified ...

Page 123: ...ft Parallelism Adjust Bushing from becoming hooked on the notch Figure 4 142 Rotating the Left Parallelism Adjust Bushing 7 Remove the guide pin of Left Bushing 8 from the Main Frame using tweezers and rotate the Bushing upwards to align with the notch on the Main Frame Figure 4 143 Rotating the Left Bushing 8 8 Remove the E ring from the PF Roller Shaft with a flathead screwdriver and slide Left ...

Page 124: ...nts Prevent the coated surface of the PF Roller Shaft from being scratched Do not touch the coated surface of the PF Roller Shaft with bare hands Figure 4 145 Handling the PF Roller Shaft Coating Part Rear Paper Guide Bushings Notch Center Support Right Bushing 8 C A U T I O N Be careful not to move Compression Spring 4 and the Leaf Spring on the left side of the PF Roller Shaft to the coated sect...

Page 125: ...older Assy from the Main Frame with a flathead screwdriver and remove the Release Holder Assy upwards Figure 4 148 Removing the Release Holder Assy 2 C B S M3x6 8 1 kgf cm 1 2 3 PE Sensor connector cable Tabs Release Holder Assy Rear side Upper Tabs Lower Tabs Front side Align the three upper tabs on the Release Holder Assy with the positioning holes on the Main Frame See Figure 4 148 Fit the FLAG...

Page 126: ...e the Driven Release Holder to the left as viewed from the front of the Printer Mechanism 4 Release the three tabs on the Driven Release Holder from the Main Frame and remove the FLAG Release Assy Figure 4 151 Removing the FLAG Release Assy C A U T I O N In the following procedure Parallel Pin 1 5 may drop off when the Driven Release Holder is slid Be careful not to lose it Figure 4 150 Parallel P...

Page 127: ...shown in the figure below to prevent ink from sticking to the LD Rollers Remove the five Paper Guide Torsion Springs from the tabs insert the notches of the Perforated Sheets into the tabs to attach them to the Main Frame and then hook the Paper Guide Torsion Springs onto the tabs again Insert the LD Cover Sheet in between the frame so that the tabs on the upper side of the LD Cover Sheet are visi...

Page 128: ...elease the shaft referring to Figure 4 155 and remove the Upper Paper Guide Assys to the rear Figure 4 156 Removing the Upper Paper Guide Assy Upper Paper Guide Torsion Sprig Tab Upper Paper Guide Assys Tabs Make sure that the leading end of the Upper Paper Guide Torsion Spring can be seen through the hole of the Upper Paper Guide Assy Figure 4 155 Reinstalling the Upper Paper Guide Torsion Spring...

Page 129: ...e Belt and remove the CR Drive Belt from the CR Motor Pinion Gear Figure 4 158 Removing the CR Motor 5 Remove the two C B S M3 x 4 screws that secure the CR Motor and remove the CR Motor from the Main Frame Figure 4 159 Removing the CR Motor CR Motor Relay connector CR Motor connector cable CR Drive Belt Driven Pulley CR Motor Pinion Gear Make the Lot No printed surface on the CR Motor face the di...

Page 130: ... the PF Drive Belt from the PF Motor Pinion Gear and remove the PF Motor from the Printer Mechanism Figure 4 161 Removing the PF Motor 1 2 PF Motor connector cable Clamp PF Drive Belt CN116 PF Motor Pinion Gear 11 C C M3x4 4 0 5 kgf cm A D J U S T M E N T R E Q U I R E D Make the slit on the PF Motor face the direction shown in the figure below Figure 4 162 Reinstalling the PF Motor Tighten the sc...

Page 131: ... 2 Release the ASF Motor cable from the cable hook and disconnect the relay connector 3 Remove the two C B P M3 x 8 screws that secure the ASF Motor and remove the ASF Motor Figure 4 163 Removing the ASF Motor Secure the grounding wire and the ASF Motor together with the screw in the middle of the printer Cable Hook ASF Motor 4 C B P M3x8 Grounding Wire ...

Page 132: ...m the connector on the CR Encoder Sensor Board and remove the CR Encoder Sensor Board Figure 4 164 Removing the CR Encoder Sensor Board 4 6 2 PF Encoder 1 Remove the Upper Housing Printer Cover p 81 2 Disconnect the FFC from the PF Encoder Sensor Board 3 Remove the C B S M3 x 8 screw that secures the PF Encoder Sensor Holder Figure 4 165 Removing the FFC and the Screw that Secures the PF Encoder S...

Page 133: ...e the C P B P1 M1 7 x 5 screw that secures the PW Sensor Holder and remove the PW Sensor Holder from the Carriage Unit Figure 4 168 Removing the PW Sensor Holder 3 Disconnect the FFC from the Ink Mark Sensor and the PW Sensor connector and remove the Ink Mark Sensor and PW Sensor Figure 4 169 Removing the Ink Mark Sensor and PW Sensor Make sure that the PF Scale is in the slit on the PF Encoder Se...

Page 134: ...p 112 2 Disengage the two hooks that secure the CDR Sensor and remove the CDR Sensor Figure 4 170 Removing the CDR Sensor Make sure that the FFC is routed as shown in Figure 4 169 A D J U S T M E N T R E Q U I R E D After replacing or removing the Ink Mark Sensor and the PW Sensor always make the required adjustments referring to the following Chapter 5 Adjustment p 137 Hooks CDR Sensor ...

Page 135: ...cure the PE Sensor Holder from the notch on the Main Frame with a flathead screwdriver and slide the PE Sensor Holder upwards and then remove it toward you Figure 4 172 Removing the PE Sensor Holder Tabs PE Sensor connector cable Tabs Release Holder Assy Head Cable Cover PE Sensor Holder Front Side Tab Align the four tabs and guide pin on the PE Sensor Holder with the positioning holes on the Main...

Page 136: ...er Open Sensor 1 Remove the Panel Unit p 78 2 Remove the C B P M3 x 8 screw that secures the Cover Open Sensor and remove the Cover Open Sensor Figure 4 174 Removing the Cover Open Sensor Align the guide pins with the positioning holes shown in Figure 4 174 4 C B P M3x8 Guide pins and Positioning holes Cover Open Sensor ...

Page 137: ...Confidential C H A P T E R 5 ADJUSTMENT ...

Page 138: ...lly all the other adjustments required after replacing the main board are no longer necessary 1 Select this function in the Adjustment Program 2 Read out the data from the defective board 3 After replacing the board with a new one write the read data to the new board Initial Setting After replacing the Main Board information common to Main Boards is written by market setting 1 Select and execute t...

Page 139: ...address of the Main Board Initialize PF deterioration offset The deterioration amount of the PF Roller Shaft is reflected to the paper feed correction amount Every time a sheet of paper is fed the deterioration amount is counted on the basis of the original counter value setting When the PF Roller Shaft or Printer Mechanism has been replaced during repair the PF deterioration counter must be reset...

Page 140: ...ake the printer perform Initial Ink Charge operation Head cleaning This function is used to execute cleaning 3 CL3 when ink is not delivered from the Print Head properly e g dot missing or skewed injection 1 Select this function in the Adjustment Program 2 Execute CL3 Waste ink pad counter This function is used to read and reset the Waste Ink Counters 1 In the Adjustment Program select data read o...

Page 141: ...Input Head ID input Consumables maintenance counter Ink charge Initialize PF deterioration offset Disenable PF deterioration offset First dot position adjustment PW adjustment Head angular adjustment Multi Sensor Adjustment Ink Mark Sensor Adjustment Bi D adjustment PF adjustment CR motor heat protection control Colorimetric calibration Final check pattern print ASF Assy Remove 1 O O Replace O O O...

Page 142: ...e O O O Replace O O O Printer Mechanism Remove O Replace O O O O O O O O O O O O PW Sensor Remove O O Replace O O Ink Mark Sensor Remove O O O Replace O O O Table 5 4 Required Adjustment List Priority 1 2 3 4 5 6 7 8 9 10 11 12 13 14 15 16 17 18 19 20 21 PF Belt tension adjustment PF Roller Shaft Center Support Position adjustment ASF Guide Roller LDs Position Adjustment PG Adjustment High Voltage...

Page 143: ...lus Photo R1800 6 PF Tension Measuring Tool 1294120 Measuring tool Used to check whether or not the tension of the PF Drive Belt is within the specified value If load is greater than the specified value the PF Motor may generate heat burning off the coil Reversely if load is less than the specified value the paper feed position may shift 7 PF Roller Shaft Position Adjustment Jig 1304993 Adjusting ...

Page 144: ...le and the Pinion Gear of the PF Motor 2 Press the POWER button The LCD of the Measuring Tool displays No 0 and No 1 3 From among No 0 to No 9 select the channel you want to store its setting by pressing the SELECT button The initial value may be selected as the channel 4 Press the WEIGHT button The initial value will be displayed Type the ten key pad so that 1 2g m is displayed 5 Press the WIDTH ...

Page 145: ...he Drive Belt is flipped with the tip of tweezers in the following steps carefully choose the flipping position so that the Belt will not make contact with the Microphone by reaction of flipping A D J U S T M E N T R E Q U I R E D Standard Value 10 5 2N 8 5 12 5N C A U T I O N Even if the Timing Belt is flipped the LCD screen may not change at all In this case flip the Timing Belt again after a fe...

Page 146: ...ill stick to the continuity measurement portion of the Adjustment Gauge and generate continuity before the continuity measurement portion makes contact with the metal frame around the Print Head interrupting accurate PG Adjustment As the ink in the Print Head may stick fast and damage the Print Head during PG Adjustment make the continuity time detected with a tester as short as possible Maximum 3...

Page 147: ...aper Guide in Figure 5 6 Figure 5 6 Setting the Adjustment Gauge 7 Move the Carriage Unit onto the Adjustment Gauge Moving position Match the left end of the Gauge with the left end of the Carriage Unit Figure 5 7 Moving the Carriage Unit 8 To set the PG position to the position turn the PG Cam on the right end of the Carriage Shaft clockwise so that the point marked faces down Figure 5 8 Markings...

Page 148: ...t the point marked 0 or or faces down 11 With its conductor connection portion up set the Adjustment Gauge in the specified position on the right side of the Front Paper Guide Setting Position Rear direction Match the rear end of the Gauge with the Driven Roller Shaft of the Upper Paper Guide Right direction Release the right end of the Gauge from the Tab on the Front Paper Guide in Figure 5 10 Fi...

Page 149: ...G position is not out of position tighten the Parallelism Adjust Bushing with the screws to end the adjustment If it is out of position repeat the adjustment procedure from step 9 5 2 3 PF Roller Shaft Center Support Position Adjustment This adjustment must be performed to compensate the deflection amount on the PF Roller Shaft and to maintain an appropriate paper feed amount when the following pa...

Page 150: ...t Position Adjustment Jig in place on the Level block and perform zero adjustment Long hand position Turn the dial to adjust the 0 position on the scale to the long hand position with the jig set in place on the Level block Short hand position Check it Figure 5 13 Setting the PF Roller Shaft Position Adjustment Jig 1 4 Tilt the Printer Mechanism at about 45 degrees and loosen the screws that secur...

Page 151: ...llowing page shows print samples when adjustment of the PF Roller Shaft Center Support Positions are inside and outside the specified value range C A U T I O N Check for any dirt on the PF Roller Shaft when performing the following procedure A D J U S T M E N T R E Q U I R E D Standard Value 30 50m Adjustment Resolution 50 C A U T I O N 30 must be set to compensate for the thickness of the coating...

Page 152: ...EPSON Stylus Photo R1900 R2880 R2000 Revision E Adjustment Adjustment 152 Confidential Figure 5 17 Outside the Specified Value Range Figure 5 18 Inside the Specified Value Range Unevenness ...

Page 153: ...lor ID can improve the Ink Counter accuracy which reduces the running cost of ink Colorimetric Calibration Technology The Principle The ink discharge amount characteristic of a printer is measured by measuring color difference L a b of a printed chart with a calibrator Created Color ID information based on the obtained L a b values is stored on the printer When printing the printer sends the Color...

Page 154: ... obtained and registered as the correction value Color ID to control the amount of ink droplets C A U T I O N Before performing Colorimetric Calibration the conventional Head ID must be pre registered This is because the Head ID contains information to create a waveform to drive the head which is also required for the Colorimetric Calibration C A U T I O N If you do not perform Colorimetric Calibr...

Page 155: ...completely non compensated state Therefore there is no need to delete an existing Color ID from EEPROM when printing out a Calibration Chart Printing of a Calibration Chart USB ID printing date time nozzle check pattern Drying of the Calibration Chart five minutes Confirmation of USB ID printing date time Measure the Calibration Chart Convert the color values Lab to Color ID from color measurement...

Page 156: ...or Measuring The color measurement procedure screen operated by the Calibrator control plug in DLL is displayed on screen overlapping the Colorimetric Calibration Tool Figure 5 26 Color Measurement C H E C K P O I N T The recommended air temperature range for printing a Calibration Chart is 15 C to 28 C 2007 09 21 16 07 GMT 2007 09 21 07 07 USBID 3030334852469D2F58 OS Win BlackInk Photo Matte Prin...

Page 157: ... other organic solvent The calibration plate and the Calibrator are used as a pair Do not use a calibration plate supplied with an another Calibrator 2007 09 21 16 07 GMT 2007 09 21 07 07 USBID 3030334852 Printer EPSON PX 2007 09 28 16 02 GMT 2007 09 28 07 02 Calibration Chart Check the time here Color measurement completed rows Patches in the completed rows are displayed in colors created accordi...

Page 158: ...llow the Calibrator to rub against unmeasured patches on the chart Prevent the ruler and Calibrator from coming off the chart sheet during color measurement Doing so will cause incorrect color measurement During color measurement measure only the patches on the chart sheet Do not measure other parts such as the USB ID text string When there is an error possibility in measuring color a warning mark...

Page 159: ... screws that secure the Guide Roller LD Figure 5 32 Guide Roller LD 2 Turn Combination Gear 29 11 on the right side of the ASF Assy CCW to raise the Hopper to the upper limit position until the Hopper Pad contacts the LD Roller Figure 5 33 Raising the Hopper C H E C K P O I N T When only removing the ASF Assy you do not need to perform this adjustment In that case mark the installing positions of ...

Page 160: ... screws See Fig 5 35 5 Check the position of the Retard Roller Holder Tab again through the notch If it is not inside the range remove the screws on the Guide Roller LD 0 Digit Side and repeat steps 2 to 4 to set the tab within the range 6 Check the clearance in both ends of the positioning hole that the Guide Roller LD Tab is inserted And align Guide Roller LD 130 Digit Side to the same height an...

Page 161: ...Confidential C H A P T E R 6 MAINTENANCE ...

Page 162: ...t the printer is in stand by state Check that the Power LED is not flashing 2 Hold down the Ink Switch on the control panel for more than 3 seconds The Power LED flashes during the cleaning sequence C A U T I O N Never use chemical solvents such as thinner benzine and acetone to clean the exterior parts of the printer like the housing These chemicals may degrade or deteriorate the quality of this ...

Page 163: ...it shown above replace the Waste Ink Pads and reset the counter to 0 with receiving prior approval from the user This prevents the printer from causing the Maintenance Request error soon after it is returned to the user Waste Ink Pads to be replaced After the Replacement Reset the Protection Counter Refer to Chapter 5 Adjustment p 137 Waste Ink Counter Limits Protection Counter A 21 500 Stylus Pho...

Page 164: ...Table 6 2 Grease Applied to the EPSON Stylus Photo R1900 R2880 R2000 Type Name EPSON CODE Supplier Grease G 26 1080614 EPSON Grease G 45 1033657 EPSON Grease G 71 1304682 EPSON Lubrication Point Shaft of Printer Cover Holder Left Right two points each Lubrication Type G 26 Lubrication Amount 1mm x 20mm x 2 ponits Remarks Apply with a syringe Pin Head 1mm Clean them with alcohol before lubrication ...

Page 165: ... Lubrication Type G 26 Lubrication Amount A little at 4 points Remarks Apply with a brush Left Side Right Side Left Side Right Side Lubrication Point Bushings of the Left and Right PG Cams inner circumference Lubrication Type G 26 Lubrication Amount 1mm diameter of the inner circumference Remarks Apply with a brush Be careful not to attach the grease to the PF scale Lubrication Point Contact point...

Page 166: ...n Head 1mm Lubrication Point Contact point of the Driven Release FLAG and the Upper Paper Guide Lubrication Type G 26 Lubrication Amount 1mm x 5mm x 6 points Remarks Apply with a syringe Pin Head 1mm Rear side of CR Guide Plate Upper Paper Guide Lubrication Point Contact point of the EJ Grounding Spring and Front and Rear Paper EJ Rollers Lubrication Type G 45 Lubrication Amount 1mm x 2mm x 2 poin...

Page 167: ...on of the Bushing 8 Lubrication Type G 45 Lubrication Amount 1 Approx 1mm x 5mm 2 All around the Shaft Remarks 1 Apply with a syringe 2 Apply with a brush Lubrication Point 1 Contact point of the Rear Paper Guide and the PF Roller 2 Contact point of the PF Grounding Spring and the PF Roller Lubrication Type G 45 Lubrication Amount 1 Apply evenly 2 1mm x 2mm Remarks 1 Apply with a brush 2 Apply wit...

Page 168: ...wing the Unit from the rear and lubricate grease with the syringe at the point shown in Figure 6 16 Figure 6 16 Lubricating the Carriage Shaft 3 5 Hold the Carriage Unit and while turning the Carriage Shaft move the Carriage Unit to the left end of the Carriage Shaft to lubricate the grease evenly 6 Lubricate grease with the syringe at the point shown in Figure 6 17 Figure 6 17 Lubricating the Car...

Page 169: ...ntenance Overview 169 Confidential 7 Hold the Carriage Unit and while turning the Carriage Shaft move the Carriage Unit to the right end of the Carriage Shaft to lubricate the grease evenly Figure 6 18 Lubricating the Carriage Shaft 5 8 Repeat Step 4 7 ...

Page 170: ...Confidential C H A P T E R 7 APPENDIX ...

Page 171: ... Table 7 1 Connection of the Major Components 7 2 Exploded Diagram Parts List This manual does not provide exploded diagrams or parts list For the information see SPI Service Parts Information C698MAIN Main Board C698MAIN Power Supply Board Ink Mark Sensor Relay Board C698 LED Board Control Panel C698 Panel Board Cover Open Sensor High Voltage Module CDR Sensor Printhead CN11 CN12 CN13 CN14 ...

Page 172: ...Confidential C H A P T E R 8 STYLUSPHOTOR2000 ...

Page 173: ... Stylus Photo R1900 This chapter includes Features DescribesthefeaturesthatareuniquetotheStylusPhotoR2000 Case specifications Network interface Ink cartridge Nozzle configration Ink scrambling sequence Operation buttons indicators Disassembly Describes the parts that are unique to the Styulus Photo R2000 Housing Panel unit Wireless LAN board Adjustment Describes the Adjustment items that are uniqu...

Page 174: ... configration Ink scrambling sequence Operation buttons indicators 8 2 1 Casing specifications Dimensions 622 1 mm W x 324 0 mm D x 219 0 mm H Peper support and stacker are closed Rubber feet are included Weight 12 3 kg Without ink cartridges CDR Tray Roll paper holders Figure 8 1 External View Paper Support Stacker are closed Paper Support Stacker are opened ...

Page 175: ...f the Wired LAN communication mode settings Setting of this printer Setting of the connected device Auto Setting Auto Setting AUTO 100BASE TX Half Duplex 10BASE T Half Duplex 100BASE TX Full Duplex 100BASE TX Full Duplex 100BASE TX Half Duplex Auto Setting AUTO 100BASE TX Half Duplex 10BASE T Full Duplex 10BASE T Full Duplex 10BASE T Half Duplex Auto Setting AUTO 10BASE T Half Duplex Table 8 3 Wir...

Page 176: ...an be made from the Control Panel When the Wireless LAN is enabled it gets priority over the Wired Lan regardless of whether the LAN Cable is connected The default Wireless LAN setting is Disabled Note No service via network is available without connecting the LAN Cable because network communication is not established except printing a status sheet or the like MCS Index Bandwidth 20MHz Bandwidth 4...

Page 177: ... Cartridges Color Code Photo Black T1591 Matte Black T1598 Light Black Light Light Black Cyan T1592 Light Cyan Magenta T1593 Vivid Magenta Vivid Light Magenta Yellow T1594 Orange T1599 Red T1597 Gloss Optimizer T1590 Table 8 8 Storage Temperature Situation Storage Temperature Limit When stored in individual boxes 20 oC to 40 oC 4oF to 104oF 1 month max at 40 oC 104oF When installed in main unit 20...

Page 178: ...r Count of CR Reciprocating Table 8 10 Count of CR Reciprocating Note 1 Days of Ink cartridge replacement means Days after production of Ink cartridges Days of Power On means Days after the previous Ink Scrambling 2 0 45sec 1 reciprocation Item Specification Nozzle Configuration Black 180 nozzles x 2 Photo Black Matte Black Color 180 nozzles x 6 Red Orange Cyan Magenta Yellow Gloss Optimizer Timin...

Page 179: ...e cutting line on the roll paper or feeds the paper backwards out of the printer Network status sheet Pirnts the network status sheet Wi Fi Adjust setting for connection to wireless LANs Table 8 12 Indicators LEDs LED Function Power LED Green Lights at power on Flashes during some sequence is in progress Flashes at high speed during power OFF sequence Ink LED Red Lights or flashes when an ink rela...

Page 180: ...ds or longer On Runs a head cleaning Runs a sequence of ink cartridge replacement when ink level low ink out no ink cartridge or ink color error 2 has occurred Roll Paper On Feeds the roll paper to the cutting position and prints a cutting line Returns the cutting position When an ink cartridge has been set in the ink replacement position moves the carriage to the home position Roll Paper when hel...

Page 181: ...s Network initialization start LED ON ON ON Network initialization start LED OFF OFF OFF State of initialization start Flashes alternately 2 Flashes alternately 1 Non connection OFF During Wireless LAN connection having IP ON During Wired LAN connection having IP OFF ON Non support device connection Flashes2 Flashes3 13 non compliant Hub Flashes 4 Flashes Ink low Flashes 2 14 During camera connect...

Page 182: ...nt way from the specified one Eject the fed paper and press the Paper button after loading paper in the specified way Cover open error Printing was executed with the Printer Cover open Close the Printer Cover Ink Color error 3 Cleaning after black ink replacement cannot be performed Replace the black ink cartridge with the one used before the error or the one that has sufficient amount of ink Acce...

Page 183: ...al 8 3 Disassembly 8 3 1 Summary This section describes changed parts new parts for Stylus Photo R2000 only For assembling of other parts please refer to the information of Stylus Photo R1900 R2880 4 1 7 Disassembly p 75 In addition the caution points are same as Stylus Photo R1900 R2880 ...

Page 184: ...r Guide Assys p 127 PF Roller Shaft p 122 Ink Mark Sensor PW sensor p 133 CR Encoder p 132 Carriage Shaft Carriage Unit p 98 APG Assy p 89 LED Board p 86 CR Scale p 90 Upper Paper Guide Assys p 127 PE Sensor Holder p 135 FLAG Release Assy p 126 Release Holder Assy p 125 PictBridge Holder Assy p 111 ASF Assy p 106 PE Sensor Holder p 135 ASF Motor p 131 PF Motor p 130 Waste Ink Pad Waste Ink Tube Le...

Page 185: ... and remove the part Figure 8 4 Removing the Panel FFC Cover 2 4 Disengage the hooks x11 of rear side of the Panel FFC Cover and pull out the rib x1 remove the Panel FFC Cover Figure 8 5 Removing the Panel FFC Cover 3 C A U T I O N Before opening the Front Cover and the CDR Tray Base unlock the Carriage Refer to 4 1 6 Locking Unlocking the Carriage and Opening Closing the CDR Tray Base p73 Printer...

Page 186: ...ve the Panel Unit 1 2 Disconnect the Panel FFC and CDR Sensor cable from the Panel Board Figure 8 8 Remove the Panel Unit 2 Be careful not to get the Panel FFC caught underneath the hooks on the Panel FFC Cover Secure the Panel FFC with double sided tape as follows Panel FFC CDR Sensor Cable Double sided tape Figure 8 6 Panel FFC C B P 3x10 6 1kgf cm Panel FFC CDR Sensor Cable ...

Page 187: ... hook x1 and lift the Decoration Plate Right while disengaging bottom of the hooks x2 2 In the same way remove the Decoration Plate Left Figure 8 9 Remove the Decoration Plate Left Right Attach the tabs x6 to the tab holes x5 and the positioning hole x1 from the upper side of the printer Figure 8 10 Attach the Decoration Plate Left Right Tab hole Positioning hole Hook ...

Page 188: ...y 1 Remove the screw C B P 3x8 x1 that secure the earth cable and remove the screw C B P 3x8 x1 that secure the Wireless LAN Board Assy Figure 8 12 Remove the Wireless LAN Board Assy 1 2 Disengage the hook x1 Figure 8 13 Remove the Wireless LAN Board Assy 2 Tighten the screws in the order show in Figure 8 11 C B P 3x10 6 1kgf cm C B P 3x10 6 1kgf cm High Voltage Module Cable Wireless LAN Board Cab...

Page 189: ...onnector Refer to Figure 8 12 for routing the cables Don t forget to secure the earth cable of the PictBridge Holder while securing the earth cable of the Wireless LAN Board No Connector No Connector CN1 PictBridge CN14 Head FFC CN4 Panel Board CDR Sensor Cover Open Sensor CN22 CSIC CN5 Relay FFC for sensor CN25 High Voltage Module CN6 LED Board CN115 CR Motor CN9 Ink Mark Sensor CR Encoder Sensor...

Page 190: ...ed to correct variations of motors characteristics The program will automatically enter a proper correction value onto the printer Initialize front tray print conter This conter is added by using the front tray printing When this conter is added PF Roller feeds more area of the paper than default When exchange the PF Roller please initialize this counter for preventing more than enough paper feedi...

Page 191: ...ce counter Ink charge Initialize PF deterioration offset Disenable PF deterioration offset Initialize front tray print counter Disable front tray print counter PW adjustment Head angular adjustment Multi Sensor Adjustment Ink Mark Sensor adjustment Bi D adjustment PF adjustment CR motor heat protection control PF motor heat protection control Colorimetric calibration Final check pattern print ASF ...

Page 192: ...O O O O O PW Sensor Remove O O Replace O O Ink Mark Sensor Remove O O O Replace O O O Table 8 17 Required Adjustment List Priority 1 2 3 4 5 6 7 8 9 10 11 12 13 14 15 16 17 18 19 20 21 22 23 PF Belt tension adjustment Pf Roller Shaft Center Support position adjustment ASF Guide Roller LDs Position adjustment PG adjustment Mist Recovery check EEPROM Data Copy Initial setting USB ID Input Head ID In...

Page 193: ...e right The MAC Address is written correctly The IP Address will be initialized also The user should be notified of the change of MAC address because of the following reasons If the user has set the printer s MAC address on a router the repaired printer with a new MAC address cannot be connected to the network The default printer name on a network consists of EPSON and the last six digits of the M...

Page 194: ...atus sheet print menu on the printer s control panel and print the sheet Check the MAC address printed on the sheet to see if it is correct Figure 8 17 MAC Address Setting Screen C A U T I O N The MAC address required on the adjustment program is written on the MAC address label on the Upper M B Shield Plate Make sure that the address written on the MAC address label matches the MAC address settin...

Page 195: ... Sensor Adjustment 1 Print the Nozzle Check Pattern to check not to appear dot missing 2 Click the Adjustment Button The program automatically adjust the Ink Mark Sensor Program prints the pattern for adjustment It s not for checking 3 Print the check pattern by clicking the Check Button 4 The upper side of the pattern don t have a dot missing The lower side of the pattern have eight dot missings ...

Page 196: ... Figure 8 18 Pattern for Multi Sensor Adjustment Ink Mark Sensor adjustment No dot missing patterns Eight dot missings patterns Dot missing counts The counts show Sensor could recognize the Dot missing for each color Count Alignment Y M Mk R Or Pk GO C Pattern Alignment Y M C Mk Pk R Or Go ...

Reviews: