Appendix
36
Seiko Epson Corporation
S5U1C17001H2 User Manual
(ICDmini Ver2.0)
Appendix
Initial Validation when Designing a Target System
This section explains the procedure for checking that the S1C processor mounted on the target system is working
properly.
Step 1
Check that the most basic circuits such as the power supply, reset, and debugging pins are working normally.
(1) With the S5U1C17001H switched on but not connected, input High
Low
High signals to the
#RESET pin.
This resets the S1C processor.
(2) Input a Low signal to the DSIO pin (input pin).
This sets the S1C processor to debug mode.
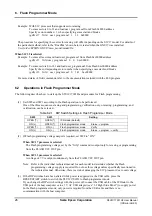
(3) If DST2 pin (output pin) changes from Low to High, it indicates that the most basic functions of the S1C
processor are working.
(If the S1C processor is set to the debug mode, the DST2 pin changes from Low to High.) Strictly
speaking, if a Low signal is input continuously, the output from DST2 is as follows.
DST2
If DST2 pin (output pin) does not change from Low to High, check the hardware of the target system.
Step 2
Try to establish a connection with the S5U1C17001H.
(1) Set the DIP switches of the S5U1C17001H.
The default is all open. Set the switches appropriately for the target system.
In this test, make the following settings at the minimum.
SW2 = OPEN
SW3 = OPEN
SW7 = OPEN
SW8 = OPEN
If the S1C processor is operating with IO voltage other than 3.3 V, it is necessary to change the settings of
SW4 and SW5.
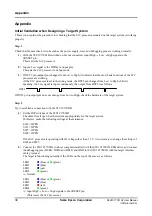
(2) Connect the S5U1C17001H to a host computer installed with the S5U1C17001H USB driver, and connect
the debugging pins (DCLK, DSIO, and DST2) and GND to the S5U1C17001H with the target interface
cable provided.
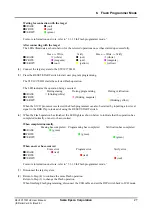
The target is functioning normally if the LEDs on the top of the case are as follows.
LED1
(blue) or
(green)
LED2
(blue)
LED3
(out)
LED4
(green)
Normal
LED1
(blue) or
(green)
LED2
(blue)
LED3
(red)
LED4
(green)
Input High
Low
High signals to the #RESET pin.
(This resets the S1C processor.)

