background image

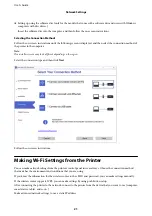
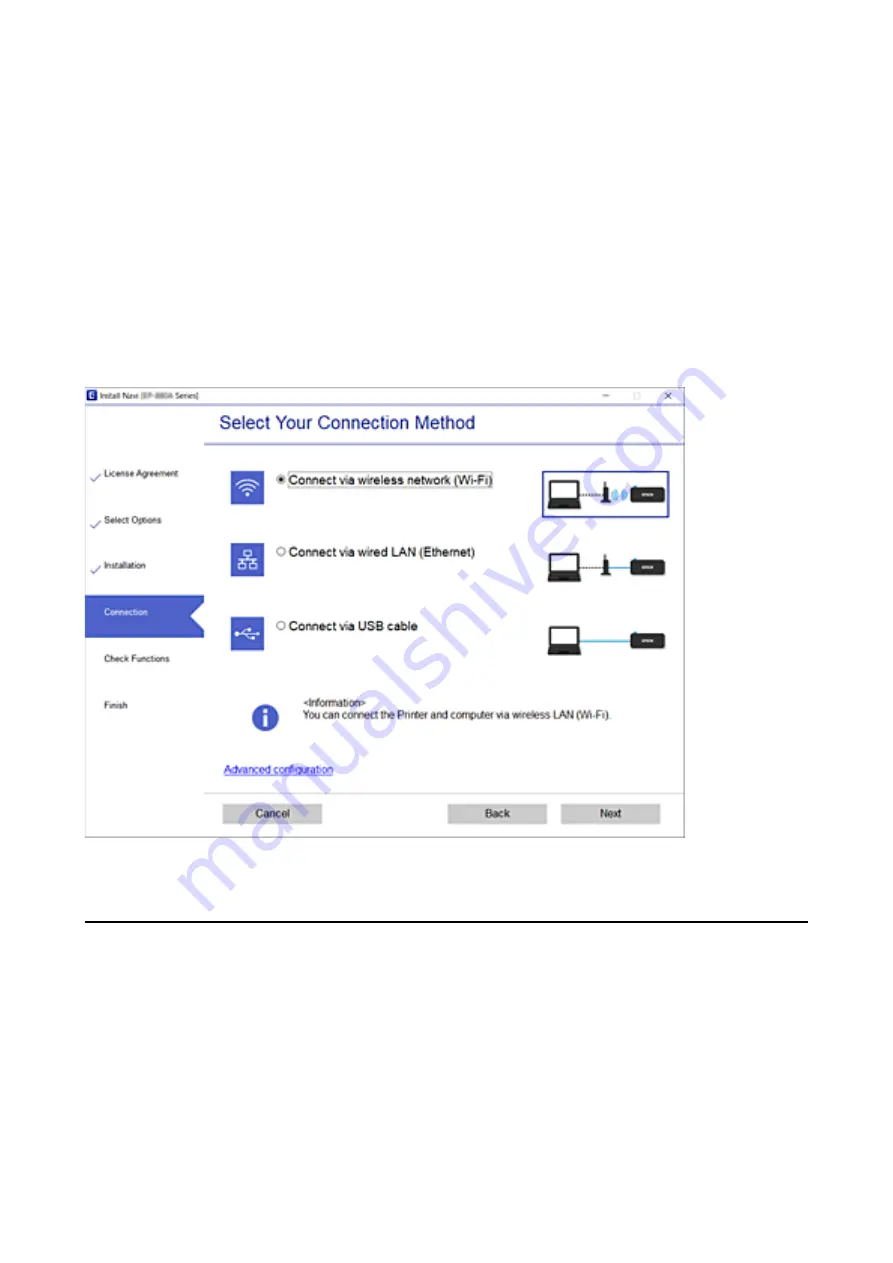
Setting up using the software disc (only for the models that come with a software disc and users with Windows
computers with disc drives.)

Insert the software disc into the computer, and then follow the on-screen instructions.

Selecting the Connection Methods

Follow the on-screen instructions until the following screen is displayed, and then select the connection method of
the printer to the computer.

Note:

The installer screens may look different depending on the region.

Select the connection type and then click 

Next

.

Follow the on-screen instructions.

Making Wi-Fi Settings from the Printer

You can make network settings from the printer's control panel in several ways. Choose the connection method
that matches the environment and conditions that you are using.

If you know the information for the wireless router such as SSID and password, you can make settings manually.

If the wireless router supports WPS, you can make settings by using push button setup.

After connecting the printer to the network, connect to the printer from the device that you want to use (computer,
smart device, tablet, and so on.)

Make advanced network settings to use a static IP address.

User's Guide

Network Settings

21

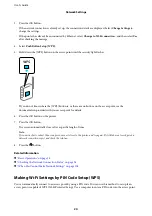
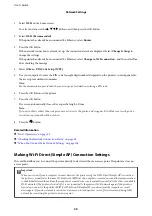
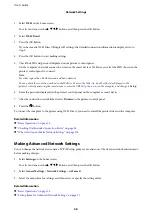
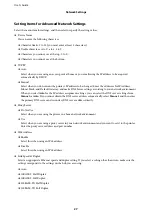
Summary of Contents for SC-F100 Series

Page 1: ...User s Guide NPD6601 01 EN ...

Page 2: ... WPS 24 Making Wi Fi Direct Simple AP Connection Settings 25 Making Advanced Network Settings 26 Checking the Network Connection Status 28 Network Icon 28 Checking Detailed Network Information from the Control Panel 28 Printing a Network Connection Report 28 Printing a Network Status Sheet 36 Replacing or Adding New Wireless Routers 37 Changing the Connection Method to a Computer 37 Changing the N...

Page 3: ...l Panel 81 Cleaning the Paper Path 82 Cleaning the Paper Path for Ink Smears 82 Cleaning the Paper Path for Paper Feeding Problems 82 Cleaning the Translucent Film 84 Cleaning the Printer 88 Checking the Total Number of Pages Fed Through the Printer 88 Checking the Total Number of Pages Fed Through the Printer Control Panel 88 Checking the Total Number of Pages Fed Through the Printer Windows 89 C...

Page 4: ...re Incorrect or Garbled 115 The Printed Image is Not Inverted 115 Mosaic Like Patterns in the Prints 115 The Printout Problem Could Not be Cleared 115 Other Printing Problems 115 Printing Is Too Slow 115 Printing Slows Down Dramatically During Continuous Printing 116 Other Problems 116 Slight Electric Shock when Touching the Printer 116 A Message Prompting You to Reset the Ink Levels is Displayed ...

Page 5: ...g the printer on a network and on solving problems You can obtain the latest versions of the above manuals with the following methods Paper manual Visit the Epson Europe support website at http www epson eu support or the Epson worldwide support website at http support epson net Digital manual To view the Web manual visit the following website enter the product name and then go to Support http eps...

Page 6: ...turn to the previous page perform the following operation on your keyboard Windows Hold down Alt and then press Mac OS Hold down the command key and then press Printing only the pages you need You can extract and print only the pages you need Click Print in the File menu and then specify the pages you want to print in Pages in Pages to Print To specify a series of pages enter a hyphen between the ...

Page 7: ...odel and settings You can read the QR code using dedicated app Operating System References Windows In this manual terms such as Windows 10 Windows 8 1 Windows 8 Windows 7 Windows Vista Windows XP Windows Server 2019 Windows Server 2016 Windows Server 2012 R2 Windows Server 2012 Windows Server 2008 R2 Windows Server 2008 Windows Server 2003 R2 and Windows Server 2003 refer to the following operatin...

Page 8: ...icrosoft Windows Server 2008 R2 operating system Microsoft Windows Server 2008 operating system Microsoft Windows Server 2003 R2 operating system Microsoft Windows Server 2003 operating system Mac OS In this manual Mac OS is used to refer to Mac OS X v10 6 8 or later User s Guide About This Manual 8 ...

Page 9: ...y unplugged Do not place or store the printer outdoors near excessive dirt or dust water heat sources or in locations subject to shocks vibrations high temperature or humidity Take care not to spill liquid on the printer and not to handle the printer with wet hands Keep the printer at least 22 cm 8 6 inches away from cardiac pacemakers Radio waves from this printer may adversely affect the operati...

Page 10: ...e building installation must be protected by a 10 or 16 amp circuit breaker to provide adequate short circuit protection and over current protection for the printer When connecting the printer to a computer or other device with a cable ensure the correct orientation of the connectors Each connector has only one correct orientation Inserting a connector in the wrong orientation may damage both devi...

Page 11: ...on the medical equipment Radio waves from this printer may negatively affect the operation of automatically controlled devices such as automatic doors or fire alarms and could lead to accidents due to malfunction When using this printer near automatically controlled devices follow all posted warnings and directions on these devices Advisories and Warnings for Using the LCD Screen The LCD screen ma...

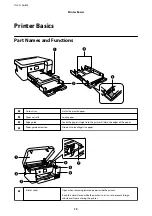
Page 12: ...paper straight into the printer Slide to the edges of the paper D Paper guide extension Slide out to load legal size paper A Printer cover Open when removing jammed paper inside the printer Keep this cover closed while the printer is not in use to prevent foreign substances from entering the printer User s Guide Printer Basics 12 ...

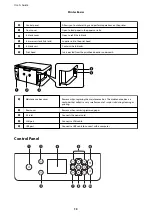
Page 13: ... ink tanks G Print head Ink is ejected from the print head nozzles underneath A Maintenance box cover Remove when replacing the maintenance box The maintenance box is a container that collects a very small amount of surplus ink during cleaning or printing B Rear cover Remove when removing jammed paper C AC inlet Connects the power cord D LAN port Connects a LAN cable E USB port Connects a USB cabl...

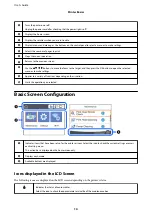
Page 14: ...e selected menu or to make settings I Applies to a variety of functions depending on the situation J Starts the operation you selected Basic Screen Configuration A Indicates items that have been setup for the printer as icons Select the icon to check the current settings or access each setting menu This action bar is displayed on the home screen only B Displays each mode C Available buttons are di...

Page 15: ...connected to a wireless Wi Fi network The number of bars indicates the signal strength of the connection The more bars there are the stronger the connection The printer is not connected to a wireless Wi Fi network in Wi Fi Direct Simple AP mode The printer is connected to a wireless Wi Fi network in Wi Fi Direct Simple AP mode Indicates that there is additional information Select the icon to displ...

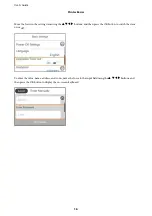
Page 16: ...tons and then press the OK button to switch the item on or off To enter the value name address and so on move the focus to the input field using the u d l r buttons and then press the OK button to display the on screen keyboard User s Guide Printer Basics 16 ...

Page 17: ...the keyboard layout F Enters frequently used email domain addresses or URLs by simply selecting the item G Enters a space H Enters character I Deletes a character to the left Deletes a character to the right when the cursor is at the start of the line and there are no characters to the left J Switches the character type abc Alphabet 123 Numbers Symbols Viewing Animations You can view animations of...

Page 18: ...te that the animation depends on the printer model A Indicates the total number of steps and the current step number In the example above it shows step 2 from 5 steps B Press l button to return to the previous step C Indicates your progress through the current step The animation repeats when the progress bar reaches the end D Press r button to move to the next step User s Guide Printer Basics 18 ...

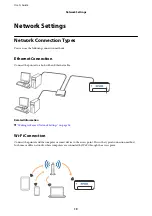
Page 19: ...ith an Ethernet cable Related Information Making Advanced Network Settings on page 26 Wi Fi Connection Connect the printer and the computer or smart device to the access point This is the typical connection method for home or office networks where computers are connected by Wi Fi through the access point User s Guide Network Settings 19 ...

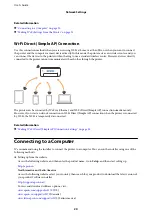
Page 20: ...nection in Wi Fi Direct Simple AP connection when the printer is connected by Wi Fi the Wi Fi is temporarily disconnected Related Information Making Wi Fi Direct Simple AP Connection Settings on page 25 Connecting to a Computer We recommend using the installer to connect the printer to a computer You can run the installer using one of the following methods Setting up from the website Access the fo...

Page 21: ...pe and then click Next Follow the on screen instructions Making Wi Fi Settings from the Printer You can make network settings from the printer s control panel in several ways Choose the connection method that matches the environment and conditions that you are using If you know the information for the wireless router such as SSID and password you can make settings manually If the wireless router s...

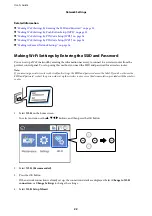
Page 22: ...p using this method you need the SSID and password for a wireless router Note If you are using a wireless router with its default settings the SSID and password are on the label If you do not know the SSID and password contact the person who set up the wireless router or see the documentation provided with the wireless router 1 Select Wi Fi on the home screen To select an item use the u d l r butt...

Page 23: ...select Start Setup 8 Select Dismiss to finish Note If you fail to connect load A4 or Letter size plain paper and then select Print Check Report to print a connection report 9 Close the network connection settings screen Related Information Basic Operations on page 15 Entering Characters on page 17 Checking the Network Connection Status on page 28 When You Cannot Make Network Settings on page 106 M...

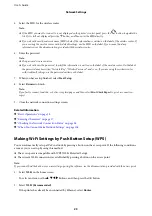
Page 24: ...s the OK button on the printer 7 Press the OK button The screen automatically closes after a specific length of time Note If connection fails restart the access point move it closer to the printer and try again If it still does not work print a network connection report and check the solution 8 Press the button Related Information Basic Operations on page 15 Checking the Network Connection Status ...

Page 25: ...f it still does not work print a connection report and check the solution 8 Press the button Related Information Basic Operations on page 15 Checking the Network Connection Status on page 28 When You Cannot Make Network Settings on page 106 Making Wi Fi Direct Simple AP Connection Settings This method allows you to connect the printer directly to devices without an access point The printer acts as...

Page 26: ...etup 6 Enter the password displayed on the printer s control panel on the computer or smart device 7 After the connection is established select Dismiss on the printer s control panel 8 Press the button To connect the computer to the printer using Wi Fi Direct you need to install the printer driver on the computer Related Information Basic Operations on page 15 Checking the Network Connection Statu...

Page 27: ...o for the IP address assignment settings you can select the DNS server settings from Manual or Auto If you cannot obtain the DNS server address automatically select Manual and then enter the primary DNS server and secondary DNS server address directly Proxy Server Do Not Use Select when you are using the printer in a home network environment Use Select when you are using a proxy server in your net...

Page 28: ...ct an item use the u d l r buttons and then press the OK button 2 Select General Settings Network Settings Network Status 3 To check the information select the menus that you want to check Wired LAN Wi Fi Status Displays the network information device name connection signal strength obtain IP address and so on for Ethernet or Wi Fi connections Wi Fi Direct Status Displays whether Wi Fi Direct is e...

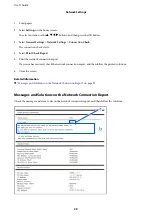
Page 29: ...port 5 Print the network connection report If an error has occurred check the network connection report and then follow the printed solutions 6 Close the screen Related Information Messages and Solutions on the Network Connection Report on page 29 Messages and Solutions on the Network Connection Report Check the messages and error codes on the network connection report and then follow the solution...

Page 30: ...SID found Confirm that the router access point is turned on and the wireless network SSID is set up correctly Contact your network administrator for assistance No wireless network names SSID found Confirm that the wireless network name SSID of the PC you wish to connect is set up correctly Contact your network administrator for assistance Entered security key password does not match the one set fo...

Page 31: ... smart device If your Wi Fi connection suddenly disconnects check for the conditions below If any of these conditions are applicable reset your network settings by downloading and running the software from the following website http epson sn Setup North America and Latin America To view and download software options visit www epson com support scf170 U S www epson ca support scf170 Canada www lati...

Page 32: ...rect Related Information Setting Items for Advanced Network Settings on page 27 Printing a Network Status Sheet on page 36 E 8 Message Incorrect IP address is assigned to the printer Confirm IP address setup of the network device hub router or access point Contact your network administrator for assistance Solutions Enable DHCP on the access point if the printer s Obtain IP Address setting is set t...

Page 33: ... Contact your network administrator for assistance Solutions Check the following Other devices on the network are turned on Network addresses IP address subnet mask and default gateway are correct if you have set the printer s Obtain IP Address to Manual Reset the network address if they are incorrect You can check the IP address subnet mask and default gateway from the Network Status part on the ...

Page 34: ...Sheet on page 36 E 12 Message Confirm the following Entered security key password is correct Index of the security key password is set to the first number IP address subnet mask or default gateway setup is correct Contact your network administrator for assistance Solutions Check the following Other devices on the network are turned on The network addresses IP address subnet mask and default gatewa...

Page 35: ...he PC or other device is correct Contact your network administrator for assistance Solutions Check the following Network devices such as an access point hub and router are turned on The TCP IP Setup for network devices has not been set up manually If the printer s TCP IP Setup is set automatically while the TCP IP Setup for other network devices is performed manually the printer s network may diff...

Page 36: ...ds and then turn it on If it still does not connect see the documentation supplied with the access point No more devices can be connected Disconnect one of the connected devices if you want to add another one Computer and smart devices that can be connected simultaneously are connected in full in the Wi Fi Direct Simple AP connection To add another computer or smart device disconnect one of the co...

Page 37: ...product s software installer http support epson net To view and download software options visit www epson com support scf170 U S www epson ca support scf170 Canada www latin epson com support scf170 Latin America Setting up using the software disc only for the models that come with a software disc and users with Windows computers with disc drives Insert the software disc into the computer and then...

Page 38: ...message and then start setup 6 When a completion message is displayed close the screen The screen automatically closes after a specific length of time 7 Press the button Disconnecting Wi Fi Direct Simple AP Connection from the Control Panel Note When Wi Fi Direct Simple AP connection disabled all computers and smart devices connected to the printer in Wi Fi Direct Simple AP connection are disconne...

Page 39: ...n automatically closes after a specific length of time 8 Press the button Restoring the Network Settings from the Control Panel You can restore all network settings to their defaults 1 Select Settings on the home screen To select an item use the u d l r buttons and then press the OK button 2 Select Restore Default Settings Network Settings 3 Check the message and then select Yes 4 When a completio...

Page 40: ...n genuine Epson paper the color may not develop as expected roller traces may be noticeable or the ink may rub off Use Epson special media under normal room conditions temperature 15 to 25 C 59 to 77 F humidity 40 to 60 Do not fold the paper or scratch the surface of the paper Avoid touching the printable surface of the paper with your bare hands Moisture and oils from your hands can affect print ...

Page 41: ...nge where they touch leaves a mark These marks will disappear if they are separated immediately and dried however they will remain if not separated Do not use a dryer to dry the printouts Avoid direct sunlight Prevent color distortion while displaying or storing the printouts by following the instructions in the printer s manual Loading Paper in the Paper Cassette 1 Open the front cover until it c...

Page 42: ...ith the printable side facing down load paper until it touches the back of the paper cassette cImportant Do not load more than the maximum number of sheets specified for the paper 8 5 x 13 in Load paper using the line User s Guide Preparing the Printer 42 ...

Page 43: ... the paper 6 Insert the paper cassette gently 7 Slide out the output tray Related Information Paper Handling Precautions on page 40 Available Paper and Capacities on page 40 Menu Options for Settings Select Settings on the home screen of the printer to make various settings User s Guide Preparing the Printer 43 ...

Page 44: ...ed Any increase will affect the product s energy efficiency Please consider the environment before making any change Power Off Settings Your product may have this feature or the Power Off Timer feature depending on the location of purchase Power Off If Inactive Select this setting to turn the printer off automatically if it is not used for a specified period of time Any increase will affect the pr...

Page 45: ...aper when the paper size setting is incorrect but this may lower the print speed Skip Blank Page Skips blank pages in the print data automatically PC Connection via USB Select Enable to allow a computer to access the printer when connected by USB When Disable is selected printing that is not sent over a network connection is restricted Network Settings Select the menus on the control panel as desc...

Page 46: ... Simple AP Connection Settings on page 25 Printing a Network Status Sheet on page 36 Checking the Network Connection Status on page 28 Changing the Network Connection to Ethernet from the Control Panel on page 37 Making Advanced Network Settings on page 26 Menu Options for Maintenance Select the menus on the control panel as described below Settings Maintenance Print Head Nozzle Check Select this ...

Page 47: ...ed the maintenance box is full Paper Guide Cleaning Select this feature if there are ink stains on the internal rollers The printer feeds paper to clean the internal rollers Related Information Checking and Cleaning the Print Head on page 78 Aligning the Print Head on page 81 Refilling the Ink Tanks on page 71 Cleaning the Paper Path for Ink Smears on page 82 Menu Options for Print Status Sheet Se...

Page 48: ... can select whether or not to start updating Notification Select On to receive a notification if a firmware update is available Saving Power The printer enters sleep mode or turns off automatically if no operations are performed for a set period You can adjust the time before power management is applied Any increase will affect the product s energy efficiency Please consider the environment before...

Page 49: ...or Power Off Timer feature depending on the location of purchase Select Sleep Timer or Power Off Settings Power Off If Inactive or Power Off If Disconnected and then make settings Select Sleep Timer or Power Off Timer and then make settings User s Guide Preparing the Printer 49 ...

Page 50: ...ick the start button and select Control Panel Printers in Hardware and Sound Right click on your printer and select Printing preferences Windows XP Windows Server 2003 R2 Windows Server 2003 Click the start button and select Control Panel Printers and Other Hardware Printers and Faxes Right click on your printer and select Printing preferences Accessing the printer driver from the printer icon on ...

Page 51: ...ou can see a preview of your document before printing Even if nothing is set in the printer driver the print data is reversed mirrored and printed On the More Options tab printing is not reversed if you clear Mirror Image 6 Click OK to close the printer driver window 7 Click Print Note When you select Print Preview a preview window is displayed To change the settings click Cancel and then repeat t...

Page 52: ...r 16 Up as the Multi Page setting Related Information Printing Basics on page 50 Main Tab on page 60 Printing and Stacking in Page Order Reverse Order Printing You can print from the last page so that the documents are stacked in page order Print Settings On the printer driver s Main tab select Reverse Order Related Information Printing Basics on page 50 User s Guide Printing 52 ...

Page 53: ...you want to print on from the Output Paper setting Select Reduce Enlarge Document and then select Fit to Page or Zoom to When you select Zoom to enter a percentage Select Center to print the images in the center of the page Related Information Printing Basics on page 50 More Options Tab on page 61 Printing One Image on Multiple Sheets for Enlargement Creating a Poster This feature allows you to pr...

Page 54: ...the panels that you do not want to print You can also select the cutting guide options Related Information Printing Basics on page 50 Main Tab on page 60 Making Posters Using Overlapping Alignment Marks Here is an example of how to make a poster when 2x2 Poster is selected and Overlapping Alignment Marks is selected in Print Cutting Guides User s Guide Printing 54 ...

Page 55: ... of Sheet 1 along the vertical blue line through the center of the top and bottom cross marks 2 Place the edge of Sheet 1 on top of Sheet 2 and align the cross marks then temporarily tape the two sheets together from the back User s Guide Printing 55 ...

Page 56: ...along the vertical red line through the alignment markers this time the line to the left of the cross marks 4 Tape the sheets together from the back 5 Repeat steps 1 to 4 to tape Sheet 3 and Sheet 4 together User s Guide Printing 56 ...

Page 57: ...e horizontal blue line through the center of the left and right side cross marks 7 Place the edge of Sheet 1 and Sheet 2 on top of Sheet 3 and Sheet 4 and align the cross marks and then temporarily tape them together from the back User s Guide Printing 57 ...

Page 58: ...8 Cut the taped sheets in two along the horizontal red line through the alignment markers this time the line above the cross marks 9 Tape the sheets together from the back User s Guide Printing 58 ...

Page 59: ...r driver s More Options tab select Custom as the Color Correction setting Click Advanced to open the Color Correction window and then select the method of color matching Normally select ICM When performing color matching with an application such as Photoshop select No Color Adjustment Related Information Printing Basics on page 50 More Options Tab on page 61 User s Guide Printing 59 ...

Page 60: ... Reset Defaults Return all settings to their factory default values The settings on the More Options tab are also reset to their defaults Ink Levels Displays the approximate ink levels Document Size Select the paper size on which you want to print If you select User Defined enter the paper width and height Supported User Defined sizes are 89 x 127 to 215 9 x 1200 mm Orientation Select the orientat...

Page 61: ...orm manual color correction Click Advanced for further settings Additional Settings Rotate 180 Rotates pages 180 degrees before printing This feature is helpful when printing on paper such as envelopes that are loaded in fixed direction in the printer Bidirectional Printing Prints when the print head moves in both directions The print speed is faster but the quality may decline Mirror Image Invert...

Page 62: ...al is displayed If it is not installed you can connect to the Epson Web site to check the manual and available technical support Printing from the Printer Driver on Mac OS Printing Basics Note Operations differ depending on the application See the application s help for details 1 Open the file you want to print Load paper in the printer if it has not already been loaded 2 Select Print from the Fil...

Page 63: ...ptions visit www epson com support scf170 U S www epson ca support scf170 Canada www latin epson com support scf170 Latin America macOS Mojave 10 14 cannot access Print Settings in applications made by Apple such as TextEdit 5 Change the settings as necessary See the menu options for the printer driver for details 6 Click Print Note Even if nothing is set in the printer driver the print data is re...

Page 64: ...nu Options for Layout on page 66 Printing and Stacking in Page Order Reverse Order Printing You can print from the last page so that the documents are stacked in page order Print Settings Select Paper Handling from the pop up menu Select Reverse as the Page Order setting Related Information Printing Basics on page 62 Menu Options for Paper Handling on page 66 User s Guide Printing 64 ...

Page 65: ...ion Select Printer enter a percentage in Scale and then click Print Select Page Setup from the File menu of the application Select your printer in Format For enter a percentage in Scale and then click OK Note Select the paper size you set in the application as the Paper Size setting Related Information Printing Basics on page 62 Menu Options for Paper Handling on page 66 Canceling Printing You can...

Page 66: ...aper such as envelopes that are loaded in fixed direction in the printer Flip horizontally Inverts an image to print as it would appear in a mirror Menu Options for Color Matching ColorSync Select the method for color adjustment These options adjusts colors between the printer and the computer display to minimize the difference in color EPSON Color Controls Menu Options for Paper Handling Collate ...

Page 67: ... Fax and then select the printer Click Options Supplies Options or Driver Operation Settings of the Mac OS Printer Driver Skip Blank Page Avoids printing blank pages High Speed Printing Prints when the print head moves in both directions The print speed is faster but the quality may decline Warning Notifications Allows the printer driver to display warning notifications Establish bidirectional com...

Page 68: ...ck the approximate ink levels from the computer and the approximate service life of the maintenance box from the control panel or the computer Checking the Status of the Maintenance Box Control Panel 1 Select Maintenance on the home screen To select an item use the u d l r buttons and then press the OK button 2 Select Remaining capacity of Maintenance box Checking the Status of the Remaining Ink a...

Page 69: ...s the use of genuine Epson ink bottles The following are the codes for genuine Epson ink bottles For Europe Australia and New Zealand BK Black C Cyan M Magenta Y Yellow T49N1 T49N2 T49N3 T49N4 For Asia BK Black C Cyan M Magenta Y Yellow T49P1 T49P2 T49P3 T49P4 For U S Canada and Latin America BK Black C Cyan M Magenta Y Yellow T49M1 T49M2 T49M3 T49M4 cImportant Epson warranty does not cover damage...

Page 70: ...the ink bottle 25 days after the ink tank was refilled Do not open the ink bottle package until you are ready to fill the ink tank The ink bottle is vacuum packed to maintain its reliability If you leave an ink bottle unpacked for a long time before using it normal printing may not be possible When storing or transporting an ink bottle do not tilt the bottle and do not subject it to impacts or tem...

Page 71: ... a mixture of color inks is used to create black The ink in the ink bottles supplied with your printer is partly used during initial setup In order to produce high quality printouts the print head in your printer will be fully charged with ink This one off process consumes a quantity of ink and therefore these bottles may print fewer pages compared to subsequent ink bottles Quoted yields may vary ...

Page 72: ...nk matches the ink color that you want to refill 4 Make sure the ink bottle cap is closed securely 5 Shake the ink bottle 15 times within five seconds 6 While holding the ink bottle upright turn the cap slowly to remove it cImportant Epson recommends the use of genuine Epson ink bottles Be careful not to spill any ink User s Guide Refilling Ink and Replacing Maintenance Boxes 72 ...

Page 73: ...ert the ink bottle into the filling port for the correct color ink starts pouring and the flow stops automatically when the ink reaches the upper line If the ink does not start flowing into the tank remove the ink bottle and reinsert it However do not remove and reinsert the ink bottle when the ink has reached the upper line otherwise ink may leak User s Guide Refilling Ink and Replacing Maintenan...

Page 74: ...ttle inserted otherwise the bottle may be damaged or ink may leak Note If any ink remains in the ink bottle tighten the cap and store the bottle upright for later use 10 Close the ink tank cap securely 11 Close the ink tank cover firmly User s Guide Refilling Ink and Replacing Maintenance Boxes 74 ...

Page 75: ...up to the upper line and reset the ink level immediately Related Information Ink Bottle Codes on page 69 Ink Bottle Handling Precautions on page 70 Ink Spilled on page 116 Disposing of Used Consumables The following used ink materials are classified as industrial waste Ink bottles Maintenance boxes Printed paper Dispose of used consumables in accordance with laws and regulations such as by contrac...

Page 76: ... leak Do not touch the openings in the maintenance box as you may get smeared with ink Do not reuse a maintenance box which has been removed and left detached for a long period Ink inside the box will have solidified and no more ink can be absorbed Keep the maintenance box out of direct sunlight Do not store the maintenance box in high or freezing temperatures Replacing a Maintenance Box In some p...

Page 77: ... user serviceable part Note When it is full you cannot print and clean the print head until the maintenance box is replaced to avoid ink leakage Related Information Maintenance Box Code on page 76 Maintenance Box Handling Precautions on page 76 User s Guide Refilling Ink and Replacing Maintenance Boxes 77 ...

Page 78: ... repeating nozzle check and head cleaning three times wait for at least 12 hours without printing and then run the nozzle check again We recommend to turn off the printer If print quality has still not improved run Power Cleaning If it has still not improved contact Epson support To prevent the print head from drying out do not unplug the printer while the power is on Checking and Cleaning the Pri...

Page 79: ...tter size paper in the printer 2 Access the printer driver window 3 Click Print Head Nozzle Check on the Maintenance tab 4 Follow the on screen instructions Related Information Loading Paper in the Paper Cassette on page 41 Accessing the Printer Driver on page 50 Checking and Cleaning the Print Head Mac OS 1 Load A4 or Letter size paper in the printer 2 Select System Preferences from the Apple men...

Page 80: ...ll you must prepare and install a replacement maintenance box to continue printing Note When the ink levels or the free space in the maintenance box are insufficient for Power Cleaning you cannot run this feature Even in this case the levels and the free space for printing may remain Running Power Cleaning Control Panel Read the instructions for Power Cleaning before running this feature 1 Press t...

Page 81: ...ote If you cannot run this feature solve the problems that are displayed on the printer s control panel Next follow this procedure from step 1 to run this feature again Aligning the Print Head If you notice a misalignment of vertical lines or blurred images align the print head Aligning the Print Head Control Panel 1 Load the actual A4 or Letter size paper for which the adjustments will be made 2 ...

Page 82: ...zzles may be clogged with lint 1 Load A4 or Letter size plain paper in the printer 2 Select Maintenance on the home screen To select an item use the u d l r buttons and then press the OK button 3 Select Paper Guide Cleaning 4 Follow the on screen instructions to clean the paper path Note Repeat this procedure until the paper is not smeared with ink Related Information Loading Paper in the Paper Ca...

Page 83: ...rely closed ink may leak 4 Close the printer cover Note The printer cover is designed to close slowly and resist a little as a precaution against catching fingers Continue to close even if you feel some resistance 5 Slide out the paper cassette and then remove the paper User s Guide Maintaining the Printer 83 ...

Page 84: ...ft cloth with water wring it out thoroughly and then wipe the roller while rotating it with the cloth 8 Return the printer to its normal position and then insert the paper cassette 9 Connect the power cord Cleaning the Translucent Film When the printout is not improved after aligning the print head or cleaning the paper path the translucent film inside the printer may be smeared Items required Cot...

Page 85: ...f tap water Light for checking smears cImportant Do not use cleaning liquid other than water with a few drops of detergent 1 Turn off the printer by pressing the P button 2 Close the document cover if it is open 3 Open the printer cover User s Guide Maintaining the Printer 85 ...

Page 86: ... next step A Translucent film B Rail cImportant Be careful not to touch the rail B Otherwise you may not be able to print Do not wipe off the grease on the rail because this is necessary for operations 5 Moisten a cotton swab with the water with a few drops of detergent so that it is not dripping water and then wipe the smeared part User s Guide Maintaining the Printer 86 ...

Page 87: ...ibers on the film Note To prevent the smear from spreading frequently replace the cotton swab with a new one 7 Repeat steps 5 and 6 until the film is not smeared 8 Visually check that the film is not smeared 9 Close the printer cover Note The printer cover is designed to close slowly and resist a little as a precaution against catching fingers Continue to close even if you feel some resistance Use...

Page 88: ...nter could be damaged Never use alcohol or paint thinner to clean the components and the case These chemicals can damage them Do not touch the parts shown in the following illustration Doing so may cause a malfunction Checking the Total Number of Pages Fed Through the Printer You can check the total number of pages fed through the printer Checking the Total Number of Pages Fed Through the Printer ...

Page 89: ...of Pages Fed Through the Printer Windows 1 Access the printer driver window 2 Click Printer and Option Information on the Maintenance tab Related Information Accessing the Printer Driver on page 50 Checking the Total Number of Pages Fed Through the Printer Mac OS 1 Select System Preferences from the menu Printers Scanners or Print Scan Print Fax and then select the printer 2 Click Options Supplies...

Page 90: ...me and the password If you forget them you will need to contact Epson service support Running Web Config on a Web Browser 1 Check the printer s IP address Select the network icon on the printer s home screen and then select the active connection method to confirm the printer s IP address To select an item use the u d l r buttons and then press the OK button Note You can also check the IP address b...

Page 91: ...e browser when you start Web Config this does not indicate a problem and can be safely ignored Running Web Config on Mac OS 1 Select System Preferences from the Apple menu Printers Scanners or Print Scan Print Fax and then select the printer 2 Click Options Supplies Show Printer Webpage Since the printer uses a self signed certificate when accessing HTTPS a warning is displayed on the browser when...

Page 92: ...ktop and then selecting Software Update Starting on Mac OS Select Go Applications Epson Software EPSON Software Updater Installing the Latest Applications Note When reinstalling an application you need to uninstall it first 1 Make sure the printer and the computer are available for communication and the printer is connected to the Internet 2 Start EPSON Software Updater The screenshot is an exampl...

Page 93: ...he Epson website Related Information Application for Updating Software and Firmware EPSON Software Updater on page 91 Uninstalling Applications on page 94 Updating the Printer s Firmware using the Control Panel If the printer is connected to the Internet you can update the printer s firmware using the control panel You can also set the printer to regularly check for firmware updates and notify you...

Page 94: ...assword if the computer prompts you Uninstalling Applications Windows 1 Press the P button to turn off the printer 2 Quit all running applications 3 Open Control Panel Windows 10 Windows Server 2019 Windows Server 2016 Click on the start button and then select Windows System Control Panel Windows 8 1 Windows 8 Windows Server 2012 R2 Windows Server 2012 Select Desktop Settings Control Panel Windows...

Page 95: ...references from the Apple menu Printers Scanners or Print Scan Print Fax and then remove the printer from the enabled printers list 4 Quit all running applications 5 Select Go Applications Epson Software Uninstaller 6 Select the application you want to uninstall and then click Uninstall cImportant The Uninstaller removes all drivers for Epson inkjet printers on the computer If you use multiple Eps...

Page 96: ...ate Check that the printer driver is installed on the computer and that the port settings for the printer are correct Make sure the printer port is selected correctly in Property Port from the Printer menu as follows Select USBXXX for a USB connection or EpsonNet Print Port for a network connection Check that the printer driver is installed on the computer and that the USB port settings for the pr...

Page 97: ...n Printer Utility 3 Click EPSON Status Monitor You can check the printer status ink levels and error status Checking the Software Status You may be able to clear the problem by updating the software to the latest version To check the software status use the software update tool Related Information Application for Updating Software and Firmware EPSON Software Updater on page 91 Contacting Epson Sup...

Page 98: ...k Removing Jammed Paper Caution Be careful not to trap your hand or fingers when opening or closing the printer cover Otherwise you may be injured Never touch the buttons on the control panel while your hand is inside the printer If the printer starts operating it could cause an injury Be careful not to touch the protruding parts to avoid injury 1 Remove the rear cover 2 Remove the jammed paper Us...

Page 99: ...aper from the rear cover 4 Insert the rear cover in the printer 5 Close the document cover if it is open 6 Open the printer cover with both hand until it locks 7 Remove the jammed paper User s Guide Solving Problems 99 ...

Page 100: ...stance Paper Does Not Feed Correctly Check the following points and then take the appropriate actions to solve the problem Place the printer on a flat surface and operate in the recommended environmental conditions Use paper supported by this printer Follow the paper handling precautions Do not load more than the maximum number of sheets specified for the paper Make sure the paper size and paper t...

Page 101: ...aper in the Paper Cassette on page 41 Power and Control Panel Problems Power Does Not Turn On Make sure the power cord is securely plugged in Hold down the P button for a little longer Power Does Not Turn Off Hold down the P button for a little longer If you still cannot turn off the printer unplug the power cord To prevent the print head from drying out turn the printer back on and turn it off by...

Page 102: ...y a test print Re set the USB connection by following the steps in this manual for changing the connection method to a computer See the related information link below for details Checking the Connection Network When you have changed your access point or provider try making network settings for the printer again Connect the computer or smart device to the same SSID as the printer Turn off the devic...

Page 103: ...ails If you are printing a large data size image the computer may run out of memory Print the image at a lower resolution or a smaller size Related Information Checking for Genuine Epson Printer Drivers on page 103 Installing the Latest Applications on page 92 Checking for Genuine Epson Printer Drivers You can check if a genuine Epson printer driver is installed on your computer by using one of th...

Page 104: ...references from the Apple menu Printers Scanners or Print Scan Print Fax and then select the printer Click Options Supplies and if the Options tab and Utility tab are displayed on the window a genuine Epson printer driver is installed on your computer Related Information Installing the Latest Applications on page 92 User s Guide Solving Problems 104 ...

Page 105: ...vices and printers Printers Printers and Faxes see the following to select the icon Example USB connection EPSON XXXX Series Network connection EPSON XXXX Series network If you install the printer driver multiple times copies of printer driver may be created If copies such as EPSON XXXX Series copy 1 are created right click the copied driver icon and then click Remove Device Make sure the printer ...

Page 106: ...n follow the printed solutions Related Information Printing a Network Connection Report on page 28 Messages and Solutions on the Network Connection Report on page 29 Cannot Connect from Devices Even Though Network Settings are No Problems If you cannot connect from the computer or smart device to the printer even though the network connection report does not show any problems see the following Whe...

Page 107: ...or smart device to a 5 GHz SSID you cannot connect to the printer because the printer only supports communication over 2 4 GHz Connect the computer or smart device to the same SSID as the printer Most wireless routers have a privacy separator feature that blocks communication between connected devices If you cannot communicate between the printer and the computer or smart device even if they are c...

Page 108: ...rinter Select Settings General Settings Network Settings Network Status You can check the SSID for Wi Fi and Wi Fi Direct from each menu Checking the SSID for the Computer Windows Click in the task tray on the desktop Check the name of the connected SSID from the list displayed User s Guide Solving Problems 108 ...

Page 109: ... any of the print head nozzles are clogged If you printed when the ink levels were too low to be seen in the ink tank windows refill the ink tanks to the upper lines and then use the Power Cleaning utility to replace the ink inside the ink tubes After you use the utility perform a nozzle check to see if print quality has improved Related Information Checking and Cleaning the Print Head on page 78 ...

Page 110: ...xpected Colors Appear The print head nozzles may be clogged Perform a nozzle check to check if the print head nozzles are clogged Clean the print head if any of the print head nozzles are clogged Related Information Checking and Cleaning the Print Head on page 78 Colored Banding Appears at Intervals of Approximately 2 mm 0 8 in Align the print head using the Horizontal Alignment feature Related In...

Page 111: ...S Select System Preferences from the Apple menu Printers Scanners or Print Scan Print Fax and then select the printer Click Options Supplies Options or Driver Select Off as the Bidirectional Printing setting Printout Comes Out as a Blank Sheet The print head nozzles may be clogged Perform the nozzle check and then try Power Cleaning if the print head nozzles are clogged The print settings and the ...

Page 112: ...aying them When drying the printouts avoid direct sun light do not use a dryer and do not touch the printed side of paper Checking the print settings Select the appropriate paper type setting for the type of paper loaded in the printer Print using a higher quality setting Checking the ink bottle Use ink bottles with the correct part code for this printer To ensure printer quality use all the ink i...

Page 113: ...g appears or the top or bottom of the paper is smeared load paper in the correct direction and slide the edge guides to the edges of the paper When vertical banding appears or the paper is smeared clean the paper path User s Guide Solving Problems 113 ...

Page 114: ...nction Place the paper on a flat surface to check if it is curled If it is flatten it Related Information Loading Paper in the Paper Cassette on page 41 Cleaning the Paper Path for Ink Smears on page 82 The Position Size or Margins of the Printout Are Incorrect Load paper in the correct direction and slide the edge guides against the edges of the paper Select the appropriate paper size setting Adj...

Page 115: ...en printing images or photos print using high resolution data Images on websites are often low resolution although they look good enough on the display and so print quality may decline The Printout Problem Could Not be Cleared If you have tried all of the solutions and have not solved the problem try uninstalling and then reinstalling the printer driver Other Printing Problems Printing Is Too Slow...

Page 116: ...is Displayed Refill all or the specified ink tanks select the color that you refilled on the LCD screen and then reset the ink levels Depending on the usage conditions the message may be displayed when there is still ink in the tank Ink Spilled If ink adheres to the area around the tank wipe it off using a napless clean cloth or cotton swab If ink spills on the desk or floor wipe it off immediatel...

Page 117: ...s 128 for each color Printable Area Printable Area for Single Sheets Print quality may decline in the shaded areas due to the printer s mechanism A 3 0 mm 0 12 in B 3 0 mm 0 12 in C 41 0 mm 1 61 in D 37 0 mm 1 46 in Interface Specifications For Computer Hi Speed USB USB 3 0 cables are not supported User s Guide Appendix 117 ...

Page 118: ...ing Epson Scan 2 IPv4 IPv6 Event Manager IPv4 Epson Connect Scan to Cloud IPv4 AirPrint Scan IPv4 IPv6 Fax Send a fax IPv4 Receive a fax IPv4 AirPrint Faxout IPv4 IPv6 Wi Fi Specifications Standards IEEE802 11b g n 1 Frequency Range 2 4 GHz Coordination Modes Infrastructure Wi Fi Direct Simple AP 2 3 Wireless Securities 4 WEP 64 128bit WPA2 PSK AES 5 1 IEEE802 11n is only available for the HT20 2 ...

Page 119: ...interference 2 The connected device should comply with IEEE802 3az standards Security Protocol SSL TLS HTTPS Server Client IPPS Dimensions Dimensions Storage Width 375 mm 14 8 in Depth 347 mm 13 7 in Height 187 mm 7 4 in Printing Width 375 mm 14 8 in Depth 503 mm 19 8 in Height 187 mm 7 4 in Weight Approx 4 6 kg 10 2 lb Without the ink and the power cord Electrical Specifications Power Supply Rati...

Page 120: ...ange shown in the following graph Temperature 10 to 35 C 50 to 95 F Humidity 20 to 80 RH without condensation Storage Temperature after initial ink charging 15 to 40 C 5 to 104 F Temperature before initial ink charging 20 to 40 C 4 to 104 F Humidity 5 to 85 RH without condensation You can store for one month at 40 C 104 F Ink Specifications Print Quality Guarantee Expiry 25 days after unpacking St...

Page 121: ...ICES 3 B NMB 3 B This equipment contains the following wireless module Manufacturer Askey Computer Corporation Type WLU6320 D69 RoHS This product conforms to Part 15 of the FCC Rules and RSS 210 of the IC Rules Epson cannot accept responsibility for any failure to satisfy the protection requirements resulting from a non recommended modification of the product Operation is subject to the following ...

Page 122: ...ncluyendo la que pueda causar su operación no deseada Modelo del producto B711A Epson SureColor F170 Modelo del módulo WLAN WLU6320 D69 RoHS Marca EPSON Nº de homologación IFT RCPEPWL14 0107 Aviso para Paraguay Importado por Fastrax S A Av Perú esq Río de Janeiro Barrios Las Mercedes Asunción Paraguay Sol Control S R L Av Gral Bernardino Caballero 810 esq Celsa Speratti Asunción Paraguay Aviso par...

Page 123: ... of the products Restrictions on Copying Observe the following restrictions to ensure the responsible and legal use of the printer Copying of the following items is prohibited by law Bank bills coins government issued marketable securities government bond securities and municipal securities Unused postage stamps pre stamped postcards and other official postal items bearing valid postage Government...

Page 124: ...f and then unplug the power cord cImportant Unplug the power cord when the power light is off Otherwise the print head does not return to the home position causing the ink to dry and printing may become impossible 3 Disconnect all cables such as the power cord and USB cable 4 Remove all of the paper from the printer 5 Open the printer cover with both hand until it locks 6 Secure the print head to ...

Page 125: ...rely 8 Close the ink tank cover securely 9 Close the printer cover Note The printer cover is designed to close slowly and resist a little as a precaution against catching fingers Continue to close even if you feel some resistance User s Guide Appendix 125 ...

Page 126: ...re to pack the printer as shown below 11 Place the printer in the plastic bag provided for transporting and close the bag 12 Pack the printer in its box using the protective materials User s Guide Appendix 126 ...

Page 127: ...e changes Otherwise ink may leak even if the cap on the ink bottle is tightened securely Be sure to keep the ink bottle upright when tightening the cap and take precautions to prevent ink from leaking when transporting the bottle for example putting the bottle in a bag Do not put opened ink bottles in the box with printer When you use the printer again make sure you remove the tape securing the pr...

Page 128: ...le for any damages or problems arising from the use of any options or any consumable products other than those designated as Original Epson Products or Epson Approved Products by Seiko Epson Corporation Seiko Epson Corporation shall not be held liable for any damage resulting from electromagnetic interference that occurs from the use of any interface cables other than those designated as Epson App...

Page 129: ...ftware version Click About Version Info or a similar button in the product software Brand and model of your computer Your computer operating system name and version Names and versions of the software applications you normally use with your product Note Depending on the product network settings may be stored in the product s memory Due to breakdown or repair of a product settings may be lost Epson ...

Page 130: ...t Epson Epson provides these technical support services Internet Support Visit Epson s support website at www latin epson com support for solutions to common problems You can download drivers and documentation get FAQs and troubleshooting advice or e mail Epson with your questions Speak to a Support Representative Before you call Epson for support please have the following information ready Produc...

Page 131: ... com tw Information on product specifications drivers for download and products enquiry are available Epson HelpDesk Phone 886 2 80242008 Our HelpDesk team can help you with the following over the phone Sales enquiries and product information Product usage questions or problems Enquiries on repair service and warranty Repair service center http www tekcare com tw branchMap page TekCare corporation...

Page 132: ...w Zealand Epson New Zealand wishes to provide you with a high level of customer service In addition to your product documentation we provide the following sources for obtaining information Internet URL http www epson co nz Access the Epson New Zealand World Wide Web pages Worth taking your modem here for the occasional surf The site provides a download area for drivers Epson contact points new pro...

Page 133: ...r information support and services are World Wide Web http www epson co th Information on product specifications drivers for download Frequently Asked Questions FAQ and e mail are available Epson Call Centre Phone 66 2685 9899 Email support eth epson co th Our Call Centre team can help you with the following over the phone Sales enquiries and product information Product usage questions or problems...

Page 134: ...ga Nomor A 4 Medan North Sumatera 6261 42066090 42066091 mdn adm epson indonesia co id WEST JAWA ESC BANDUNG Jl Cihampelas No 48 A Bandung Jawa Barat 40116 6222 4207033 bdg admin epson indonesia co id DI YOGYAKARTA ESC YOGYAKARTA YAP Square Block A No 6 Jl C Simanjutak Yogyakarta DIY 62274 581065 ygy admin epson indonesia co id EAST JAWA ESC SURABAYA Hitech Mall Lt 2 Block A No 24 Jl Kusuma Bangsa...

Page 135: ...EMBANG Jl H M Rasyid Nawawi No 249 Kelurahan 9 Ilir Palembang Sumatera Selatan 62711 311330 escplg epson indonesia co id EAST JAVA ESC JEMBER JL Panglima Besar Sudirman Ruko no 1D Jember Jawa Timur Depan Balai Penelitian Pengolahan Kakao 62331 488373 486468 jmr admin epson indonesia co id NORTH SULAWESI ESC MANADO Tekno Megamall Lt LG 11 TK 21 Kawasan Megamas Boulevard Jl Piere Tendean Manado SULU...

Page 136: ...services users are welcome to contact the Epson Philippines Corporation at the telephone fax numbers and e mail address below World Wide Web http www epson com ph Information on product specifications drivers for download Frequently Asked Questions FAQ and E mail Enquiries are available Epson Philippines Customer Care Toll Free PLDT 1 800 1069 37766 Toll Free Digital 1 800 3 0037766 Metro Manila 6...

Page 137: ...Fax 632 706 2663 User s Guide Appendix 137 ...

Reviews: