c
Important:
Do not reuse maintenance boxes that have been
removed and left out in the open for a long period of
time. The ink on the inside will be dry and hard and
will be unable to absorb enough ink.
How to replace
The following shows the number of maintenance boxes
and the installation positions.
SC-P9000 Series/SC-P8000 Series: 2 (left and right)
SC-P7000 Series/SC-P6000 Series: 1 (right only)
Replace the Maintenance Box on the side with the
No
Enough Space
message displayed. The replacement
procedure is the same for both sides. When you need to
replace both sides, repeat Steps 2 to 5.
c
Important:
Do not replace the Maintenance Box when the
printer is turned on. Waste ink may leak.
A
Turn off the printer.
B
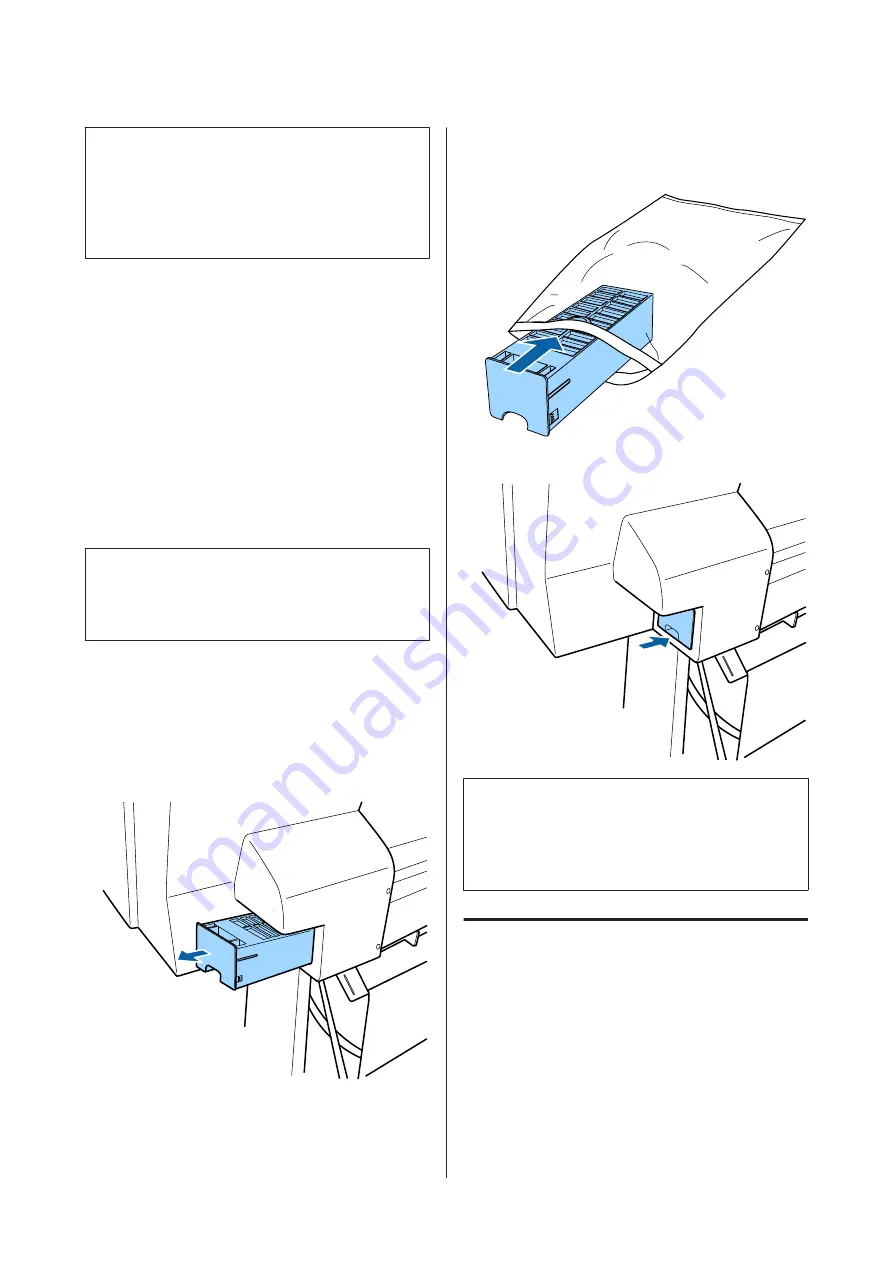
Remove the new maintenance box from the
package.
C
Remove the maintenance box without tilting it.
D
Place the used maintenance box in the clear bag
included with your new maintenance box, and
make sure that the zipper is closed tight.
E
Insert the new maintenance box.
c
Important:
Do not touch the IC chip on the maintenance box.
Doing so may prevent normal operation and
printing.
Replacing the Cutter
Replace the cutter when it is not cutting paper cleanly.
Supported cutter
U
“Options and Consumable Products” on
Use a cross-head screwdriver to replace the cutter. Make
sure you have a cross-head screwdriver with you before
replacing the cutter.
SC-P9000 Series/SC-P7000 Series/SC-P8000 Series/SC-P6000 Series User's Guide
Maintenance
135


