❏
Save only
:
Saves the job without printing.
Next, print the document normally.
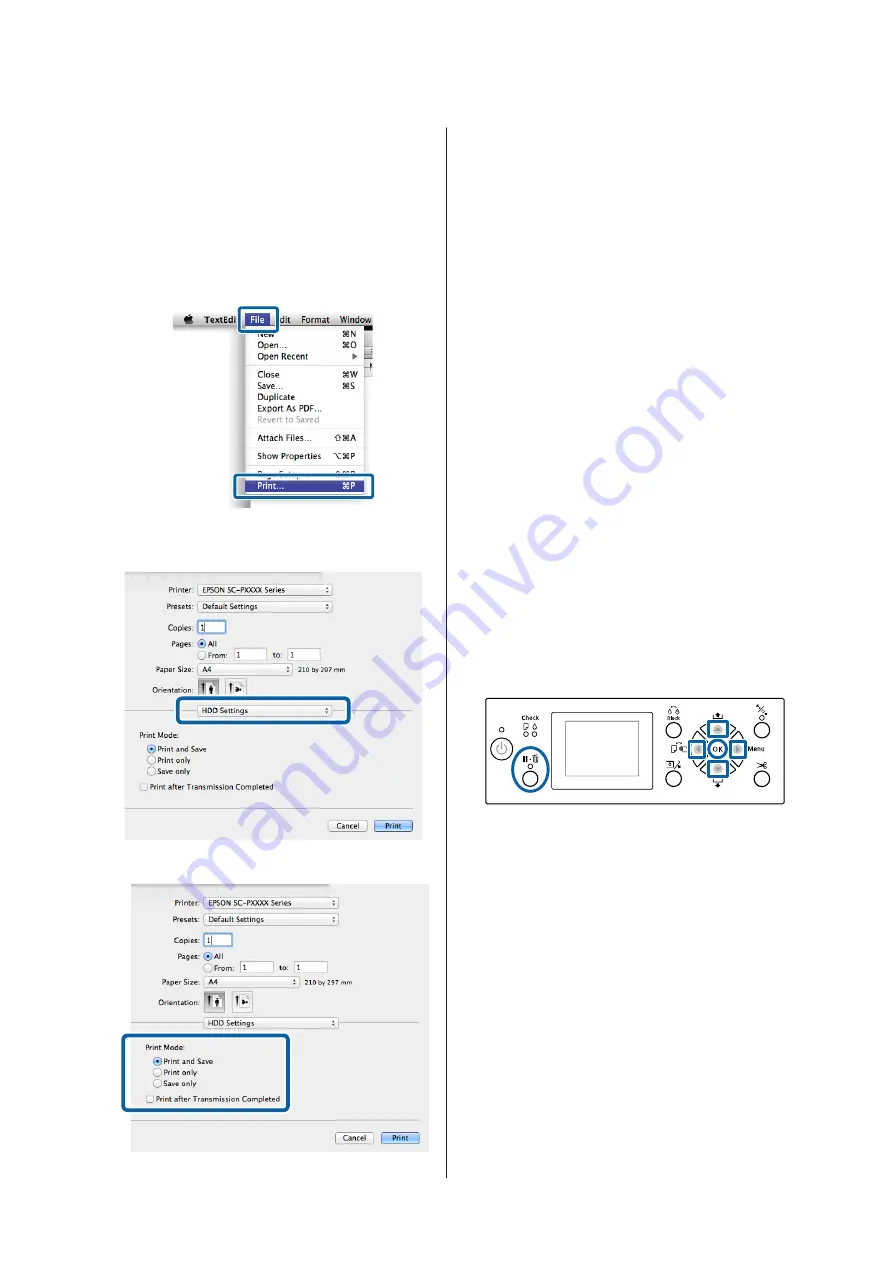
Making Settings for Mac OS X
A
When you have created the data, from the File
menu of the application, click
and so on.
B
Check that the printer is selected, and then select
HDD Settings
from the list.
C
Select
Print Mode
.
After clicking
, the operations differ
depending on the selected content as shown
below.
❏
Print and Save
:
Saves the job to the hard disk at the same time as
printing. When
Print after Transmission
Completed
is selected, printing starts after the
print job has been saved to the hard disk unit.
❏
Print only
:
Prints the job without saving to the hard disk.
❏
Save only
:
Saves the job without printing.
Next, print the document normally.
Viewing and Printing
Saved Print Jobs
This section describes how to view and print saved jobs
from the control panel.
Buttons that are used in the following settings
A
Confirm that the printer is ready and press the
r
button.
The settings menu will be displayed.
B
Press the
d
button, and then the
r
button.
The Print Job menu will be displayed.
C
Press the
d
/
u
buttons to select
Saved Job Queue
and press the
Z
button.
The names of stored print jobs are displayed.
D
Press the
d
/
u
buttons to select the desired job
and press the
Z
button.
Information on the selected job will be displayed.
SC-P9000 Series/SC-P7000 Series/SC-P8000 Series/SC-P6000 Series User's Guide
Using the Optional Hard Disk Unit
59


