background image

Troubleshooting

61

PROBS.FM (A4 size) Rev.C

R4CJ350

User’s Guide

Your Image is Distorted or Blurred

Make sure the document lies flat on the document table. Also make sure your 
document is not wrinkled or warped.

c

Caution:

Do not place heavy objects on the document table.

Make sure you do not move the document or scanner while scanning.

Make sure the scanner is placed on a flat, stable surface.

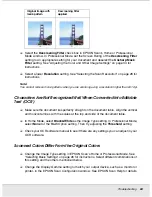
Select 

Unsharp Mask Filter 

in EPSON Scan’s Professional Mode window. See 

"Adjusting the Color and Other Image Settings" on page 34 for instructions.

Adjust the 

Auto Exposure

 setting in EPSON Scan’s Professional Mode window. See 

"Adjusting the Color and Other Image Settings" on page 34 for instructions.

You can also select 

Color Control

 and 

Continuous auto exposure

 in the 

Configuration window, or select the 

Color

 tab and click the 

Recommended Value


button to return the Auto Exposure setting to the default. See EPSON Scan Help for 
details.

Increase the Resolution setting. See "Selecting the Scan Resolution" on page 28 for 
instructions.

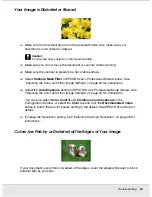
Colors Are Patchy or Distorted at the Edges of Your Image

If your document is very thick or warped at the edges, cover the edges with paper to block 
external light as you scan.

Summary of Contents for Scanner

Page 1: ...r than those designated as Original Epson Products or Epson Approved Products by Seiko Epson Corporation EPSON is a registered trademark and EPSON STYLUS and Exceed Your Vision are trademarks of Seiko Epson Corporation Microsoft and Windows are registered trademarks of Microsoft Corporation Adobe Adobe Reader Acrobat and Photoshop are registered trademarks of Adobe Systems Incorporated Apple Macin...

Page 2: ...ck Documents 13 Chapter 3 Scanning Documents or Photos Starting a Scan With EPSON Scan 15 Starting a Scan With the EPSON Creativity Suite 17 Starting a Scan With Another Scanning Program 19 Selecting EPSON Scan Settings 20 Overview of the EPSON Scan Modes 20 Selecting File Save Settings 21 Using Full Auto Mode 23 Changing the Scan Mode 25 Selecting Basic Settings 26 Selecting the Scan Resolution 2...

Page 3: ...g Takes a Long Time 60 Scan Quality Problems 60 The Edges of Your Document Are Not Scanned 60 You See Only a Few Dots in Your Scanned Image 60 A Line Of Dots Always Appears in Your Scanned Images 60 Straight Lines in Your Image Come Out Crooked 60 Your Image is Distorted or Blurred 61 Colors Are Patchy or Distorted at the Edges of Your Image 61 Your Scanned Image is Too Dark 62 An Image on the Bac...

Page 4: ...Technical Specifications System Requirements 78 Windows System Requirements 78 Macintosh System Requirements 79 Scanner Specifications 80 General 80 Memory Card Slots 81 Mechanical 82 Electrical 82 Environmental 83 Interfaces 83 Standards and Approvals 83 Chapter C Using a Memory Card Introduction 84 Handling Memory Cards 84 Memory card copying precautions 84 Supported memory cards 84 Inserting a ...

Page 5: ...5 Windows 2000 89 Windows Me and 98 SE 90 Macintosh 90 ...

Page 6: ...nges in temperature or humidity Do not use with wet hands Place the scanner near an electrical outlet where the power cord can be easily unplugged The power supply cords should be placed to avoid abrasions cuts fraying crimping and kinking Do not place objects on top of the power supply cords and do not allow the power supply cords to be stepped on or run over Be particularly careful to keep all t...

Page 7: ...the scanner has been dropped or the case has been damaged the scanner does not operate normally or exhibits a distinct change in performance Do not adjust controls that are not covered by the operating instructions Allow spaces behind the scanner for the cables and space above the scanner so that you can fully raise the document cover If you are not going to use the scanner for a long period be su...

Page 8: ...to legal procedure Exercise caution when copying the following items Private marketable securities stock certificates negotiable notes checks etc monthly passes concession tickets etc Passports driver s licenses warrants of fitness road passes food stamps tickets etc Responsible use of copyrighted materials Scanners can be misused by improperly copying copyrighted materials Unless acting on the ad...

Page 9: ...olor and sharpness You can restore printed photos For instructions on using this feature see Restoring Color in Photos on page 41 Available Scanning Methods Your scanner gives you a variety of ways to scan You can select the method that works best for the project you are scanning and the way you like to work Using EPSON Scan EPSON Scan lets you control all aspects of scanning and includes three mo...

Page 10: ...e 15 EPSON Scan also starts when you use a scanning option in EPSON File Manager To scan documents or photos see Starting a Scan With the EPSON Creativity Suite on page 17 You also use EPSON Scan whenever you scan with another TWAIN compliant program such as Adobe Photoshop Elements To scan documents or photos see Starting a Scan With Another Scanning Program on page 19 Using the EPSON Creativity ...

Page 11: ...adjust image brightness and contrast For details see Using the Scanner as a Copier on page 46 Copy to Fax to scan and then fax your images if you have already installed a fax program or driver See the EPSON File Manager or Copy Utility Help for instructions Attach to e mail to open your e mail program and attach your image to an e mail message You can also adjust the image size before you attach i...

Page 12: ... images without first checking their copyright status cCaution Do not place heavy objects on the document table glass and do not press the glass with too much force 1 Make sure that the feeder guard is closed and then open the document cover 2 Place your document or photo on the document table face down on the glass Make sure the top of the document or photo is against the upper left corner of the...

Page 13: ... or Thick Documents on page 13 for instructions 4 Close the document cover gently so that your original does not move Note Always keep the document table clean Do not leave photos on the document table for an extended period of time as they may stick to the glass To scan your document or photo see Starting a Scan With EPSON Scan on page 15 Placing Large or Thick Documents When you scan a large or ...

Page 14: ...cover 2 Pull the document cover straight up and off the scanner Note When scanning without the document cover gently press down on your document to flatten it When you are finished scanning replace the document cover in the reverse order that you removed it ...

Page 15: ... a standalone program 1 Place your document or photo on the scanner See Placing Documents or Photos on page 12 for instructions 2 Do one of the following to start EPSON Scan Windows Double click the EPSON Scan icon on your desktop Or select Start All Programs or Programs EPSON Scan EPSON Scan Mac OS X Open the Applications folder and click the EPSON Scan icon The EPSON Scan window appears ...

Page 16: ... Full Auto Mode on page 23 If you are in Home or Professional Mode see Selecting Basic Settings on page 26 Note To change scan modes see Changing the Scan Mode on page 25 4 The File Save Settings window appears For instructions on selecting options see Selecting File Save Settings on page 21 5 When you are finished selecting File Save Settings click OK EPSON Scan starts scanning in Full Auto Mode ...

Page 17: ...int attach or import your image files 1 Place your document or photo on the scanner See Placing Documents or Photos on page 12 for instructions 2 Do one of the following to start EPSON File Manager Windows Double click the EPSON File Manager icon on your desktop Or select Start Programs or All Programs EPSON Creativity Suite EPSON File Manager Mac OS X Double click the EPSON File Manager for X ico...

Page 18: ... box at the top right of the EPSON Scan window is set to Full Auto Mode click the Scan button For more information on selecting optional settings see Using Full Auto Mode on page 23 If the Mode box is set to Home Mode or Professional Mode see Selecting Basic Settings on page 26 for instructions Note If you want to change the scanning mode see Changing the Scan Mode on page 25 ...

Page 19: ... PhotoImpression to scan with your scanner You open the program select EPSON Scan as your scanning program and scan When you are finished the scanned image opens in your scanning program so you can modify print and save it 1 Place your document or photo on the scanner See Placing Documents or Photos on page 12 for instructions 2 Start your scanning program Double click the program icon from your d...

Page 20: ...out selecting any settings or previewing your image This is the default mode in EPSON Scan Full Auto Mode is best when you need to scan documents or photos at 100 size and you do not need to preview the images before scanning You can restore faded colors by clicking the Customize button See Using Full Auto Mode on page 23 for instructions on scanning in this mode Home Mode lets you customize some ...

Page 21: ...ify the location in which you want to save your scanned image Click the My Documents or My Pictures buttons Windows or the Documents or Pictures button Mac OS X If you want to select another folder click Other then click Browse Windows or Choose Mac OS X and select the folder 2 Specify a file name prefix with an alphanumeric character string A 3 digit number is automatically added to the file name...

Page 22: ...me the data is saved The TIFF format is recommended when modification and retouching are required Multi TIFF TIF A TIFF format where multiple pages are saved to the same file You can also edit the scanned images before saving them See EPSON Scan Help for details To open Multi TIFF files you need a program that supports it PDF PDF A document format that can be read on both Windows and Macintosh sys...

Page 23: ...hose Using Full Auto Mode When you start EPSON Scan for the first time it runs in Full Auto Mode and displays the EPSON Scan standby window Note If you want to change the scan mode see Changing the Scan Mode on page 25 If you have a problem scanning your photo or document in Full Auto Mode try scanning it in Home or Professional Mode instead ...

Page 24: ...stomize window Select your settings and click OK For details on selecting settings click the Help button 2 Click the Scan button 3 The File Save Settings window appears For instructions on selecting options see Selecting File Save Settings on page 21 4 When you are finished selecting File Save Settings click OK EPSON Scan starts scanning in Full Auto Mode ...

Page 25: ... you need to cancel scanning click the Cancel button when it appears 5 Depending on how you started EPSON Scan the program saves the file to the location you specified or opens the scanned image in your scanning program See Finishing the Scan on page 39 for details Changing the Scan Mode To change the scan mode click the arrow in the Mode box at the top right of the EPSON Scan window Then select t...

Page 26: ...ing using these modes see Full Auto Mode Using Full Auto Mode on page 23 Home or Professional Mode Selecting Basic Settings on page 26 Selecting Basic Settings When you start EPSON Scan in Home or Professional Mode you see the main EPSON Scan window Home Mode ...

Page 27: ...so it can select the correct default resolution scan quality for you Follow these steps to select the basic settings for a document or photo in EPSON Scan 1 Do one of the following to select your document type Home mode Click the arrow to open the Document Type list and select the type of original you are scanning Then click the Color Grayscale or Black White button to select the colors in the ori...

Page 28: ...open the Image Type list and select the detailed image type you are scanning 3 EPSON Scan selects a default resolution setting based on the original and destination settings you select See Selecting the Scan Resolution on page 28 to continue scanning Selecting the Scan Resolution In Home Mode you can change the resolution only if you select Other as the Destination setting In Professional Mode you...

Page 29: ...solution by the same amount you will increase the image size For example if the resolution is 300 dpi dots per inch but you will increase the image size by 200 in an image editing program change the Resolution setting to 600 dpi in EPSON Scan Click the arrow next to the Resolution list and select the number of dots per inch at which you want to scan See the table below for some guidelines After se...

Page 30: ...re settings to the images Thumbnail is the default preview type in Home Mode but you can also select it in Professional Mode if available Note Depending on your document type and other settings Normal preview may be automatically selected and you will not be able to change to Thumbnail preview Follow these steps to preview your image s in Home or Professional Mode 1 Click the Preview button toward...

Page 31: ...Scanning Documents or Photos 31 Normal preview Thumbnail preview Note If the edge of your document or photo is not scanned move it away from the edge of the document table slightly ...

Page 32: ...ick the auto locate icon to place a marquee that marks the edges of your image area You can move the marquee to change the scan area See Adjusting the Scan Area Marquee on page 33 for instructions Note If you are going to scan at a different size than your original you must first select your Target Size and automatically create a marquee that is proportioned to that size See Selecting the Scan Siz...

Page 33: ... marquee move your cursor over a preview image The pointer becomes a set of cross hairs 2 Position the pointer in the area where you want to place the corner of your marquee and click Hold down the mouse button and drag the cross hairs over the image to the opposite corner of the desired scan area Then release the mouse button You see the moving dotted line of the marquee 3 Do one of the following...

Page 34: ...escribed in step 3 To delete a marquee click inside it and click the delete marquee icon Adjusting the Color and Other Image Settings Once you have previewed your images and adjusted the scan area you can modify the image quality if necessary EPSON Scan offers a variety of settings for improving color sharpness contrast and other aspects affecting image quality Before you make adjustments be sure ...

Page 35: ...omatically applied Professional Click the Auto Exposure button To turn it on continuously click the Configuration button click the Color tab and select Continuous auto exposure You can adjust the level of exposure adjustment using the slider Unsharp Mask Filter Home Automatically applied Professional Turn on to make the edges of image areas clearer for an overall sharper image The level of sharpne...

Page 36: ...lick the Reset button if available turn off the setting or preview your image again Selecting the Scan Size You can scan your images at their original size or you can reduce or enlarge their size as you scan them You do this using the Target Size setting in Home or Professional Mode Home Mode Color Palette Professional only Provides a graphical interface for adjusting mid tone levels such as skin ...

Page 37: ...e scan area to the correct proportions so your image will not be cropped unexpectedly For instructions on previewing your image s see Previewing and Adjusting the Scan Area on page 29 Then follow these steps to select the Target Size setting 1 You can choose a predefined scan size from the Target Size list Click the arrow in the list and select the size you want A marquee dotted line proportioned ...

Page 38: ...ped turn Trimming on or off See EPSON Scan Help for details To unlock the proportions of your scan size click the lock icon Then adjust the marquee or enter new width height measurements 4 Once you have selected your scan size you can click and drag the marquee to the area in the image you want to scan For details see Adjusting the Scan Area Marquee on page 33 The marquee proportions are retained ...

Page 39: ...ges in the EPSON File Manager window Note If you do not see your scanned images select the folder in which you saved them on the left side of the EPSON File Manager window If you want to use your scanned images in one of the EPSON Creativity Suite project programs click the checkbox beneath each image thumbnail The images are displayed in the My Selection box on the bottom of the EPSON File Manage...

Page 40: ... Note Once you have saved a scanned image you can start EPSON File Manager by dragging the image file or an image folder to the EPSON File Manager icon on your desktop Easy Photo Print See EPSON Easy Photo Print Help for instructions ...

Page 41: ... colors using EPSON Scan 1 Place your original photo on the scanner See Placing Documents or Photos on page 12 for instructions 2 Start EPSON Scan See one of these sections for instructions Starting a Scan With EPSON Scan on page 15 Starting a Scan With the EPSON Creativity Suite on page 17 Starting a Scan With Another Scanning Program on page 19 3 When the EPSON Scan window appears do one of the ...

Page 42: ...nning photos see Changing the Scan Mode on page 25 4 Select the basic settings for the type of original s you are scanning then select the destination setting for the way you will use your image s See Selecting Basic Settings on page 26 5 Click the Preview button to preview your image s then select your scan area See Previewing and Adjusting the Scan Area on page 29 6 Do one of the following to se...

Page 43: ...s on page 34 8 Size your image as necessary See Selecting the Scan Size on page 36 9 Click the Scan button to scan and restore the color in your image s What happens next depends on how you started EPSON Scan See Finishing the Scan on page 39 Using the Color Palette Function Professional Mode Only Follow the steps in these sections to fine tune the colors in your images using the Color Palette fea...

Page 44: ...e window with variations in hue in the surrounding cells 4 Select the cell that contains the hue you would like to use to adjust the color in your image This color now becomes the color of the center cell and the color change is reflected in your image Note You can also use the cells to the right of the adjustment area to change the brightness if necessary 5 If you want to continue adjusting the c...

Page 45: ...ntains the hue you would like to use to adjust the color in your image This color now becomes the color of the center cell Note You can also use the cells to the right of the adjustment area to change the brightness if necessary 3 Click the Color Applicator button Your cursor changes to a droplet 4 In the Preview window click on the color in your image that needs adjustment The color change is ref...

Page 46: ...hine You can even enlarge and reduce restore faded colors enhance text and adjust image brightness and contrast as you copy 1 Place your original document or photo on the scanner See Placing Documents or Photos on page 12 2 Start the EPSON Copy Utility in one of these ways Start EPSON File Manager see Starting a Scan With the EPSON Creativity Suite on page 17 Then click the Scan and Copy icon at t...

Page 47: ...or instructions on selecting settings 7 If you want to enlarge or reduce your image as you copy it click the Copy Size box select the enlargement reduction and click OK Source Type setting Type of document Color Document Single Page One page color document containing text or text and graphics such as a flyer Black White Document Single Page One page black and white document containing text or text...

Page 48: ...rrow in the Number of Copies box to select the number of copies you want if necessary 12 When you are ready to scan and print click the Copy button Note If you want to preview your scan before printing it or make additional copy settings click the Custom Copy button at the bottom of the window Click Help in the Copy Utility for instructions on using the Custom Copy features Scanning to a PDF File ...

Page 49: ...Scan window is set to Full Auto Mode click the Scan button If you are in Home Mode or Professional Mode see Selecting Basic Settings on page 26 for instructions Note If you want to change the scan mode see Changing the Scan Mode on page 25 4 The File Save Settings window appears ...

Page 50: ...rn to the File Save Settings window 6 When you are finished selecting file settings click OK EPSON Scan scans your page and displays this window 7 If you have finished scanning your document and want to view thumbnail images of the scanned pages click Edit page and go to step 8 If you need to place more pages for scanning click Add page Then place your originals and click Scan When you are finishe...

Page 51: ... even pages or all pages icon to select the pages Then click the left or right rotate icon to rotate them or the delete icon to delete them Note The delete icon is not available when all document pages are selected 9 When you have finished editing your document pages click OK Your document is saved in a PDF file in the location you selected 10 Click Close to exit EPSON Scan Scanning to an E mail Y...

Page 52: ... window displays information about the image file s you are attaching to the e mail message 5 Click OK Your e mail program is opened and any scanned images you selected are attached to a new e mail message See your e mail program Help if you need instructions on sending your e mail message Converting Scanned Documents Into Editable Text For DX6000 Series You can scan a document and convert the tex...

Page 53: ...eader 1 Place your original document on the scanner See Placing Documents or Photos on page 12 2 Do one of the following to start ABBYY FineReader Windows Select Start Programs or All Programs ABBYY FineReader 6 0 Sprint ABBYY FineReader 6 0 Sprint Mac OS X Open the Applications ABBYY FineReader 5 Sprint Plus folders and double click the Launch FineReader 5 Sprint icon You see the ABBYY FineReader...

Page 54: ...Table as the Document Source and Document as the Auto Exposure Type Then select Black White 24 bit Color or 48 bit Color as the Image Type and 300 dpi as the Resolution Preview and select your scan area as described in Previewing and Adjusting the Scan Area on page 29 Then click Scan Your document is scanned processed into editable text and opened in the FineReader window Note In Home or Professio...

Page 55: ...mp declines over time If the lamp breaks or becomes too dim to operate normally the scanner stops working When this happens the lamp assembly must be replaced For details contact your dealer cCaution Never open the scanner case If you think repairs or adjustments are necessary consult your dealer ...

Page 56: ...canning see the other topics in this section The Scanner Does Not Scan Wait until the On light turns green to indicate that the scanner is ready to scan The scanner may not work properly when connected to the computer through more than one hub Connect the scanner directly to the computer s USB port or through one hub only The scanner may not work properly when your computer is in standby mode Wind...

Page 57: ...ect the scanner directly to the computer s USB port or through one hub only Check to see if your computer system meets the requirements for the scanner interface you are using See System Requirements on page 78 for details If Windows still has problems recognizing your scanner make sure your computer supports USB See Checking For Windows USB Support on page 57 for instructions Checking For Windows...

Page 58: ...mages at One Time Position photos at least 20 mm 0 8 inches apart from each other on the document table Make sure your scanning program can scan multiple images Scanning Software Problems Note Some EPSON Scan settings may be unavailable or grayed out based on your scanner s capabilities or the currently selected settings You Cannot Start EPSON Scan Make sure the scanner s P On light is turned on T...

Page 59: ...oftware Does Not Work Properly Make sure your computer has enough memory and meets the other system requirements for the software you are using See your software and computer documentation for details With Windows check whether your scanner appears more than once in the Scanners and Cameras utility Do one of the following Windows XP and Me Double click the Scanners and Cameras icon in Control Pane...

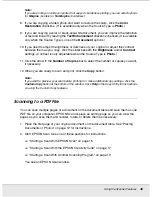
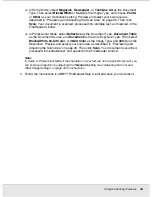
Page 60: ...ing You See Only a Few Dots in Your Scanned Image Make sure the document is placed on the scanner s document table with the side to be scanned facing down See Placing Documents or Photos on page 12 for details When scanning with the Black White setting in Home or Professional Mode change the Threshold setting See Adjusting the Color and Other Image Settings on page 34 for instructions A Line Of Do...

Page 61: ...for instructions Adjust the Auto Exposure setting in EPSON Scan s Professional Mode window See Adjusting the Color and Other Image Settings on page 34 for instructions You can also select Color Control and Continuous auto exposure in the Configuration window or select the Color tab and click the Recommended Value button to return the Auto Exposure setting to the default See EPSON Scan Help for det...

Page 62: ...r adjust brightness using the Histogram in Professional Mode see EPSON Scan Help Adjust the brightness using the Histogram in EPSON Scan s Professional Mode See EPSON Scan Help for details Check the brightness and contrast settings of your computer monitor An Image on the Back of Your Original Appears in Your Scanned Image If your original is printed on thin paper images on the back may be visible...

Page 63: ...raight on the document table Align the vertical and horizontal lines with the scales at the top and side of the document table In Home Mode select Black White as the Image Type setting In Professional Mode select None for the B W Option setting Then try adjusting the Threshold setting Check your OCR software manual to see if there are any settings you can adjust in your OCR software Scanned Colors...

Page 64: ...itor documentation for information on color matching and calibration Printed colors can never exactly match the colors on your monitor because printers and monitors use different color systems monitors use RGB red green and blue and printers typically use CMYK cyan magenta yellow and black You Have Trouble Adjusting the Scan Area in the Thumbnail Preview Create a marquee or adjust the existing mar...

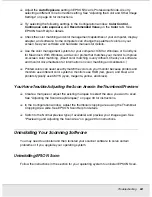
Page 65: ...ct the scanner s USB cable from your computer 3 Open the Windows Control Panel and double click the Add or Remove Programs icon Windows XP or the Add Remove Programs icon Windows Me 98 SE or 2000 4 Click EPSON Scan in the list of currently installed programs and click Change Remove Windows XP or 2000 or Add Remove Windows Me or 98 SE 5 When the confirmation window appears click Yes 6 Follow the on...

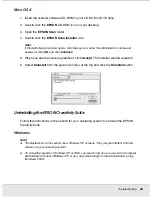
Page 66: ...ck Accept The Installer window appears 6 Select Uninstall from the pull down menu at the top and click the Uninstall button Uninstalling the EPSON Creativity Suite Follow the instructions in the section for your operating system to uninstall the EPSON Creativity Suite Windows Note The illustrations in this section show Windows XP screens They may be different from the screens for your operating sy...

Page 67: ...mation window appears click Yes 4 Follow the on screen instructions to uninstall EPSON Attach to Email 5 Repeat steps 2 through 4 for each of the following programs in the EPSON Creativity Suite EPSON Copy Utility 3 EPSON Easy Photo Print EPSON File Manager EPSON Scan Assistant Note Additional programs may be available depending on the software you have installed on your system 6 In some cases a m...

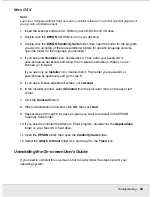
Page 68: ... to step 9 If you see only an Installer icon double click it Then enter your password or pass phrase as necessary and go to step 5 5 If you see a license agreement screen click Accept 6 In the Installer window select Uninstall from the pull down menu in the upper left corner 7 Click the Uninstall button 8 When uninstallation is finished click OK then click Quit 9 Repeat steps 2 through 8 for each ...

Page 69: ...Panel and double click the Add or Remove Programs icon Windows XP or the Add Remove Programs icon Windows Me 98 SE or 2000 4 Click model name User s Guide in the list of currently installed programs and click Change Remove Windows XP or 2000 or Add Remove Windows Me or 98 SE 5 When the confirmation window appears click Yes 6 Follow the on screen instructions to uninstall the User s Guide Mac OS X ...

Page 70: ...For All products but regional info sect2 is depend on categories See comments Before Contacting Epson If your Epson product is not operating properly and you cannot solve the problem using the troubleshooting information in your product documentation contact customer support services for assistance If customer support for your area is not listed below contact the dealer where you purchased your pr...

Page 71: ... advise on problems they can often solve problems quickly and easily as well as give advise on the next step to take Internet URL http www epson com au Access the Epson Australia World Wide Web pages Worth taking your modem here for the occasional surf The site provides a download area for drivers Epson contact points new product information and technical support e mail Epson Helpdesk Epson Helpde...

Page 72: ...y Asked Questions FAQ Sales Enquiries and Technical Support via e mail are available Epson HelpDesk Phone 65 6586 3111 Our HelpDesk team can help you with the following over the phone Sales enquiries and product information Product usage questions or problem Enquiries on repair service and warranty Help for Users in Thailand Contact for information support and services are World Wide Web http www ...

Page 73: ...gh e mail Epson Hotline Sales enquiries and product information Technical support Epson Service Center Epson Hotline Phone 84 8 823 9239 Service Center 80 Truong Dinh Street District 1 Hochiminh City Vietnam Phone 62 21 572 4350 Fax 62 21 572 4357 Jakarta Mangga Dua Mall 3rd floor No 3A B Jl Arteri Mangga Dua Jakarta Phone Fax 62 21 62301104 Bandung Lippo Center 8th floor Jl Gatot Subroto No 2 Ban...

Page 74: ...ers to Frequently Asked Questions FAQs Latest versions of Epson product drivers Users can access our World Wide Web home page at http www epson com hk Technical Support Hotline You can also contact our technical staff at the following telephone and fax numbers Yogyakarta Hotel Natour Garuda Jl Malioboro No 60 Yogyakarta Phone 62 274 565478 Medan Wisma HSBC 4th floor Jl Diponegoro No 11 Medan Phone...

Page 75: ... Head Office Epson Helpdesk Sales enquiries and product information Infoline Enquiries on repair services warranty product usage and technical support Techline Help for Users in India Contacts for information support and services are World Wide Web http www epson co in Information on product specifications drivers for download and products enquiry are available Epson India Head Office Bangalore Ph...

Page 76: ...ax numbers and e mail address below World Wide Web http www epson com ph Information on product specifications drivers for download Frequently Asked Questions FAQ and E mail Enquiries are available Fax 30515005 30515078 Mumbai Phone 28261516 17 Fax 28257287 Delhi Phone 26447201 02 03 04 07 09 Fax 26447205 Chennai Phone 28203940 41 28218658 59 Fax 28272463 Kolkata Phone 22831589 90 Fax 22831591 Hyd...

Page 77: ... 77 Epson Helpdesk Phone 63 2 813 6567 Our Hotline team can help you with the following over the phone Sales enquiries and product information Product usage questions or problems Enquiries on repair service and warranty ...

Page 78: ...onal x64 Edition or 2000 Professional Operating systems upgraded from Windows Millennium Edition 98 and 95 are not supported by the software USB 2 0 Host Driver by Microsoft must be used Interface USB port Type A built into the main board Display SVGA or higher resolution monitor 800 600 16 bit High Color screen resolution or higher Color and tone reproduction are subject to the display capability...

Page 79: ...r higher Color and tone reproduction are subject to the display capability of your computer system including the video card display monitor and software See your system documentation for details System PowerPC based Macintosh computers running Mac OS X 10 2 8 or later Fast User Switching on Mac OS X 10 3 is not supported Intel based Macintosh computers with Rosetta Interface Macintosh USB Display ...

Page 80: ...he video card display monitor and software See your system documentation for details Scanner type Flatbed color Photoelectric device CIS Effective pixels 10 200 14 040 pixels at 1200 dpi Document size 216 297 mm 8 5 11 7 inches A4 or US letter size Scanning resolution 1200 dpi main scan 2400 dpi with Micro Step sub scan Output resolution 50 to 4800 7200 and 9600 dpi 50 to 4800 dpi in 1 dpi increme...

Page 81: ...ype M xD Picture Card Type H Voltage Requirements 3 3 v Maximum current is 500 mA CF Type II card slot Compatible with CF and CompactFlash Specification 3 0 cards Memory Stick MemoryStick PRO card slot Compatible with Memory Stick Standard version 1 42 00 or Memory Stick Standard Memory Stick PRO Format Specifications version 1 02 00 cards SD MMC card slot Compatible with SD Memory Card Specificat...

Page 82: ...7 7 inches Weight Without the ink cartridges Approx 6 9 kg 15 2 lb 100 120 V model 220 240 V model Input voltage AC 90 to 132 V AC 198 to 264 V Rated frequency 50 to 60 Hz Rated current 0 4 A Max 0 7A 0 2 A Max 0 4A Power consumption Approx 13 W Standalone copying Approx 5 0 W Low Power Mode Approx 3 5 W Sleep Mode Approx 0 2 W Powered off Mode Approx 13 W Standalone copying Approx 5 0 W Low Power...

Page 83: ...e or home conditions Avoid operating the scanner in direct sunlight near a strong light source or in extremely dusty conditions Interface type Based on Universal Serial Bus Specifications Revision 2 0 Electrical standard 480Mbps High Speed Device Connector type One Type B port Safety UL60950 1 CSA C22 2 No 60950 1 EMC FCC Part 15 Subpart B Class B CAN CSA CEI IEC CISPR 22 Class B Low Voltage Direc...

Page 84: ...delines Do not eject your memory card or turn off the scanner while the memory card light is flashing or you may lose data Make sure that your memory card is not write protected Many memory cards have a write protect switch Do not copy files to a memory card while you are printing from the memory card The scanner display does not update information about your memory card after you copy files to it...

Page 85: ...card slot cover 3 Make sure no cards are in any of the slots Then insert your memory card as shown in the illustrations below CompactFlash SD Memory Card Microdrive SDHC Memory Card Memory Stick miniSD card Memory Stick Duo miniSDHC card Memory Stick PRO microSD card Memory Stick PRO Duo microSDHC card MagicGate Memory Stick xD Picture Card MagicGate Memory Stick Duo xD Picture Card Type M MultiMe...

Page 86: ...O MagicGate Memory Stick Memory Stick Duo Memory Stick PRO Duo MagicGate Memory Stick Duo SD Memory Card SDHC Memory Card MultiMedia Card miniSD card miniSDHC card microSD card microSDHC card Adapter required xD Picture Card xD Picture Card Type M xD Picture Card Type H ...

Page 87: ...card from static electricity If you touch the inserted memory card it may cause the scanner to malfunction If a digital camera is connected to the scanner disconnect it before you insert your memory card Make sure you check which direction the card should be inserted and if the card needs an adapter make sure you attach the adapter before inserting the card Otherwise you may not be able to remove ...

Page 88: ...emovable disk icon then select the folder in which your files are saved Note If you have set a volume label it is displayed as the drive name If you have not set the volume label removable disk is displayed as the drive name on Windows XP x64 and XP 4 Select the files you want to copy and drag them to a folder on your computer s hard drive Saving files to a memory card Before inserting your memory...

Page 89: ...f the Scanner When you finish copying files to or from a memory card in the scanner you must carefully follow the steps in these sections before you turn off the scanner or disconnect it from your computer Windows XP x64 and XP 1 Double click the icon on the task bar 2 Select USB Mass Storage Device and click Stop 3 Select USB Mass Storage Device and click OK 4 Click anywhere in the window 5 Turn ...

Page 90: ...he My Computer icon on the desktop 2 Right click the Removable Disk icon and click Eject 3 Turn off the scanner or disconnect the USB cable Macintosh 1 Drag the removable disk icon on your desktop into the trash 2 Turn off the scanner or disconnect the USB cable ...

Reviews: