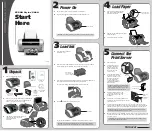
Unpack
Unpack
1
1
EPSON Stylus
®
C82N
Start
Here
Start
Here
1
Remove everything from the box.
2
Remove all the blue tape and packing material inside and
around the printer. The tape may be in slightly different
places on your printer, so check carefully.
3
Slide the paper support into the grooves on
either side of the sheet feeder. The
paper support should
fit securely.
Paper support
Printer
Ink cartridges
Printer software
CD-ROM
EPSON Stylus C82N
Load Paper
Load Paper
4
4
Turn over
CPD-15266
Supplement
booklet
AC adapter and
power cord for
print server
Print server
Printer Basics
1
Lower the printer’s output tray
and open the cover.
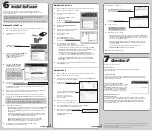
2
Shake the package of ink cartridges four or five times. Then remove the cartridges
from the package. (Don’t shake them after removing the packaging.)
3
Lower each ink cartridge into its holder with the green circuit board facing the back.
Then gently push each ink cartridge down until it is firmly seated.
The color of the cartridge label should match the marker on the holder.
4
Press the
ink button and close the printer cover.
The green power light flashes as your printer charges ink for about 90 seconds.
CAUTION: Don’t turn off the printer while the green power light is flashing
unless the printer hasn’t moved or made any noise for more than 5 minutes.
1
Plug the printer’s power cord into a grounded electrical outlet.
2
Press the printer’s
power button until the green power light comes on.
CAUTION: Use only the printer’s
power button to turn the printer on or off.
Power button
Ink button
Don’t touch the
green circuit boards
or remove any labels
Power On
Power On
2
2
Load Ink
Load Ink
3
3
Connect the
Print Server
Connect the
Print Server
5
5
1
Fan a few sheets of paper and place
them against the right edge guide.
Don’t push the paper in.
2
Slide the left edge guide against the paper,
but not too tightly.
3
Pull out the output tray extensions.
Don’t load paper
above this arrow
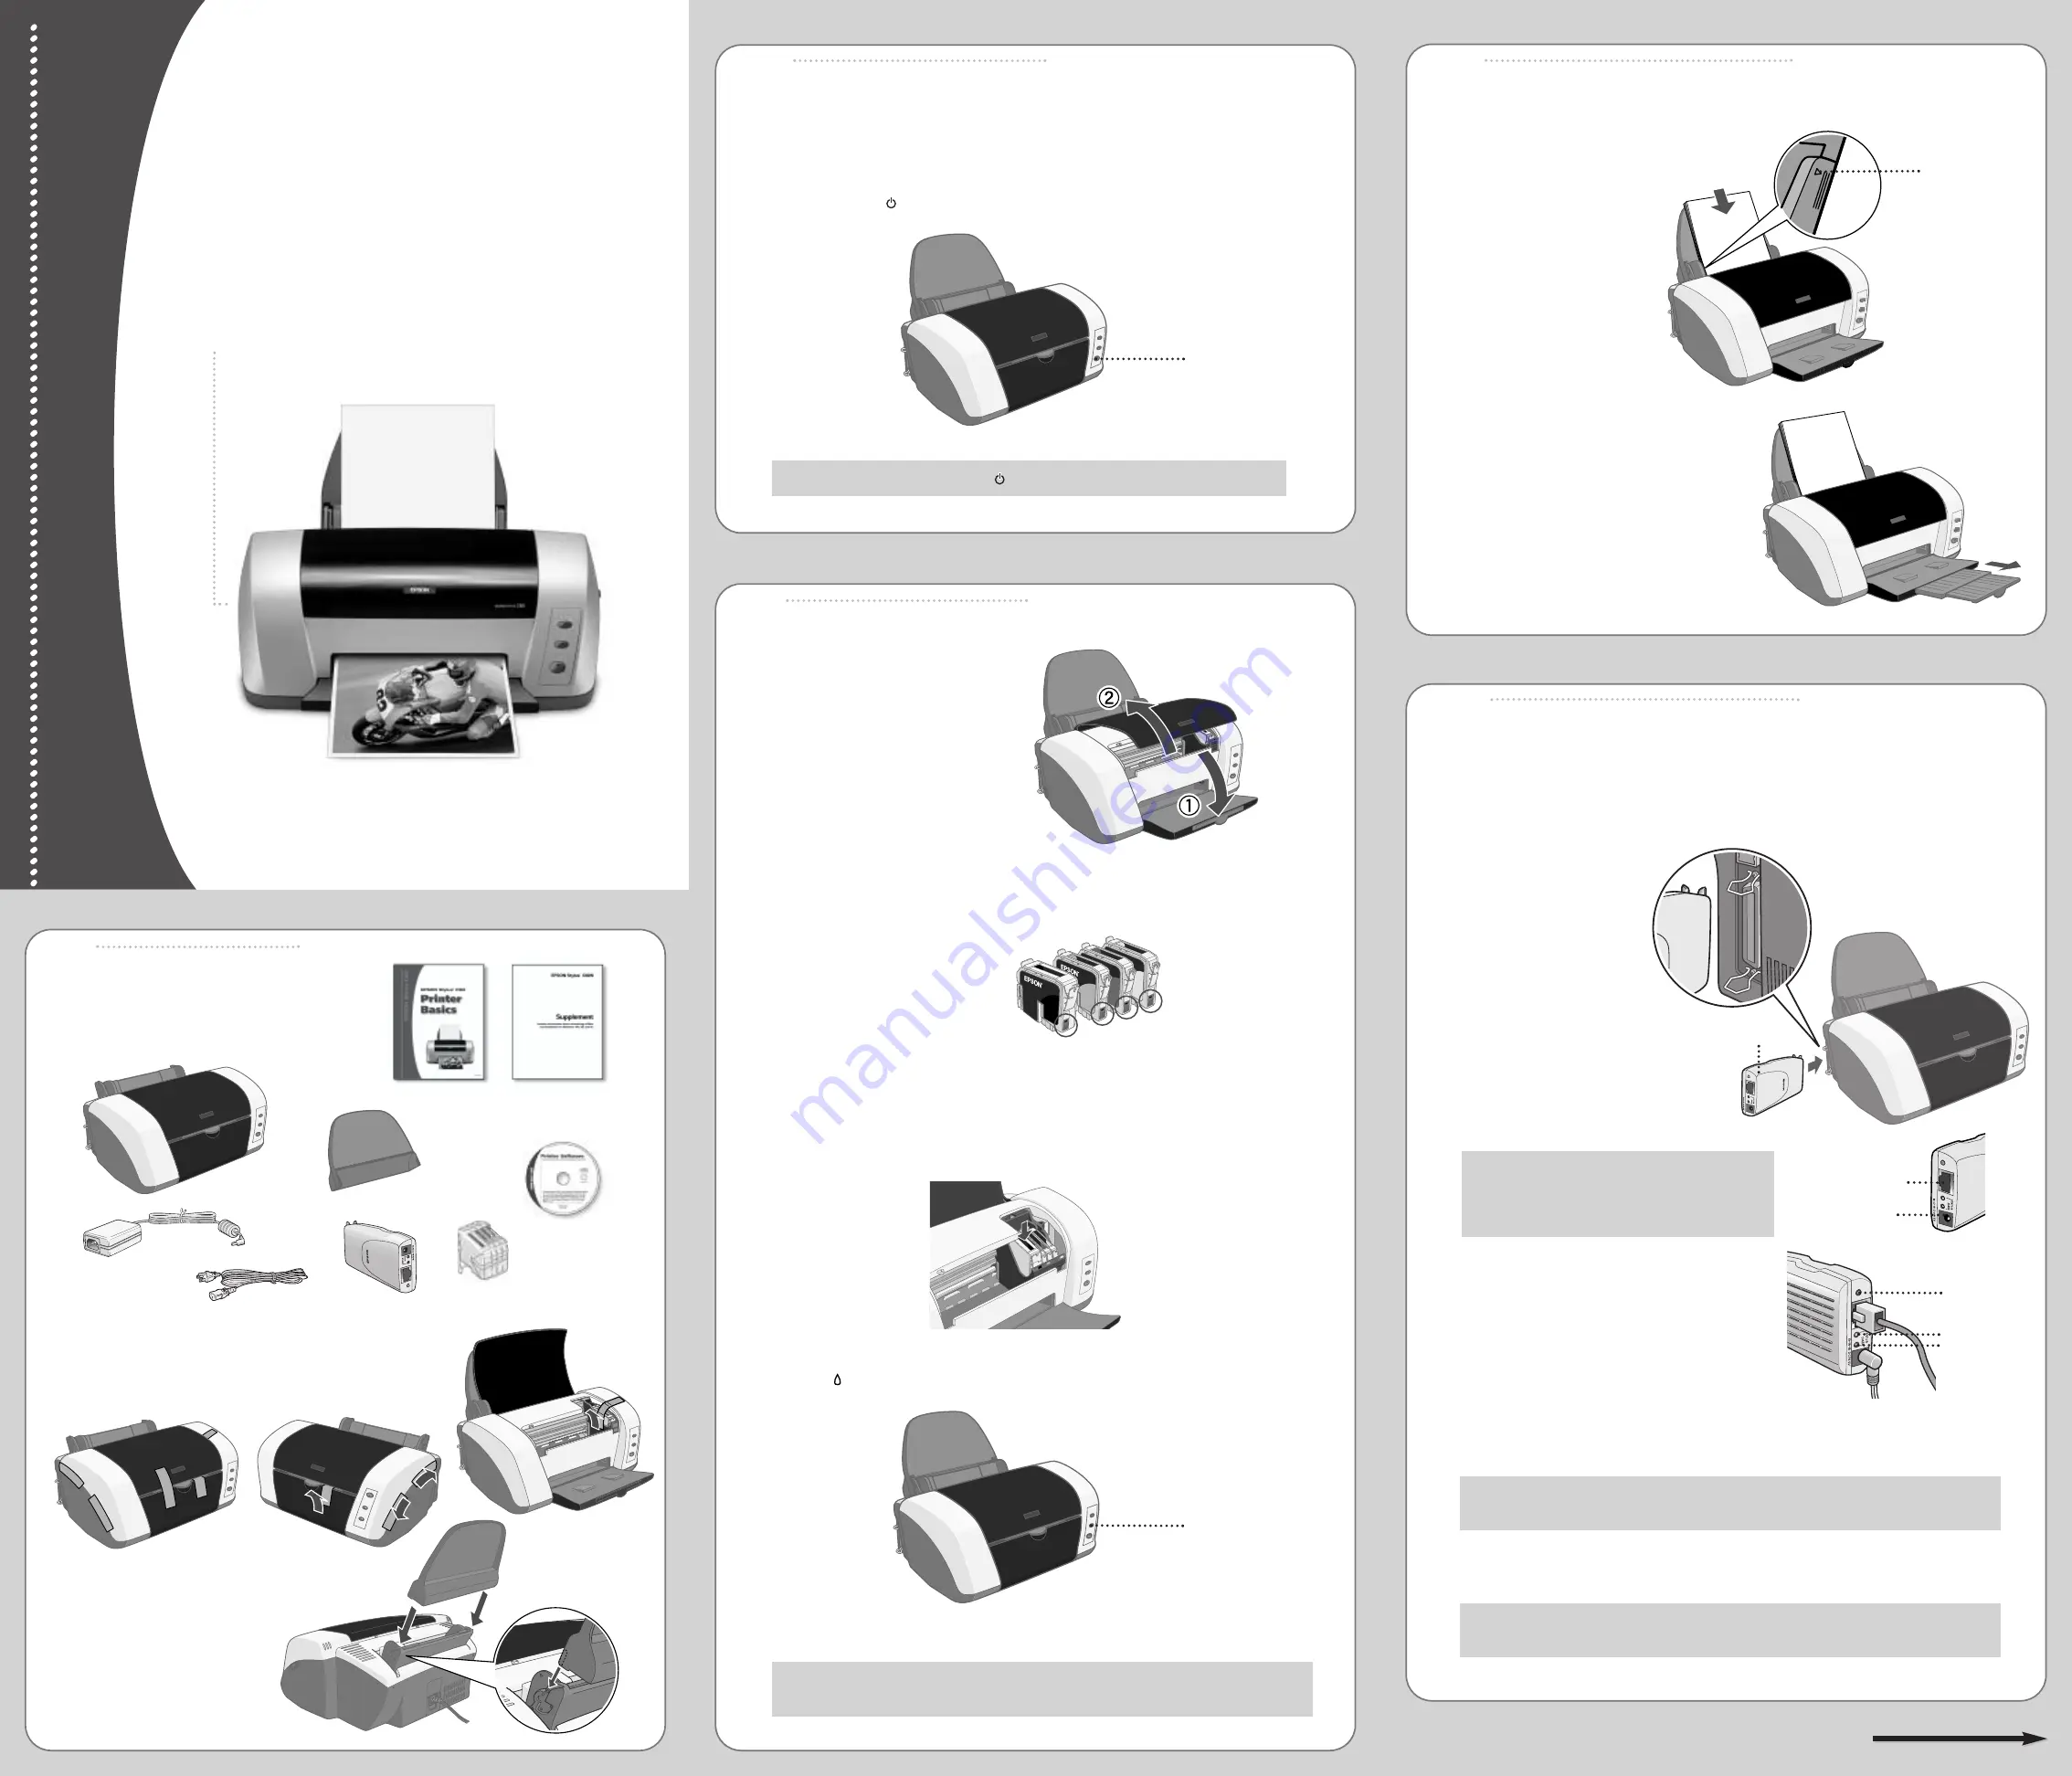
1
Turn off the printer.
2
Plug the print server into
the printer’s parallel port.
Squeeze the wire clips
together until they lock
in place on either side
of the connector.
3
Connect the network cable to
the 10/100 connector on the
print server, and then connect
the other end of the cable
to a hub or switch. Use
a Category 5 twisted pair
straight-through cable with
RJ45 connectors.
NOTE: The print server will automatically use
DHCP to obtain an IP address. If it cannot
get an IP address this way, it will use the
private IP address of 192.168.192.168.
4
Plug the AC adapter into the DCIN
connector on the print server. Connect
the AC adapter’s power cord to the
AC adapter.
5
Plug the power cord of the AC adapter into a
grounded electrical outlet. The lights on the print
server will turn on.
6
Press and hold down the status sheet button on the print server, and then turn on the
printer. Continue to hold down the status sheet button for about 5 seconds. The STATUS
light turns red as the print server initializes, while the DATA light beneath it stays green.
NOTE: It can take up to one minute to initialize the print server. When it is done
initializing, its STATUS light turns green or orange.
7
When the print server is done initializing, press the status sheet button again for about two
seconds to print a report that is two pages long. If the status report prints, the print server
is installed correctly.
CAUTION: Before disconnecting the print server from the printer, always turn off
the printer and unplug the AC adapter.
Print server
Status sheet
button
DATA light
10/100 connector
DCIN connector
STATUS light


