EPSON Stylus COLOR 860/1160
Revision C
Disassembly and Assembly
Disassembly Procedures
88
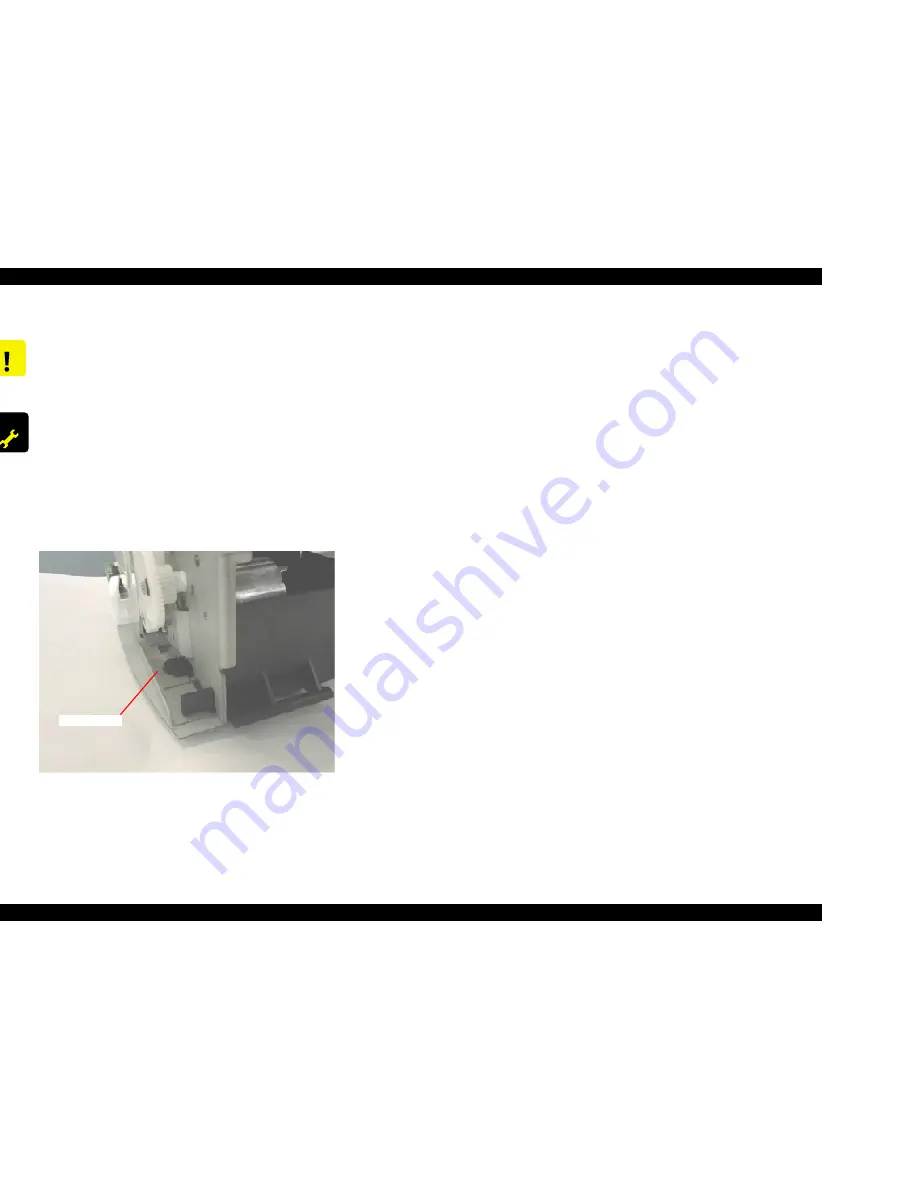
Figure 4-11. Installing the Spacer Tray
C A U T I O N
1.
When installing the Waste Ink Absorber Tray Assembly,
make sure to fix it with the Spacer Tray in the left side of
the printer mechanism. Refer to Figure 4-11.
2.
Be careful not to damage Loop Scale when removing the
Tray Spacer.
A D J U S T M E N T
R E Q U I R E D
1.
After the replacing the Waste Ink Absorber, perform the
following Panel Reset Function for ink overflow counter.
Turn on the Printer while holding the “Load/Eject
SW”+”Cleaning SW”, then hold “Cleaning SW” for 10
seconds.
Otherwise, perform the counter reset operation by using
the adjustment program. For details, Refer to Chapter 5
Section 5.2.3.11.
Spacer Tray
Summary of Contents for Stylus COLOR 1160
Page 8: ...C H A P T E R PRODUCTDESCRIPTION ...
Page 28: ...C H A P T E R OPERATINGPRINCIPLES ...
Page 53: ...C H A P T E R TROUBLESHOOTING ...
Page 74: ...C H A P T E R DISASSEMBLYANDASSEMBLY ...
Page 116: ...C H A P T E R ADJUSTMENT ...
Page 150: ...C H A P T E R MAINTENANCE ...
Page 160: ...APPENDIX C H A P T E R ...


