background image

9. For each pattern you selected, the printer prints a Test

Alignment Sheet containing multiple samples of vertical
lines, each of which is assigned a number. On each sheet,
look for the sample that is most closely aligned. Then enter
the number of the aligned sample or select 

Not-aligned

 if

none of the samples are aligned. Click 

Next

.

10. Repeat steps 8 and 9 until all patterns are aligned. 

11. Click the 

Print Current Alignment Sheet

 checkbox to print

a final test sheet or click 

Finish

 to exit the Calibration Utility.

Calibrating the Printer From DOS

Before you calibrate the printer from DOS for the first time, you
must copy the EPSON Printer Calibration Utility to your
computer’s hard disk. 

Copying the calibration utility

1. Insert the EPSON Setup disk 1 into your diskette drive.

2. At the DOS prompt, type 

A:SETUP

 (or 

B:SETUP

 if you inserted

the diskette in drive B) and press 

Enter

.

3. When you see the Printer Utility Setup screen, highlight

Epson Stylus COLOR 200

 and press 

Enter

.

4. At the next screen, select the directory in which you want to

install the calibration utility. To choose the default directory
(C:\CALIBRAT), press 

Enter

; to change the directory, erase

the default, type in another, and press 

Enter

.

5. Follow the prompts on the screen to install the software.

6. At the installation completion prompt, press 

Enter

.

5-14      

Maintenance 

Summary of Contents for Stylus Color 200

Page 1: ...g the U S failure to strictly comply with Seiko Epson Corporation s operating and maintenance instructions Seiko Epson Corporation shall not be liable against any damages or problems arising from the use of any options or any consumable products other than those designated as Original EPSON Products or EPSON Approved Products by Seiko Epson Corporation EPSON EPSON Stylus and EPSON ESC P are regist...

Page 2: ...r support control panel printer cover sheet feeder edge guides parallel interface connector power switch paper thickness lever ink cartridge clamp print head unit release lever print head unit thickness adjustment lever ...

Page 3: ... different from that to which the receiver is connected Consult the dealer or an experienced radio TV technician for help WARNING The connection of a non shielded equipment interface cable to this equipment will invalidate the FCC Certification of this device and may cause interference levels which exceed the limits established by the FCC for this equipment It is the responsibility of the user to ...

Page 4: ...Paper Support 1 4 Plugging In and Turning On the Printer 1 5 Charging the Ink Delivery System 1 6 Checking the Paper Thickness Lever 1 14 Loading Paper 1 15 Testing the Printer 1 17 Connecting the Printer to Your Computer 1 18 Chapter 2 Installing and Using the Printer Software Installing the Printer Software 2 2 Installing the Software for Windows 3 1 2 2 Installing the Software for Windows 95 2 ...

Page 5: ...a 3 8 Loading Special Papers and Transparencies 3 8 Loading Envelopes 3 11 Chapter 4 Controlling the Printer Managing Print Jobs 4 2 Using the Printer s Control Panel 4 5 Lights 4 5 Buttons 4 6 Using the Default Setting Mode 4 8 Chapter 5 Maintenance Cleaning the Print Head 5 2 Changing the Print Head Unit 5 3 Replacing an Ink Cartridge 5 6 Selecting the Correct Ink Cartridges 5 7 Removing and Ins...
Page 6: ...cifications Printing A 2 Paper A 3 Ink Cartridges A 6 Mechanical A 7 Electrical A 7 Environmental A 8 Safety Approvals A 8 Fonts A 8 Parallel Interface Specifications A 9 Pin Assignments A 9 Reverse Channel A 11 Timing Chart A 14 Initialization A 14 Default Settings A 15 Appendix B Commands and Character Tables Command List B 2 Character Tables B 3 International Character Sets B 7 Characters Avail...

Page 7: ...ludes a driver that controls printing and lets you choose from a wide variety of printer settings You can change settings to improve print quality speed up printing or achieve special printing effects And to make your selections easy the driver includes an option that analyzes each page and automatically adjusts the settings before printing it Getting the Most Out of Your Printer To achieve the hi...

Page 8: ...n Canada call 800 BUY EPSON for sales locations For information about special papers and other media see Chapter 3 EPSON ink cartridges black and color are specially formulated to work with EPSON papers and your printer software to deliver the best looking images Always use genuine EPSON ink cartridges and do not refill them Other products may cause damage not covered by EPSON s warranty Printer d...

Page 9: ...Color printing with the EPSON Stylus COLOR 200 produces amazing images whether you print text graphics line drawings photographs or documents containing many different image types However you use your color printer keep the following in mind Leave a large amount of hard disk space free to make room for your color images A full page color photographic image may require 40MB or more of disk space de...

Page 10: ... closely match colors for your image type resolution and paper or other media If you need extreme precision in matching colors you can use a color calibration system available with many software applications If you use a scanner make sure your scanning software is set to the correct setting for ink jet printers Also your application may include image editing capabilities that let you adjust the co...

Page 11: ...s Manual This manual contains all the information you need to set up and use your printer Chapter 1 Setting Up the Printer provides simple steps for setting up your printer running its self test and connecting it to your computer Chapter 2 Installing and Using the Printer Software explains how to install and access the printer software and gives guidelines for selecting printer driver settings Cha...

Page 12: ...d by the printer and shows the printer s built in character tables A Glossary and Index are included at the end of the book Where to Get Help If you purchased your printer in the United States or Canada EPSON provides customer support and service through a network of Authorized EPSON Customer Care Centers EPSON also provides the following services when you dial 800 922 8911 EPSON fax on demand tec...

Page 13: ...lletins for EPSON products is through the online services below World Wide Web If you are connected to the Internet and have a Web browser you can access EPSON s World Wide Web site at http www epson com EPSON s home page links users to What s New EPSON Products EPSON Connection SM Corporate Info and EPSON Contacts Link to the EPSON Connection for the latest drivers and FAQs Frequently Asked Quest...

Page 14: ...mpuServe members can call the Epson America Forum on CompuServe If you are already a member simply type GO EPSON at the menu prompt to reach the Forum If you are not currently a member you are eligible for a free introductory membership as an owner of an EPSON product This membership entitles you to An introductory credit on CompuServe Your own user ID and password A complimentary subscription to ...

Page 15: ...at regularly switch on and off Do not let the power cord become damaged or frayed If you use an extension cord with the printer make sure the total ampere rating of the devices plugged into the extension cord does not exceed the cord s ampere rating Also make sure the total of all devices plugged into the wall outlet does not exceed 15 amperes Except as specifically explained in this User s Guide ...

Page 16: ...nter 1 4 Selecting a Location 1 4 Attaching the Paper Support 1 4 Plugging In and Turning On the Printer 1 5 Charging the Ink Delivery System 1 6 Checking the Paper Thickness Lever 1 14 Loading Paper 1 15 Testing the Printer 1 17 Connecting the Printer to Your Computer 1 18 1 Setting Up the Printer 1 1 ...

Page 17: ...3 1 or Windows 95 At least 8MB of available RAM more for Windows 95 A minimum of 10MB of hard disk space for storing images 40MB or more is recommended for color images VGA or higher standard monitor A shielded twisted pair parallel cable 6 to 10 feet long to connect your computer to the printer s parallel interface the cable must have a D SUB 25 pin male connector for your computer and a 36 pin C...

Page 18: ...ials packed around and inside the printer before you set it up and turn on the power Follow the directions on the Notice Sheet packed with the printer Save all packaging and protective materials in case you need to transport the printer in the future You should always transport it in its original packaging or equivalent materials print head storage box printer paper support black ink cartridge col...

Page 19: ...ontal and stable Locate the printer away from the edge of your desk or table so that paper ejected from the front has room to land on a flat surface Avoid locations subject to rapid changes in temperature and humidity Also keep the printer away from direct sunlight heat sources and sources of electromagnetic interference such as the base unit of a cordless telephone Attaching the Paper Support Ins...

Page 20: ...nter See the Notice Sheet for more information 2 Make sure the printer is turned off by checking the position of the POWER switch as shown below 3 Plug the power cord into a properly grounded electrical outlet 4 Turn on the printer by pressing the POWER switch Note The Power and Ink Out lights turn on to indicate that no ink cartridge is installed Setting Up the Printer 1 5 ...

Page 21: ...t set up the printer you need to completely charge its ink delivery system by first installing the color ink cartridge and then replacing it with the black print head unit and cartridge Follow all the steps in this section Note Even if you don t plan to use the black ink cartridge immediately you still need to install it to charge the ink delivery system Once both ink delivery systems are charged ...

Page 22: ...ling the color ink cartridge Follow these steps to install the color ink cartridge 1 Make sure the printer is turned on 2 Raise the printer cover by lifting the edges as shown below Setting Up the Printer 1 7 ...

Page 23: ... ink cartridge install position The Power light begins flashing c Caution Never move the print head by hand always use the Load Eject button to move it 4 Raise the ink cartridge clamp to open the print head unit 5 Remove the protective paper sheet ink cartridge clamp paper sheet 1 8 Setting Up the Printer ...

Page 24: ...l from the top of each cartridge leaving the tape on will permanently damage a cartridge Do not remove the clear seal from the bottom of the cartridge ink will leak out 7 Lower the color ink cartridge into the print head unit with the label facing up and the arrow on the top of the cartridge pointing toward the back of the printer color cartridge black cartridge Setting Up the Printer 1 9 ...

Page 25: ...ge the print head 9 Press the Load Eject button again to return the print head to its home position Even if you do not press Load Eject the print head moves back to its home position about 60 seconds after you close the clamp The printer charges the ink delivery system for about two minutes During this time the Power light flashes When the printer is finished charging the Power light stays on c Ca...

Page 26: ...ive seconds until the print head unit moves slightly left to the ink cartridge install position The Power light flashes 3 Raise the blue print head unit release lever as far as it will go c Caution Do not lift up the ink cartridge clamp the ink cartridge and print head may become unusable 4 Grasp both sides of the print head unit and carefully lift it out of the printer Place the print head unit o...

Page 27: ... head unit from its storage box by pressing on the notch as shown Place the color print head unit in the box Always store the unused print head unit in this box to protect its delicate components 6 Carefully insert the monochrome print head unit into the printer with the electrical contacts and print head facing the back of the printer 1 12 Setting Up the Printer ...

Page 28: ...artridge clamp or remove the cartridge except to replace it with a new one Once you remove a cartridge do not reuse it you may damage the print head 11 Press the Load Eject button again to return the print head to its home position Even if you do not press Load Eject the printer moves the print head back to its home position about 60 seconds after you close the clamp After you install the black in...

Page 29: ... damage not covered by EPSON s warranty When you want to print in color again replace the monochrome print head unit with the color print head unit as described in Chapter 5 Checking the Paper Thickness Lever Before you load paper make sure that the paper thickness lever which controls the distance between the paper and the printer carriage is set correctly The paper thickness lever is on the top ...

Page 30: ...For instructions on loading coated or glossy paper envelopes or transparencies see Chapter 3 For paper specifications see Appendix A Always load plain paper with the printable surface facing up The printable surface is marked with an arrow on most paper packaging 1 Push down the left edge guide lock lever then slide the left edge guide to the left as far as it will go Setting Up the Printer 1 15 ...

Page 31: ...o not load paper above the arrow mark inside the left edge guide of the sheet feeder 3 Slide the left edge guide against the left edge of the paper then push up the lock lever to secure its position 4 Remove the paper fan the stack and tap the edges against a flat surface to even them up 1 16 Setting Up the Printer ...

Page 32: ...Always turn it off with the POWER switch 2 Hold down the Cleaning button while pressing the POWER switch to turn on the printer Keep holding down Cleaning until the printer begins feeding a page The test prints in black on the first and last lines of the first sheet to measure the page length 3 After the first page prints press Load Eject to print the next page containing character samples of the ...

Page 33: ...connector for the printer Follow these steps to connect the cable 1 Make sure both the printer and computer are turned off 2 Plug the 36 pin end of the cable securely into the printer s interface connector Then squeeze the wire clips together until they lock in place on both sides If your cable has a ground wire attach it to the ground connector below the interface connector 3 Plug the 25 pin end ...

Page 34: ...or DOS Programs 2 8 Accessing the Printer Driver 2 9 Accessing the Driver From Windows Applications 2 9 Accessing the Driver From Windows 3 1 2 10 Accessing the Driver From Windows 95 2 10 Using the Printer Driver 2 11 Changing Settings 2 14 Using Online Help 2 15 Accessing Online Help From Windows 3 1 2 15 Accessing Online Help From Windows 95 2 15 Installing and Using the Printer Software 2 1 ...

Page 35: ...4 for information on the Spool Manager and Chapter 5 for instructions on using the Calibration Utility Note Be sure to make backup copies of your software diskettes Installing the Printer Software If you are using Windows 3 1 follow the steps in the next section to install the printer software If you are running Windows 95 see page 2 5 for instructions Installing the Software for Windows 3 1 1 Mak...

Page 36: ...stallation is complete click OK to exit Setup The installation program automatically selects the EPSON Stylus COLOR 200 printer as your default printer for Windows applications It also assigns the printer driver to port LPT1 If you are happy with this configuration go to page 2 9 for information on accessing the driver If you need to change the default printer driver or the port assignment see the...

Page 37: ...lt Printer button If you do not need to change the printer port assignment for the EPSON Stylus COLOR 200 printer go to step 8 4 To change the port assignment select EPSON Stylus COLOR 200 in the Installed Printer drop down list 5 Click the Connect button You see the Connect dialog box 6 In the Ports drop down list select the port to which you want to assign the EPSON Stylus COLOR 200 printer Clic...

Page 38: ... Hardware found screen follow the procedure under Installing the driver while running Windows 95 on page 2 7 instead 5 Your printer model name is displayed on the screen Click the Driver from disk provided by hardware manufacturer button Do not select any of the other buttons Note The next time you turn on or restart your computer after installing the driver Windows 95 may display the New Hardware...

Page 39: ...ll Windows 95 applications select Yes No is the default 11 Click the Finish button 12 Follow the prompts on the screen to install your software After the program has installed all the files it creates an Epson folder containing the following icons Spool Manager EPSON Printer Calibration EPSON Stylus COLOR 200 Help EPSON Stylus ReadMe 13 When the installation is complete click OK The Setup program ...

Page 40: ...tup icon The EPSON Printer Utility Setup dialog box appears 6 Select Stylus COLOR 200 in the Printer Model tab then click OK to start the printer driver installation 7 Follow the prompts on the screen to install the software After the program has installed all the files it creates an Epson folder containing the following icons Spool Manager EPSON Printer Calibration EPSON Stylus COLOR 200 Help EPS...

Page 41: ...ur software manufacturer to see if a Stylus COLOR 200 driver is available or is included with a new version of your software When printing in color as well as black and white select LQ 860 LQ 2550 When printing black and white only select LQ 870 1170 LQ 570 1070 SQ 870 1070 LQ 850 LQ 500 Note These drivers let you use your printer but do not support some features such as 720 dpi and MicroWeave 2 8...

Page 42: ... of your software program If you choose Print Setup you access the printer driver directly and see the Main menu tab shown on page 2 11 If you choose Print you first see a Print dialog box The Print dialog box contains the settings you change most often including the number of copies and the print range To access the printer driver settings choose the Printer Setup Properties or Options button You...

Page 43: ...oose Setup You see the Main menu tab shown on page 2 11 Accessing the Driver From Windows 95 Follow these steps to access the driver from the Windows 95 My Computer group 1 Double click the My Computer icon 2 Double click the Printers icon 3 Right click the EPSON Stylus COLOR 200 icon or double click the icon and then pull down the Printer menu 4 Select Properties 5 Click the Main tab You see the ...

Page 44: ...ettings Main shown above and Graphics These settings which are listed in the tables on pages 2 13 and 2 14 let you control the appearance of your printed documents All the driver settings are preset to default values which produce good quality output for the most common types of documents Installing and Using the Printer Software 2 11 ...

Page 45: ...to be printed business graphics photographs text etc Printing Mode resolution 720 dpi 360 dpi or Economy 180 dpi Head Unit the color or monochrome print head currently installed Media Type the type of paper or other media you are using Paper Size the size of paper you have loaded The best way to learn about your printer driver is to use the driver s extensive online help It explains all the option...

Page 46: ...ions MicroWeave On Off High Speed On Off Paper Size A4 210 x 297 mm A4 Centered 210 x 297 mm B5 182 x 157 mm Letter 8 1 2 x 11 in Letter Centered 8 1 2 x 11 in Legal 8 1 2 x 14 in Legal Centered 8 1 2 x 14 in Envelope 10 4 1 8 x 9 1 2 in Envelope DL 110 x 220 mm Statement 5 1 2 x 8 1 2 in Executive 7 1 2 x 10 in A6 Index card not used User Defined Copies Number 1 99 Collate On Off Reverse Page Ord...

Page 47: ...rinter driver click the menu tab you want to see and click the setting you want to change Use the scroll arrows or click the appropriate radio button to choose the desired option Do this for each setting you want to change and then click the Apply button at the bottom of the screen to save your settings Go to the other tab if necessary and do the same If you make one or more changes but then decid...

Page 48: ...LOR 200 Help icon You see the help contents window If you need instructions for how to use help click the Help button in the help screens Accessing Online Help From Windows 95 To access online help from the printer driver while you are in a Windows application click the Help button at the bottom of the menu tab Then select the topic you need help with For specific help related to any item in the m...

Page 49: ...ting the Paper Thickness and Adjustment Levers 3 3 Paper Thickness Lever 3 3 Thickness Adjustment Lever 3 4 Loading Plain Paper 3 5 Loading Special Papers and Other Media 3 8 Loading Special Papers and Transparencies 3 8 Loading Envelopes 3 11 3 Paper Handling 3 1 ...

Page 50: ... for 360 dpi Use this paper for best results when printing at 360 dpi EPSON special coated paper for 720 dpi Use this paper for best results when printing at 720 dpi EPSON high quality glossy paper Use this paper when printing at 720 dpi to produce camera ready composites When printing on glossy paper use only EPSON high quality glossy paper For best results use glossy paper within six months of o...

Page 51: ... thickness adjustment levers to make sure they are set correctly for the type of paper or other media you are loading c Caution Before you change the lever settings make sure the printer is not loading printing or ejecting paper Paper Thickness Lever The paper thickness lever on the right side of the sheet feeder has two settings plain paper and thick paper Set the lever to the position that best ...

Page 52: ...print on thick paper such as envelopes or labels or if your documents smear as shown in the following table Paper type Thickness adjustment lever position Plain or special paper 0 Transparencies 0 Envelopes or labels Previously smeared documents plain paper setting thick paper setting 3 4 Paper Handling ...

Page 53: ...rinting mode See Using the Printer s Control Panel in Chapter 4 for more information Loading Plain Paper This section explains how to load plain bond paper in the printer For instructions on loading coated or glossy paper envelopes and transparencies see page 3 8 You can load up to 100 sheets of plain paper in the sheet feeder Be sure to load it with the printable surface facing up The printable s...

Page 54: ...re no labels are curled or peeling away from the backing when you load them 1 Push down the left edge guide lock lever then slide the left edge guide to the left as far as it will go 2 Load a stack of paper printable side up so that its right edge rests against the right side of the sheet feeder Do not load paper above the arrow mark inside the left edge guide of the sheet feeder 3 6 Paper Handlin...

Page 55: ...edges against a flat surface to even it up 5 Reload the paper straight down into the printer as shown Then rest it against the paper support 6 Change the Media Type and other printer driver settings so they are appropriate for the paper or labels you loaded For more information see Chapter 2 For labels select Plain paper as your Media Type Paper Handling 3 7 ...

Page 56: ...rom the output tray immediately after it is printed Make sure each sheet is dry before stacking Return unused sheets and envelopes to their original package as soon as possible after you finish printing Unfavorable storage conditions especially high temperature humidity and direct sunlight can damage the media Follow any other special loading procedures included in the following sections Loading S...

Page 57: ...ssy paper the minimum top margin is 1 2 inches 30 mm To print with a smaller top margin load and print glossy paper one sheet at a time 50 sheets of transparency film printed one at a time with one sheet of plain paper beneath the last transparency in the stack Follow these steps to load special paper or transparency film 1 Push down the left edge guide lock lever then slide the left edge guide to...

Page 58: ...e paper support 4 Slide the left edge guide against the left edge of the paper then push up the lock lever to secure its position 5 Change the Media Type and other printer driver settings so they are appropriate for the paper or transparency film you loaded Before printing on EPSON high quality glossy paper or special coated paper make sure the color print head unit is installed and Color is selec...

Page 59: ... to load envelopes 1 Make sure you set the paper thickness and thickness adjustment levers to the correct positions for envelope printing as described on page 3 3 2 Load up to 10 envelopes in the sheet feeder with the front side facing up as shown 3 Adjust and lock the left edge guide so the envelopes feed straight into the paper path 4 Change the Paper Size and other printer driver settings so th...

Page 60: ...Chapter 4 Controlling the Printer Managing Print Jobs 4 2 Using the Printer s Control Panel 4 5 Lights 4 5 Buttons 4 6 Using the Default Setting Mode 4 8 4 Controlling the Printer 4 1 ...

Page 61: ...he paper loading position Managing Print Jobs The EPSON Spool Manager was automatically copied to your hard disk drive when you installed the printer software When you print a document the printer uses the EPSON Spool Manager to send data to the printer This allows you to continue working in your software program while printing When you send a print job to the printer the Despooler dialog box appe...

Page 62: ... similar to the one shown below that appears when you send a print job to the printer It allows you to monitor the progress of the print job and cancel pause or restart the job Note If you do not want the Despooler dialog box to appear each time you print you can turn it off using Spool Manager Start Spool Manager open the View menu and select Show Despool Popup to turn it off the checkmark next t...

Page 63: ...not appear when you are printing over a network with the printer connected to another computer The Status Monitor uses these icons to report the status of your printer Checking the printer status A printing error has occured and your printer cannot print The printer is ready to print The printer is currently printing The ink level is low or empty check the Ink Out light on the control panel and re...

Page 64: ...on page Lights Power On when the printer is on Flashes while replacing the ink cartridge or print head unit while cleaning the print head and in certain error conditions Ink Out Flashes when ink is low or during certain error conditions On when the ink cartridge is empty or not installed The printer will not work when the ink cartridge is empty or not installed Paper Out On when the printer runs o...

Page 65: ...efly before the operation begins Cleaning Self test Checks the paper length and performs a printer self test at 360 dpi Paper must be loaded in the printer Hold down Cleaning until the printer feeds the first page Then press Load Eject to print the next page To stop the self test wait until the second page prints and then turn off the printer See Chapter 1 for more information on testing the print...

Page 66: ...lt setting mode and prints an instruction page see page 2 8 for more information Paper must be loaded in the printer Hold down both the Load Eject and Cleaning buttons while you turn on the printer and hold them down until the printer feeds a page To use Default setting mode without printing an instruction page hold down Load Eject and Cleaning and turn on the printer then press Load Eject again T...

Page 67: ...cter table If you commonly use a language containing accents symbols or other characters not available in the Italic U S A character table change to a different character table For a list of available character tables see Appendix B Print direction Specifies how the print head moves across the page The options are Uni D Bi D and Auto default When Uni D is on the print head prints in only one direc...

Page 68: ...nt on thick paper or envelopes Monochrome print speed Sets a faster print speed when the monochrome print head unit is installed The speed can be 167 cps characters per second or 125 cps default Economy Turns on economy mode for printing rough drafts With economy mode on the printer uses less ink by printing fewer dots per character The default setting is off To turn on the Default setting mode an...

Page 69: ...ng an Ink Cartridge 5 6 Selecting the Correct Ink Cartridges 5 7 Removing and Installing an Ink Cartridge 5 7 Cleaning the Printer 5 10 Transporting the Printer 5 11 Calibrating the Printer 5 12 Calibrating the Printer From Windows 5 13 Calibrating the Printer From DOS 5 14 5 Maintenance 5 1 ...

Page 70: ... the print head cleaning cycle to unclog the print head so the nozzles deliver ink properly Follow these steps to clean either print head 1 Make sure the printer is turned on and not printing 2 Press the Cleaning button The cleaning cycle takes about one minute during which the carriage moves and you hear the printer recharging the print head The Power light flashes throughout the cycle and then s...

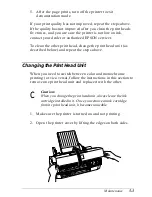
Page 71: ... unit as described below and repeat the steps above Changing the Print Head Unit When you need to switch between color and monochrome printing or vice versa follow the instructions in this section to remove one print head unit and replace it with the other c Caution When you change the print head unit always leave the ink cartridge installed in it Once you remove an ink cartridge from its print he...

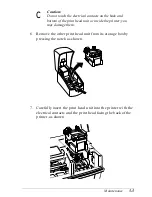
Page 72: ...the operation in step 4 within 60 seconds c Caution Never move the print head unit by hand always use the Load Eject button to move it 4 Raise the print head unit release lever as far as it will go c Caution Do not lift up the ink cartridge clamp the ink cartridge and print head will become unusable 5 Grasp both sides of the print head unit and carefully lift it out of the printer Place it on a fl...

Page 73: ...it or inside the printer you may damage them 6 Remove the other print head unit from its storage box by pressing the notch as shown 7 Carefully insert the print head unit into the printer with the electrical contacts and the print head facing the back of the printer as shown Maintenance 5 5 ...

Page 74: ...protect its delicate components 11 Close the printer cover Replacing an Ink Cartridge The printer s Ink Out light tells you when an ink cartridge is low on ink and when you need to replace the cartridge If the Ink Out light flashes the cartridge is low on ink If the printer stops and the Ink Out light comes on the cartridge is empty c Caution Do not replace an ink cartridge unless the Ink Out ligh...

Page 75: ... your dealer or call EPSON Accessories at 800 873 7766 U S only In Canada call 800 BUY EPSON for sales locations c Caution Use only genuine EPSON cartridges and do not refill them Other products may cause damage not covered by EPSON s warranty Removing and Installing an Ink Cartridge Follow these steps to replace an ink cartridge 1 Make sure the printer is on and not printing and the Ink Out light...

Page 76: ... hand always use the Load Eject button to move it 4 Raise the ink cartridge clamp to open it The cartridge rises partially out of the printer 5 Lift the cartridge out of the printer and dispose of it carefully so any excess ink does not spill out Do not take the used cartridge apart or try to refill it ink cartridge clamp 5 8 Maintenance ...

Page 77: ...e tape seal from the top of the cartridge c Caution You must remove the tape seal from the top of the cartridge leaving the tape on will permanently damage it Do not remove the clear seal from the bottom of the cartridge ink will leak out 7 Lower the ink cartridge into the print head unit with the label facing up and the arrow on the top of the cartridge pointing toward the back of the printer col...

Page 78: ...er you close the clamp The Power light flashes as the printer charges the ink delivery system for about two minutes 10 Close the printer cover When the charging cycle finishes the Power light stops flashing and stays on c Caution Never turn off the printer while the Power light is flashing Cleaning the Printer If you want to clean the printer follow these steps 1 Turn off the printer and disconnec...

Page 79: ...mage the printer mechanisms Do not clean or remove the print head unit while cleaning the printer and do not clean the spare print head unit Transporting the Printer If you need to transport your printer carefully repack it in the original box and packing materials as follows 1 Turn off the printer if you have not already done so 2 Open the printer cover and make sure that the print head is locked...

Page 80: ...oblems with printed output after transporting the printer clean the print head as described on page 5 2 If the printed image is misaligned calibrate the printer as described below Calibrating the Printer Your printer has been calibrated at the factory so that vertical lines in your text and graphics are properly aligned If you notice misaligned images in printouts however you can calibrate the pri...

Page 81: ...button to select the print head installed in the printer Then click Next 5 At the next screen select the port to which you connected your printer and click Next 6 Make sure the printer is loaded with several sheets of letter size paper Then click Next 7 The printer prints the Current Alignment Sheets Examine the printout for misaligned vertical lines Aligned Not aligned If none are misaligned clic...

Page 82: ...rate the printer from DOS for the first time you must copy the EPSON Printer Calibration Utility to your computer s hard disk Copying the calibration utility 1 Insert the EPSON Setup disk 1 into your diskette drive 2 At the DOS prompt type A SETUP or B SETUP if you inserted the diskette in drive B and press Enter 3 When you see the Printer Utility Setup screen highlight Epson Stylus COLOR 200 and ...

Page 83: ... press or to highlight it 4 Press Tab to move to the Calibration item box and select the print head you have installed in the printer color or black monochrome 5 Press Tab twice to highlight the Next button and press Enter 6 At the next screen select the port to which you connected the printer and select Next 7 Select Next at the next screen if you ve already loaded paper 8 The printer prints the ...

Page 84: ...each sheet look for the sample that is most closely aligned Enter the number of the aligned sample or select Not aligned if none of the samples are aligned Then select Next 11 Repeat steps 9 and 10 until all patterns are aligned 12 Select the Print Current Alignment Sheet checkbox to print a final test sheet or select Finish to exit the Calibration Utility 5 16 Maintenance ...

Page 85: ...oting Diagnosing Problems 6 2 Print Quality Problems 6 3 Problems With Printing 6 8 Paper Handling Problems 6 13 Paper Jam Problems 6 13 Paper Feeding Problems 6 14 Other Paper Handling Problems 6 14 6 Troubleshooting 6 1 ...

Page 86: ...ms See this section if you have paper jams or other problems with paper handling Diagnosing Problems Your printer s control panel and the Status Monitor box in the EPSON Despooler Windows 95 only report the status of your print job and alert you to printing errors Check the tables below to diagnose your problem using the control panel lights and the Status Monitor icons Control panel light status ...

Page 87: ...rint see page 6 11 If you have a printing problem check the appropriate section below and follow all suggestions that apply to your problem Also check the ReadMe item in the EPSON program group or folder and the online help available in the driver for the latest information If none of the suggested solutions solve your problem see Where to Get Help in the Introduction Print Quality Problems To hel...

Page 88: ...dia loaded in the printer If you re printing a scanned image and the colors are not right first try to fix the problem using your scanning software program If print quality does not improve see the following specific problems Printed output is not what you expect or is faint or blurred You may not be printing on the correct side of the paper On coated paper print only on the white coated side on g...

Page 89: ...g color graphics at 360 or 720 dpi make sure MicroWeave is on and High Speed mode is off Also check that the Brightness and Contrast settings are appropriate for the image Turn on non smear printing mode if necessary as described in Chapter 4 Make sure the correct print head unit is selected in the printer driver Select Color for the color print head and Mono for monochrome print head Try using th...

Page 90: ...ait The printout contains incorrect or garbled characters Make sure EPSON Stylus COLOR 200 is selected as the default Windows printer driver If you are running Windows make sure the Print Manager is turned off in the Control Panel Printers utility see your Windows documentation or online help for instructions Print jobs may be held in the EPSON Spool Manager Click Spool Manager 3 in the EPSON prog...

Page 91: ...e your scanner to your monitor and printer to more closely match colors If you are printing from a DOS application using economy mode black text or graphics will appear gray on your printout turn off economy mode using the printer s Default setting mode to achieve deeper blacks See Chapter 4 for instructions Printing starts too high or too low on the page or the page length or margins are not what...

Page 92: ...light off and resume printing Printing stops and the Paper Out light is flashing Paper may have jammed in the printer Turn off the printer and gently pull out the paper If it tears off inside the printer open the printer cover and remove the paper See Paper Handling Problems later in this chapter for information on preventing paper jams The Ink Out light is flashing or on If the Ink Out light is f...

Page 93: ...s packaging First clean the print head as described in Chapter 5 If this does not solve the problem replace the ink cartridge The cable between the printer and computer may not be connected securely or it may not meet the specifications for the printer or computer See System Requirements in Chapter 1 for cable guidelines Turn off the printer and perform a self test as described in Chapter 1 If the...

Page 94: ...d and then open the Queue menu 4 Select Setup In the Queue Setup dialog box change the spool directory to the one you created in step 1 5 Also make sure the Use Print Manager for this port checkbox is checked Then select OK 6 Open the Options menu and select Default Spool Directory 7 In the dialog box change the spool directory to the one you created in step 1 Then select OK 8 Close the Spool Mana...

Page 95: ...es of high quality graphics or photographs Ink cartridges do not last as long as expected The ink cartridge life depends on the amount of ink used in printing If you often print pages with large graphics and little white space you will use up cartridges faster than if you print pages with lots of white space The printer also uses ink during print head cleaning cycles so do not perform them unless ...

Page 96: ... select Delete To verify that the print queue is not held open the Queue menu and click Hold if there is a checkmark beside the option Also change the Spool Manager default directory as described on page 6 10 Make sure EPSON Stylus COLOR 200 is selected as the default Windows printer driver If you still get no output try printing a demonstration page to see if the problem is with your printer see ...

Page 97: ...these suggestions Paper Jam Problems Use a higher quality paper that is suitable for ink jet printers and is not too thin too thick or rough For best quality use EPSON special coated and high quality glossy papers See Appendix A for paper specifications Do not load too many sheets at once You can load up to 100 sheets of plain paper 70 sheets of special coated paper 50 sheets of transparency film ...

Page 98: ...s of plain paper 70 sheets of special coated paper 50 sheets of transparency film with one sheet of plain paper beneath the stack 30 sheets of high quality glossy paper with one sheet of plain paper beneath the stack or 10 envelopes The paper may be pushed down too far in the sheet feeder Remove the paper fan it even up the stack and then reload it as described in Chapter 3 Other Paper Handling Pr...

Page 99: ...our application software Ejected paper is wrinkled The paper may be too thin or damp Do not store paper in damp or humid places Paper does not fully eject Use the Load Eject button to eject the page The paper may be too long Use paper that is within the maximum size listed in Appendix A Paper is feeding crooked The paper is old or creased Use only new smooth sheets of paper Too much paper is loade...

Page 100: ... Cartridges A 6 Mechanical A 7 Electrical A 7 Environmental A 8 Safety Approvals A 8 Fonts A 8 Parallel Interface Specifications A 9 Pin Assignments A 9 Reverse Channel A 11 Timing Chart A 14 Initialization A 14 Default Settings A 15 A Technical Specifications A 1 ...

Page 101: ...n system configuration software application resolution and amount of page covered Resolution Maximum 360 dpi raster on a 720 720 dpi matrix Dots are printed in an alternating pattern in which horizontal and vertical dots are non contiguous Contiguous printing of dots is available only on the diagonal which yields an effective resolution greater than 360 dpi Paper feed speed 102 milliseconds per 1 ...

Page 102: ... m2 70 sheets of EPSON special coated paper 30 sheets of EPSON high quality glossy paper with one sheet of plain paper beneath the stack or single sheet loaded and printed one page at a time 50 transparency films with one sheet of plain paper beneath the stack and printed one page at a time 10 envelopes Paper size Letter 8 5 11 inches A4 210 297 mm B5 176 250 mm Legal 8 5 14 inches Statement 8 5 5...

Page 103: ...igher grade of paper Print on special coated paper high quality glossy paper envelopes and transparencies only under these conditions Temperature 59 to 77 F 15 to 25 C Humidity 40 to 60 RH High quality glossy paper can be stored at 20 to 60 relative humidity Do not load curled or folded paper envelopes or transparencies The following EPSON genuine papers are available Special coated paper for 720 ...

Page 104: ... right margin is 0 12 inch 3 0 mm for Statement and Executive paper 0 38 inch 9 7 mm for Letter and Legal paper and transparencies 0 15 inch 3 8 mm for A4 paper 0 54 inch 13 8 mm for DL envelopes 1 38 inches 35 1 mm for 10 envelopes C The minimum bottom margin is 0 54 inch 14 0 mm Note Always load paper into the sheet feeder short edge first except envelopes Load envelopes long edge first A BR C B...

Page 105: ... yellow Print capacity 320 pages A4 paper 360 dpi 5 each color Cartridge life 2 years from production date and up to 6 months after opening the package at 77 F 25 C Temperature Storage 22 to 104 F 30 to 40 C 1 month at 104 F 40 C Transit 22 to 140 F 30 to 60 C 1 month at 104 F 40 C 120 hours at 140 F 60 C Freezing 21 2 F 6 C Dimensions 1 8 inches W 2 2 inches D 1 7 inches H 45 9 mm W 56 5 mm D 43 ...

Page 106: ...pages Dimensions Without paper support Width 15 6 inches 396 7 mm Depth 8 1 inches 205 6 mm Height 5 7 inches 144 0 mm With paper support Width 15 6 inches 396 7 mm Depth 8 1 inches 205 6 mm Height 10 5 inches 267 3 mm Weight 8 6 lb 3 9 kg without the ink cartridge and print head unit Electrical Input voltage range 103 5 to 132 V Rated frequency range 50 to 60 Hz Input frequency range 49 5 to 60 5...

Page 107: ...lled set of fonts which are selectable using the Default setting mode described in Chapter 4 However the printer always uses the fonts you select with your software program The only time you need to select the printer s installed fonts is when your software program does not allow you to select fonts You can select other font and pitch combinations using ESC P 2 commands as described in Appendix B ...

Page 108: ... Pin Assignments Signal pin Return pin Signal Direction Description 1 19 STROBE IN STROBE pulse to read data 2 3 4 5 6 7 8 9 20 21 22 23 24 25 26 27 DATA 1 DATA 2 DATA 3 DATA 4 DATA 5 DATA 6 DATA 7 DATA 8 IN IN IN IN IN IN IN IN These signals represent information in bits 0 to 7 of parallel data respectively Each signal is at HIGH level when data is logical 1 and LOW when it is logical 0 10 28 ACK...

Page 109: ...in an error state 13 28 SLCT OUT Pulled up to 5 V through 1 kΩ resistance 14 30 AFXT IN Not used 15 NC Not used 16 GND Logic ground level 17 CHASSIS GND Printer s chassis ground which is connected to the logic ground 18 Logic H OUT Not used 19 30 GND Twisted pair return signal ground level 31 30 INIT IN When this signal goes LOW the printer controller is reset to its default state when the power i...

Page 110: ...o use a twisted pair cable for each signal and to complete the connection on the return side All interface conditions are based on TTL level Both the rise and fall times of each signal must be less than 0 2 microseconds Data transfer must be carried out by observing the ACKNLG or BUSY signal Data transfer to this printer can be carried out only after receipt of the ACKNLG signal or when the level ...

Page 111: ...spectively Each signal is at HIGH level when data is logical 1 and LOW when it is logical 0 These signals are used to transfer the 1284 extensibility request values to the printer 3 DATA1 21 In 4 DATA2 22 In 5 DATA3 23 In 6 DATA4 24 In 7 DATA5 25 In 8 DATA6 26 In 9 DATA7 27 In 10 PtrClk 28 Out Used to qualify data being sent to the host Set LOW then HIGH to cause an interrupt indicating to host th...

Page 112: ...aAvail DataBit 0 4 29 Out This signal is LOW when the printer is in an error state 36 1284 Active 30 In Set HIGH during 1284 mode 18 Logic H Out This line is pulled up to 5V through 3 9 kΩ resistance 35 5V Out This line is pulled up to 5V through 1 0 kΩ resistance 17 Chassis Chassis GND 16 33 19 30 GND Signal GND 15 34 NC Not connected The column heading In Out indicates the direction of signal fl...

Page 113: ...l from the parallel interface pin 31 goes LOW Software initialization Software sends the ESC initialize the printer command the last control panel settings are kept Both initialization methods reset the font according to the default settings selected using the control panel However ESC does not initialize the printer mechanism clear the input data buffer or clear the user defined character set BUS...

Page 114: ...elf test Left and right margins Cancelled Line spacing 1 6 inch line spacing Character pitch Last font selected using Default setting mode Vertical tab position Cleared Horizontal tab positions Every eight characters Font selection Last font selected using Default setting mode Special printing effects Cancelled except condensed and economy printing User defined character set Hardware control panel...

Page 115: ...Appendix B Commands and Character Tables Command List B 2 Character Tables B 3 International Character Sets B 7 Characters Available With the ESC Command B 8 B Commands and Character Tables B 1 ...

Page 116: ...aper feeding CR FF LF ESC 0 ESC 2 ESC 3 ESC Page format ESC C ESC C ESC C 0 ESC Q ESC 1 ESC c ESC N ESC O Print position motion ESC ESC ESC V ESC v ESC D HT ESC B ESC J VT Font selection ESC k ESC x ESC X ESC P ESC g ESC p ESC 4 ESC 5 ESC E ESC F ESC ESC M Font enhancement ESC W DC4 SO DC2 SI ESC w ESC G ESC H ESC T ESC S ESC ESC ESC q Spacing ESC SP ESC c ESC U Character handling ESC t ESC t ESC ...

Page 117: ... program and cannot print the character you need you should never have to change the character table These character tables are selected using the printer s Default setting mode or by using software commands All tables except the italic are the same as the PC437 table for hex codes 00 through 7F so only the PC437 table is shown completely The rest of the tables show only the characters for hex cod...

Page 118: ...PC850 Multilingual PC860 Portuguese PC861 Icelandic PC863 Canadian French B 4 Commands and Character Tables ...

Page 119: ...PC865 Nordic Abicomp BRASCII Commands and Character Tables B 5 ...

Page 120: ...Italic No characters are available for hex code 15 in the italic character table B 6 Commands and Character Tables ...

Page 121: ...or example when you select Italic France the characters in the France row on the table below are used in the italic character table The following eight international character sets can be selected using Default setting mode or the ESC R command The following seven additional sets can be selected only with the ESC R command Commands and Character Tables B 7 ...

Page 122: ...Characters Available With the ESC Command To print the characters in the table below use the ESC command B 8 Commands and Character Tables ...

Page 123: ... constitute the set of characters used in a particular language CMY A method of specifying and creating colors using Cyan blue green Magenta and Yellow contrast The difference between the darkest and lightest colors in an image The greater the difference the higher the contrast control code A special code used to control a printer function such as performing a carriage return or line feed default ...

Page 124: ...ge consisting of multiple shades of gray ranging from white to black halftoning Method of repeating tiny dot patterns to represent images hex dump A troubleshooting feature that helps advanced users find the cause of communication problems between the printer and the computer When the printer is in hex dump mode it prints each code it receives in hexadecimal notation and ASCII characters Also call...

Page 125: ...driver A software program that sends commands for using the features of a particular printer print head unit The printer mechanism that contains the ink cartridge and distributes the ink onto printing media printing mode A driver setting that assigns the number of dots per inch used to represent an image Your printer has three printing mode settings Super 720 dpi Best 360 dpi and Economy 180 dpi S...

Page 126: ...est A method for checking the operation of the printer When you run the self test the printer prints the characters stored in its memory unidirectional printing Printing in which the print head prints in one direction only Unidirectional printing is useful for printing graphics because it allows precise vertical alignment 4 Glossary ...

Page 127: ... 12 Calibration Utility 2 2 5 12 16 6 6 Cancel button 2 14 Carriage return character 4 9 Cartridges see Ink cartridges Character pitch 4 9 A 15 Character tables 4 8 A 3 B 3 8 Choosing paper 3 2 3 Cleaning button 4 6 9 print heads 4 6 5 2 3 5 12 6 3 4 printer 5 10 11 Coated papers 2 13 3 2 3 3 8 10 4 7 A 3 5 Collate setting 2 13 Color balance 2 12 2 14 head unit option 2 13 6 5 incorrect 6 7 ink ca...

Page 128: ... guides 1 15 16 3 6 11 6 14 Electrical specifications A 7 Electronic support services Intro 7 8 Energy Star compliance Intro 4 Energy conserving Intro 4 5 Envelopes driver options 2 13 loading 3 11 specifications A 4 5 Environmental specifications 1 4 A 8 EPSON Accessories Intro 2 Intro 7 3 2 3 5 7 B 2 America Forum Intro 8 Customer Care Centers Intro 6 Download Service Intro 8 Fax on Demand servi...

Page 129: ...2 Interface Intro 1 1 18 A 9 14 International character sets B 7 Internet Intro 7 Italic character set B 6 J Jammed paper preventing 6 13 14 L Labels 3 6 8 Landscape setting 2 13 Left edge guide 3 6 11 6 14 Left margin A 5 A 15 Lights control panel 4 5 6 2 6 8 9 Line feed auto 4 9 Line spacing A 3 A 15 Lines aligning see Vertical lines aligning Load Eject button 4 6 9 Loading coated papers 3 8 10 ...

Page 130: ...in paper 1 15 17 3 5 7 loading special paper 3 8 10 Paper continued ordering Intro 2 Intro 7 3 2 3 orientation setting 2 13 plain see Plain paper printable area A 5 printable surface 1 15 3 5 6 3 8 3 10 11 6 4 selecting type 2 12 13 3 2 3 size 2 12 13 3 11 6 7 6 10 A 3 source setting 2 13 special see Special papers specifications A 3 5 storing 3 8 6 5 transparencies see Transparencies types 3 2 3 ...

Page 131: ...ng self test 1 17 18 4 6 6 9 setting up 1 1 18 specifications A 1 16 testing 1 17 18 4 6 transporting 1 3 5 11 12 turning on and off 1 5 unpacking 1 3 weight A 7 Printer driver accessing 2 9 10 changing settings 2 14 color matching option 2 14 default settings 2 12 14 6 6 7 6 12 dialog box 2 11 2 13 14 diskettes 1 3 2 2 DOS 2 8 Graphics menu tab 2 11 2 14 help 2 12 2 15 installing 2 2 8 6 9 Main m...

Page 132: ...pers driver options 2 13 loading 3 8 11 ordering 3 2 3 selecting 3 2 3 specifications A 3 5 storing 6 5 Specifications A 1 16 Spool Manager 2 2 4 2 4 6 6 6 10 12 Status Monitor 4 2 4 6 2 3 6 11 Super 720 dpi option 2 13 3 10 Support services Intro 6 8 System requirements 1 2 T Tab positions A 15 Technical assistance Intro 6 8 Telephone numbers Intro 6 8 Temperature A 4 A 6 A 8 Temporary directorie...

Page 133: ...eight paper A 3 4 printer A 7 What s This prompt 2 15 Windows calibration 5 12 14 color matching option 2 14 default printer 2 3 4 2 6 6 6 7 6 10 6 12 plug and play 2 5 7 printer driver see Printer driver supported versions 1 2 updating version 2 3 6 9 VGA driver 6 5 World Wide Web Intro 7 Wrinkled paper 6 15 Index 7 ...

Reviews: