EPSON Stylus COLOR 760
Revision C
Troubleshooting
Overview
69
Table 3-15. Cleaning does not Solve the Print Problem
Step
Check Point
Action
1
Repeat the cleaning
7 or 8 times.
Unlike the previous products, the Stylus Color 860/
1160 is not equipped with the CL3 (dummy
cleaning). Therefore, you can repeat the cleaning
every time you press the Cleaning button without
running a self-test nor any printing.
2
Trying the initial ink
charge operation.
You can repeat the initial ink charge operation in
the way described below:
1. Using the exclusive program, reset the initial ink
charge flag in the EEPROM.
2. Turn the printer back on. (Refer to Chapter 5 for
details.)
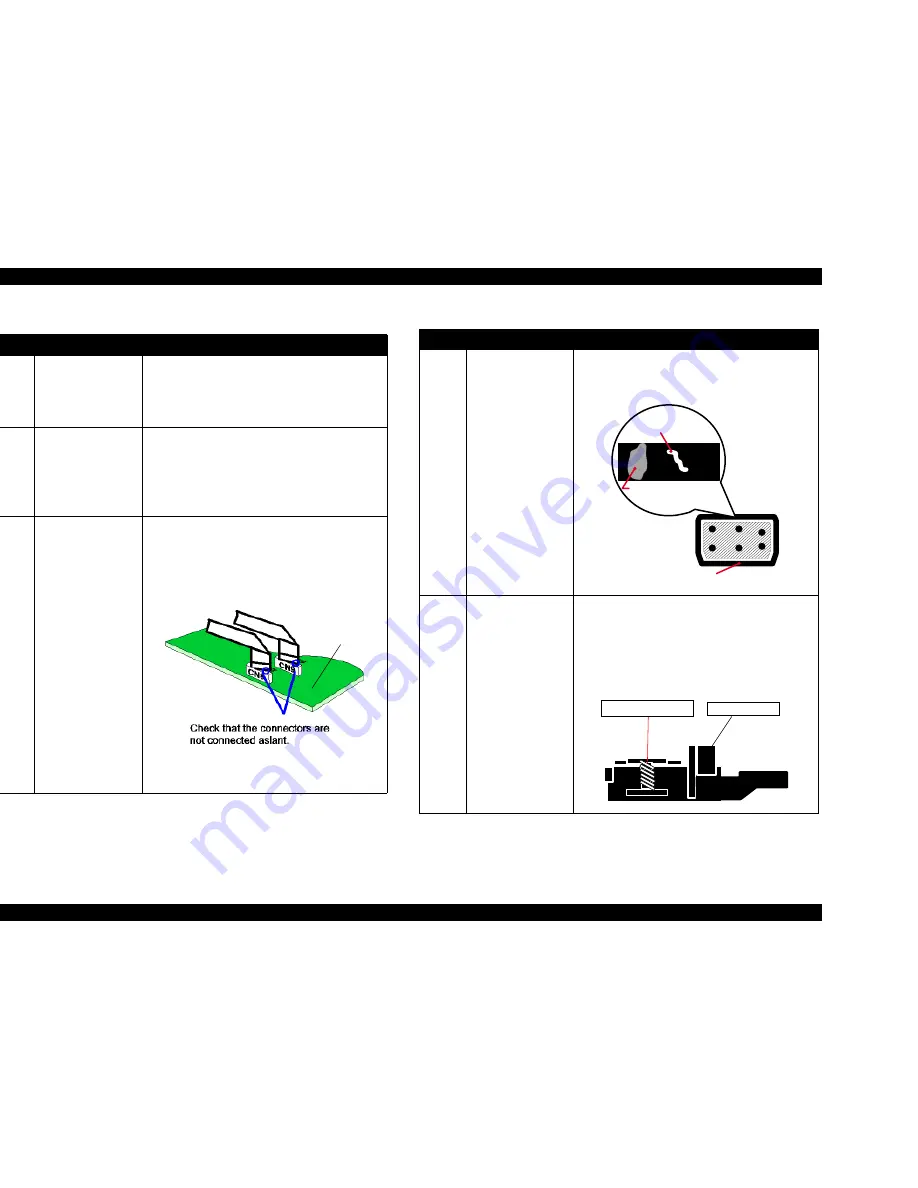
3 Reinstalling
the
printhead FFC.
Remove the upper case and check if the FFCs are
properly connected to the CN8 and CN9 on the
C298 Main Board. Even though they are not
installed aslant as shown below, disconnect the
FFC once and connect them again, then run a print
check.
C298 Main
Board
4
Check the cap for
any foreign matter,
dirt, or damage.
Remove the printer mechanism and release the
carriage lock to move the carriage unit away from
the home position. Then, have a close look at the
cap rubber and check for any problem below.
5
Has the Tension
Spring assembled in
the Cap Unit come
off?
If the compression Spring assembled in the Cap
Unit, comes off, the sealing ability is lowered and
the cap rubber portion dose not fit to the surface of
the printhead. And the ink is not absorbed from the
head. Therefore, check that the Compression
Spring is securely assembled in the following
figured portion..
Table 3-15. Cleaning does not Solve the Print Problem (continued)
Step
Check Point
Action
F o r e i g n m a t t e r
D u s t
D a m a g e d a r e a
o n t h e r u b b e r
R u b b e r p a r t o f t h e c a p
Cap Assembly
CompressionSpring
Summary of Contents for Stylus Color 760
Page 1: ...EPSONStylusCOLOR760 Color ink jet printer SEIJ99004 SERVICE MANUAL ...
Page 8: ...C H A P T E R PRODUCTDESCRIPTION ...
Page 27: ...C H A P T E R OPERATINGPRINCIPLES ...
Page 53: ...C H A P T E R TROUBLESHOOTING ...
Page 72: ...C H A P T E R DISASSEMBLYANDASSEMBLY ...
Page 109: ...C H A P T E R ADJUSTMENT ...
Page 142: ...C H A P T E R MAINTENANCE ...
Page 152: ...APPENDIX C H A P T E R ...


