EPSON Stylus Photo 750
Revision A
Disassembly and Assembly
Disassembly
74
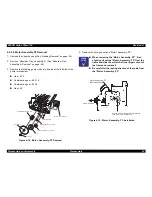
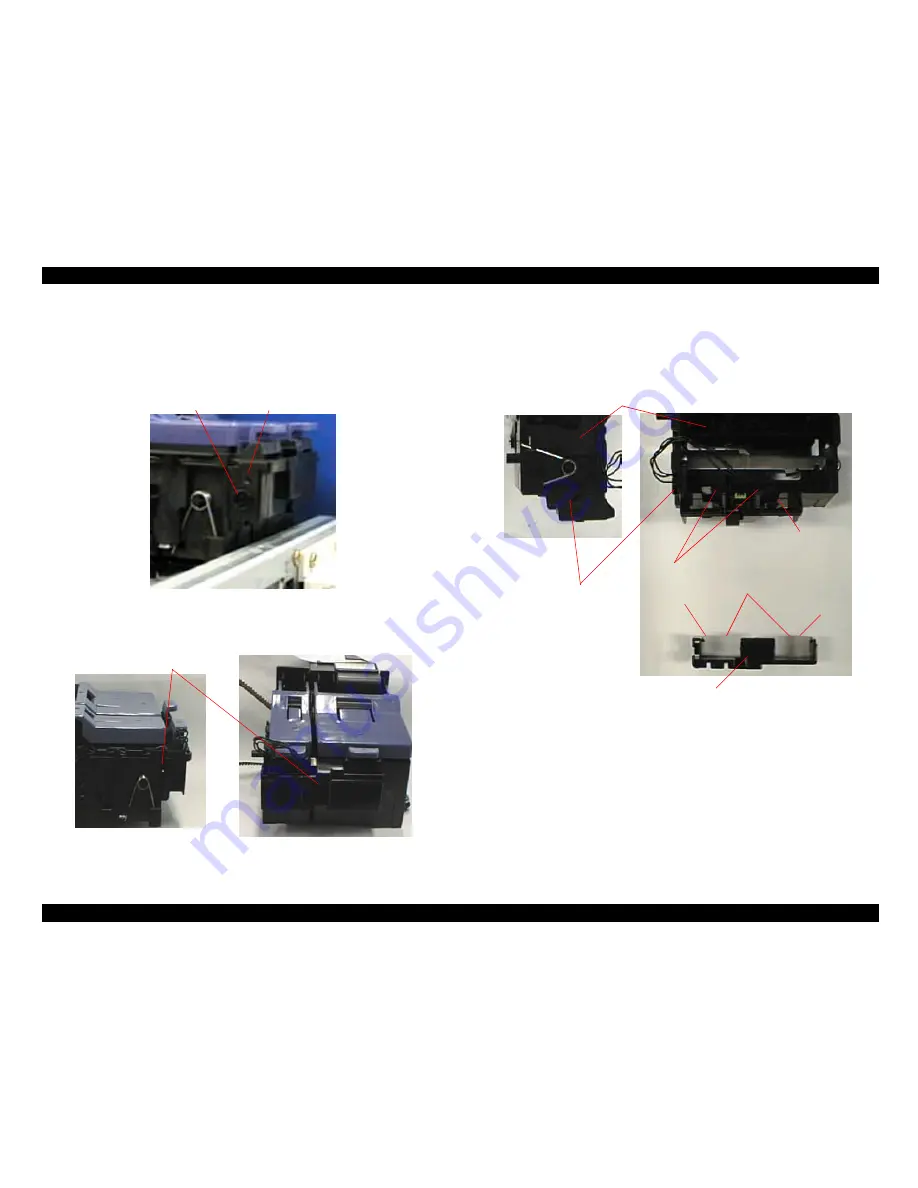
4.2.5.12 Cartridge Sensor(Sensor, I/C) Removal
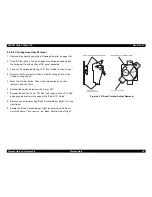
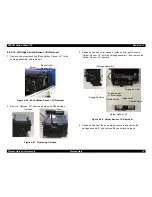
1. Remove one screw securing “Bush Holder, Sensor, I/C” to the
carriage assembly, and remove it.
Figure 4-26. Bush Holder, Sensor, I/C Removal
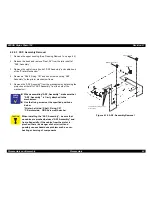
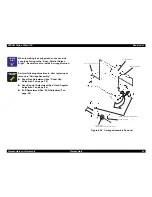
2. Remove “Harness, I/C” from the clamp part of the carriage.
Figure 4-27. Removing Harness
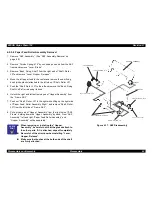
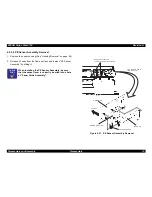
3. Release 4 hooks(2 outer hooks, 2 inside hooks), which secure
“Holder, Sensor, I/C” with the carriage assembly”, and remove the
“Holder, Sensor, I/C” upward.
Figure 4-28. Holder,Sensor, I/C Removal
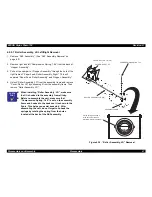
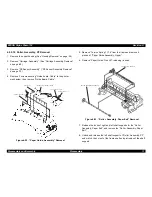
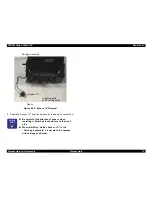
4. Release 2 hooks of the hook, which secure the sensor to the
carriage assembly”, and remove the sensor and harness.
Screw
Bush Holder,
Sensor, I/C
Harness
Engaging Holes
Outside Hook
Holder Sensor, I/C
Inside Hook
Outside Hook
Engaging Hole
Carriage Assembly
Engaging part
of inside hook
Summary of Contents for Stylus Photo 750
Page 1: ...EPSON Stylus Photo750 Color Inkjet Printer SEIJ98005 6 59 0 18 6 59 0 18 6 59 0 18 6 59 0 18 ...
Page 8: ... 3 7 5 4 PRODUCTDESCRIPTION ...
Page 32: ... 3 7 5 5 OPERATINGPRINCIPLES ...
Page 43: ... 3 7 5 6 TROUBLESHOOTING ...
Page 55: ... 3 7 5 7 DISASSEMBLYANDASSEMBLY ...
Page 81: ... 3 7 5 8 ADJUSTMENT ...
Page 95: ... 3 7 5 9 MAINTENANCE ...
Page 101: ... 3 7 5 APPENDIX ...
Page 111: ......
Page 112: ......
Page 113: ......
Page 114: ......

