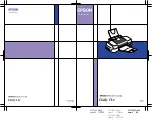
background image

Color Ink Jet Printer

Color Ink Jet Printer

Daily Use

Printed in Japan

99.11-5.9A

4011309

C01-00

Daily Use

4011309  Rev.0  
cover-F            

4011309    Rev.0   
cover-F       PMS265
4011309    Rev.0  
cover-F      DIC2425

4011309   Rev.0 
cover-F      DICF43

 BK

Summary of Contents for Stylus PHOTO 870

Page 1: ...k Jet Printer Color Ink Jet Printer DailyUse Printed in Japan 99 11 5 9A 4011309 C01 00 DailyUse 4011309 Rev 0 cover F 4011309 Rev 0 cover F PMS265 4011309 Rev 0 cover F DIC2425 4011309 Rev 0 cover F DICF43 BK ...

Page 2: ... customer support information Online Guides included on the CD ROM The guides on the CD ROM included with your printer will help you learn more about your printer and color printing To view these guides you must have a Web browser installed on your computer For more information on using this CD ROM see the included CD ROM Booklet Reference Guide Provides detailed information about printer software...

Page 3: ...alterations to this product or excluding the U S failure to strictly comply with SEIKO EPSON CORPORATION s operating and maintenance instructions SEIKO EPSON CORPORATION shall not be liable for any damages or problems arising from the use of any options or any consumable products other than those designated as Original EPSON Products or EPSON Approved Products by SEIKO EPSON CORPORATION SEIKO EPSO...

Page 4: ...ii R4C475 short bk Rev_C A5 size FRONT FM 2 15 00 Pass 2 L Proof Sign off M Hida _______ N Nomoto _______ editor name _______ ...

Page 5: ...anel Functions 7 Loading Special Paper Envelopes and Other Media 9 Loading Special Paper and Other Media 9 Loading Envelopes 11 Printing with Windows 13 Printer Software Introduction 13 Making Changes to Printer Settings 15 Previewing your printout 23 Getting Information Through Online Help 26 Printing with Macintosh 27 Printer Software Introduction 27 Making Changes to Printer Settings 27 Preview...

Page 6: ...n off M Hida _______ N Nomoto _______ editor name _______ Troubleshooting 53 Correcting USB Problems 53 Error Indicators 57 Typical Problems and Solutions 59 Cancelling Printing 61 Where to Get Help 63 Options and Consumable Products 70 Options and Consumable Products 70 ...

Page 7: ...rly grounded power outlets Avoid using outlets on the same circuit as photocopiers or air control systems that regularly switch on and off Avoid electrical outlets controlled by wall switches or automatic timers Keeptheentire computer system away from potentialsources of electromagnetic interference such as loudspeakers or the base units of cordless telephones Do not use a damaged or frayed power ...

Page 8: ...e building installation must be protected by a 16 Amp circuit breaker Bei Anschluß des Druckers an die Stromversorgung muß sichergestellt werden daß die Gebäudeinstallation mit einem 16 A Überstromschalter abgesichert ist A Few Precautions When using the printer Do not put your hand inside the printer or touch the ink cartridges during printing Do not move the print head by hand otherwise you may ...

Page 9: ... unpacked for a long time before using it normal printing may not be possible Do not use an ink cartridge beyond the date printed on the cartridge carton otherwise it may result in reduced print quality For best results use up the ink cartridges within six months of first installing them Do not touch the green chip on the side of the cartridge This may inhibit normal operation and printing Do not ...

Page 10: ...k supply port or surrounding area When choosing a place for the printer Place the printer on a flat stable surface that is larger than the printer The printer will not operate properly if it is tilted or at an angle Avoid places subject to rapid changes in temperature and humidity Also keep the printer away from direct sunlight strong light or heat sources Avoid places subject to shocks and vibrat...

Page 11: ...x machines and copiers in an effort to reduce air pollution caused by power generation For United Kingdom Users Use of options EPSON UK Limited shall not be liable against any damages or problems arising from the use of any options or consumable products other than those designated as Original EPSON Products or EPSON Approved Products by EPSON UK Limited Safety information w Warning This appliance...

Page 12: ...th the letter E or the earth symbol G The blue wire must be connected to the terminal in the plug marked with the letter N The brown wire must be connected to the terminal in the plug marked with the letter L If damage occurs to the plug replace the cord set or consult a qualified electrician Replace fuses only with a fuse of the correct size and rating Warnings Cautions and Notes w Warnings must ...

Page 13: ..._ N Nomoto _______ editor name _______ Printer Parts and Functions Printer Parts and Control Panel Functions sheet feeder edge guides output tray extension output tray printer cover paper support ink cartridge clamps control panel adjust lever ink cartridge replacement button print head ...

Page 14: ...he printer cover not in the control panel Light Description P power On when the printer is on Flashes when printer is receiving data printing replacing an ink cartridge charging ink or cleaning the print head S paper out On when the printer is out of paper Load paper in the sheet feeder then press the E load eject button to resume printing Flashes when the paper is jammed Take all of the paper out...

Page 15: ...SON read the instruction sheets packed with the media first and keep the following points in mind For more details on using such media see Paper Handling in the online Reference Guide Make sure the printable side of the paper is facing up when loading media into the sheet feeder See the instruction sheets packed with the media to determine which side is the printable surface Some media have cut co...

Page 16: ...ilm If you wish to load multiple sheets and load a maximum of 20 sheets for A4 set the minimum top margin of the page to 30 mm Ink Jet Transparencies Up to 30 transparencies Always put a sheet of plain paper under the stack of transparencies Photo Quality Self Adhesive Sheet One sheet at a time Photo Paper Up to 20 sheets For 200 300 mm Photo Paper you can only load one sheet at a time Always put ...

Page 17: ...et feeder Note The folding quality and thickness of envelopes varies widely If the total thickness of the stack of envelopes exceeds 10 mm press each envelope in the stack flat before loading Set the adjust lever to the position To do this open the printer cover and reposition the lever Note Return the adjust lever to the 0 position which is the normal position after you finish printing on envelop...

Page 18: ...st with the flap side down as shown in the illustration Do not use envelopes that are curled or folded Make sure to flatten the envelope flaps before loading Also avoid using envelopes that are too thin they may curl during printing Select Plain Paper as the Media Type setting in the printer driver Available envelopes sizes are No 10 DL C6 132 mm 220 mm ...

Page 19: ...er driver see Making Changes to Printer Settings on page 15 For information on using the printer utilities see Using the Printer Utilities in the online Reference Guide Note The specific features available in the printer software vary depending on the version of Windows you are using Online help provides more information about the printer software See Getting Information Through Online Help on pag...

Page 20: ...File menu click Print or Print Setup 2 In the dialog box that appears click Printer Setup Options orProperties Dependingonyourapplication youmayneed to click a combination of these buttons The printer driver opens From the Windows Start menu 1 Click Start point to Settings then click Printers 2 For Windows 95 and 98 select your printer then click Properties on the File menu For Windows NT 4 0 sele...

Page 21: ...e Copies Orientation Paper Source Printable Area Layout Reduce Enlarge Multi Page Watermark Automatic This mode provides the quickest and easiest way to start printing See Using the Automatic mode on page 19 PhotoEnhance This mode lets you choose from a variety of image correction settings specially designed for photos See Using the PhotoEnhance mode on page 20 Custom This mode lets you choose fro...

Page 22: ...n the printer To find out what Media Type you are using find your media in the list below and refer to the corresponding Media Type under which it is grouped shown in larger type For some media there are several Media Type settings to choose from Plain Paper 360 dpi Ink Jet Paper Plain paper Envelopes EPSON Premium Ink Jet Plain Paper A4 S041214 EPSON 360 dpi Ink Jet Paper A4 S041059 S041025 EPSON...

Page 23: ...0 S041122 EPSON Photo Quality Self Adhesive Sheet A4 S041106 EPSON Ink Jet Note Cards A6 with envelopes S041147 EPSON Ink Jet Greeting Cards 5 x 8 with envelopes S041148 EPSON Ink Jet Greeting Cards 8 x 10 with envelopes S041149 EPSON Matte Paper Heavyweight A4 S041256 S041258 S041259 EPSON Matte Paper Heavyweight Letter S041257 EPSON Photo Paper A4 S041140 EPSON Photo Paper Letter S041141 EPSON P...

Page 24: ...y of special media varies by location EPSON Photo Quality Glossy Film A4 S041071 EPSON Photo Quality Glossy Film Letter S041072 EPSON Photo Quality Glossy Film A6 S041107 EPSON Photo Stickers 16 A6 S041144 EPSON Photo Stickers 4 A6 S041176 EPSON Ink Jet Transparencies A4 S041063 EPSON Ink Jet Transparencies Letter S041064 EPSON Premium Glossy Photo Paper A4 S041287 S041297 EPSON Premium Glossy Pho...

Page 25: ...in black and white or grayscale To make the Media Type setting see Making the Media Type setting on page 16 Note Depending on the media selected in the Media Type list while Automatic is selected a slider appears under the Custom radio button that lets you choose from Quality or Speed settings Select Quality when print quality is more important than speed Most Windows applications feature paper si...

Page 26: ...you can apply to your photo images before printing PhotoEnhance does not affect your original data Note This mode is only available only when printing 32 bit color data Printing with PhotoEnhance selected may increase the time required for printing depending on your computer system and the amount of data contained in your image Do not print using PhotoEnhance mode if Roll Paper is selected as the ...

Page 27: ...tos taken with a digital camera to give your printed images the smooth natural appearance of photographs taken with a film camera Standard This setting provides standard image correction for most photos Try this first People This setting is best for photos of people Nature This setting is best for outdoor scenery such as mountains sky and oceans Soft Focus This setting makes your photos look as if...

Page 28: ...You can also create and save your own custom settings You can select from the following ready made settings Text Graph This setting is good for printing presentation documents such as graphs and charts Economy This setting is best for printing drafts of text ICM For Windows 95 and 98 This setting automatically adjusts printout colors to match colors on your screen ICM stands for Image Color Matchi...

Page 29: ... or image you wish to print 3 When you select a Custom setting other settings such as Print Quality Halftoning and Color Adjustment are made automatically Changes to these settings are reflected in the display on the left side of the Main menu 4 Before printing be sure to verify the Media Type and Ink settings as they may be affected by the Custom setting you select See Making the Media Type setti...

Page 30: ...his feature enlarges or reduces the size of the previewed page Fit to screen This feature scales the previewed page so that it fits the size of the window Select this option if you want to see the entire page at one time Maximum zoom This feature displays the previewed page at the maximum possible zoom ratio Printable area on off This feature displays a rectangle on the page being previewed This r...

Page 31: ...ppearing on the left side of the preview window Then add or remove it using the commands in the Print Options menu Watermark This feature opens the watermark settings dialog box This dialog box allows you to change any of the current watermark settings Reset watermark settings This feature returns all watermark settings to what they were when the Preview was first opened If nothing has been change...

Page 32: ...ication Open the File menu and choose Print or Print Setup Then click Printer Setup Options or Properties Depending on your application you may need to click a combination of these buttons Click Helpat the bottom of the Main Paper Layout and Utility menus for help related to the items on that menu For Windows 95 98 and NT 4 0 you can get specific help related to any item on a menu by right clickin...

Page 33: ...ter Settings on page 27 For information on using the printer utilities see Using the Printer Utilities in the online Reference Guide You can also get more information about the printer software by clicking the help icon in any of the dialog boxes in the printer driver Making Changes to Printer Settings You will find the printer driver settings in the following dialog boxes Print dialog box click P...

Page 34: ...ions For information on page layout options Automatic This mode provides the quickest and easiest way to start printing See Using the Automatic mode on page 32 PhotoEnhance This mode lets you choose from a variety of image correction settings specially designed for photos See Using the PhotoEnhance mode on page 32 Custom This mode lets you choose from a list of ready made or personalized settings ...

Page 35: ...in the printer To find out what Media Type you are using find your media in the list below and refer to the corresponding Media Type under which it is grouped shown in larger type For some media there are several Media Type settings to choose from Plain Paper 360 dpi Ink Jet Paper Plain paper Envelopes EPSON Premium Ink Jet Plain Paper A4 S041214 EPSON 360 dpi Ink Jet Paper A4 S041059 S041025 EPSO...

Page 36: ...0 S041122 EPSON Photo Quality Self Adhesive Sheet A4 S041106 EPSON Ink Jet Note Cards A6 with envelopes S041147 EPSON Ink Jet Greeting Cards 5 x 8 with envelopes S041148 EPSON Ink Jet Greeting Cards 8 x 10 with envelopes S041149 EPSON Matte Paper Heavyweight A4 S041256 S041258 S041259 EPSON Matte Paper Heavyweight Letter S041257 EPSON Photo Paper A4 S041140 EPSON Photo Paper Letter S041141 EPSON P...

Page 37: ...y of special media varies by location EPSON Photo Quality Glossy Film A4 S041071 EPSON Photo Quality Glossy Film Letter S041072 EPSON Photo Quality Glossy Film A6 S041107 EPSON Photo Stickers 16 A6 S041144 EPSON Photo Stickers 4 A6 S041176 EPSON Ink Jet Transparencies A4 S041063 EPSON Ink Jet Transparencies Letter S041064 EPSON Premium Glossy Photo Paper A4 S041287 S041297 EPSON Premium Glossy Pho...

Page 38: ...to print in black and white or grayscale To make the Media Type setting see Making the Media Type setting on page 29 Note Depending on the media you choose in the Media Type list while Automatic is selected a slider appears to the right of the Mode options that lets you choose Quality Speed or an intermediate setting Select Quality when print quality is more important than speed Using the PhotoEnh...

Page 39: ...with the PhotoEnhance mode on You can select from the following settings If you are printing photos taken with a digital camera you can alsoselecttheDigital Camera Correction checkbox togiveyour printed images the smooth natural appearance of photographs taken with a film camera Standard This setting provides standard image correction for most photos Try this first People This setting is best for ...

Page 40: ...g 1 Verify the Media Type and Ink settings in the Printdialog box For details see Making the Media Type setting on page 29 2 Click the Custom button in the Print dialog box This enables the Custom Settings list located below and to the right of the Custom radio button 3 From the Custom Settings list select the most appropriate setting for the type of document or image you will print Text Graph Thi...

Page 41: ...t dialog box Previewing your printout The Preview feature allows you to see how your document will look before actually printing it Follow these steps to preview your document 1 Make your printer driver settings 2 Click the Preview icon button in the Print dialog box The Print button changes into a Preview button Note Use the Preview icon button to switch between the Print Preview and Save File mo...

Page 42: ...ture lets you select move and resize watermarks Zoom This feature enlarges the or reduces the size of the previewed page Margin Display Non Display This feature displays or hides borderlines which indicate the printable area Watermark Editing This button opens the Watermark Edit box This dialog box allows you to add watermarks to the document and to change any of the current watermark settings Add...

Page 43: ... button in the Print dialog box This feature lets you print the data at a later time simply by double clicking the saved file Follow these steps Note Use the Preview icon button to switch between the Print Preview and Save File modes Click the icon to select the mode you want 1 Make your printer driver settings 2 Click the Preview icon button in the Print dialog box repeatedly until the Print butt...

Page 44: ...ks reliability The printer s indicator lights will inform you when it is time to obtain a replacement ink cartridge and when it is time to replace an empty cartridge You can also check ink levels and start the ink cartridge replacement procedure from your computer using the Status Monitor 3 utility See the online Reference Guide for more information This table describes the status of the lights on...

Page 45: ...vered by EPSON s warranties Leave the old cartridge installed in the printer until you have obtainedareplacement otherwise inkremainingintheprint head nozzles may dry out Do not refill the ink cartridges The ink cartridges for this printer are not for refill The printer calculates the amount of ink remaining using an IC chip on the ink cartridge Even if the cartridge is refilled the amount of ink ...

Page 46: ... the Status Monitor s Printer Status window then follow the on screen instructions 1 Make sure the printer is on The P power light should be on but not flashing Determine which cartridge needs to be replaced as indicated by the B black and A color ink out lights 2 Lower the output tray at the front of the printer then open the printer cover 3 Press the orange ink cartridge replacement button The p...

Page 47: ...artridge you want to replace as far as it will go The cartridge rises partly out of the cartridge holder 5 Lift the cartridge out of the printer and dispose of it properly Do not take the used cartridge apart or try to refill it The illustration shows color ink cartridge replacement To replace the black ink cartridge lift up only the smaller clamp on the left ...

Page 48: ...stalled an ink cartridge without removing the yellow tape seal you must remove the cartridge and installanewone Preparethenewcartridgebyremoving the yellow tape seal then install it in the printer Do not remove the blue portion of the tape seal from the top of the cartridge otherwise the print head may become clogged and be unable to print Do not remove the tape seal from the bottom of the cartrid...

Page 49: ...gn the tabs on the ink cartridge so that they are resting on the tabs protruding from the base of the opened ink cartridge clamp Do not apply excessive force to the cartridge c Caution Make sure the ink cartridge tabs are not under the tabs protruding from the base of the opened ink cartridge clamp as this could damage the clamp ...

Page 50: ... become unable to print 9 Press the orange ink cartridge replacement button The printer moves the print head and begins charging the ink delivery system This process takes about one minute to complete When the ink charging process is finished the printer returns the print head to its home position the P power light stops flashing and stays on and the B black and A color lights turn on The illustra...

Page 51: ... _______ N Nomoto _______ editor name _______ c Caution The P power light continues to flash while the printer performs the ink charging operation Never turn off the printer while this light is flashing Doing so can result in incomplete charging of ink 10 Close the printer cover ...

Page 52: ...f by using the printer s control panel buttons Using the Nozzle Check utility Follow the steps below to use the Nozzle Check utility Note Do not use the Nozzle Check utility while printing is in progress otherwise your printout may be marred For Windows users 1 Make sure A4 or Letter size paper is loaded in the sheet feeder 2 Click the Utility tab in the printer software then click the Nozzle Chec...

Page 53: ...tons Follow the steps below to check the print head nozzles using the control panel buttons 1 Turn off your printer 2 Make sure that A4 or Letter size paper is loaded in the sheet feeder 3 Hold down the E load eject button in the illustration below and press the P power button in the illustration below to turn on the printer 4 Then release both buttons ...

Page 54: ...rinted lines is missing there is a problem with the printer This could be a clogged ink nozzle or a misaligned print head See the next section for details on cleaning the print head For information on aligning the print head see Aligning the Print Head on page 52 Cleaning the Print Head If you find that the printed image is unexpectedly faint or dots in the printed image are missing you may be abl...

Page 55: ...ut light is flashing or on you cannot clean the print head Replace the appropriate ink cartridge first Do not start the Head Cleaning or Nozzle Check utility while printing is in progress otherwise your printout may be marred Using the Head Cleaning utility Follow the steps below to use the Head Cleaning utility For Windows users 1 Make sure that the printer is on and both B black and A color ink ...

Page 56: ...tton 3 Follow the on screen instructions Using the control panel buttons Follow the steps below to clean the print head using the control panel buttons 1 Make sure that the P power light is on and that both the B black and A color ink out lights are off Note If the B black or A color ink out light is flashing or on you cannot clean the head 2 Hold down the R cleaning button for three seconds The p...

Page 57: ...hasn t improved after repeating this procedure four or five times turn the printer off and leave it alone overnight Then do the head cleaning again If the print quality still has not improved one or both of your ink cartridges may be old or damaged and may need to be replaced To replace an ink cartridge before it is empty see Replacing Ink Cartridges in the online Reference Guide If print quality ...

Page 58: ...ent utility while printing is in progress otherwise your printout may be marred For Windows users 1 Make sure A4 or Letter size plain paper is loaded in the sheet feeder 2 Click the Utility tab in the printer software then click the Print Head Alignment button 3 Follow the messages on your screen to align the print head For Macintosh users 1 Make sure A4 or Letter size plain paper is loaded in the...

Page 59: ...which is upgraded from Windows 95 to 98 For details about your computer contact your dealer Make sure that EPSON USB Printer Devices appears in the Device Manager menu If you canceled the plug and play driver installation before the procedure was completed either the USB printer device driver or the printer driver may be incorrectly installed Follow the steps below to check the installation and re...

Page 60: ... does not appear in the Device Manager menu click the plus sign beside Other Devices to view the installed devices If USB Printer appears under Other Devices the USB printer device driver is not installed correctly If EPSON Stylus Photo 870 appears the printer driver is not installed correctly If neither USB Printer nor EPSON Stylus Photo 870 appears under Other Devices click Refresh or unplug the...

Page 61: ... 4 Under Other Devices click USB Printer or EPSON Stylus Photo 870 then click Remove Then click OK 5 When the following dialog box appears click OK Then click OK to close the Properties window 6 Turn off the printer and restart your PC Then reinstall the driver from the beginning following the instructions in the Setup Guide ...

Page 62: ... a USB hub connect the printer to the first tier of the hub or connect the printer to the computer s USB port directly For PCs try reinstalling the USB printer device driver and the printer software First uninstall EPSON Printer Software using the Add Remove Programs utility in the Control Panel then uninstall EPSON USB Printer Devices Next reinstall the software as described in Setup Guide If EPS...

Page 63: ...blem and Solution S O Paper out No paper is loaded in the printer Load paper in the sheet feeder then press the E load eject button The printer resumes printing and the light goes out S F B N AN Paper jam Paper has jammed in the printer Press the E load eject button The printer ejects the jammed paper and then resumes printing If the error is not cleared open the printer cover and remove the jamme...

Page 64: ...or ink cartridge T008 A O Ink out color ink cartridge The color ink cartridge is empty or not installed Replace the color ink cartridge with a new one T008 See Replacing Ink Cartridges on page 38 Wrong ink color ink cartridge The installed color ink cartridge cannot be used by this printer Use the appropriate color ink cartridge T008 See Replacing Ink Cartridges on page 38 P F S F B O AO Carriage ...

Page 65: ...lity problems try the solutions offered here Horizontal banding Try one or more of these solutions Makesure the printable side of the paperis face up in the sheet feeder Run the Head Cleaning utility to clear any clogged ink nozzles Vertical misalignment Try one or more of these solutions Makesure the printable side of the paperis face up in the sheet feeder Run the Print Head Alignment utility Tu...

Page 66: ...ntable side of the paperis face upinthe sheet feeder Make sure your paper is not damaged dirty or too old Set the adjust lever to the position and make sure the Media Type setting in your printer driver is correct Paper feed or paper jam problems If the printer doesn t feed paper feeds multiple pages or the paper is jammed remove and reload the stack of paper then press the E load eject button Als...

Page 67: ...rect or garbled characters or images you may need to cancel printing To cancel printing follow the instructions below For Windows 95 98 and NT 4 0 When you send a print job to the printer the Progress Meter appears on your computer screen Click the Stop button to cancel printing For Macintosh The procedure for canceling printing for Macintosh varies depending upon whether background printing is on...

Page 68: ...m the application menu 2 Press the P power button to turn off the printer 3 Click the name of the document which is printing in the Document Name list then click the Stop icon button to cancel the print job When background printing is off 1 Press the P power button to turn off the printer 2 Hold down the J command key on your keyboard and press the period key to cancel the print job ...

Page 69: ...el is on the back of the printer Printer model Brand and model of your computer Printer software version Click About in your printer driver Windows version you are using Software application s you normally use with your printer and their version number s For United Kingdom and the Republic of Ireland Users If you purchased your product in the UK or the Republic of Ireland EPSON UK LTD provides a r...

Page 70: ...ormation on installing configuring and operating your EPSON products Arranging for faulty EPSON products to be repaired within the warranty period Pre Sales Enquiry Desk Our Enquiry Desk team can be contacted by calling 0800 220546 in the UK or 1 800 409132 from the Republic of Ireland by faxing 01442 227271 in the UK or 0044 1442 227271 from the Republic of Ireland and via Email at info epson co ...

Page 71: ...stem will guide you through a number of choices before faxing the information to your fax machine EPSON Bulletin Board System This is where you can download the latest software and drivers Visitthe BBS to check out the latestversions Ifyou havea modem phone 02 9417 5090 Internet URL http www epson com au Access the EPSON Australia World Wide Web pages Worth taking your modem here for the occasiona...

Page 72: ...lpdesk numbers are We encourage you to have all the relevant information on hand when you ring The more information you prepare the faster we can help solve the problem This information includes the User s Guide for your EPSON product type of computer operating system application programs andany otherinformation youfeel is required For India Users Contacts for information support and services are ...

Page 73: ...on Trading Shah Alam Head Office For Singapore Users Sources of information support and services available from Epson Singapore are World Wide Web www epson com sg Information on product specifications drivers for download Frequently Asked Questions FAQ Sales Enquiry and Technical Email Support are available Epson HelpDesk Phone 065 8323111 Our HelpDesk team can help you with the following over th...

Page 74: ... with the following information Product information Answers to Frequently Asked Questions FAQs Latest versions of EPSON printer drivers Users can access our World Wide Web home page at http www epson com hk Electronic bulletin board system An electronic bulletin board system BBS is also available to obtain printer information and the latest versions of printer drivers You can log on to the followi...

Page 75: ... N Nomoto _______ editor name _______ For Philippines Users To obtain technical support as well as other after sales services users are welcome to contact the EPSON Philippines Representative Office at the telephone and fax numbers below Phone 632 813 6552 Fax 632 813 6545 BBS 632 814 0595 ...

Page 76: ...nts Parallel Interface Cable shielded C83602 from D SUB 25 pin computer to 36 pin Amphenol 57 Series printer USB Interface Cable shielded C83623 from Series A 4 pin computer to Series B 4 pin printer Note Note The asterisk is a substitute for the last digit of the product number which varies by location Depending on your geographic location one or both of these cables may not be supplied c Caution...

Page 77: ...igh quality printing needs Black ink cartridge Standard Capacity T007 Light Capacity T010 Color ink cartridge T008 EPSON Premium Ink Jet Plain Paper A4 S041214 EPSON 360 dpi Ink Jet Paper A4 S041059 S041025 EPSON 360 dpi Ink Jet Paper Letter S041060 S041028 EPSON Photo Quality Ink Jet Paper A4 S041061 S041026 EPSON Photo Quality Ink Jet Paper Letter S041062 S041029 EPSON Photo Quality Ink Jet Pape...

Page 78: ...o Paper A4 S041140 EPSON Photo Paper Letter S041141 EPSON Photo Paper 4 6 S041134 EPSON Photo Paper 100 150 mm S041255 EPSON Photo Paper 200 300 mm S041254 EPSON Photo Paper 89mm 7M S041281 EPSON Photo Paper 100mm 8M S041279 EPSON Photo Paper 210mm 10M S041280 EPSON Photo Paper Cards A4 S041177 EPSON Photo Stickers 16 A6 S041144 EPSON Photo Stickers 4 A6 S041176 EPSON Panoramic Photo Paper 210 594...

Page 79: ... No 1 Temasek Avenue 36 00 Millenia Tower Singapore 039192 Phone 065 33 77 911 Fax 065 33 41 185 EPSON HONG KONG LTD Rooms 4706 10 47 F China Resources Bldg 26 Harbour Road Wanchai Hong Kong Phone 2585 4300 Fax 2827 7083 EPSON TAIWAN TECHNOLOGY TRADING LTD 10F No 287 Nanking E Road Sec 3 Taipei Taiwan R O C Phone 02 717 7360 Fax 02 712 9164 EPSON ITALIA S p A V le F lli Casiraghi 427 20099 Sesto S...

Page 80: ...k Jet Printer Color Ink Jet Printer DailyUse Printed in Japan 99 11 5 9A 4011309 C01 00 DailyUse 4011309 Rev 0 cover F 4011309 Rev 0 cover F PMS265 4011309 Rev 0 cover F DIC2425 4011309 Rev 0 cover F DICF43 BK ...

Reviews: