

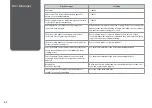


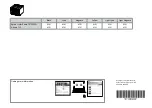

Print Quality/Layout
Problems
Problems
Solution No.
You see banding (light lines) in your printouts or copies.
ABDEGI
Your printout is blurry or smeared.
ABDEFH
Your printout is faint or has gaps.
ABCDG
Your printout is grainy.
E
You see incorrect or missing colors.
DG
The image size or position is incorrect.
JKLMN
Solutions
A
Make sure you select the correct paper type.
R
&
10
B
Make sure the printable side (the whiter or glossier side) of the paper is facing to the correct direction.
R
&
11
C
When you select Standard Quality or Best as the Quality setting, set the Bidirectional setting to Off. Bidirectional printing
decreases print quality.
R
&
41
D
Clean the print head.
R
&
55
E
Align the print head.
R
&
57 If quality is not improved, try aligning using the printer driver utility. See your online User’s Guide
to align the print head.
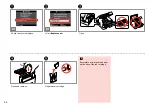
F
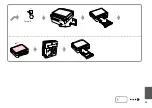
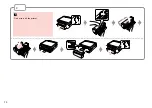
To clean the inside of the printer, make a copy without placing a document on the document table. For further information,
see your online User’s Guide.
G
For best results, use up ink cartridge within six months of opening the package.
R
&
63
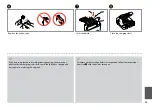
H
Try to use genuine Epson ink cartridges and paper recommended by Epson.
I
If a moiré (cross-hatch) pattern appears on your copy, change the Reduce/Enlarge setting or shift the position of your original.
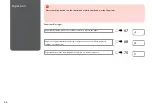
J
Make sure you selected the correct Paper Size, Layout, Expansion, and Reduce/Enlarge setting for the loaded paper.
R
&
28, 41
K
Make sure you loaded paper and placed the original correctly.
R
&
11, 19
L
Adjust the CD/DVD print position if it is misaligned.
R
&
27
M
If the edges of the copy or photo are cropped off, move the original slightly away from the corner.
N
Clean the document table. See your online User’s Guide.
Try the following solutions in order from the Top. For further information, see your online User’s Guide.
Summary of Contents for Stylus Photo TX720WD
Page 1: ...Basic Operation Guide for use without a computer ...
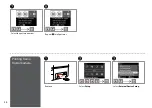
Page 9: ... Handling Media and Originals ...
Page 21: ...21 Copy Mode ...
Page 29: ...29 Print Photos Mode ...
Page 42: ...42 ...
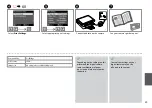
Page 43: ...43 Other Mode ...
Page 52: ...52 ...
Page 53: ...53 Setup Mode Maintenance ...
Page 61: ...61 Solving Problems ...
Page 67: ...67 A Operate the button as instructed on the LCD screen ...
Page 68: ...68 If an error message cannot be cleared try the following steps Q B ...
Page 69: ...69 Turn off ...