EPSON Stylus Pro 10000/10000CF
Revision A
Disassembly & assembly
Disassembly Flow
149
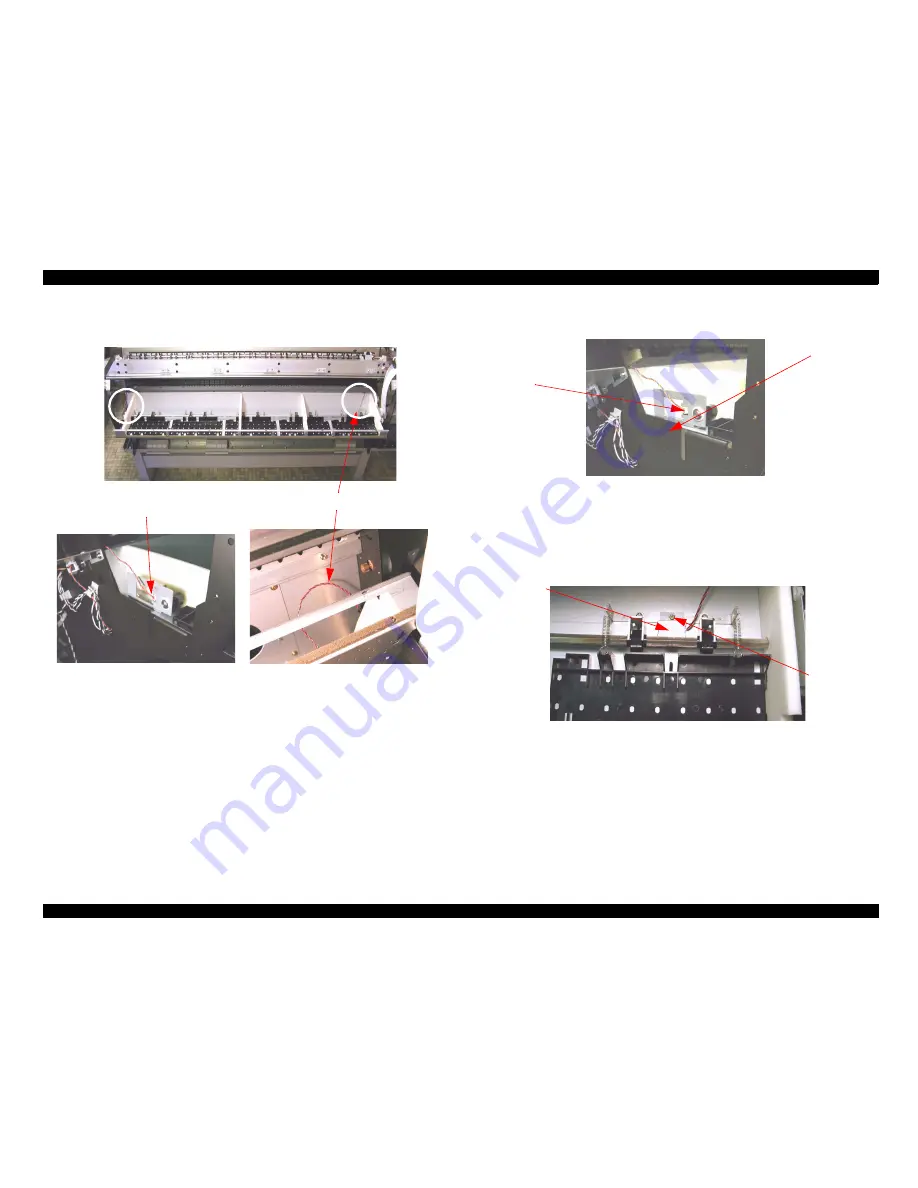
11. Open as inside of the fan duct becomes upward like the rough sketch, after it raises it a
little upward, while paying attention so as not to scar each cable of the right and left.
Figure 4-76.
12. Disconnect left side suction location detect sensor cable connector.
Figure 4-77.
13. Remove one screw (M4x8) fixing right P_FRONT sensor, and remove P_FRONT
sensor with bracket.
Figure 4-78.
14. Remove the Fan Duct.
Cable right side
Cable left side
Suction location
detect sensor cable
P_FRONT sensor
Screw
Summary of Contents for Stylus Pro 10000 Series
Page 7: ...Revision Status ...
Page 8: ...Revision Issued Date Description Rev A March 30 2001 First Release ...
Page 13: ...C H A P T E R PRODUCTDESCRIPTION ...
Page 59: ...EPSON Stylus Pro 10000 10000CF Revision B Product Description Jumper Settings 59 ...
Page 60: ...C H A P T E R OPERATINGPRINCIPLES ...
Page 86: ...C H A P T E R TROUBLESHOOTING ...
Page 113: ...C H A P T E R DISASSEMBLY ASSEMBLY ...
Page 187: ...C H A P T E R ADJUSTMENT ...
Page 276: ...C H A P T E R MAINTENANCE ...
Page 289: ...C H A P T E R APPENDIX ...
Page 315: ......
Page 316: ......
Page 317: ......
Page 318: ......
Page 319: ......
Page 320: ......
Page 321: ......
Page 322: ......
Page 323: ......


