EPSON Stylus Pro 10000/10000CF
Revision A
Disassembly & assembly
Disassembly Flow
153
7.
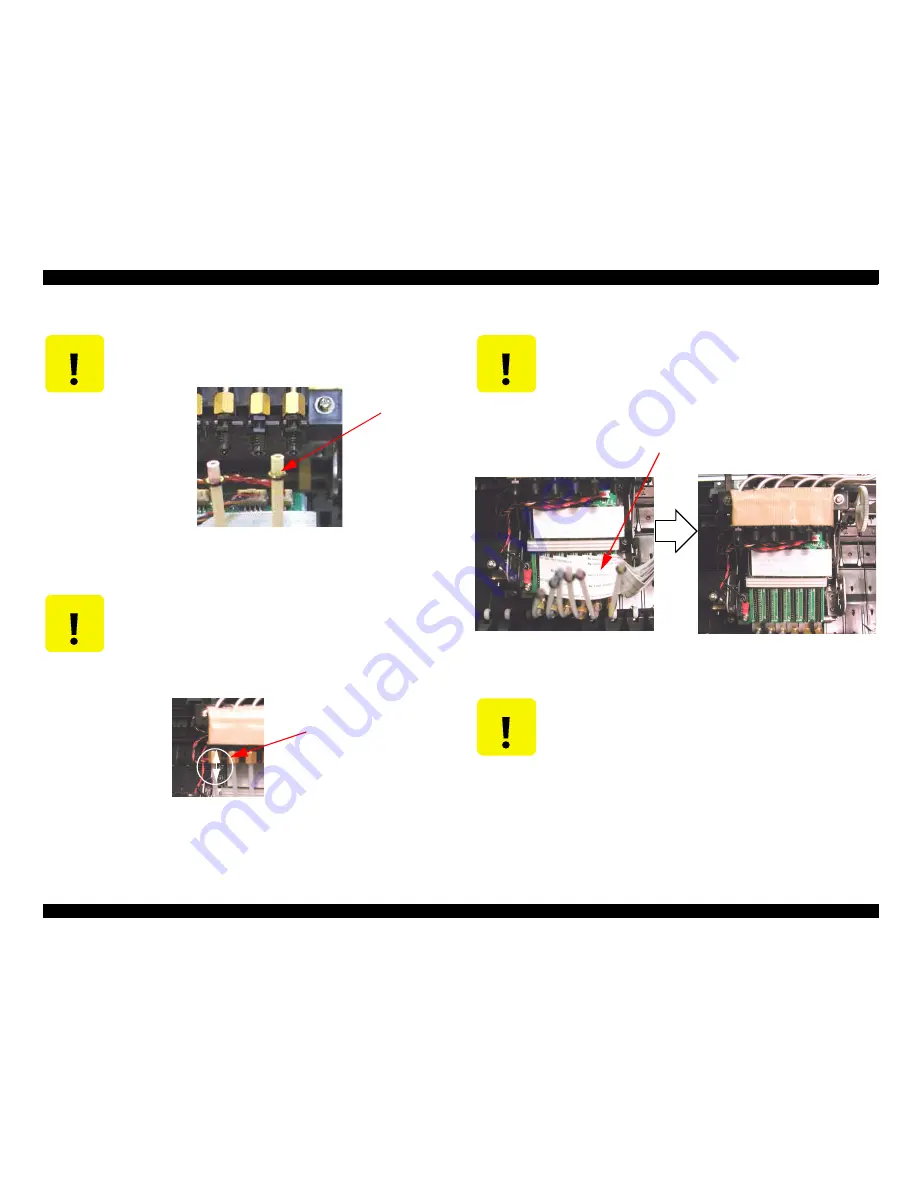
Disconnect all head cables (6 pieces) from the Head board.
Figure 4-88.
C A U T I O N
Do not lose the O ring between the tube and nut.
Do not touch with the empty hand and also, do not soil. (It becomes the
cause of ink leakage.)
Figure 4-86.
C A U T I O N
When assembly, there is ink leakage occurs by the tightening
defectiveness of the nut, if it is not the condition where the tube was
plugged vertically to the nut joint department.
Tightening of the nut with the torque wrench of the exclusive use
(#E589: torque 1kg).
Confirm that the O-ring (packing) is not transforming.
Figure 4-87.
O ring
As the pipe becomes vertical
to the nut it joins.
C A U T I O N
Do not loosen the nut on the side of the metal pipe.
C A U T I O N
Plug it firmly until the head cable is related about the back on the
occasion of the attachment. The contact lack becomes the cause that
dot missing and the obstacle of the C362DRV board.
Head cable
Summary of Contents for Stylus Pro 10000 Series
Page 7: ...Revision Status ...
Page 8: ...Revision Issued Date Description Rev A March 30 2001 First Release ...
Page 13: ...C H A P T E R PRODUCTDESCRIPTION ...
Page 59: ...EPSON Stylus Pro 10000 10000CF Revision B Product Description Jumper Settings 59 ...
Page 60: ...C H A P T E R OPERATINGPRINCIPLES ...
Page 86: ...C H A P T E R TROUBLESHOOTING ...
Page 113: ...C H A P T E R DISASSEMBLY ASSEMBLY ...
Page 187: ...C H A P T E R ADJUSTMENT ...
Page 276: ...C H A P T E R MAINTENANCE ...
Page 289: ...C H A P T E R APPENDIX ...
Page 315: ......
Page 316: ......
Page 317: ......
Page 318: ......
Page 319: ......
Page 320: ......
Page 321: ......
Page 322: ......
Page 323: ......


