EPSON Stylus Pro 4400/4450/4800/4880/4880C
Revision C
Disassembly & Assembly
Disassembly Procedures
270
4.2.7.2 Motor Assy., CR
1.
2.
3.
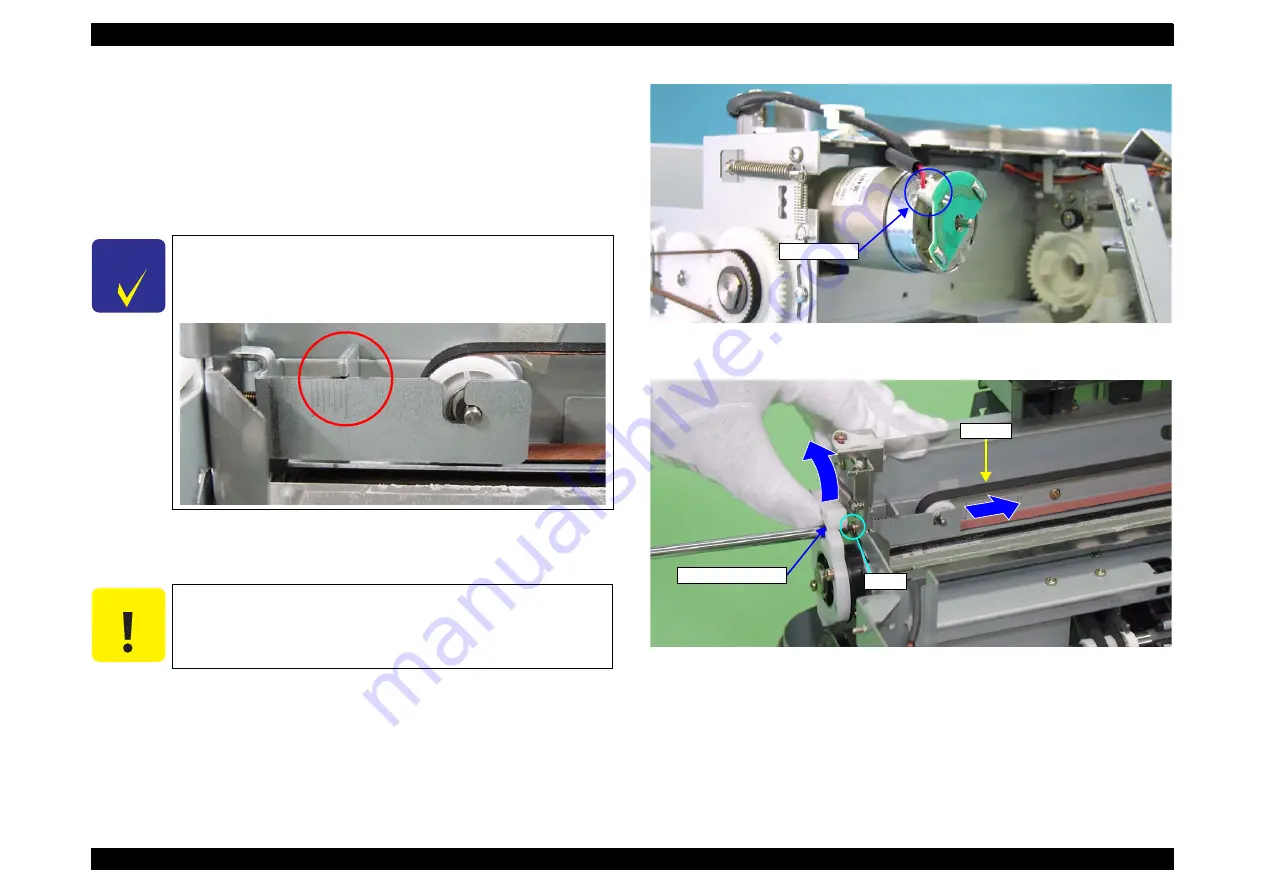
Disconnect the connector from the "Motor Assy., CR".
4.
Slide carriage to the center of the printer.
(Refer to "4.2.4.3 C593_SUB Board" (p234).)
5.
While pushing up "Lever, Lock, PG", loosen the CR Tension Installation
screw and release the tension of "Belt, CR".
6.
Release "Belt, CR" from the pinion gear of "Motor Assy., CR".
Figure 4-83. Disconnecting the CR Motor Connector
Figure 4-84. Releasing Tension of Belt, CR
C H E C K
P O I N T
When performing the following steps, note the position set
on the scale of "Holder, Pulley". Returning to this same
position when installing the "Belt, CR" will reduce the time
needed for belt adjustment.
C A U T I O N
When performing the following step, be careful not to
scratch the "Motor Assy., CR" pinion gear.
Connector
Belt, CR
Screw
Lever, Lock, PG
Summary of Contents for Stylus Pro 4800 Portrait Edition
Page 9: ...C H A P T E R 1 PRODUCTDESCRIPTION ...
Page 113: ...C H A P T E R 2 OPERATINGPRINCIPLES ...
Page 156: ...C H A P T E R 3 TROUBLESHOOTING ...
Page 200: ...C H A P T E R 4 DISASSEMBLY ASSEMBLY ...
Page 366: ...C H A P T E R 5 ADJUSTMENT ...
Page 448: ...C H A P T E R 6 MAINTENANCE ...
Page 457: ...C H A P T E R 7 APPENDIX ...


