EPSON Stylus Pro 4400/4450/4800/4880/4880C
Revision C
Adjustment
Basic Adjustment
413
5.3.21 Rear Sensor Adjustment
When the rear sensor has been replaced, the AD value for setting a paper
detection standard must be acquired and stored in the Main Board.
Required Tool
Microtrace #300 (A4)
Procedure
1.
Enter Maintenance Mode 2.
Power off
→
Press
"Paper Source (<)" + "Paper Feed (
Δ
)" + "Paper
Feed (
∇
)"
→
Power on
2.
Select "SELF TESTING" and enter the Self Testing menu.
"Menu (>)"
3.
Select "SELF TESTING: Adjustment".
"Paper Feed (-)" x 1
→
"Menu (>)"
4.
Find "Adj: Rear AD".
"Paper Feed (-)" x 2
5.
Raise "Paper Lever".
6.
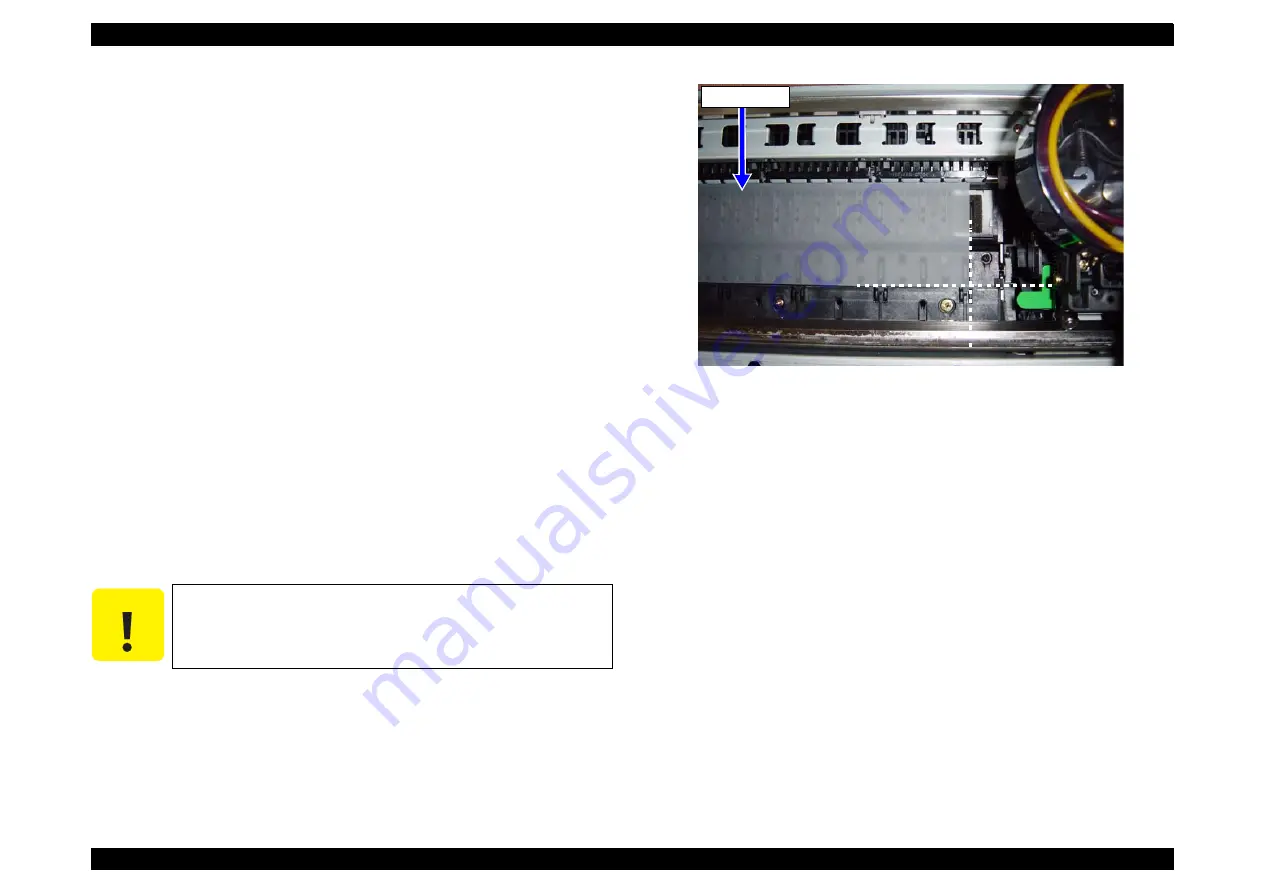
Insert Microtrace from rear paper feed slot and set it in the position
shown by
, and then lower the "Paper Lever".
7.
Press
"Menu (>)"
2 times and the panel display will change as shown
below.
"[Enter] Start"
→
"Exc."
8.
Start acquisition of AD value by pressing
"Menu (>)"
.
"RearAD: *** *** ***" will be shown in the display approximately 15
seconds later.
9.
"Confirm that "RearAD: *** *** ***" is displayed, raise the [Paper Lever]
and take out the Microtrace.
10. Lower the "Paper Lever" and turn off the printer power.
Figure 5-59. Setting the Microtrace
C A U T I O N
If "Retry AD Adjust" is displayed in the panel at this time, the
sensor has failed. Replace the sensor with a new part and
execute the adjustment again.
Microtrace
Summary of Contents for Stylus Pro 4800 Portrait Edition
Page 9: ...C H A P T E R 1 PRODUCTDESCRIPTION ...
Page 113: ...C H A P T E R 2 OPERATINGPRINCIPLES ...
Page 156: ...C H A P T E R 3 TROUBLESHOOTING ...
Page 200: ...C H A P T E R 4 DISASSEMBLY ASSEMBLY ...
Page 366: ...C H A P T E R 5 ADJUSTMENT ...
Page 448: ...C H A P T E R 6 MAINTENANCE ...
Page 457: ...C H A P T E R 7 APPENDIX ...


