EPSON Stylus Pro 4400/4450/4800/4880/4880C
Revision C
Adjustment
Installing Firmware for SP 4400 (4-color model) after replacing Main Board with New one
445
5.8 Installing Firmware for SP 4400 (4-color
model) after replacing Main Board with
New one
The firmware preinstalled on the main board provided as ASP is for 8-color
model. If you have replaced the main board of 4-color model with a new one,
you need to delete the preinstalled firmware and install firmware for 4-color
model.
Tool required
Firmware Update Tool
Supported OS: Windows 98, Me, 2000, XP
Port:
USB
Procedure
1.
Turn off both the printer and the computer, and connect the printer to
the computer with a USB cable.
2.
Turn on the printer.
3.
Start the Firmware Update Tool.
4.
Transmit the “ErasePro.upg”.
5.
When “Pro Area Erase ?” appears on the control panel, press the
[Menu(>)] button.
"Flash ROM ERASE" appears and the data in the Flash ROM is
deleted.
6.
Turn off the printer after “End [Success]” appears on the control panel.
7.
Turn on the printer.
(The printer turns on in firmware update mode.)
8.
Start the Firmware Update Tool.
9.
Transmit the firmware data.
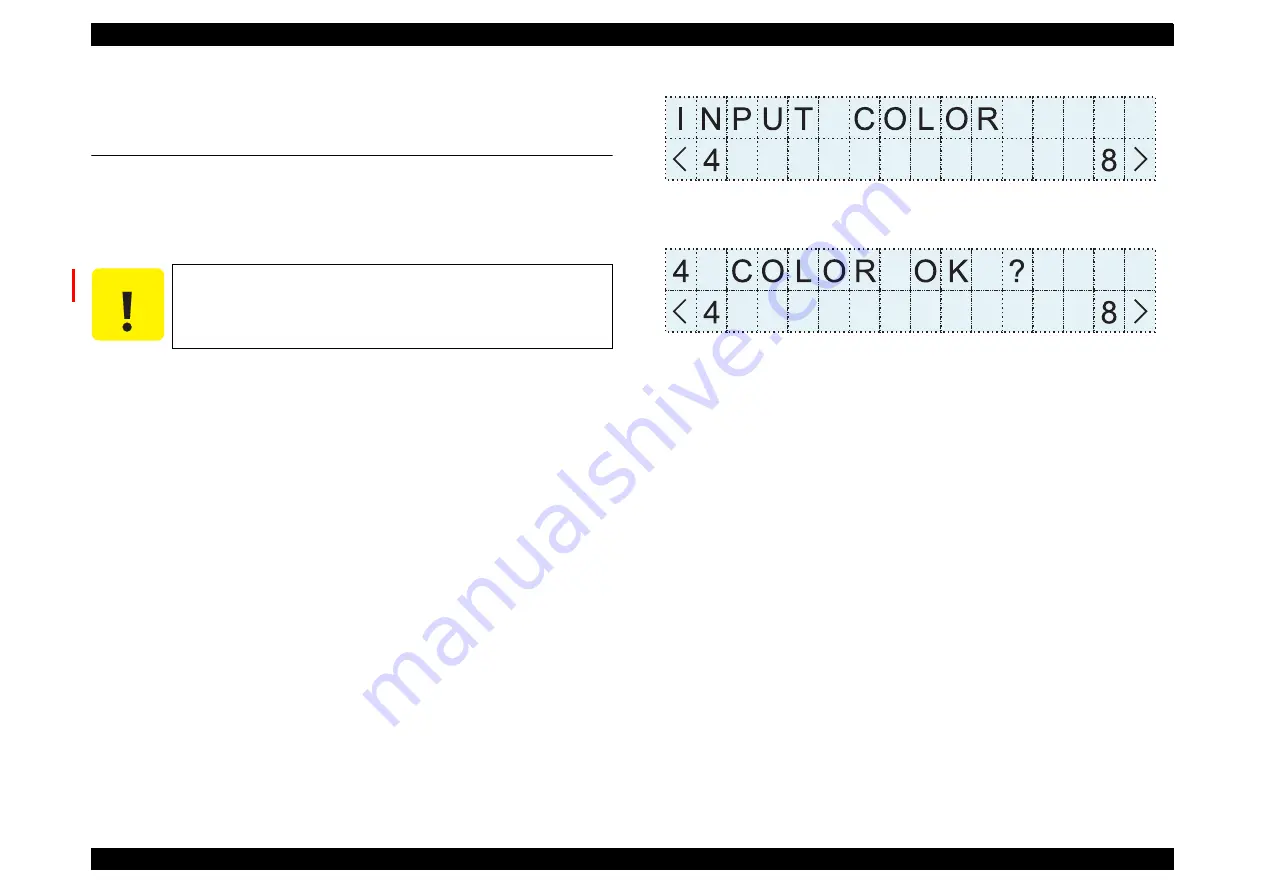
10. When the following message appears, press the [Paper (<)] button to
select 4-color.
11. When the following confirmation message appears, press the [Paper
(<)] button.
12. “F/W UPDATING” appears and the firmware update begins.
13. When the “NVRAM CLEAR OK” appears on the control panel, press
the [Menu (>)] button to restart the printer.
14. Perform the other required operations/adjustments listed in
Adjustment Items classified by Part/Unit (p.368)”
.
C A U T I O N
As for the main board of Stylus Pro 4450 supplied as ASP,
the firmware for 4-color is preintalled on it.
Summary of Contents for Stylus Pro 4800 Portrait Edition
Page 9: ...C H A P T E R 1 PRODUCTDESCRIPTION ...
Page 113: ...C H A P T E R 2 OPERATINGPRINCIPLES ...
Page 156: ...C H A P T E R 3 TROUBLESHOOTING ...
Page 200: ...C H A P T E R 4 DISASSEMBLY ASSEMBLY ...
Page 366: ...C H A P T E R 5 ADJUSTMENT ...
Page 448: ...C H A P T E R 6 MAINTENANCE ...
Page 457: ...C H A P T E R 7 APPENDIX ...


