10
Introduction to Your Printer
Refer to these sections to learn more about your printer and this manual.
Printer Features
Notations Used in the Documentation
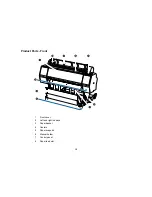
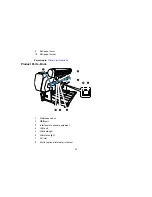
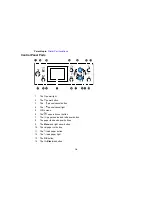
Printer Part Locations
Printer Features
The Epson SureColor P6000/P7000/P8000/P9000 Series printers include these special features:
High productivity
• Precise Piezo-based print head capable of 8 or 10 channels with 360 nozzles per inch
• Available 150, 300, or 700 ml large-capacity ink cartridges
• Optional internal print server offloads print data from computer and network quickly
Reliability
• User-scheduled cleaning cycles improve print head health over prolonged idle periods
• Ink repellant print head surface for reduced nozzle clogging
High resolution
• Prints at resolutions up to 2880 x 1440 dpi
• Supports variable-sized droplet technology as small as 3.5 picoliter
Easy-to-use setup and operation
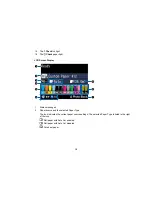
• Intuitive, easy-to-read, color LCD display
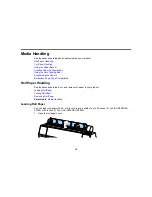
• Front-loaded media for easy access
• Easy-to-use software
Optional Equipment and Replacement Parts
Parent topic:
Introduction to Your Printer
Optional Equipment and Replacement Parts
For information on how to purchase genuine Epson ink, accessories and paper visit
epson.com
(U.S.
sales) or
epson.ca
(Canadian sales). You can also purchase accessories from an Epson authorized
reseller. To find the nearest one, call 800-GO-EPSON (800-463-7766).
Summary of Contents for SureColor P8000
Page 1: ...Epson SureColor P6000 P7000 P8000 P9000 User s Guide ...
Page 2: ......
Page 8: ......
Page 21: ...21 5 Release the tension levers on both roll media adapters ...
Page 31: ...31 If you are using the optional Auto Take Up Reel rewind the paper using the Manual switch ...
Page 42: ...42 1 Raise the paper guides ...
Page 43: ...43 2 Lower the front of the paper basket ...
Page 45: ...45 4 Raise the front of the basket one level ...
Page 46: ...46 5 Fasten the front of the basket with the tabs ...
Page 50: ...50 1 Unfasten the tabs at the front of the paper basket ...
Page 51: ...51 2 Raise the paper guides ...
Page 52: ...52 3 Raise the front of the basket so that the cloth is pulled taut ...
Page 54: ...54 1 Raise the paper guides ...
Page 55: ...55 2 Raise the front of the basket and lower the paper guides ...
Page 92: ...92 You can also place the same print data multiple times as shown here ...
Page 190: ...190 2 Cut the paper above the paper feed slot ...


