138
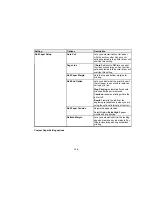
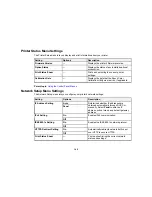
Setting
Options
Description
Paper Size
Check
On
Automatically detects the width of the
loaded media. Turn off this setting only
if the printer displays a paper setting
error when media is loaded correctly.
Changed settings take effect when you
reload paper.
Caution:
Disabling this setting may
cause the printer to print outside the
margins of the loaded media and may
cause ink to build up inside the printer.
Off
Paper Skew
Check
On
Stops printing when skewed paper is
detected. Leave this setting turned on
to avoid paper jams.
Off
Auto Nozzle
Check
Auto Cleaning
Setting
Periodically
Every Job
Off
Automatically runs a nozzle check and
cleans the print head if necessary.
Periodically
: checks the nozzles
occasionally.
Every Job
: checks the nozzles after
every print job.
Note:
Even if you select
Off
as the
Auto Cleaning Setting
option, the
printer runs an automatic nozzle check
(and may clean the print head) when
you switch between black inks and
after initial ink charging.
Auto Clean Max
Repeat
1
to
3
Selects the number of automatic print
head cleanings the printer performs
when clogged nozzles are detected.
Timer Cleaning
Various settings
Performs an automatic nozzle check
and head cleaning if the printer is
turned on or woken from sleep mode
and the printer has not printed within
the set length of time.
Off
Summary of Contents for SureColor P8000
Page 1: ...Epson SureColor P6000 P7000 P8000 P9000 User s Guide ...
Page 2: ......
Page 8: ......
Page 21: ...21 5 Release the tension levers on both roll media adapters ...
Page 31: ...31 If you are using the optional Auto Take Up Reel rewind the paper using the Manual switch ...
Page 42: ...42 1 Raise the paper guides ...
Page 43: ...43 2 Lower the front of the paper basket ...
Page 45: ...45 4 Raise the front of the basket one level ...
Page 46: ...46 5 Fasten the front of the basket with the tabs ...
Page 50: ...50 1 Unfasten the tabs at the front of the paper basket ...
Page 51: ...51 2 Raise the paper guides ...
Page 52: ...52 3 Raise the front of the basket so that the cloth is pulled taut ...
Page 54: ...54 1 Raise the paper guides ...
Page 55: ...55 2 Raise the front of the basket and lower the paper guides ...
Page 92: ...92 You can also place the same print data multiple times as shown here ...
Page 190: ...190 2 Cut the paper above the paper feed slot ...


