98
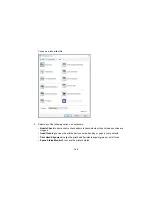
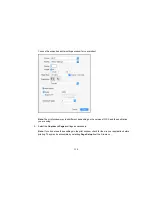
• To change the size of your printed document or photo, select the
Reduce/Enlarge
checkbox and
select sizing options.
• To print multiple pages on one sheet of paper, or print one image on multiple sheets of paper, select
the
Multi-Page
checkbox and select the options you want.
• To manage print jobs with the optional internal print server (if applicable), select the
Hard Disk Unit
checkbox and select the options you want.
• To enlarge your image beyond the limits of your application program, select the
Optimize
Enlargement
checkbox.
Note:
The driver can increase the image size up to 650% and decrease the output resolution to stay
within the pixel limitations. Depending on the resolution of the original image and the print size, you
may see reduced print quality.
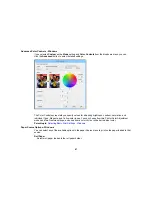
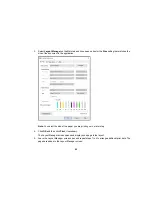
• To print a color background on the page, select the
Print Bckg Color
checkbox and click
Color
Settings
to select the color you want to use.
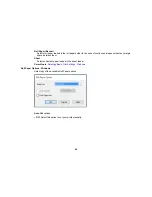
• To print the time, date, and other information about your print job at the top or bottom of the page,
select the
Job Settings
checkbox and click
Details
to select the settings you want to use.
Reduce/Enlarge Options - Windows
Multi-Page Printing Options - Windows
Parent topic:
Printing with Windows
Reduce/Enlarge Options - Windows
You can select any of the Reduce/Enlarge options to size your printed image.
Fit to Page
Sizes your printed image to fit on the paper you loaded and selected as the Output Paper setting.
Fit to Roll Paper Width
Sizes your printed image to fit the width of the roll paper you loaded.
Custom
Sizes your printed image by the percentage you select as the
Scale to
setting.
Parent topic:
Selecting Print Layout Options - Windows
Multi-Page Printing Options - Windows
You can select these Multi-Page options to set up your multi-page print job.
N-up
Prints 2 (
2-up
) or 4 (
4-up
) pages on one sheet of paper.
Summary of Contents for SureColor P8000
Page 1: ...Epson SureColor P6000 P7000 P8000 P9000 User s Guide ...
Page 2: ......
Page 8: ......
Page 21: ...21 5 Release the tension levers on both roll media adapters ...
Page 31: ...31 If you are using the optional Auto Take Up Reel rewind the paper using the Manual switch ...
Page 42: ...42 1 Raise the paper guides ...
Page 43: ...43 2 Lower the front of the paper basket ...
Page 45: ...45 4 Raise the front of the basket one level ...
Page 46: ...46 5 Fasten the front of the basket with the tabs ...
Page 50: ...50 1 Unfasten the tabs at the front of the paper basket ...
Page 51: ...51 2 Raise the paper guides ...
Page 52: ...52 3 Raise the front of the basket so that the cloth is pulled taut ...
Page 54: ...54 1 Raise the paper guides ...
Page 55: ...55 2 Raise the front of the basket and lower the paper guides ...
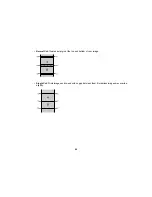
Page 92: ...92 You can also place the same print data multiple times as shown here ...
Page 190: ...190 2 Cut the paper above the paper feed slot ...

