34
Chapter 2 Setup
Connecting the Printer to the Host
USB Interface
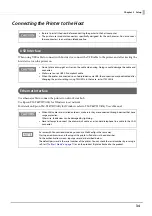
When using USB cable to connect with host device, connect the USB cable to the printer, and after starting the
host device, turn the printer on.
Ethernet Interface
Use ethernet cable to connect the printer to network via a hub.
Use Epson TM-T88VII Utility for Windows to set network.
For details on Epson TM-T88VII Utility for Windows, refer to TM-T88VII Utility User's Manual.
•
Be sure to install the driver before connecting the printer to the host computer.
•
The printer uses modular connectors specifically designed for the cash drawer. Do not connect
these connectors to an ordinary telephone line.
•
Do not place any weight or stress on the cable when using. Doing so could damage the cable and
connectors.
•
Make sure to use a USB 2.0 compliant cable.
•
When the printer is connected to an Android device via USB, the connection may be disabled after
changing the printer settings using TM Utility. In that case, restart TM Utility.
•
When LAN cables are installed outdoors, make sure they are connected through devices that have
surge protection.
Otherwise, the devices can be damaged by lightning.
•
Never attempt to connect the drawer kick cable or a standard telephone line cable to the LAN
connector.
As same with Conventional models, you can use WebConfig in the same way.
Start up a web browser and then input the printer's IP address in the address bar.
On the authentication screen, input password as described below.
The default password is the serial number of the printer. You can check the serial number by running a
self-test (
) or on the product ID plate attached to the product.

