background image

10   TM-U295 Installation Manual

English

8. Then push firmly on the right side and then the left side of the 

ribbon cartridge until each side clicks into place.

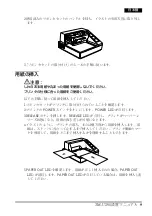
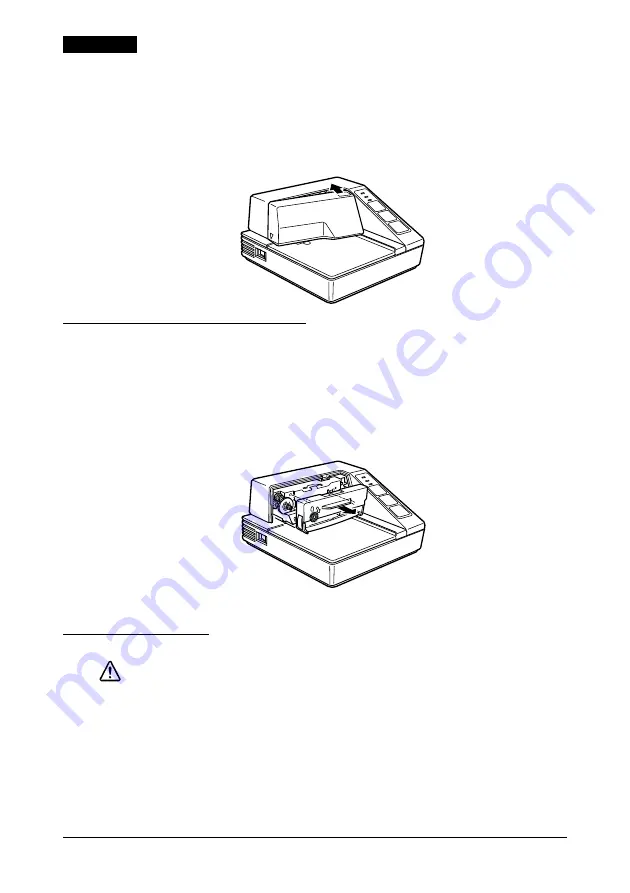
9. To put the cover back on the printer, first align the left and 

insert the tab on the top; then press the bottom until it clicks 
into place, as shown below.

Replacing a Used Ribbon 

When your printing is not dark enough, it is time to replace the 
ribbon. 

1.

Follow steps 1 through 4 in the “Installing the Ribbon.” 

2.

Remove the used ribbon by grasping the handle and pulling 
straight out, as shown by the arrow in the illustration below. 

3.

Follow the rest of the steps in “Installing the Ribbon.”

Inserting Paper 

CAUTION:

Do not use wrinkled or curled paper.
Use paper that meets the printer’s specifications.

 To insert paper, follow these steps:
1. Make sure that a ribbon cassette is installed in the printer.
2. Turn on the printer. The 

POWER

 LED comes on.

Summary of Contents for TM U295 - B/W Dot-matrix Printer

Page 1: ...TM U295 Installation Manual English 設置マニュアル Japanese ...

Page 2: ...y Standards Applied Product Name TM U295 Model Name M66SA M117A The following standards are applied only to the printers that are so labeled EMC is tested using the Epson power supplies Europe CE marking Safety EN 60950 North America EMI FCC ICES 003 Class A Safety UL 1950 CSA C22 2 No 950 Japan EMC VCCI Class A Oceania EMC AS NZS 3548 CISPR22 Class B WARNING The connection of a non shielded print...

Page 3: ... produces smoke a strange odor or unusual noise Continued use may lead to fire Immediately unplug the equipment and contact your dealer or a Seiko Epson service center for advice Never attempt to repair this product yourself Improper repair work can be dangerous Never disassemble or modify this product Tampering with this product may result in injury or fire Be sure to use the specified power sour...

Page 4: ... to it Purpose of This Manual This manual provides information to operators of the TM U295 printer to describe basic operations to enable safe and correct use of the printer Notes on Usage Use specified paper Do not use solvents based on alcohol benzine thinner or ketone to remove the dirt on the printer If you ever transport the printer or store it for a prolonged period of time attach the transp...

Page 5: ...ount set by ESC 2 and ESC 3 REVERSE Feeds the paper backward based on the line feed amount set by ESC 2 and ESC 3 RELEASE Pressing this button moves the rollers so that paper can be inserted or removed This state is called the paper release mode Note Pressing the POWER switch while holding down the RELEASE button runs a self test See Running a Self Test upper case printer cover document table POWE...

Page 6: ...e position error Timing error Drive circuit error Power supply voltage error If this LED flashes turn off the printer make sure that no paper is jammed in it and then turn it back on If the LED is still flashing contact your administrator or a qualified service person PAPER OUT This LED is on when paper is not inserted or is not inserted correctly Removing the Transportation Damper The printer is ...

Page 7: ...t the printer and the computer are turned off 2 Plug the serial interface cable into the interface connector on the back of the printer as shown 3 Tighten the screws of the serial interface cable connector Note Your printer comes with inch type hexagonal lock screws installed If you plan to use an interface cable that requires millimeter type lock screws replace the inch type screws with the enclo...

Page 8: ...he back of the printer with the FG screw as shown Connecting the Power Supply This printer requires an external power supply Use an optional Epson power supply CAUTION Using an incorrect power supply can cause serious damage to the printer 1 Make sure that the printer is turned off 2 Plug the power supply s DC cable connector into the printer s connector as shown below Note that the flat side of t...

Page 9: ...he printer CAUTION 4 Be sure to perform the steps above because it is necessary to make sure that the printer is in the paper release mode before you install the ribbon cassette 5 Open the printer cover by slightly pressing the ridges on the top left and pulling the cover forward as shown in the illustration below 6 Check that the ribbon in the cassette is not creased or twisted Then turn the feed...

Page 10: ...printing is not dark enough it is time to replace the ribbon 1 Follow steps 1 through 4 in the Installing the Ribbon 2 Remove the used ribbon by grasping the handle and pulling straight out as shown by the arrow in the illustration below 3 Follow the rest of the steps in Installing the Ribbon Inserting Paper CAUTION Do not use wrinkled or curled paper Use paper that meets the printer s specificati...

Page 11: ...you want to check the performance of your printer you can run a self test as described below This shows whether your printer is working correctly It is independent of any other equipment or software The self test checks the control circuits printer mechanisms print quality RAM ROM version and DIP switch settings To perform a self test follow the steps below 1 Make sure that the ribbon cassette is ...

Page 12: ...tion ON OFF 1 See Table 1 International character set selection 2 3 4 Word length 7 bits 8 bits 5 Parity check Yes No 6 Parity selection Even Odd 7 See Table 2 Transmission Speeds 8 9 Pin 6 reset signal Used Not used 10 Pin 25 reset signal Used Not used Table 1 International Sets SW1 3 SW1 2 SW1 1 Country ON ON ON U S A ON ON OFF FRANCE ON OFF ON GERMANY ON OFF OFF U K OFF ON ON DENMARK OFF ON OFF...

Page 13: ...かねますのでご了承ください EPSON はセイコーエプソン株式会社の登録商標です ご使用の前に ご使用の際は 必ず ユーザーズマニュアル をよくお読みのうえ 正しくお使 いください ユーザーズマニュアル は 不明な点をいつでも解決できるように すぐ取り出 して見られる場所に保管してください 安全にお使いいただくために 本書および製品には 製品を安全に正しくお使いいただき お客様や他の人々へ の危害や財産への損害を未然に防止するために 以下の記号が使われています その意味は次のとおりです 内容をよく理解してから本文をお読みください 警告 この表示を無視して誤った取扱をすると 人が死亡または重症を負う可能性が想 定される内容を示しています 注意 この表示を無視して誤った取り扱いをすると 人が損傷を負う可能性が想定され る内容 および物的損害のみの発生が想定される内容を示しています 安全上のご注...

Page 14: ...ため必ず電源コードを抜いてく ださい 本製品を移動する場合は 電源コードを抜いて すべての配線を外した ことを確認してから行ってください プリンタに詰まった紙を取り除く場合 プリントヘッドには決して触れないでく ださい プリントヘッドが低温になってから作業を始めてください 長時間印字 した後はプリントヘッドが高温になっているので やけどなどの恐れがありま す 電波障害自主規制について 注意 この装置は 情報処理装置等電波障害自主規制協議会 VCCI の基準に基づくク ラス A 情報技術装置です この装置を家庭環境で使用すると電波妨害を引き起 こすことがあります この場合には 使用者が適切な対策を講ずるよう要求され ることがあります 本書の目的 本書は 製品を正しく安全にお使い頂くための基本的な製品取扱情報を オペレー タに提供することを目的としています 取り扱い上のご注意 用紙は指定された...

Page 15: ...置マニュアル 3 日本語 同梱品 梱包箱には以下のものが入っています 万一損傷を受けているものがありました ら お買い求め頂いたお店にお問い合わせください 注記 ページの六角ロックネジに関する項を参照してください 各部の名称 輸送ダンパー リボンカセット 六角ロックネジ 2本 プリンタ 上ケース プリンタカバー ドキュメント台 POWERスイッチ コントロールパネル ディップスイッチ インタフェースコネクタ FG 電源コネクタ ...

Page 16: ...RELEASE ボタンを押しながら POWER スイッチを押すと セルフテストが実 行されます セルフテストの行い方 を参照してください インジケータ LED POWER プリンタの POWER スイッチがオンの時 点灯します RELEASE ペーパーレリーズ状態のとき点灯し 用紙がクランプ状態 用紙がプリンタによっ て押さえられている状態 のとき消灯します プリンタがペーパーレリーズモー ドのとき用紙を挿入することができます 次の場合に点滅し エラーを知らせます 紙詰まり ホームポジション検出異常 タイミング検出異常 駆動回路異常 電源電圧異常 電源投入時のみ RRELEASE LED が点滅している場合は プリンタの POWER スイッチをオフにし 紙詰まりがないことを確認し 再度プリンタの POWER スイッチをオンにしてく ださい それでもなお RELEASE LEDが点滅している...

Page 17: ...送する時 または長期間プリンタを使用しない時は 以下の手順に 従ってダンパーを取り付けてください 1 プリンタの POWER スイッチがオンであることを確認します 2 RELEASE ボタンを押します RELEASE ボタンを押した状態を ペーパーレ リーズ状態といいます 3 FORWARD ボタンを押します 4 プリンタの POWER スイッチをオフにします 5 ダンパーを取り付けます コンピュータへのプリンタの接続 コンピュータとプリンタの接続には プリンタの仕様に合ったインタフェース ケーブルをご用意ください 1 プリンタとコンピュータの POWER スイッチがオフであることを確認します 2 イラストのように ケーブルのコネクタを プリンタ背面のインタフェースコ ネクタに接続します ...

Page 18: ...付けてください 六角ロックネジ の取り外し 取り付けには 5 の六角ドライバーを使用します 下の図は 六 角ロックネジの見分け方を示しています 4 ケーブルのもう一方の端をコンピュータに接続します プリンタの接地 プリンタの接地には プリンタの仕様に合ったアース線をご用意ください 以下 のアース線を使用されることをお奨めします アース線の太さ AWG18 相当 接続するターミナルの直径 3 2 1 プリンタの POWER スイッチがオフになっていることを確認します 2 アース線を プリンタ背面の FG と示された場所に 備え付けのネジで締め 付けます 電源ユニットの接続 注意 電源ユニットには セイコーエプソン製電源 オプション をご使用ください 指定以外の電源を使うと プリンタに重大な損害が発生する恐れがあります 1 プリンタの POWER スイッチがオフになっていることを確認します ...

Page 19: ...以下の手順で行ってください 1 プリンタの POWER スイッチをオフにします 2 電源ユニットの電源プラグをコンセントから抜き取ります 3 コネクタ部を持って DC ケーブルコネクタをプリンタのコネクタから抜き取 ります リボンカセットの取り付け リボンカセットは セイコーエプソン製リボンカセット ERC 27 のみをご使用く ださい 1 プリンタの POWER スイッチをオンにします 2 RELEASE ボタンを押します LED が点灯し プリンタがペーパーレリーズ状態 になります 3 プリンタの POWER スイッチをオフにします 注意 必ずこの手順に従い プリンタをペーパーレリーズ状態にしてからリボンカセッ トを取り付けてください ペーパーレリーズ状態でないと リボンカセットを取 り付けることができません ...

Page 20: ...いか確認します リボンカセットのつ まみをリボンカセット上に示している矢印方向に回し リボンのたるみを取り ます 6 イラストのように リボンカセットをプリンタの正しい位置に挿入します 7 リボンカセットの右側 次に左側をカチッと音がするまで押し込みます 8 プリンタカバーをプリンタの上に戻し まず左側を合わせた後 カバー上面の タブを挿入します 次にイラストのように プリンタカバーの下部をカチッと 音がするまで押し込みます リボンカセットの交換 リボンカセットのインクが薄くなったら 以下の手順で新しいリボンカセットに 交換してください 1 リボンカセットの取り付け の1 4の手順に従います ...

Page 21: ...用紙を挿入してください 1 リボンカセットがプリンタに取り付けられていることを確認します 2 プリンタの POWER スイッチをオンにします POWER LED が点灯します 3 RELEASE ボタンを押します RELEASE LED が点灯し プリンタがペーパーレ リーズ状態になり 用紙の抜き差しが可能になります 4 イラストのように プリンタの前方 または横方向から用紙を挿入します 用 紙は ストッパに当たって止まるまで挿入してください プリンタ側面のマー クを利用して 用紙をどこまで挿入するかを判断することもできます 5 PAPER OUT LED を確認します 用紙が正しく挿入された場合 PAPER OUT LED が消灯します PAPER OUT LED が点灯している場合は 用紙を挿入し直 してください ...

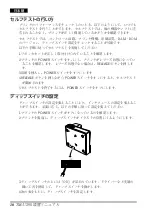
Page 22: ...く取り付けられていることを確認します 2 プリンタの POWER スイッチをオンにし プリンタがレリーズ状態になってい ることを確認します レリーズ状態でない場合は RELEASE ボタンを押しま す 3 用紙を挿入し POWER スイッチをオフにします 4 RELEASE ボタンを押しながら POWER スイッチをオンにすると セルフテスト が開始されます 5 セルフテストを終了するには POWER スイッチをオフにします ディップスイッチの設定 ディップスイッチの設定を変えることにより インタフェースの設定を変えるこ とができます 必要に応じ 以下の手順に従って設定を変えてください 1 プリンタの POWER スイッチがオフになっているのを確認します 2 プリンタを裏返し ディップスイッチがイラストの位置にくるようにします 3 ディップスイッチの上には ON が記されています ドライバ...

Page 23: ...ティあり パリティなし 6 パリティ選択 偶数パリティ 奇数パリティ 7 ボーレートの選択 別表 2 参照 8 9 6 ピンリセット信号 使用する 使用しない 10 25 ピンリセット信 号 使用する 使用しない Country DIP SW1 3 DIP SW1 2 DIP SW1 1 アメリカ合衆国 ON ON ON フランス ON ON OFF ドイツ ON OFF ON イギリス ON OFF OFF デンマーク OFF ON ON スウェーデン OFF ON OFF イタリア OFF OFF ON スペイン OFF OFF OFF 転送速度 bps DIP SW1 8 DIP SW1 7 1200 ON ON 2400 ON OFF 4800 OFF ON 9600 OFF OFF ...

Page 24: ...Printed on Recycled Paper Printed in China ...

Reviews: