background image

User's Guide

NPD6125-03 EN

Summary of Contents for WF-110

Page 1: ...User s Guide NPD6125 03 EN ...

Page 2: ...urred by the purchaser or third parties as a result of accident misuse or abuse of this product or unauthorized modifications repairs or alterations to this product or excluding the U S failure to strictly comply with Seiko Epson Corporation s operating and maintenance instructions Seiko Epson Corporation and its affiliates shall not be liable for any damages or problems arising from the use of an...

Page 3: ...ountries Use of the Works with Apple badge means that an accessory has been designed to work specifically with the technology identified in the badge and has been certified by the developer to meet Apple performance standards Google Cloud Print Chrome Chrome OS and Android are trademarks of Google LLC Adobe and Adobe Reader are either registered trademarks or trademarks of Adobe Systems Incorporat...

Page 4: ...twork Connection Types 28 Wi Fi Connection 28 Wi Fi Direct Simple AP Connection 28 Connecting to a Computer 29 Connecting to a Smart Device 30 Connecting to a smart device over a wireless router 30 Connecting to an iPhone iPad or iPod touch using Wi Fi Direct 31 Connecting to Android Devices using Wi Fi Direct 34 Connecting to Devices other than iOS and Android using Wi Fi Direct 36 Making Wi Fi S...

Page 5: ... the Remaining Ink and the Maintenance Box Windows 91 Checking the Status of the Remaining Ink and the Maintenance Box Mac OS 91 Ink Cartridge Codes 92 Ink Cartridge Handling Precautions 92 Replacing Ink Cartridges 95 Maintenance Box Code 97 Maintenance Box Handling Precautions 98 Replacing a Maintenance Box 99 Temporarily Printing with Black Ink 102 Temporarily Printing with Black Ink Windows 102...

Page 6: ...blems 130 Checking the SSID Connected to the Printer 132 Checking the SSID for the Computer 132 Wireless LAN Wi Fi Connections Become Unstable When Using USB 3 0 Devices on a Mac 133 Cannot Print from an iPhone iPad or iPod touch 133 Printout Problems 133 Print Quality Is Poor 133 The Position Size or Margins of the Printout Are Incorrect 135 Paper Is Smeared or Scuffed 135 Printed Characters Are ...

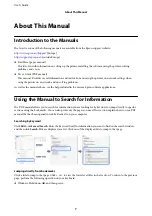
Page 7: ...s Using the Manual to Search for Information The PDF manual allows you to search for information you are looking for by keyword or jump directly to specific sections using the bookmarks You can also print only the pages you need This section explains how to use a PDF manual that has been opened in Adobe Reader X on your computer Searching by keyword Click Edit Advanced Search Enter the keyword tex...

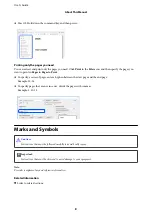
Page 8: ...s enter a hyphen between the start page and the end page Example 20 25 To specify pages that are not in series divide the pages with commas Example 5 10 15 Marks and Symbols Caution Instructions that must be followed carefully to avoid bodily injury cImportant Instructions that must be observed to avoid damage to your equipment Note Provides complementary and reference information Related Informat...

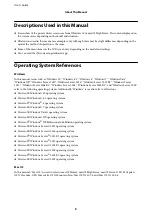
Page 9: ... the following operating systems Additionally Windows is used to refer to all versions Microsoft Windows 10 operating system Microsoft Windows 8 1 operating system Microsoft Windows 8 operating system Microsoft Windows 7 operating system Microsoft Windows Vista operating system Microsoft Windows XP operating system Microsoft Windows XP Professional x64 Edition operating system Microsoft Windows Se...

Page 10: ...e AC adapter near a wall outlet where the plug can be easily unplugged Do not place or store the printer and the AC adapter outdoors near excessive dirt or dust water heat sources or in locations subject to shocks vibrations high temperature or humidity Do not leave the printer in direct sunlight near heaters inside cars or other locations that are subject to high temperatures The printer may be d...

Page 11: ...As a result the battery could become hot emit smoke rupture or catch fire Do not leave the printer or external battery in a vehicle Otherwise the battery could overheat Do not expose the printer or external battery to high humidity Do not handle the battery with wet hands or use it in locations near water If the battery gets wet or is immersed in water an excessive current will flow during chargin...

Page 12: ...tery could become hot emit smoke rupture catch fire or explode Use the specified charger and observe the charging requirements Otherwise the printer or external battery could become hot emit smoke rupture or catch fire Do not charge the printer or external battery near an open flame or in very hot locations If the protection circuit in the battery is activated you will not be able to charge the ba...

Page 13: ...ted by a 10 or 16 amp circuit breaker to provide adequate short circuit protection and over current protection for the printer When connecting the printer to a computer or other device with a cable ensure the correct orientation of the connectors Each connector has only one correct orientation Inserting a connector in the wrong orientation may damage both devices connected by the cable Place the p...

Page 14: ...Only use a dry soft cloth for cleaning Do not use liquid or chemical cleaners The exterior cover of the LCD screen could break if it receives a heavy impact Contact your dealer if the screen s surface chips or cracks and do not touch or attempt to remove the broken pieces Disposing of European Printer Models There is a battery in the printer The crossed out wheeled bin label that can be found on y...

Page 15: ...hen you give the printer to someone else or dispose of it erase all the personal information stored in the printer s memory by selecting Menu Restore Default Settings All Settings on the control panel User s Guide Important Instructions 15 ...

Page 16: ... in Battery You can use the printer connecting AC adapter but the printer also operates with a built in battery You can charge the battery by connecting AC adapter to the printer or using the micro USB cable Related Information Charging the Built in Battery on page 83 Tips Printing from Your Smartphone or Tablet Epson iPrint is an application that allows you to print photos documents and Web pages...

Page 17: ...t the density and color on the printer s control panel Related Information Menu on page 23 Tips Considering the Environment When you use the printer in places where the use of electronic devices are limited such as hospitals please set the disable Wi Fi setting on the control panel User s Guide Tips for Smart Use 17 ...

Page 18: ...inter operation the printer lowers the operations sounds Related Information Menu on page 23 Tips Storing the Printer When the printer is not in use you can place it with the silver clip face up Keep the printer away from direct sunlight and place it in a cool dry place User s Guide Tips for Smart Use 18 ...

Page 19: ...en the printer cannot charge the battery because the temperature is too low less than 5 C or too high higher than 40 C Charge the battery within a range of 10 to 35 C 50 to 95 F D Power light Turns on when the power is on Flashes when the printer is operating or an error occurs E Output slot Ejects the printed paper F Edge guide Feeds the paper straight into the printer Slide to the edge of the pa...

Page 20: ...the maintenance box D Built in battery Allows you to operate the printer without connecting the AC adapter This part must not be replaced by the user A Inner cover Open when replacing ink cartridges or removing jammed paper inside the printer B Ink cartridge holder Install the ink cartridges Ink is ejected from the print head nozzles underneath User s Guide Printer Basics 20 ...

Page 21: ...ture C Cancels the current operation or returns to the previous screen Related Information Guide to the LCD Screen on page 21 Guide to the LCD Screen The home screen is displayed when the printer is turned on Status icons and the amount of ink remaining in the ink cartridges are displayed on the home screen A Displays the print density that is selected in Plain Paper Density Setting User s Guide P...

Page 22: ...ery is running low Indicates that the built in battery is too hot or too cold Select Menu Battery to check the status Indicates that the built in battery is charging When charging is complete the icon changes to the icon that indicates the amount of built in battery remaining D Displays the approximate levels for the ink cartridges and the maintenance box Displays the approximate levels of the ink...

Page 23: ...ional external battery Press the d button to make settings for charging the battery Battery Settings USB Power Supply via PC Connect the printer to the computer using a micro USB cable so that you can charge the built in battery from the computer when the printer is turned off or printer is in the sleep mode Maintenance Ink Cartridge Replacement Replaces the ink cartridge Nozzle Check Prints a pat...

Page 24: ...r the environment before making any change Battery Power Quiet Mode Reduce noise during printing However the print speed may be slower Language Select the display language Keyboard Change the layout of the keyboard on the LCD screen Sleep Timer Select the time period before the printer enters sleep mode energy saving mode when no operations are performed The LCD screen turns black when the set tim...

Page 25: ...he wireless router is compatible with WPS Wi Fi Protected Setup or if the current Wi Fi connection was established by pressing a button on the wireless router Others PIN Code WPS You can automatically connect to a wireless router by using a PIN code You can use this method to set up if a wireless router is capable of WPS Wi Fi Protected Setup Wi Fi Auto Connect Use the network settings on the comp...

Page 26: ...oors or Outdoors cImportant We recommend taking the printer as hand luggage on airplanes Contact your airline to confirm if you can take the device on their airplanes Depending on handling at the airport the printer could be damaged or ink may leak due to strong impacts Turn off the printer and make sure the power light and the LCD screen turn off Disconnect the AC adapter and the USB cable Close ...

Page 27: ...Related Information Part Names and Functions on page 19 Checking and Cleaning the Print Head on page 106 Aligning the Print Head on page 107 User s Guide Moving and Transporting the Printer 27 ...

Page 28: ...n Connecting to a Computer on page 29 Connecting to a Smart Device on page 30 Making Wi Fi Settings from the Printer on page 39 Wi Fi Direct Simple AP Connection Use this connection method when you are not using Wi Fi at home or at the office or when you want to connect the printer and the computer or smart device directly In this mode the printer acts as an wireless router and you can connect the...

Page 29: ...id using Wi Fi Direct on page 36 Connecting to a Computer We recommend using the installer to connect the printer to a computer You can run the installer using one of the following methods Setting up from the website Access the following website and then enter the product name Go to Setup and then start setting up http epson sn Setting up using the software disc only for the models that come with ...

Page 30: ... website Access to the website from the smart device that you want to connect to the printer http epson sn Setup Note If you want to connect a computer and a smart device to the printer at the same time we recommend setting up from the computer first by using the installer If you want to connect to a Wi Fi tethered smartphone enter the SSID and the password of the smartphone on the printer Related...

Page 31: ...pson iPrint version 7 0 or later Epson iPrint is used to print from a smart device Install Epson iPrint on the smart device in advance Note You only need to make these settings for the printer and the smart device that you want to connect to once Unless you disable Wi Fi Direct or restore the network settings to their defaults you do not need to make these settings again 1 Select Wi Fi Setup on th...

Page 32: ...nter s control panel in PHOTO mode Use the Camera app for iOS 11 or later You cannot connect to the printer using the Camera app for iOS 10 or earlier Also you cannot connect using an app for scanning QR codes If you cannot connect press the l button See Related Information below for details on connecting 8 Tap the notification displayed on the screen of the iPhone iPad or iPod touch 9 Tap Join Us...

Page 33: ...nter is not selected 13 Select the printer that you want to connect to See the information displayed on the printer s control panel to select the printer 14 On the printer s control panel press the OK button For smart devices that have been connected to the printer before select the network name SSID on the smart device s Wi Fi screen to connect them again User s Guide Network Settings 33 ...

Page 34: ...ed to print from a smart device Install Epson iPrint on the smart device in advance Note You only need to make these settings for the printer and the smart device that you want to connect to once Unless you disable Wi Fi Direct or restore the network settings to their defaults you do not need to make these settings again 1 Select Wi Fi Setup on the home screen To select an item use the u d l r but...

Page 35: ... are not displayed connect by selecting Other OS Devices See Related Information below for connecting 9 When the device connection approval screen is displayed select Approve 10 On the printer s control panel press the OK button For smart devices that have been connected to the printer before select the network name SSID on the smart device s Wi Fi screen to connect them again Related Information ...

Page 36: ...e Unless you disable Wi Fi Direct or restore the network settings to their defaults you do not need to make these settings again 1 Select Wi Fi Setup on the home screen To select an item use the u d l r buttons and then press the OK button 2 Select Wi Fi Direct 3 Check the message and then press the OK button to proceed 4 Check the message and then press the OK button to proceed 5 Select Other OS ...

Page 37: ...e s Wi Fi screen select the SSID shown on the printer s control panel and then enter the password The screenshot is an example on iPhone 7 On the printer s control panel press the OK button User s Guide Network Settings 37 ...

Page 38: ...ect to See the information displayed on the printer s control panel to select the printer 11 On the printer s control panel press the OK button For smart devices that have been connected to the printer before select the network name SSID on the smart device s Wi Fi screen to connect them again Related Information Printing from Smart Devices on page 79 User s Guide Network Settings 38 ...

Page 39: ...uter from the printer s control panel To set up using this method you need the SSID and password for a wireless router Note If you are using an wireless router with its default settings the SSID and password are on the label If you do not know the SSID and password contact the person who set up the wireless router or see the documentation provided with the wireless router 1 Select Wi Fi Setup on t...

Page 40: ...rmation Entering Characters on page 22 Checking the Network Connection Status on page 41 When You Cannot Make Network Settings on page 130 Making Wi Fi Settings by Push Button Setup You can automatically set up a Wi Fi network by pressing a button on the wireless router If the following conditions are met you can set up by using this method The wireless router is compatible with WPS Wi Fi Protecte...

Page 41: ...o the wireless router 1 Select Wi Fi Setup on the home screen To select an item use the u d l r buttons and then press the OK button 2 Select Wi Fi Recommended 3 Press the OK button to proceed 4 Select Others 5 Select PIN Code WPS 6 Use your computer to enter the PIN code an eight digit number displayed on the printer s control panel into the wireless router within two minutes Note See the documen...

Page 42: ... the wireless router 1 Load papers 2 Select Menu on the home screen and then press the OK button To select an item use the u d l r buttons and then press the OK button 3 Select Network Settings Connection Check The connection check starts 4 Press the OK button to print the network connection report If an error has occurred check the network connection report and then follow the printed solutions R...

Page 43: ... follow the solutions a Error code b Messages on the Network Environment Related Information E 1 on page 44 E 2 E 3 E 7 on page 44 E 5 on page 45 E 6 on page 45 E 8 on page 45 E 9 on page 45 E 10 on page 46 E 11 on page 46 E 12 on page 47 E 13 on page 47 Message on the Network Environment on page 48 User s Guide Network Settings 43 ...

Page 44: ...p if your wireless router does not support WPS Makes sure your SSID uses only ASCII characters alphanumeric characters and symbols The printer cannot display an SSID that contains non ASCII characters Makes sure you know your SSID and password before connecting to the wireless router If you are using a wireless router with its default settings the SSID and password are located on a label on the wi...

Page 45: ... wireless router is using shared authentication with WEP security make sure the authentication key and index are correct If the number of connectable devices on the wireless router is less than the number of network devices that you want to connect make settings on the wireless router to increase the number of connectable devices See the documentation provided with the wireless router to make sett...

Page 46: ...from the Network Status part on the network connection report If DHCP is enabled change the printer s Obtain IP Address setting to Auto If you want to set the IP address manually check the printer s IP address from the Network Status part on the network connection report and then select Manual on the network settings screen Set the subnet mask to 255 255 255 0 If still does not connect your printe...

Page 47: ...n Report on page 42 Connecting to a Computer on page 29 E 13 Solutions Check the following Network devices such as a wireless router hub and router are turned on The TCP IP Setup for network devices has not been set up manually If the printer s TCP IP Setup is set automatically while the TCP IP Setup for other network devices is performed manually the printer s network may differ from the network ...

Page 48: ... devices by checking the network status sheet or the printer s control panel The same SSID as Wi Fi Direct exists in the environment Change the Wi Fi Direct SSID if you cannot connect a smart device to the printer On the printer s control panel go to Wi Fi Direct Setup screen and select the menu to change the setting You can change the network name following after DIRECT XX Enter within 32 charact...

Page 49: ...hods Follow the on screen instructions until the following screen is displayed Select Set up Printer connection again for new network router or changing USB to network etc on the Install Software screen and then click Next Changing the Wi Fi Direct Simple AP Settings When a Wi Fi Direct Simple AP connection is enabled you can change the Wi Fi Direct settings such as the network name and the passwo...

Page 50: ...ging the frequency range all connected devices are disconnected Re connect the device Note that you cannot re connect from devices that do not support 5 GHz frequency range when changing to 5 GHz Disable Wi Fi Direct Disable Wi Fi Direct simple AP settings of the printer When disabling it all devices connected to the printer in Wi Fi Direct Simple AP connection are disconnected Restore Default Set...

Page 51: ...Simple AP connection you can disable all connections by using the printer s control panel or disable each connection from the computer or the smart device This section explains how to disable all connections cImportant When Wi Fi Direct Simple AP connection disabled all computers and smart devices connected to the printer in Wi Fi Direct Simple AP connection are disconnected Note If you want to di...

Page 52: ...ng the Network Settings from the Control Panel You can restore all network settings to their defaults 1 Select Menu on the home screen To select an item use the u d l r buttons and then press the OK button 2 Select Restore Default Settings Network Settings 3 Check the message and then press the OK button User s Guide Network Settings 52 ...

Page 53: ...p too thick too thin or paper that has stickers stuck to it Using these types of paper causes paper jams and smears on the printout Fan and align the edges of the envelopes before loading When the stacked envelopes are puffed up with air press them down to flatten them before loading Do not use envelopes that are curled or folded Using these envelopes causes paper jams and smears on the printout D...

Page 54: ...m 4 6 in 5 Epson Photo Paper Glossy A4 13 18 cm 5 7 in 5 10 15 cm 4 6 in 5 Epson Matte Paper Heavyweight A4 1 Epson Photo Quality Ink Jet Paper A4 20 Load one sheet of paper at a time if the paper does not feed correctly or if the printout has uneven colors or smears Note The availability of paper varies by location For the latest information on paper available in your area contact Epson support C...

Page 55: ...Glossy Epson Ultra Glossy Epson Premium Glossy Photo Paper Prem Glossy Epson Premium Glossy Epson Premium Glossy Epson Premium Semigloss Photo Paper Prem Semigloss Epson Premium Semigloss Epson Photo Paper Glossy Glossy Photo Paper Glossy Epson Matte Paper Heavyweight Epson Photo Quality Ink Jet Paper Matte Epson Matte Epson Matte Envelope Envelope Envelope Loading Paper in the Rear Paper Feed 1 L...

Page 56: ... Load paper vertically along the right side of the rear paper feed with the printable side facing up cImportant Do not load more than the maximum number of sheets specified for the paper Envelopes User s Guide Loading Paper 56 ...

Page 57: ...ng capacity One sheet Available size A4 B5 A5 A6 Letter Legal Binding holes Do not load paper with the binding holes at the top or the bottom Adjust the print position of your file to avoid printing over the holes 4 Slide the edge guide to the edge of the paper User s Guide Loading Paper 57 ...

Page 58: ...panel set the size and type of the paper you loaded in the rear paper feed Note You can also display the paper size and paper type settings screen by selecting Menu Printer Setup Paper Source Settings Paper Setup Return the remaining paper to its package If you leave it in the printer the paper may curl or the print quality may decline Related Information Paper Handling Precautions on page 53 User...

Page 59: ...d that you install this printer s driver Note For Windows XP Service Pack 3 or later is supported Installing the Epson Basic Driver for Windows Only 1 Disconnect the printer from the computer 2 Select Menu WF 110 Basic Driver on the control panel Press the OK button to start installing 3 When the on screen instructions are displayed connect the printer and the computer with a micro USB cable and t...

Page 60: ...iver for Windows Only 1 Load paper in the printer 2 Open the file you want to print 3 Access the printer driver window 4 Select the orientation you set in the application as the Orientation on the Layout tab User s Guide Printing 60 ...

Page 61: ...ab Media Select the type of paper you loaded Color Select to print in full color or monochrome 6 Click Advanced make the following settings and then click OK Paper Size Select the paper size you set in the application 7 Click OK User s Guide Printing 61 ...

Page 62: ... the application s help for details 1 Load paper in the printer 2 Open the file you want to print 3 Select Print or Print Setup from the File menu 4 Select your printer 5 Select Preferences or Properties to access the printer driver window 6 Make the following settings Document Size Select the paper size you set in the application Borderless Select to print with no margins around the image Orienta...

Page 63: ...in the Rear Paper Feed on page 55 List of Paper Types on page 55 Printing Basics Mac OS Note Explanations in the section use TextEdit as an example Operations and screens differ depending on the application See the application s help for details 1 Load paper in the printer 2 Open the file you want to print 3 Select Print from the File menu or another command to access the print dialog If necessary...

Page 64: ...p menu Note On OS X Mountain Lion or later if the Print Settings menu is not displayed the Epson printer driver has not been installed correctly Select System Preferences from the Apple menu Printers Scanners or Print Scan Print Fax remove the printer and then add the printer again See the following to add a printer http epson sn 6 Make the following settings Paper Source Select the paper source i...

Page 65: ...ns to print the even pages You can also print a booklet that can be created by folding the printout Note This feature is not available for borderless printing If you do not use paper that is suitable for 2 sided printing the print quality may decline and paper jams may occur Depending on the paper and the data ink may bleed through to the other side of the paper If EPSON Status Monitor 3 is disabl...

Page 66: ...ties on page 54 Loading Paper in the Rear Paper Feed on page 55 Printing Basics Windows on page 62 Printing Several Pages on One Sheet You can print two or four pages of data on a single sheet of paper Printing Several Pages on One Sheet Windows Note This feature is not available for borderless printing 1 Load paper in the printer 2 Open the file you want to print 3 Access the printer driver windo...

Page 67: ...the printer 2 Open the file you want to print 3 Access the print dialog 4 Select Layout from the pop up menu 5 Set the number of pages in Pages per Sheet the Layout Direction page order and Border 6 Set the other items as necessary 7 Click Print Related Information Loading Paper in the Rear Paper Feed on page 55 Printing Basics Mac OS on page 63 Printing to Fit the Paper Size You can print to fit ...

Page 68: ...ain and More Options tabs as necessary and then click OK 6 Click Print Related Information Loading Paper in the Rear Paper Feed on page 55 Printing Basics Windows on page 62 Printing to Fit the Paper Size Mac OS 1 Load paper in the printer 2 Open the file you want to print 3 Access the print dialog 4 Select the size of the paper you set in the application as the Paper Size setting 5 Select Paper H...

Page 69: ...t 3 Access the printer driver window 4 Select Job Arranger Lite on the Main tab 5 Click OK to close the printer driver window 6 Click Print The Job Arranger Lite window is displayed and the print job is added to the Print Project 7 With the Job Arranger Lite window opened open the file that you want to combine with the current file and then repeat steps 3 to 6 Note If you close the Job Arranger Li...

Page 70: ...aper in the printer 2 Open the file you want to print 3 Access the printer driver window 4 Select 2x1 Poster 2x2 Poster 3x3 Poster or 4x4 Poster from Multi Page on the Main tab 5 Click Settings make the appropriate settings and then click OK 6 Set the other items on the Main and More Options tabs as necessary and then click OK 7 Click Print Related Information Loading Paper in the Rear Paper Feed ...

Page 71: ... make a poster when 2x2 Poster is selected and Overlapping Alignment Marks is selected in Print Cutting Guides 1 Prepare Sheet 1 and Sheet 2 Cut off the margins of Sheet 1 along the vertical blue line through the center of the top and bottom cross marks User s Guide Printing 71 ...

Page 72: ...and align the cross marks then temporarily tape the two sheets together from the back 3 Cut the taped sheets in two along the vertical red line through the alignment markers this time the line to the left of the cross marks User s Guide Printing 72 ...

Page 73: ...rom the back 5 Repeat steps 1 to 4 to tape Sheet 3 and Sheet 4 together 6 Cut off the margins of Sheet 1 and Sheet 2 along the horizontal blue line through the center of the left and right side cross marks User s Guide Printing 73 ...

Page 74: ...7 Place the edge of Sheet 1 and Sheet 2 on top of Sheet 3 and Sheet 4 and align the cross marks and then temporarily tape them together from the back User s Guide Printing 74 ...

Page 75: ...8 Cut the taped sheets in two along the horizontal red line through the alignment markers this time the line above the cross marks 9 Tape the sheets together from the back User s Guide Printing 75 ...

Page 76: ...printing features available on the printer driver Related Information Windows Printer Driver on page 112 Mac OS Printer Driver on page 114 Adding a Printing Preset to Print Easily If you create your own preset of frequently used print settings on the printer driver you can print easily by selecting the preset from the list User s Guide Printing 76 ...

Page 77: ...ions differ depending on the application See the application s help for details Select Page Setup or Print from the File menu Select the printer from Format For select the paper size and then enter a percentage in Scale Close the window and then print following the basic printing instructions Related Information Printing Basics Mac OS on page 63 Adjusting the Print Color You can adjust the colors ...

Page 78: ...re is not available with borderless printing Click Watermark Features on the More Options tab and then select a watermark Click Settings to change details such as the color and position of the watermark Printing a Header and Footer for Windows Only You can print information such as a user name and printing date as headers or footers Click Watermark Features in the More Options tab and then select ...

Page 79: ...nts and web pages from a smart device such as a smartphone or tablet You can use local print printing from a smart device that is connected to the same wireless network as your printer or remote print printing from a remote location over the Internet To use remote print register your printer in the Epson Connect service Related Information Epson Connect Service on page 110 Installing Epson iPrint ...

Page 80: ...gs such as paper size and paper type G Displays the paper size When this is displayed as a button tap it to display the paper settings currently set on the printer H Displays photos and documents you selected I Starts printing Note To print from the document menu using iPhone iPad and iPod touch running iOS start Epson iPrint after transferring the document you want to print using the file sharing...

Page 81: ...ter Using AirPrint AirPrint enables instant wireless printing from iPhone iPad iPod touch and Mac without the need to install drivers or download software Note If you disabled paper configuration messages on your product control panel you cannot use AirPrint See the link below to enable the messages if necessary 1 Load paper in your product 2 Set up your product for wireless printing See the link ...

Page 82: ...inting from the computer In this case cancel the print job by using the printer s control panel Canceling Printing Printer Button Press the y button to cancel the print job in progress Canceling Printing Windows 1 Access the printer driver window 2 Select the Maintenance tab 3 Click Print Queue 4 Right click on the job you want to cancel and then select Cancel Related Information Windows Printer D...

Page 83: ...attery may deteriorate if you charge it in low or high temperatures If the battery s usable time is significantly short even after the battery is fully charged the battery may be at the end of its service life Contact Epson support to replace the battery If you do not use the printer for a long time charge the battery on a regular basis to avoid letting it run out If the printer does not turn on c...

Page 84: ...harge the battery if this happens wake the computer 2 Connect the printer to the computer using a micro USB cable Note You cannot charge the battery using a USB hub Connect the printer directly to the computer 3 If the printer is on press the P button to turn it off Note If battery charging does not start select Menu Battery Battery Settings on the control panel enable USB Power Supply via PC and ...

Page 85: ...y may cause damage that is not covered by Epson s warranties and under certain circumstances may cause erratic printer behavior The following are the code for genuine external battery C12C934941 Installing the External Battery 1 Turn off the printer by pressing the P button 2 Disconnect all cables such as the power cord and USB cable 3 Remove the rear cover User s Guide Using the Optional External...

Page 86: ... into this section otherwise the printer may be damaged 4 Insert the battery Removing the External Battery 1 Turn off the printer by pressing the P button 2 Disconnect all cables such as the power cord and USB cable 3 Push the section shown in the illustration and then remove the battery User s Guide Using the Optional External Battery 86 ...

Page 87: ...e l r buttons to change the display between the built in battery and the optional external battery You can check the status of the battery using the icon on the home screen When the external battery runs out the display switches to the built in battery icon Displays the amount of external battery remaining Indicates that the external battery is running low User s Guide Using the Optional External ...

Page 88: ...ow less than 5 C or high higher than 40 C temperatures Charging only takes place if the printer is idle in sleep mode or turned off If the battery s usable time is significantly short even after the battery is fully charged the battery may be at the end of its service life We recommend replacing the battery with a new one If you do not use the printer for a long time charge the battery on a regula...

Page 89: ...harged Related Information Precautions when Charging the External Battery on page 88 Precautions on Storing and Disposing the External Battery Store the battery out of children s reach in order to avoid troubles by swallowing When not using the printer for a long period of time remove the battery from the printer and store them separately to avoid over discharging the battery Do not store the batt...

Page 90: ...f batteries as ordinary refuse Instead dispose of them in a collection or recycle box in accordance with local laws Do not incinerate or dispose of the battery in fire User s Guide Using the Optional External Battery 90 ...

Page 91: ...e screen Related Information Guide to the LCD Screen on page 21 Checking the Status of the Remaining Ink and the Maintenance Box Windows 1 Access the printer driver window 2 Click EPSON Status Monitor 3 on the Maintenance tab and then click Details Note If EPSON Status Monitor 3 is disabled click Extended Settings on the Maintenance tab and then select Enable EPSON Status Monitor 3 Related Informa...

Page 92: ...dge Handling Precautions Read the following instructions before replacing ink cartridges Handling precautions Store ink cartridges at normal room temperature and keep them away from direct sunlight Epson recommends using the ink cartridge before the date printed on the package For best results use up ink cartridge within six months of opening the package For best results store ink cartridge packag...

Page 93: ... ink charging is incomplete you may not be able to print Do not leave the printer with the ink cartridges removed or do not turn off the printer during cartridge replacement Otherwise ink remaining in the print head nozzles will dry out and you may not be able to print Be careful not to let dust or any objects get inside the ink cartridge holder Anything inside the holder may adversely affect the ...

Page 94: ...and appearance of the ink cartridge are subject to change without prior notice for improvement Do not disassemble or remodel the ink cartridge otherwise you may not be able to print normally You cannot use the cartridges that came with the printer for the replacement Quoted yields may vary depending on the images that you are printing the paper type that you are using the frequency of your prints ...

Page 95: ...eck which ink cartridge needs to be replaced and then press the OK button Select Replace now and then press the OK button When replacing ink cartridges before they are expended From the home screen select Menu Maintenance Ink Cartridge Replacement and then press the OK button 2 Remove the ink cartridge from its package and then remove only the yellow tape 3 Remove the cap User s Guide Replacing In...

Page 96: ...ng 4 Press the OK button 5 Open the inner cover 6 Push the lever to unlock the ink cartridge and then pull out the cartridge diagonally 7 Insert the ink cartridge diagonally into the cartridge holder and gently push it down until it clicks into place User s Guide Replacing Ink Cartridges and Other Consumables 96 ...

Page 97: ... turn off the printer during ink charging If the ink charging is incomplete you may not be able to print If you remove the cartridge from the printer for later use or to dispose of it make sure you put the cap back on the cartridge s ink supply port to prevent ink from drying out or to prevent surrounding areas from getting smeared by ink Related Information Ink Cartridge Codes on page 92 Ink Cart...

Page 98: ...and printing Do not press or remove the film on the box otherwise ink may leak Do not touch the sections shown in the illustration Doing so may prevent normal operation and you may get smeared with ink Do not seal the holes of the maintenance box These are necessary to operate normally Keep the maintenance box out of direct sunlight Do not replace the maintenance box when the printer is on otherwi...

Page 99: ... that the printer performs Replace the maintenance box when you are promoted to do so The Epson Status Monitor your LCD or lights on the control panel will advise you when this part needs replacing The need for replacement of the box does not mean that your printer has ceased to operate in accordance with its specifications The Epson warranty does not cover the cost of this replacement It is a use...

Page 100: ...ver 5 Push the tab on the cover using a narrow object such as a pen and then remove the maintenance box cover 6 Slide the maintenance box as shown in the illustration and then remove the box User s Guide Replacing Ink Cartridges and Other Consumables 100 ...

Page 101: ...emove the film on the maintenance box 8 Place the new maintenance box straight down and then slide it to install it 9 Reattach the maintenance box cover Note When the maintenance box cover cannot be reattached the maintenance box may not be installed correctly Remove the maintenance box and re install it Related Information Maintenance Box Code on page 97 Maintenance Box Handling Precautions on pa...

Page 102: ...eature is only available for approximately five days replace the expended ink cartridge as soon as possible Note If EPSON Status Monitor 3 is disabled access the printer driver click Extended Settings on the Maintenance tab and then select Enable EPSON Status Monitor 3 The available period varies depending on the usage conditions Temporarily Printing with Black Ink Windows Do one of the following ...

Page 103: ...e Paper Type setting on the Main tab 4 Select Grayscale 5 Set the other items on the Main and More Options tabs as necessary and then click OK 6 Click Print 7 Click Print in Black in the window displayed Related Information Loading Paper in the Rear Paper Feed on page 55 Printing Basics Windows on page 62 Continue printing temporarily with only black ink Mac OS Note To use this feature through a n...

Page 104: ...s or Envelope as the Media Type setting 9 Select Grayscale 10 Set the other items as necessary 11 Click Print Related Information Loading Paper in the Rear Paper Feed on page 55 Printing Basics Mac OS on page 63 Conserving Black Ink when the Black Ink Is Low for Windows Only When black ink is running low and there is enough color ink remaining you can use a mixture of color inks to create black Yo...

Page 105: ...k ink is also consumed Options Description Yes Select to use a mixture of color inks to create black This window is displayed the next time you print a similar job No Select to continue using the remaining black ink This window is displayed the next time you print a similar job Disable this feature Select to continue using the remaining black ink This window is not displayed until you replace the ...

Page 106: ...about two times wait for at least six hours without printing and then run the nozzle check again and repeat the head cleaning if necessary We recommend to turn off the printer If print quality has still not improved contact Epson support To prevent the print head from drying out always turn the printer off by pressing the P button To keep the print head operating at its best we recommend printing ...

Page 107: ... driver window 3 Click Nozzle Check on the Maintenance tab 4 Follow the on screen instructions Related Information Windows Printer Driver on page 112 Checking and Cleaning the Print Head Mac OS 1 Load A4 size plain paper in the printer 2 Select System Preferences from the Apple menu Printers Scanners or Print Scan Print Fax and then select the printer 3 Click Options Supplies Utility Open Printer ...

Page 108: ...ct this if you see horizontal banding at regular intervals 5 Follow the on screen instructions Vertical Alignment Find and enter the number for the most solid pattern in each group Horizontal Alignment Find and enter the number for the least separated and overlapping pattern Note The test pattern may vary by model Cleaning the Paper Path When the printouts are smeared or scuffed or paper does not ...

Page 109: ...enu from the home screen 3 Select Maintenance Paper Guide Cleaning 4 Follow the on screen instructions to clean the paper path Note Repeat this procedure until the paper is not smeared with ink To clear a paper feeding problem repeat this procedure two or three times The cleaning sheet loses its effect when used three times or more User s Guide Maintaining the Printer 109 ...

Page 110: ...psonconnect com http www epsonconnect eu Europe only Application for Configuring Printer Operations Web Config Web Config is an application that runs in a web browser such as Internet Explorer and Safari on a computer or smart device You can confirm the printer status or change the network service and printer settings To use the Web Config connect the printer and the computer or device to the same...

Page 111: ...puter to the printer using WSD follow the steps below to run Web Config 1 Open the printer list on the computer Windows 10 Click on the start button and then select Windows System Control Panel View devices and printers in Hardware and Sound Windows 8 1 Windows 8 Select Desktop Settings Control Panel View devices and printers in Hardware and Sound or Hardware Windows 7 Click the start button and s...

Page 112: ... Right click on your printer or press and hold it and then select Printing preferences Windows 8 1 Windows 8 Windows Server 2012 R2 Windows Server 2012 Select Desktop Settings Control Panel View devices and printers in Hardware and Sound Right click on your printer or press and hold it and then select Printing preferences Windows 7 Windows Server 2008 R2 Click the start button and select Control P...

Page 113: ...lick on your printer or press and hold it and then select Printer properties Click the Optional Settings tab Windows 7 Windows Server 2008 R2 Click the start button and select Control Panel View devices and printers in Hardware and Sound Right click on your printer and then select Printer properties Click the Optional Settings tab Windows Vista Windows Server 2008 Click the start button and select...

Page 114: ... Supplies Utility Open Printer Utility Making Operation Settings for the Mac OS Printer Driver Accessing the Operation Settings Window of the Mac OS Printer Driver Select System Preferences from the Apple menu Printers Scanners or Print Scan Print Fax and then select the printer Click Options Supplies Options or Driver Operation Settings of the Mac OS Printer Driver Skip Blank Page Avoids printing...

Page 115: ...ton and then select Epson Software Epson Photo Windows 8 1 Windows 8 Enter the application name in the search charm and then select the displayed icon Windows 7 Windows Vista Windows XP Click the start button and select All Programs or Programs Epson Software Epson Photo Starting on Mac OS Select Go Applications Epson Software Epson Photo Related Information Installing Applications on page 118 Sof...

Page 116: ...for EpsonNet Config or the application s help for more details Starting on Windows Windows 10 Windows Server 2019 Windows Server 2016 Click the start button and then select EpsonNet EpsonNet Config Windows 8 1 Windows 8 Windows Server 2012 R2 Windows Server 2012 Enter the application name in the search charm and then select the displayed icon Windows 7 Windows Vista Windows XP Windows Server 2008 ...

Page 117: ...rint jobs Delete or wait to be printed the jobs before uninstalling 6 Uninstall the applications Windows 10 Windows 8 1 Windows 8 Windows 7 Windows Vista Windows Server 2019 Windows Server 2016 Windows Server 2012 R2 Windows Server 2012 Windows Server 2008 R2 Windows Server 2008 Click Uninstall Change or Uninstall Windows XP Windows Server 2003 R2 Windows Server 2003 Click Change Remove or Remove ...

Page 118: ...tor Enter the administrator password if the computer prompts you When reinstalling an application you need to uninstall it first 1 Quit all running applications 2 When installing the printer driver disconnect the printer and the computer temporarily Note Do not connect the printer and the computer until you are instructed to do so 3 Access to the following website and then enter the product name h...

Page 119: ...the computer or the printer until the update is complete otherwise the printer may malfunction Note If you cannot find the application you want to update in the list you cannot update using the EPSON Software Updater Check for the latest versions of the applications from your local Epson website http www epson com Related Information Software Update Tools EPSON Software Updater on page 115 User s ...

Page 120: ...off and then install the maintenance box E 14 A maintenance box is not recognized Turn the power off and then install the maintenance box again If the message continues to be displayed even after reinstalling the maintenance box replace it with a new maintenance box E 21 E 25 A battery error has occurred The printer is turned off automatically Contact Epson support E 21 is a built in battery error...

Page 121: ...t enough power in the battery or a battery error has occurred The print speed may be slower when the printer is in built in battery mode Connect the AC adapter to the printer or install the external battery when you do not want to change the print speed Ink is low You can continue printing until you are prompted to replace the ink cartridge s However note that the printer cannot print if any one o...

Page 122: ... click Details Note If EPSON Status Monitor 3 is disabled click Extended Settings on the Maintenance tab and then select Enable EPSON Status Monitor 3 Related Information Windows Printer Driver on page 112 Checking the Printer Status Mac OS 1 Select System Preferences from the Apple menu Printers Scanners or Print Scan Print Fax and then select the printer 2 Click Options Supplies Utility Open Pri...

Page 123: ...er from Inside the Printer Caution Never touch the buttons on the control panel while your hand is inside the printer If the printer starts operating it could cause an injury Be careful not to touch the protruding parts to avoid injury 1 Open the inner cover User s Guide Solving Problems 123 ...

Page 124: ... and operate in the recommended environmental conditions The battery may be running low Connect the AC adapter to the printer or install the optional external battery Use paper supported by this printer Follow the paper handling precautions Load paper in the correct direction and slide the edge guide against the edge of the paper Do not load more than the maximum number of sheets specified for the...

Page 125: ...may be running low Connect the AC adapter or charge the battery and then turn on the printer again When the power light is on but the LCD screen is not displayed the printer may not have been turned off correctly Try the solution to the problem that occurs when the power does not turn off Power Does Not Turn Off Disconnect the AC adapter and the USB cable Hold down the P button and the y button at...

Page 126: ...nal battery cannot be charged from a computer Charge it using the AC adapter Related Information Charging the Built in Battery with a USB Connection on page 84 Optional External Battery is Not Recognized When the screen below is displayed turn off the printer connect the AC adapter and then turn on the printer Cannot Print from a Computer Checking the Connection USB Place the printer on a flat sur...

Page 127: ... Move the printer and computer or smart device closer to the wireless router to help with radio wave communication and then try to make network settings again Print the network connection report See the related information link below for details If the report shows that the network connection failed check the network connection report and then follow the printed solutions If the IP address assigne...

Page 128: ...perties window Windows 10 Windows 8 1 Windows 8 Windows 7 Windows Server 2019 Windows Server 2016 Windows Server 2012 R2 Windows Server 2012 Windows Server 2008 R2 Click the printer icon and then click Print server properties at the top of the window Windows Vista Windows Server 2008 Right click on the Printers folder and then click Run as administrator Server Properties Windows XP Windows Server ...

Page 129: ...d on your computer Checking the Printer Status from the Computer Windows Click Print Queue on the printer driver s Maintenance tab and then check the following Check if there are any paused print jobs If unnecessary data remains select Cancel all documents from the Printer menu Make sure the printer is not offline or pending If the printer is offline or pending clear the offline or pending setting...

Page 130: ...erences from the Apple menu Printers Scanners or Print Scan Print Fax and then double click the printer If the printer is paused click Resume or Resume Printer When You Cannot Make Network Settings Turn off the devices you want to connect to the network Wait for about 10 seconds and then turn on the devices in the following order wireless router computer or smart device and then printer Move the p...

Page 131: ...less router when the wireless router has multiple SSIDs and devices are connected to different SSIDs on the same wireless router Connect the computer or smart device to the same SSID as the printer Most wireless routers have a privacy separator feature that blocks communication between connected devices If you cannot communicate between the printer and the computer or smart device even if they are...

Page 132: ...eck the SSID by printing a network connection report network status sheet or on Web Config Related Information Printing a Network Connection Report on page 42 Printing a Network Status Sheet on page 48 Checking the SSID for the Computer Windows Click in the task tray on the desktop Check the name of the connected SSID from the list displayed User s Guide Solving Problems 132 ...

Page 133: ...er away from the computer If the printer supports the 5 GHz frequency range connect to the SSID for the 5 GHz range Related Information Wi Fi Specifications on page 141 Cannot Print from an iPhone iPad or iPod touch Connect the iPhone iPad or iPod touch to the same network SSID as the printer Enable Paper Configuration in the following menus Menu Printer Setup Paper Source Settings Paper Configura...

Page 134: ...nabled the print head prints while moving in both directions and vertical lines may be misaligned If you disable this feature printing may slow down Windows Clear High Speed on the printer driver s More Options tab Mac OS Select System Preferences from the Apple menu Printers Scanners or Print Scan Print Fax and then select the printer Click Options Supplies Options or Driver Select Off as the Hig...

Page 135: ...ht and then load paper again Select the appropriate paper size setting on the control panel or in the printer driver Adjust the margin setting in the application so that it falls within the printable area During borderless printing the image is slightly enlarged and the protruding area is cropped Adjust the amount of enlargement Windows Click Settings of the Borderless on the printer driver s Main...

Page 136: ...r manually into the Hibernate mode or the Sleep mode while printing Pages of garbled text may be printed next time you start the computer Related Information Canceling Printing on page 82 The Printed Image Is Inverted Clear any mirror image settings in the printer driver or the application Windows Clear Mirror Image on the printer driver s More Options tab Mac OS Clear Mirror Image from the print ...

Page 137: ...Printers Scanners or Print Scan Print Fax and then select the printer Click Options Supplies Options or Driver Select On as the High Speed Printing setting Disable quiet mode This feature slows down the printing speed Control Panel From the home screen select Menu Printer Setup Quiet Mode and then disable it Windows Select Off as the Quiet Mode setting on the printer driver s Main tab Mac OS Selec...

Page 138: ...menu Printers Scanners or Print Scan Print Fax and then select the printer Click Options Supplies Options or Driver Select On as the Quiet Mode setting Application Is Blocked by a Firewall for Windows Only Add the application to the Windows Firewall allowed program in security settings on the Control Panel User s Guide Solving Problems 138 ...

Page 139: ... is within this range the paper may not feed in the printer or the print quality may decline depending on the paper properties or quality Printable Area Print quality may decline in the shaded areas due to the printer s mechanism Single sheets normal printing A 3 0 mm 0 12 in B Except for Letter and Legal 3 0 mm 0 12 in Letter Legal 6 0 mm 0 24 in C 41 0 mm 1 62 in D 37 0 mm 1 46 in Single sheets ...

Page 140: ...4 IPv6 WSD Printing Windows IPv4 IPv6 Windows Vista or later Bonjour Printing Mac OS IPv4 IPv6 IPP Printing Windows Mac OS IPv4 IPv6 PictBridge Printing Wi Fi IPv4 Digital camera Epson Connect Email Print Remote Print IPv4 AirPrint iOS Mac OS IPv4 IPv6 iOS 5 or later Mac OS X v10 7 or later Google Cloud Print IPv4 IPv6 Network Scanning Epson Scan 2 IPv4 IPv6 Event Manager IPv4 Epson Connect Scan t...

Page 141: ...ructure Wi Fi Direct Simple AP 4 5 Security Protocols 6 WEP 64 128bit WPA2 PSK AES 7 1 Only available for the HT20 2 Use of the product outdoors over these channels is prohibited 3 The availability of these channels varies by location For more information see http support epson net wifi5ghz 4 Not supported for IEEE 802 11b 5 Infrastructure and Wi Fi Direct modes can be used simultaneously 6 Wi Fi ...

Page 142: ...Rated Input Power Supply Voltage AC 100V to 240 V Rated Input Current 1 A Rated Frequency Range 50 to 60Hz Output Rated Output Power Supply Voltage DC 24 V Rated Output Current 1 A Printer Electrical Specifications Using the AC Adapter Rated DC Input Rated DC Input Power Supply Voltage DC 24 V Rated DC Input Current Not Charging Battery 0 4 A Rated DC Input Current Charging Built in Battery 0 6 A ...

Page 143: ...nsumption http www epson eu energy consumption Built in Battery Specifications Type Li ion Rated Power Supply Voltage 3 6 V Capacity of Current 1 86 Ah Continuous Number of Prints 1 Color Approx 50 sheets Monochrome Approx 100 sheets Charging Time 2 AC Adapter Approx 2 5 hours 3 USB Port 5 V 0 5 A Approx 10 hours USB Port 5 V 1 5A Approx 2 5 hours 1 The value that is measured when printing A4 size...

Page 144: ...0 C 22 to 104 F Freezing Temperature 16 C 3 2 F Ink thaws and is usable after approximately 3 hours at 25 C 77 F You can store for one month at 40 C 104 F System Requirements Windows 10 32 bit 64 bit Windows 8 1 32 bit 64 bit Windows 8 32 bit 64 bit Windows 7 32 bit 64 bit Windows Vista 32 bit 64 bit Windows XP SP3 or later 32 bit Windows XP Professional x64 Edition SP2 or later Windows Server 201...

Page 145: ...rs and away from windows to provide maximum shielding Equipment or its transmit antenna that is installed outdoors is subject to licensing This equipment complies with FCC IC radiation exposure limits set forth for an uncontrolled environment and meets the FCC radio frequency RF Exposure Guidelines in Supplement C to OET65 and RSS 102 of the IC radio frequency RF Exposure rules This equipment shou...

Page 146: ...rmities containing reference to the Directives and harmonized standards used to declare conformity http www epson eu conformity AC Adapter A461H Optional External Battery D231A Restrictions on Copying Observe the following restrictions to ensure the responsible and legal use of the printer Copying of the following items is prohibited by law Bank bills coins government issued marketable securities ...

Page 147: ...roduct manuals contact Epson support services for assistance If Epson support for your area is not listed below contact the dealer where you purchased your product Epson support will be able to help you much more quickly if you give them the following information Product serial number The serial number label is usually on the back of the product Product model Product software version Click About V...

Reviews: