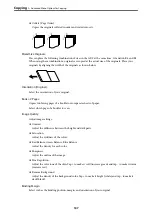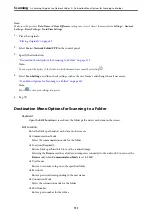
Remove Shadow:
Remove the shadows of the original that appear in the scanned image.
❏
Frame:
Remove the shadows at the edge of the original.
❏
Center:
Remove the shadows of the binding margin of the booklet.
Remove Punch Holes:
Remove the punch holes that appear in the scanned image. You can specify the area to erase the
punch holes by entering a value in the box on the right.
❏
Erasing Position:
Select the position to remove the punch holes.
❏
Orientation (Original):
Select the orientation of the original.
Subject:
Enter a subject for the email in alphanumeric characters and symbols.
Attached File Max Size:
Select the maximum file size that can be attached to the email.
File Name:
❏
Filename Prefix:
Enter a prefix for the name of the images in alphanumeric characters and symbols.
❏
Add Date:
Add the date to the file name.
❏
Add Time:
Add the time to the file name.
Scanning Originals to a Computer
You can save the scanned image to a computer connected over a network.
The method of saving images is registered as a
job
in Document Capture Pro installed on your computer. Preset
jobs are available that allow you to save scanned images to a computer. You can also create and register new jobs
using Document Capture Pro on your computer.
>
Scanning Originals to a Computer
116
Summary of Contents for WF-C878R Series
Page 20: ...Part Names and Functions Front 21 Rear 25 ...
Page 35: ...Loading Paper Paper Handling Precautions 36 Paper Size and Type Settings 37 Loading Paper 38 ...
Page 313: ...Using Optional Items List of Optional Items 314 Printer Stand 315 Paper Cassette Unit 322 ...
Page 532: ...Where to Get Help Technical Support Web Site 533 Contacting Epson Support 533 ...

