QuadroFXO Manual II: Administrator's Guide
Quadro's Graphical Interface
QuadroFXO; SW Version 5.1.x
25
•
Assign manually – this selection is used to manually configure
the firmware server settings. The Server Name (the IP address or
hostname), the Server Port and the Update Method should be
defined. The Update Method drop down list provides a possibility
to choose among TFTP, FTP, HTTP or HTTPS methods. For some
of these selections, authentication Username and Password can
be entered.
•
Assign automatically via DHCP - choose this selection if the
Quadro acts as a DHCP client in its WAN interface. In this case the
firmware server’s configuration will be automatically obtained from
the DHCP server. This selection requires previous configuration on
the firmware server and will work only if the “auto-update”
directory is created on the TFTP server. The DHCP server should
also be configured to provide the "TFTP server name" parameter
(option 66) to the Quadro.
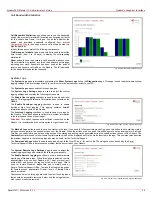
The second manipulation buttons group on this page allows you to
select the frequency of checking for a new update.
•
Check and notify – choose this selection if you only wish to be
notified about the new available firmware on the server. With this
selection, on the indicated weekday and time, on daily or weekly
basis, the Quadro will check for a new firmware available on the
server. The way of notification is configured from the
page.
Check and update – choose this selection to check and automatically
install the new firmware on the Quadro as it becomes available on the
server. With this selection, on the indicated weekday and time, on daily
or weekly basis, the Quadro will check for a new firmware available on
the server, will automatically download and install it on the Quadro.
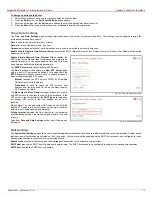
Fig. II-42
:
Upload Configuration page
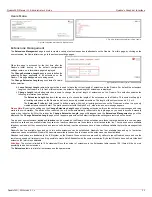
The Check/Update Now button is used to manually initiate Check and notify or Check and update actions. The action to be executed depends on
the radio button selected above
Networking Tools
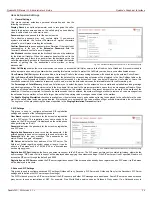
The Networking Tools page provides the possibility to check the Internet connection.
Ping sends four ICMP (Internet Control Message Protocol) requests with a default size of 64 bytes to the destination (IP address or host name)
specified in the text field Ping Target. The response times are logged, and the round trip time (the time required from being sent until being received
again) is measured. The minimum and maximum round trip time and its average as well as the percentage of lost and of received frames results are
displayed in the lower area of the page.
Traceroute checks the Internet connection by triggering the routers (hops) that are passed to reach the destination specified in the Traceroute
Target text field.
Trace routing gives feedback on the routers passed by packets on the way toward the destination and the round trip delay of
packets to these routers.
Attention
: No Traceroute is possible if a high priority Firewall has been enabled (see chapter
For the purpose of tracerouting, several IP packets are sent
out. UDP (User Datagram Protocol) is used to send packets
and ICMP (Internet Control Message Protocol) is used to
receive information about the routers. In their headers, the
TTL (Time To Live) value increases from 1 to 30. When the
first IP frame is received by the first router, its IP address will
be returned in its acknowledgement
The second frame delivers the IP address of the second
router and so on and so forth. The results of Traceroute are
displayed on the lower area of the page.
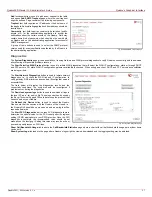
Ping Target requires the destination (IP address or host
name) for the ICMP request.
The Ping button starts pinging the specified ping target.
Traceroute Target is used to enter the IP address or host
name of the destination to be trace routed.
The Traceroute button is used to process the router
triggering to check the Internet connection.
In the field below these, the output of the Ping or Traceroute
procedure is shown.
Fig. II-43: Networking Tools page
To Check the Internet connection
1.
Specify the destination address for the ICMP request in the Ping Target text field.
2.
Press
the
Ping button to process the ICMP request.
3.
Specify the destination address to trace the route.
4.
Press
the
Traceroute button to process the router triggering.


