background image

ADDITIONAL SAFETY INSTRUCTIONS FOR YOUR ROUTER

1.  Hold tool by insulated gripping surfaces when performing an operation where the 

cutting tool may contact hidden wiring. 

Contact with a “live” wire will make exposed 

metal parts of the tool “live” and shock the operator.

2.  Use clamps or another practical way to secure and the workpiece to a stable 

platform. 

Holding the work by hand or against your body leaves it unstable and may lead 

to loss of control.

3.  Always wear a dust mask.

4.  Wear protective glasses and hearing protection.

5.  For long hair, wear hair protection. Work only with closely fitting clothes.

6.  If the mains cable is damaged or cut through while working, do not touch the cable. Never 

use the machine with a damaged cable.

7.  Do not operate the machine in rain or high moisture conditions.

8.  Always direct the cable to the rear away from the machine.Take care with the trailing cable from 

the router and we recomend that an RCD is user at all times with this machine.

9.  Contact with electric lines can lead to fire and electric shock. Damaging a gas line can lead 

to explosion. Penetrating a water line causes property damage or may cause an electric 

shock.

10. When working with the machine, always hold it firmly with both hands. 

11. Secure the workpiece. A workpiece clamped with clamping devices or in a vice is held more 

secure than by hand.

12. Before putting into operation, check the routing tool for firm seating.

13. Never route over metal objects such as nails or screws.

14. Keep hands away from rotating router bits.

15. After finishing work, guide the machine back into the upper starting position by actuating the 

clamping lever and switch the machine off.

16. Always  switch  the  machine  off  and  wait  until  it  has  come  to  a  standstill  before  placing  it 

down.

17. Protect tools from impact and shock.

18. Never allow children to use the machine. 

19.Do not use blunt or damaged router bits. 

Blunt or damaged router bits cause increased 

friction, can become jammed and lead to imbalance.

20.The allowable speed of the router bit must be at least as high as the maximum 

speed listed on the power tool.

 Accessories that rotate faster than permitted can be 

destroyed.

21.Never touch the bit during or immediately after the use.

 After use the bit is too hot to 

be touched by bare hands.


Warning: Some dust particles created by power sanding, sawing, grinding, drill 

and other construction jobs contain chemicals known to cause cancer,  birth 

defects or other reproductive harm. 

Some examples of these chemicals are:

•  Lead from lead-based paints.

•  Crystalline silica from bricks and cement and other masonry products.

•  Arsenic and chromium from chemically treated timber.

Your risk from these exposures varies, depending upon how often you do this type of work. To 

reduce your exposure to these chemicals:

•  Work in a well-ventilated area.

•  Work with approved safety equipment, such as those dust masks that are specially

 designed 

to filter microscopic particles.

Summary of Contents for ERB380ROU

Page 1: ...2100w ROUTER ERB380ROU...

Page 2: ...Original Instructions Version 1 0...

Page 3: ...oods This guarantee does not affect your statutory rights This guarantee is only valid in the UK For further technical advice spare parts or repair service outside of guarantee please contact the cust...

Page 4: ...ging the power tool Keep cord away from heat oil sharp edges or moving parts Damaged or entangled cords increase the risk of electric shock e When operating a power tool outdoors use an extension cord...

Page 5: ...idle power tools out of the reach of children and do not allow persons unfamiliar with the power tool or these instructions to operate the power tool Power tools are dangerous in the hands of untraine...

Page 6: ...to operation check the routing tool for firm seating 13 Never route over metal objects such as nails or screws 14 Keep hands away from rotating router bits 15 After finishing work guide the machine ba...

Page 7: ...ssessment of exposure Warning The vibration emission value during actual use of the power tool can differ from the declared value depending on the ways in which the tool is used dependant on the follo...

Page 8: ...ouble insulation The tool is double insulated This means that all the external metal parts are electrically insulated from the mains power supply This is done by placing insulation barriers between th...

Page 9: ...roducts should not be disposed of with household waste Please recycle where facilities exist Check with your Local Authority or retailer for recycling advice RyyWxx Manufacturing date code Year of man...

Page 10: ...1 8 2 3 4 5 7 9 10 20 19 11 12 17 18 6 13 29 14 15 16 26...

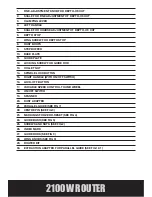
Page 11: ...Locking Screw For Guide Rod 13 COLLET NUT 14 Spindle Lock Button 15 Right Handle With On Off Switch 16 Lock off button 17 VARIABLE SPEED CONTROL THUMB WHEEL 18 On Off Switch 19 Spanner 20 Dust Adapte...

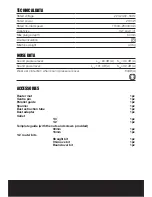
Page 12: ...e level LpA 90 dB A KPA 3 0 dB A Sound power level LwA 101 dB A KWA 3 0 dB A Wear ear protection when sound pressure is over 80dB A ACCESSORIES Router mat 1pc Centre pin 1pc Parallel guide 1pc Spanner...

Page 13: ...plastics or aluminium The most commonly used bits are listed below Warning Use only routing tools with an allowable speed matching at least the highest no load speed of the machine The shank diameter...

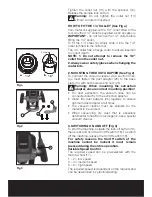
Page 14: ...ith both screws and nuts 25 Warning When mounting the extraction adapter ensure correct mounting position For dust extraction the vacuum hose can be connected directly to the extraction adapter Clean...

Page 15: ...can be determined by practical testing Constant Speed Control and Soft Start Constant speed control maintains the speed constant at no load and under most working conditions Soft start delays the inc...

Page 16: ...e mark 0 1 mm 1 rotation 2 0 mm The maximum adjustment is approx 8 mm Example Slide router upwards again and measure the depth of cut set value 10 0 mm actual value 9 8 mm Lift up router and position...

Page 17: ...router and allow the bit to reach maximum speed Release the clamping lever by turning in clockwise direction and slowly lower the bit into the workpiece surface keeping the base plate flush and advan...

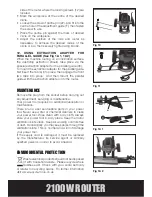
Page 18: ...essure on the parallel guide 21 along the edge of the workpiece 11 ROUTING CIRCULAR ARC PROFILES See Fig 9 10 11 To reassemble the router guide for use as a circle guide arc guide follow below steps L...

Page 19: ...er onto the router Maintenance Remove the plug from the socket before carrying out any adjustment servicing or maintenance Your power tool requires no additional lubrication or maintenance There are n...

Page 20: ...ollows the instruction below IMPORTANT The wire in the mains lead are coloured in accordance with the following code Blue Neutral Brown Live The wire that is coloured blue must be connected to the ter...

Page 21: ...EC Restrictions of the Use of Certain Hazardous Substances in Electrical and Electronic Equipment 2002 95 EC Waste Electrical and Electronic Equipment WEEE 2002 96 EC and 2003 108 EC Standards and te...

Page 22: ......

Page 23: ......

Page 24: ......

Reviews: