38
•
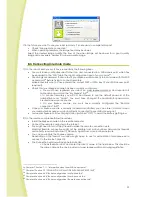
If you ever need to update the firmware, click on "Load" and select the new firmware file.
•
Click on “OK” and wait for the loading to complete.
IMPORTANT: DO NOT DISCONNECT OR TURN OFF THE ROBOT DURING FIRMWARE UPLOAD.
WE RECOMMEND THAT YOU PUT THE ROBOT ON ITS CHARGING BASE TO AVOID ANY RISK OF
INTERRUPTION THAT COULD DAMAGE SPYKEE.
The loaded software could be incomplete and make your robot unusable.
If this should ever occur, please send the robot in its box, complete with manual to After Sales Service
(address at the end of the manual).
•
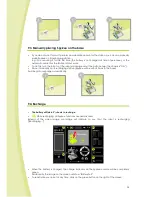
During the update, all of Spykee's lights will flash quickly.
JOURDU FIRMWARE
12.
RESET
•
The Reset button is found under the chassis of your Spykee.
•
This allows you to:
> Change the local connection mode by quickly pressing it with a pen
31
.
> Restart your robot and return it to its default configuration (as it was when you purchased your
robot) by pressing it with a pen for more than 10 seconds. In this case, all SPYKEE lights will flash
quickly all at the same time.
13.
TECHNICAL DATA SHEET
. PC/ Mac Compatible
. 200 MHz ARM9
. 32Mb SDRAM
. Neither 4Mb NOR Flash
. WiFi client 802.11b/g
. USB host
. 8-bits µC to control the dual DC motor and control the charge
. 4 LEDs and 1LED flash
. Camera QVGA CMOS with 15 images per second in local mode (optimal conditions) / 4 to 15 images per
second in remote mode (optimal conditions)
. Infrared receiver
. Charge control for the 9.6V NiMH battery
. JTAG / Serial / port i2c port available
. Joypad compatible
. Electret microphone
. Loudspeaker 8 Ohm 2W
. Audio sampler microphone 16bits / 16 kHz
. Sampler speaker 16bits / 8 to 48 kHz
. Open source software
31
Chapter 7 Section 7.4 “Changing local connection"


