Take precautions with regard to electrostatic discharge (ESD) safety. Handling components should be done in
electrostatically safe environment. Use personal and workplace grounding. Any discharge (even a minor one) from
body to a component may permanently damage it.
Our PCBs have silkscreened both component values and designators nevertheless we highly recommend you to print
out files with component placement before you start assembly of the module. And, please, at least take a look on this
manual!
Some components are marked as NU (not used) – leave those unpopulated! Some components are market as OPTION
(those are for optional modifications) – leave those unpopulated for now.
ASSEMBLY
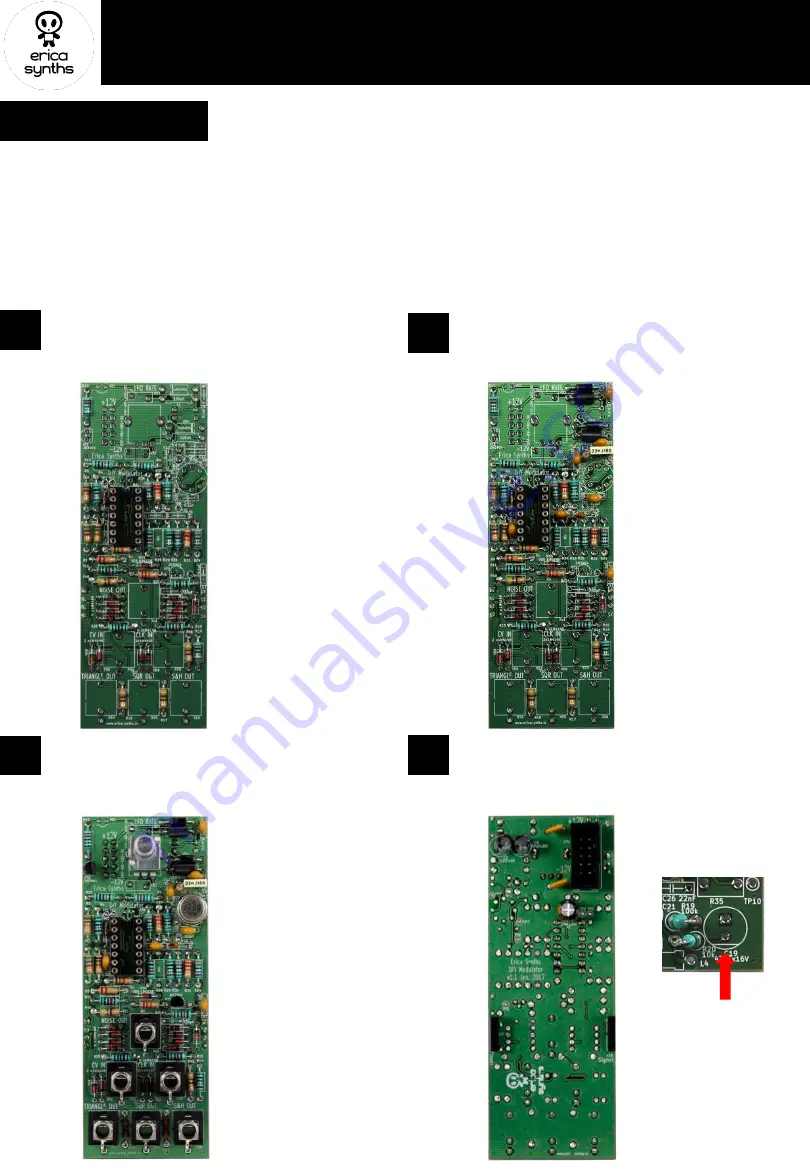
1
Solder horizontally placed resistors and diodes! Pay
attention on orientation of diodes! Also solder DIP14
socket! Few resistors are placed vertically; solder
those too!
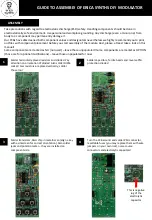
2
GUIDE TO ASSEMBLY OF ERICA SYNTHS DIY MODULATOR
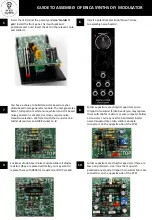
3
Solder transistors, S&H chip in metallic can (align a key
with a silkscreen for correct orientation). Also solder
jacks and potentiometer – they are installed on
component side.
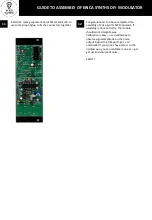
4
Turn the PCB around and solder PSU connector,
resettable fuses (you may replace them with wire
jumpers on your own risk), noise source
connectors and electrolytic capacitors!
This is negative
lug of the
electrolytic
capacitor
Solder capacitors, ferrite beads and reverse PSU
protection diodes!


