PAINT BORER 518 USB
23
BAE 518 USB
5 Layer thickness measurement
5.1 Preparing the test samples
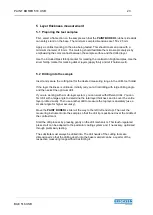
First, select a flat section on the sample such that the
PAINT BORER
's rubber side skids
can safely stand on the base. The minimum sample dimensions are 150 x 25 mm.
Apply a contrast marking to the area being tested. This should cover an area with a
minimum diameter of 6 mm. This marking should facilitate the microscopic analysis by
emphasizing the color contrast between the sample surface and the drilled layer.
Use the included black felt-tip marker for marking the contrast on bright samples. Use the
sliver felt-tip marker for marking darker layers (apply thinly and let it harden well).
5.2 Drilling into the sample
Insert and secure the cutting tool for the desired measuring range in the drill's tool holder.
If the layer thickness is unknown, initially carry out a trial drilling with large drilling angle
and then select the optimum drill.
If you are working with a multi-layer system, you can work with different drills. You can
first drill with a large angle to determine the total layer thickness and to cover the entire
layer profile visually. Then use another drill to measure the top layer separately (use a
smaller angle for higher accuracy).
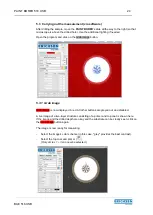
Move the
PAINT BORER
's slider all the way to the left (left end stop). Then set the
measuring instrument onto the sample so that the drill tip is positioned over the middle of
the contrast mark.
Start the drill process by pressing gently on the drill mechanism. This touch-regulated
press start can be adapted to the particular coating system and, if necessary, optimized
through preliminary testing.
The substrate must always be drilled into. The drill heads of the cutting tools are
dimensioned so that the drilling depth into the base material can be a quarter of the
respective measuring range without restricting it.


