74
75
How to align the clock case
For optimal readability we suggest to place the 10 mm drilling for the wall plug approximately
in eye height (ca. 180 cm). This position is equivalent to the centre of the dial.
Insert the wall plug. Screw in the hanger bolt with the cap nut until the bolt protrudes 4 cm
from the wall. Take off the cap nut again. Now hang the empty case with the central drilling
over the bolt. Then put on the washers and the cap nut to screw the hanger bolt deeper into
the wall until the case is pressed gently to the wall. Put the case in vertical position by using
a water level. Now screw in the four case screws located in the corners of the clock case until
the tips get stuck in the wall.
How to hang in the pendulum
Caution!
Do always hold or carry the pendulum at the free pendulum rod, never at the adjusting-
table or the plate of the barometer-instrument.
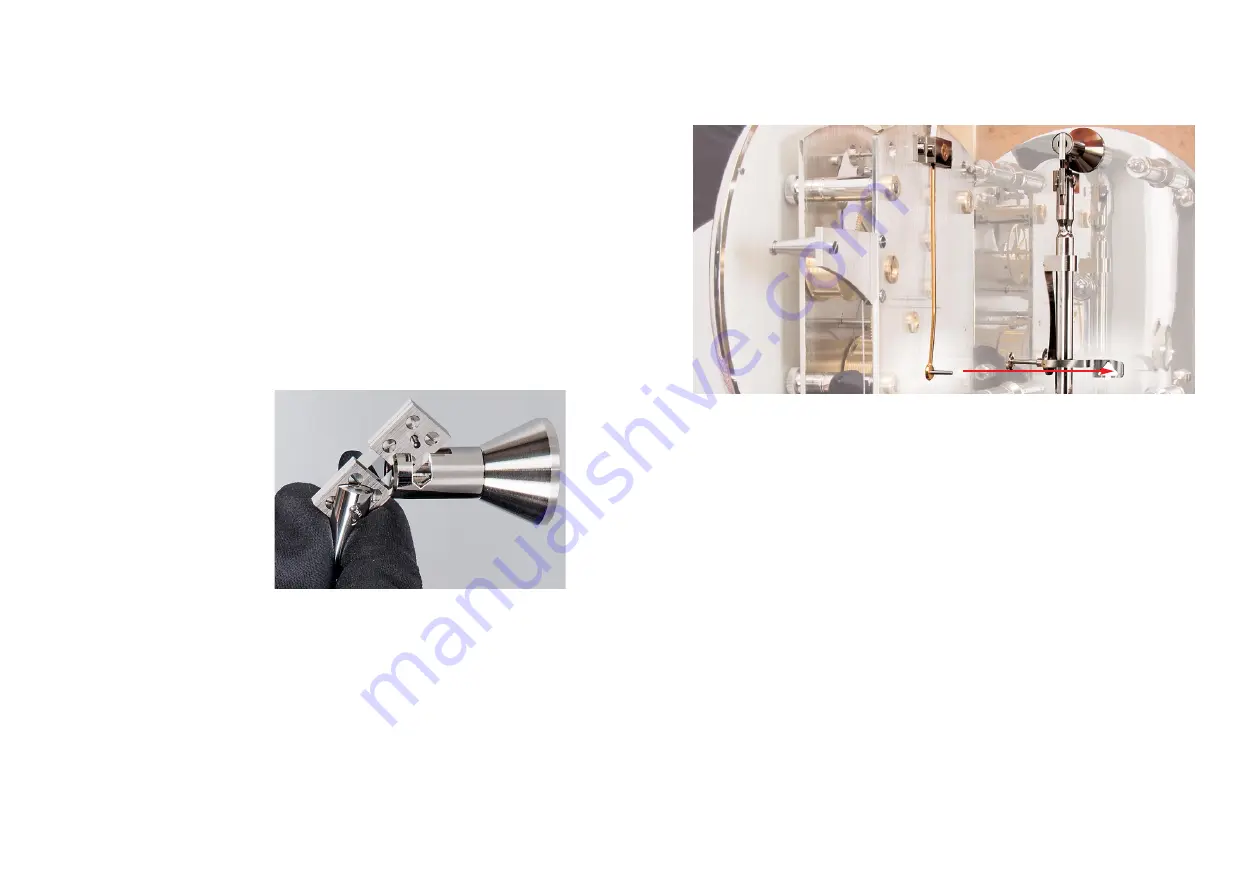
Since the movement is already removed, the nickel-plated protection tube can be pulled off
from the suspension spring block (located between the two upper movement holding pillars).
Remove the suspension spring and keep in reach. Now unscrew the protection cap from the
tip of the pendulum. To avoid damage of the delicate suspension spring we recommend to
insert it into the slot of the pendulum
rod first, hold it in place and then
hang the pendulum together with the
suspension spring into the suspen-
sion spring block.
Push back the protection tube on the
suspension spring block. By turning
the nuts at the sides of the pendulum
scale you can adjust the pendulum
scale in a position that the tip of the
pendulum points exactly to »0«.
How to fit in the movement
Remove the transport protection of the escapement lever, the hammer and the gong.
Caution!
when placing the movement on the four pillars, take care that the hammer does not
collide with the pendulum.
Then push the movement as far back as possible and fix it securely in place using the four
movement retaining nuts. At this point, please pay attention to the hammer of the striking
mechanism – it must not be allowed to jam against the gong. Once the movement is installed
in the case, the hammer should ideally hang above the straight part of the gong with a few
millimetres clearance.
How to start the clock
When hanging the weights in the pulleys, please make sure that the steel cable is properly
seated in the groove of the pulley in each case and the foremost groove of the two barrel
wheels.
Please note that: the weight with the marking/inscription on the bottom »left« must be sus-
pended from the left pulley – it is the heavier weight.
Using the crank, the clock is wound up one revolution in anti-clockwise direction. While
precisely observing the tip of the pendulum and the scale, you now very slowly deflect the
pendulum sideways until – brought about by the escape wheel falling against the pallet lever
– a »tick« is heard. You must then make a note of the number of angular minutes shown on
the scale precisely at the point the tick is heard. Then you deflect the pendulum to the other
side until you hear the »tock«. Ideally this should occur at the same number of minutes on
the scale in the other direction. If, for example, the pendulum has to be deflected further to
the right for the tick to be heard than to the left, you can correct this by turning the adjuster
screw on the pendulum rod behind the movement clockwise.
Stop winding the clock, when the top end of the pulley is about 1 cm below the dial ring.
How to set the time
When setting the time, the minute hand may be turned only clockwise. The clock should be
set so that the moon phase display always change at night. The second hand shall not be
turned. In order to synchronise the second hand to that of another clock (e.g. a radio clock)
stop the pendulum when the second hand has reached the mark of the sixtieth second. Let
the pendulum go when the second hand of the clock of comparison reaches the sixtieth
second.
So that motion can be transmitted from the movement to the pendulum, the driving pin of the
pallet lever must be inserted in the triangular cut-out in the safety flap on the beat adjuster.
To do so, reach behind the movement from the side, carefully press the lever with the cut-out
backwards and upwards until the driving pin slots into the triangular cut-out.


