11
adjustment can be made after the wire feed is put into
operation. Note that a light silver-colored spring
(182W55) is installed on the accessory support for
use with soft and small diameter hard wire. For large
diameter hard wire, replace this spring with a heavy
blue- colored spring (182W54) supplied with the unit.
SECTION 2
INSTALLATION
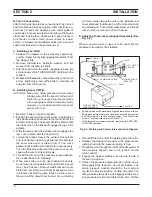
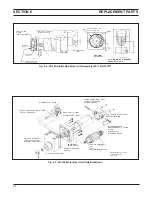
F. WATER KIT (Optional see Fig. 6-7)
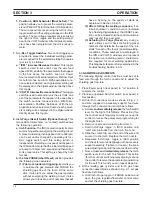
Mount bulkhead adaptor (58V75) behind opening pro-
vided in rear vertical support plate, below gas connec-
tions, and secure with screws (No. 8 - 32 x 3/8-in.) and
lockwashers provided. Attach coupling and adaptor
(11N16) to the bulkhead adaptor. Mount torch cable
adaptor (45V11) on welding power stud. Connect water
drain hose to this adaptor, and water inlet hose to
adaptor 11N16.
SECTION 3
OPERATION
3.1 GENERAL
Do not allow metal-to-metal contact between the
wire feeder chassis and a metal surface connected
in any way to a welding ground. With such contact,
a poor welding ground connection may create a
difference In potential that sends part of the welding
current through the safety ground wiring in the
control cable and wire feeder, resulting in burnout of
that wiring and/or damage to wire feeder circuitry. If
the safety ground burns out, the operator may be
exposed to 115V. shock hazard.
3.2 DESCRIPTION/FUNCTION OF CONTROL FEA-
TURES
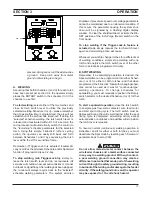
1. Power Switch.
This two-position toggle switch turns
power “on” or “off’ to the wire feeder control.
NOTE: Immediately after the control has been turned
“on” various numerical code data (e.g.; Pro-
gram I.D., Power Source and Slope) will appear
in the IPM and VOLTS display windows for 4-
seconds. After this delay, the preset weld pa-
rameters for the last torch used will be shown.
This is further described in the General Trouble-
shooting Section.
2. Run-Set Key.
This "key-operated” switch must be in
the SET position to preset, vary and weld-test the
welding parameters programmed into the control
(e.g.: Sched. I (RUN), Sched. II for each torch, Spot).
After the desired results are achieved, the program(s)
can be “locked-in” by turning the key to the RUN
position. No parameter can be altered by the opera-
tor in the RUN position.
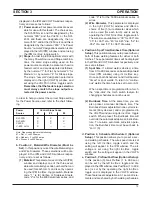
Fig. 3-1. Rear Panel Control
3. Reset Circuit Breaker.
A seven (7) ampere circuit
breaker provides protection to the 115-volt control
circuit and the wire feed motor. If an overload occurs,
the breaker will trip and suspend all operation. To
restore service, depress the breaker button to reset
the circuit.
3a.Trigger -Lock-In Switch.
This feature allows the
operator to release the torch switch (trigger lock
“on”), of the torch being used, after starting the weld
cycle. To stop the welding cycle, you simply de-
press the torch switch again, and all welding action
ceases. When this function is selected (on), it
“locks-in” both torches and their selected schedule.
It will also automatically override a Spotweld opera-
tion (if programmed). An indicator light (LED) on the
front panel lights when this feature is engaged. In
the “off” position this feature in not functional, and
the LED is off.
3A
1
3
2
Summary of Contents for Digimig Dual
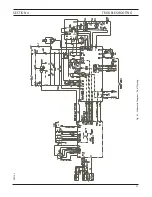
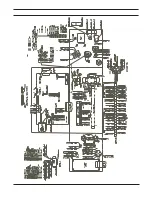
Page 21: ...21 SECTION 4 TROUBLESHOOTING Fig 4 1 Schematic Diagram Dual Digimig 30914 L ...
Page 22: ......
Page 29: ...29 NOTES ...
Page 30: ...30 NOTES ...


