12
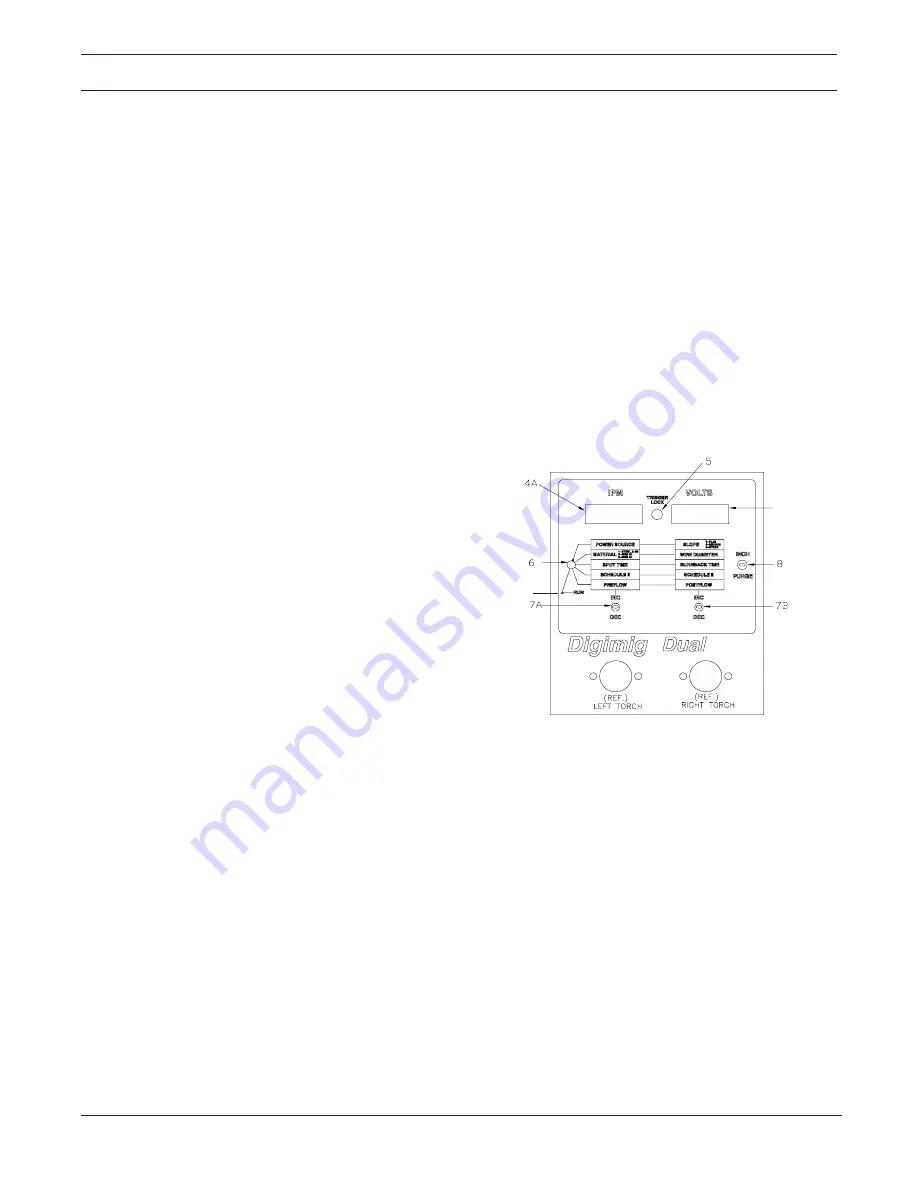
4. Digital Readout Windows.
Two individual three-
digit windows are provided to display preset or actual
welding parameters as follows:
a. IPM Digital Readout.
This window is primarily
used to display wire feed speed in IPM from 20 to
999 inch per minute in one inch increments. How-
ever, with the appropriate Rotary function actu-
ated, this window can also display the following:
— Power Source selection designated by the nu-
merals “300”, “450” or “650” (see Rotary Switch
Item 6)
— a code number that indicates the MATERIAL
selection programmed for various welding wire
applications; #1, #2, or #3 (see Rotary Switch
Item 6)
— shielding gas PREFLOW from .1 to 99.9 sec-
onds in one tenth of a second increments.
— SPOT welding time for each Torch, from .1 to
99.9 seconds in one tenth of a second incre-
ments.
— cold wire INCH speed in IPM from 40 to 999
inches per minute in one inch increments. Please
note the initial starting speed jumps to 100 ipm
for 2-seconds and then goes to preset value.
NOTE: When power is first turned “on” (but not welding)
the display windows will initially show the Pro-
gram I.D. numbers for 1 second and then flash
the Power Source and Slope selections for 3-
seconds (to make sure that the correct power
source and slope are being used). Then, the
IPM window will “continuously” read Preset wire
speed if the Rotary switch is in the RUN or SCH.
II mode. When the arc is struck, the IPM window
will then continuously read Actual welding wire
speed.
b. Volts Digital Readout.
This window is primarily
used to display arc voltage in VOLTS from 12 to 50
vdc in one tenth volt increments. However, with the
appropriate Rotary function actuated, this window
can also display the following:
— indicates power source SLOPE selected and
designated by the numeral 1, 3 or 6 (see Rotary
Switch Item 6)
— a pair of numbers represent WIRE DIAMETER
sizes which are programmed for selection as
follows: #30, #35, #45, #52 or #63 (see Rotary
Switch Item 6).
— shielding gas POSTFLOW from .1 to 99.9 sec-
onds in one tenth of a second increments.
— manual BURNBACK time. Manually adjustable
burnback time period which when preset will
override the automatic adaptive anti-stick fea-
SECTION 3
OPERATION
ture. This time period will be set In one-cycle (60
cycle = 1 sec.) Increments. When set to “zero”,
the Automatic Anti-stick feature will be opera-
tional.
NOTE: When power is first turned “on” (but not welding)
the display windows will initially show the Pro-
gram I.D. numbers for 1 second and then flash
the Power Source and Slope selections for 3-
seconds (to make sure that the correct power
source and slope are being used). Then, the
VOLTS window will “continuously” read Preset
voltage if the Rotary Switch is in the RUN or
SCH. II mode. When the arc is struck, the
VOLTS window will then continuously read Ac-
tual welding voltage.
5. LED Light.
This LED lights to indicate that Trigger-
Lock-In is engaged.
IMPORTANT
To setup the torches for programming, simply oper-
ate and release the torch switch lever for one torch
and preset the desired parameters. Then, repeat
this procedure with the remaining torch to preset its
welding parameters. Under normal operation, the
control’s memory will always “default” to the torch/
parameters last used during the preceding welding
operation. When the unit is initially turned “on” or
“reset”, the “right” torch is the dominant or “de-
fault” torch.
6. Rotary Switch.
This six (6) position switch allows
you to select a “pair” of welding parameters per
position as follows:
a. Position 1, Power Source/Slope (Must be set).
This position must match the
Power Source
used,
and its Slope setting. These selections will be
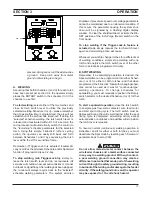
Fig. 3-2. Front Panel Controls
Pos. #6
¾
4B
Positions
#1
#2
#3
#4
#5
Summary of Contents for Digimig Dual
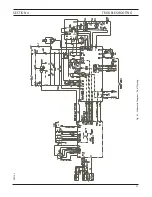
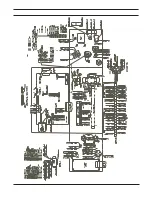
Page 21: ...21 SECTION 4 TROUBLESHOOTING Fig 4 1 Schematic Diagram Dual Digimig 30914 L ...
Page 22: ......
Page 29: ...29 NOTES ...
Page 30: ...30 NOTES ...


