28
seCtIon 3
InstallatIon
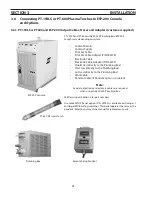
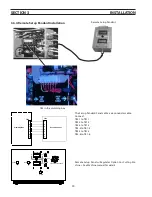
3.6.3 Input connections to esp-200 plumbing Box
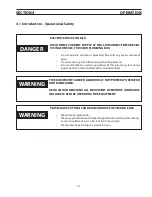
eleCtrIC shoCK Can KIll!
turn oFF prIMarY Input poWer at the Wall DIsConneCt Box
BeFore MaKIng anY ConneCtIons to the esp-200.
WarnIng
1. Connect cooling water supply (from Console connection labeled
“TORCH”) hose to “COOLING WATER IN”.
2. Connect cooling water return (from Console connection labeled “PILOT
ARC”) hose to “COOLING WATER OUT”.
3. Insert Pilot arc cable into pilot arc cable strain relief and connect to pilot
arc cable terminal. Tighten strain relief.
4. Insert electrode cable from the plasma console cooling water supply
adapter into the strain relief labeled “Cable to Power Source Torch
Adapter”. Connect to the terminal labeled “Electrode Cable”. Tighten
strain relief.
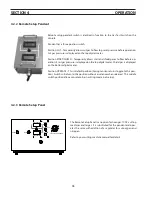
5. Insert Remote Pendant cable (if this option was selected in your pack-
age) into strain relief labeled “Cable to Remote Setup Pendant”. (See
remote pendant installation and operation Sections for more details).
Summary of Contents for ESP-200
Page 1: ...ESP 200 Plasmarc Cutting System Instruction Manual F15 462 C 02 2008 ...
Page 12: ...12 section 2 description ...
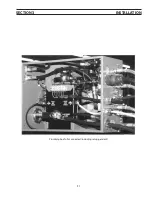
Page 31: ...31 section 3 installation Plumbing box fully connected including setup pendant ...
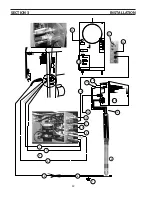
Page 32: ...32 CE 1 2 3 4 5 6 7 9 10 11 12 13 16 19 20 21 22 15 17 18 14 section 3 installation 8 ...
Page 84: ...84 section 7 replacement parts 1 2 3 4 5 6 7 8 9 10 11 12 13 7 6 Right Inside View ...
Page 88: ...88 section 7 replacement parts 6 1 4 5 6 R ef R ef 2 3 7 8 Back and Top Inside View ...
Page 92: ...92 section 7 replacement parts 1 2 3 4 5 6 7 8 7 10 Remote Setup Pendant P N 37145 ...
Page 100: ...100 notes ...


