30
SECTION 3
OPERATION
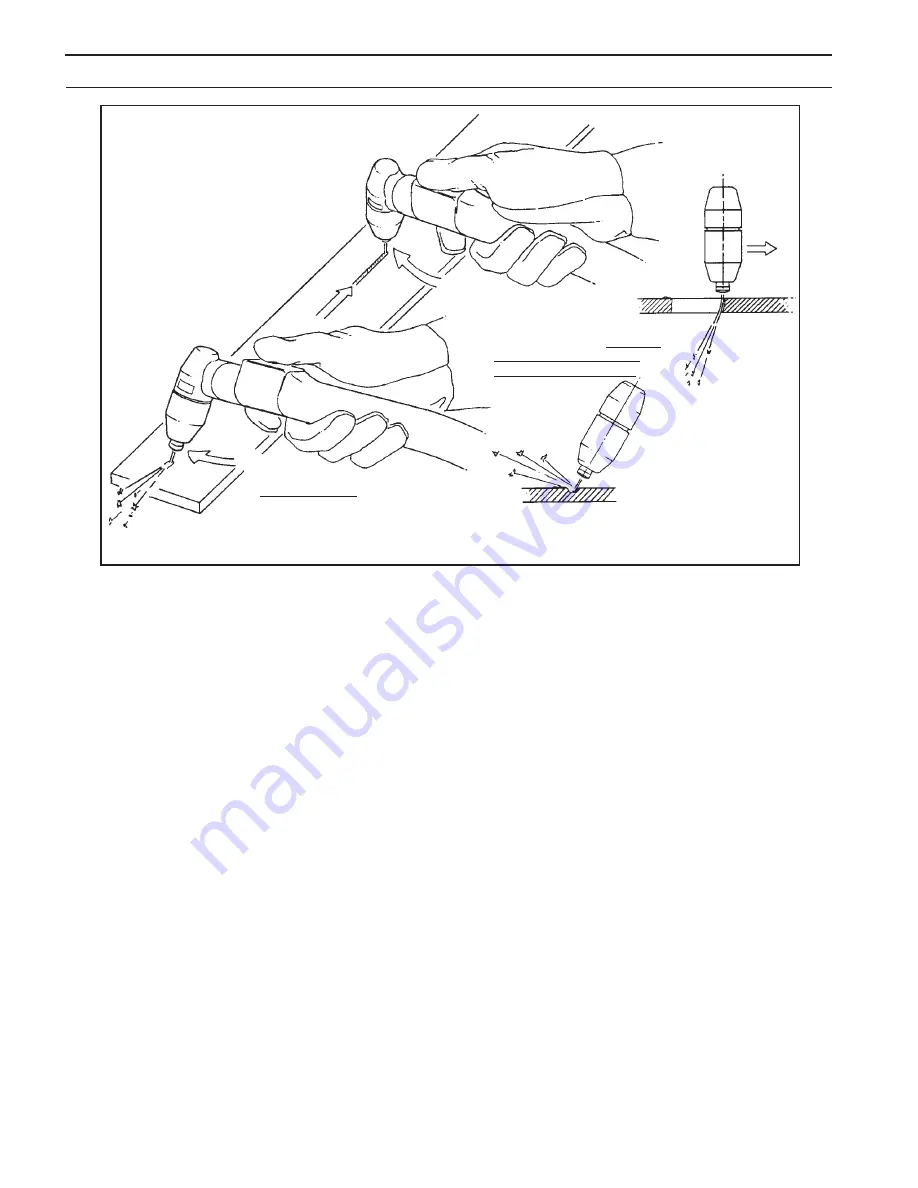
WHEN THE ARC BREAKS
THROUGH THE WORK, BRING THE
TORCH TO AN UPRIGHT POSI-
TION AND PROCEED TO CUT.
TO START A PIERCE, TILT THE TORCH
TO PREVENT MOLTEN MATERIAL FROM
COMING BACK AGAINST AND DAMAG-
ING THE TORCH.
1
2
CAUTION: Locate the console at least 10 ft. (3m) from
the cutting work area. Chips and hot slag
from the cutting operation can damage the
console.
After placing the primary (wall) switch to the ON position and
making control and air pressure adjustments as described
above, proceed as follows:
1. Touch the tip of the torch to the workpiece holding the
torch at about 15- 30° angle to avoid damaging the tip.
2. Depress the torch switch. (Air and high frequency should
energize.)
3. Two seconds after depressing torch switch, the plasma
arc will start cutting.
4. After starting the cut, bring the torch to an upright
position and proceed to cut by dragging the torch
along the workpiece. It may be necessary to cut with a
tip-to-work (standoff) distance of up to 0.06" (1.6mm)
due to various material surface conditions.
Figure 3-4 Piercing Technique using the PT-31XL
5. When ending a cut, the torch switch should be released
to minimize double-arcing which can damage the tip. This
is to prevent high frequency from reigniting after cutting
arc extinguishes.
6. In the postflow mode, the arc can be restarted immediately
by depressing the torch switch. The two second preflow
will automatically cancel.
Summary of Contents for HandyPlasma 250
Page 4: ...4 TABLE OF CONTENTS ...
Page 20: ...20 SECTION 1 DESCRIPTION ...
Page 32: ...32 SECTION 3 OPERATION ...
Page 36: ...36 SECTION 4 MAINTENANCE ...


